Blog

  • 09. Pathway Designs

    Infosheets

    09. Pathway Designs

    Download the PDF – English

    Research shows that well-designed pathways promote physical activity, play, and learning by providing children and teachers with integrated access to outdoor learning environments (OLEs). Once established, a circulation hierarchy of three pathway types will make the pathway system more interesting and easier to navigate.

    Primary Pathways

    Primary pathways are a functional necessity in the OLE and should be designed to provide easy circulation by connecting classrooms to high-use settings. Primary pathways provide spatial structure and accessibility, simplifying navigation for children and allowing teachers to move quickly through the OLE. Primary pathways should be:

    Looped. Avoid dead-ends, which disrupt circulation.

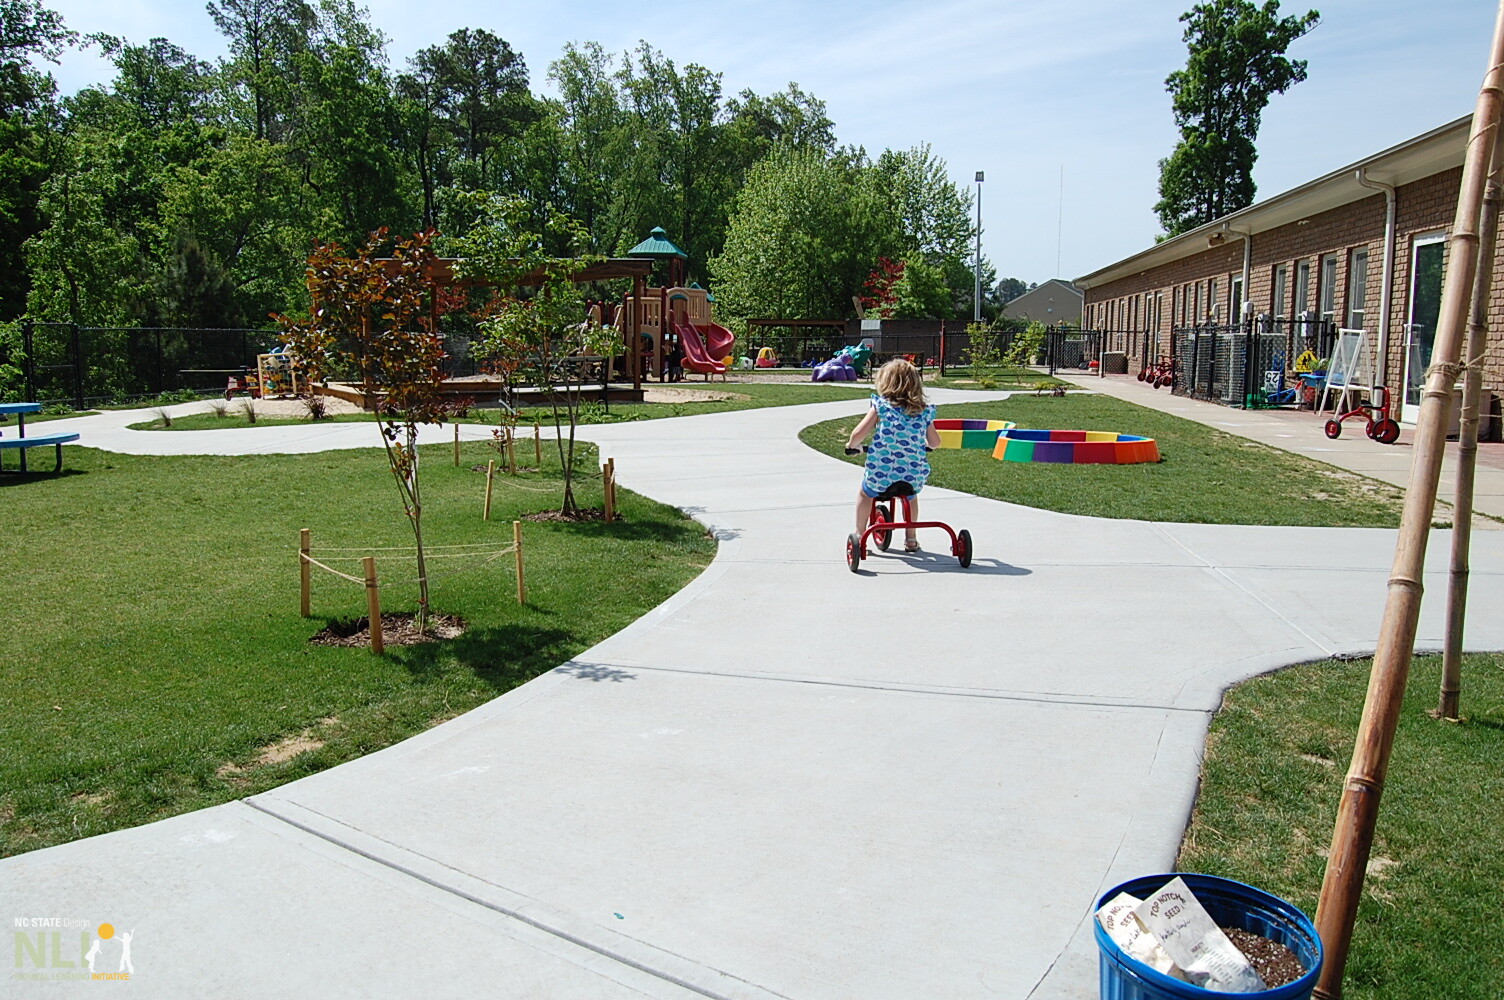
    Curvy. Avoid sharp corners, straightaways, and bottlenecks. Gently curving forms combined with shrubby adjacent landscaping will stimulate excitement, exploration, chase games, and higher levels of healthy physical activity.

    Connected. Primary entrances and exists should be accessible from the primary pathway. Primary play settings and landmarks should also be incorporated.

    Wide. Primary pathways must accommodate intense pedestrian and wheeled-toy traffic, helping children stay on the pathway and pass each other without conflict. Preschool primary pathways should be a minimum of 5 feet wide, with a preferred width of 6 feet. Infant and toddler primary pathways can be narrower (4 feet minimum). Note that pathways are more than circulation areas— they are play settings in their own right.

    Secondary Pathways

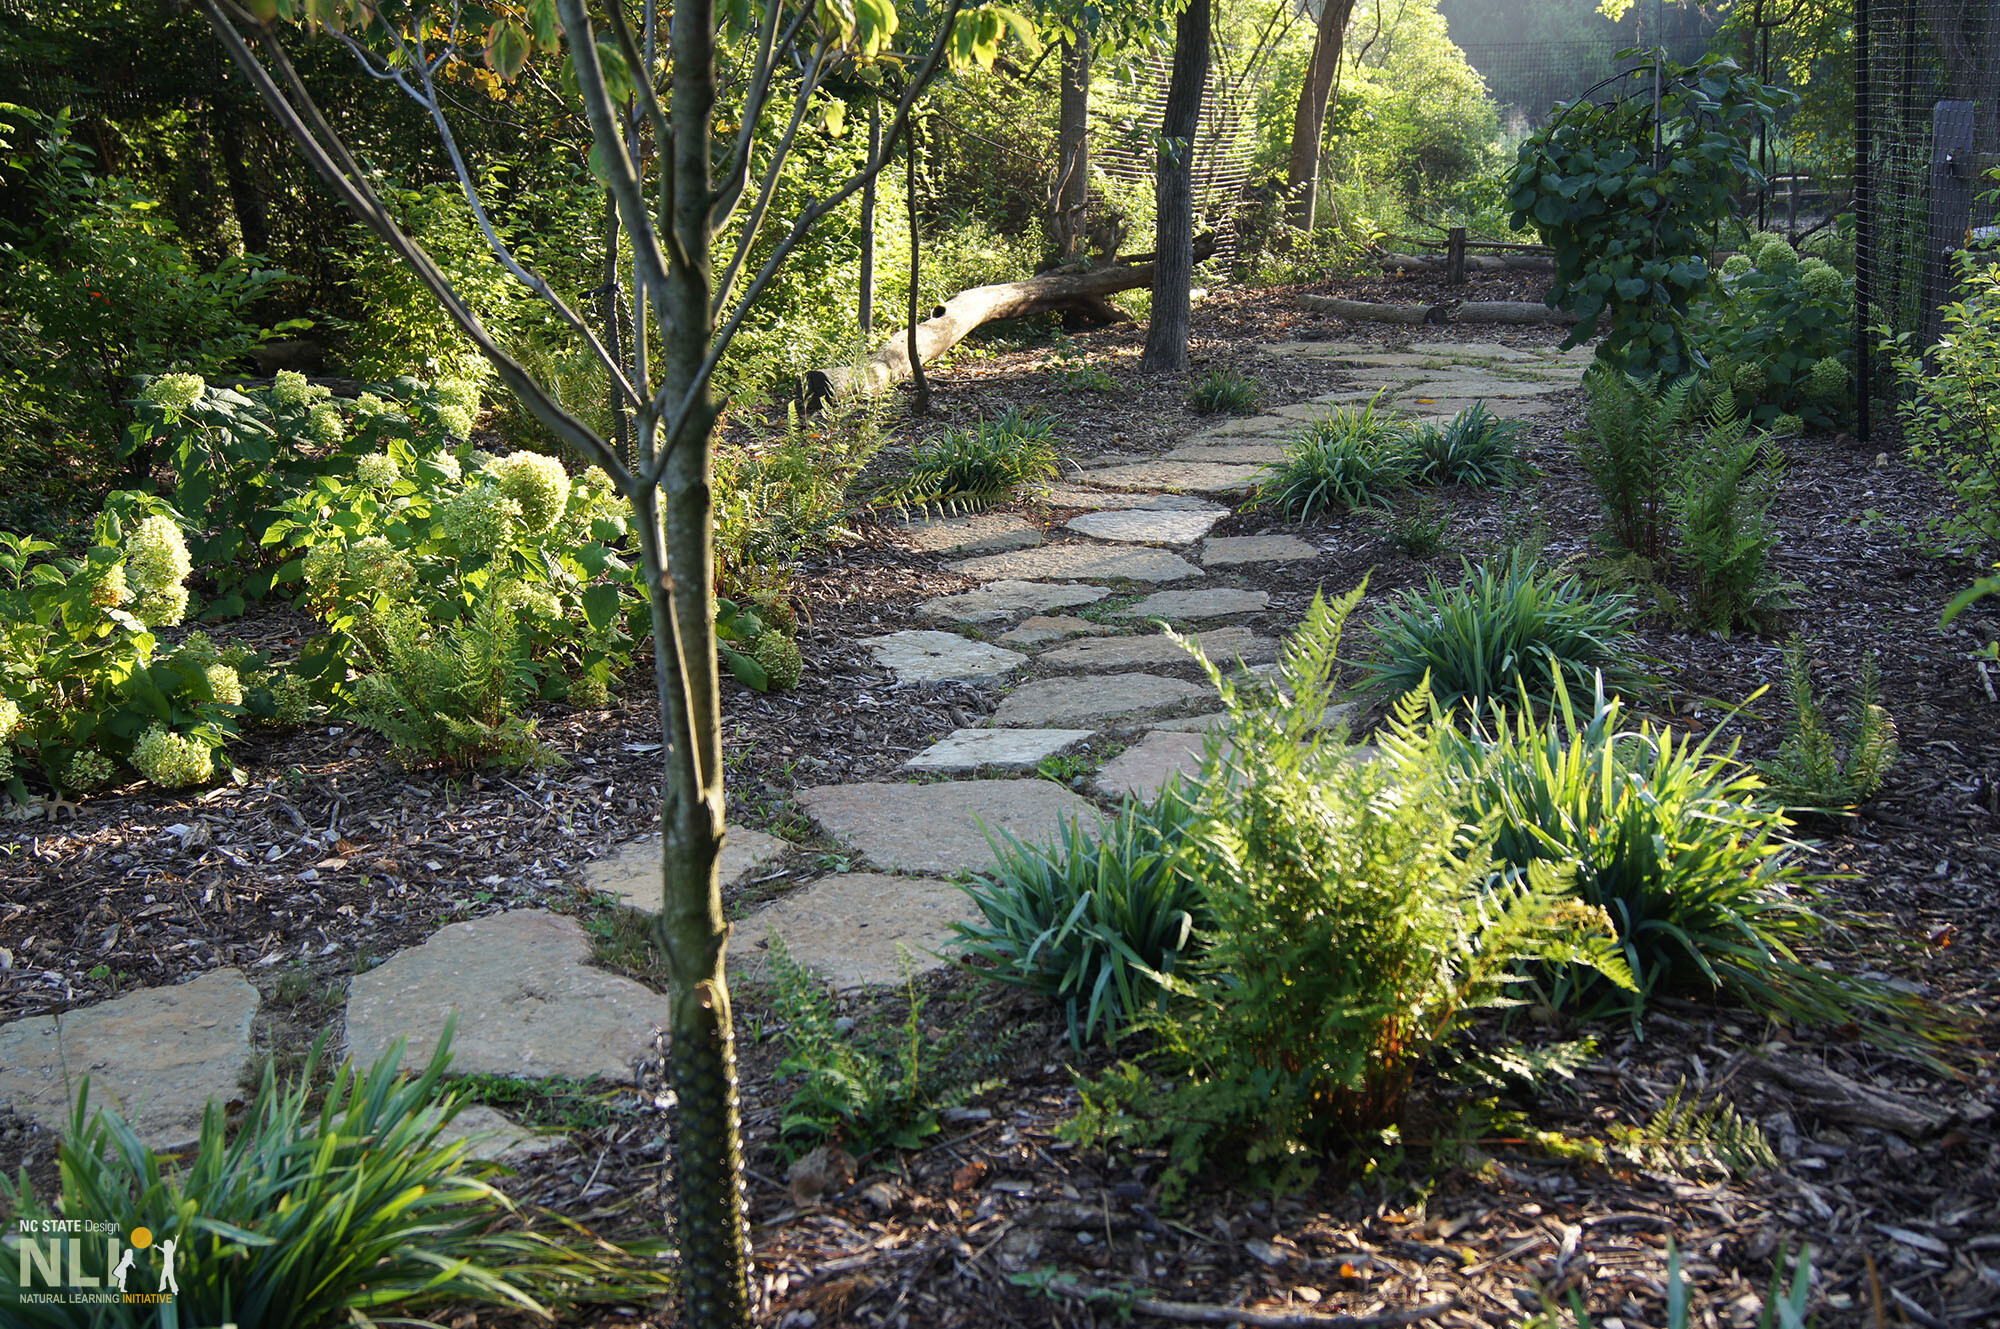
    Secondary pathways connect the primary pathway to more intimate play and learning settings. Secondary pathways allow children to interact with the natural landscape and make discoveries. They can take many forms, with widths as narrow as 30 inches. Surfacing materials may include hardwood mulch, fine crushed stone, and stepping stones.

    Tertiary Pathways

    Tertiary pathways are the narrowest type of pathway, branching off primary or secondary pathways and allowing children to take short journeys into intimate landscape settings. They can be as narrow as 18 inches and surfaced with hardwood mulch, fine crushed stone, stepping stones, or tree cookies.

    Pathway surfacing materials

    Poured-in-place rubber surfacing. This material is recommended for primary toddler pathways where children will be learning to walk. Poured-in-place rubber surfacing is installed over concrete by trained specialists. Because it is a high-cost material, maintenance costs should be factored into installation.

    Concrete. Concrete is the best practice recommendation for primary preschool pathways because it is more stable and requires less maintenance that other available materials. Due to its durability, concrete is more expensive than other options such as asphalt or crushed stone. Concrete can be treated with stain or integrated color to enhance the appearance of the OLE. It can also be imprinted with leaves, “animal tracks”, and other decorative elements to provide textural diversity.

    Asphalt. This material can be used for primary or secondary pathways. Asphalt pathways are less expensive than concrete pathways and require less maintenance. However, they are still more expensive than fine crushed stone or mulch pathways.

    Fine crushed stone. Crushed stone can be used for all pathway types. If installed properly, it can be an accessible surface. In order to provide a smooth, flat surface, fine material must be used in conjunction with a coarse layer of gravel underneath. Though not as hard as concrete, crushed stone will gradually become more compact with use. This material is less stable than concrete and will require some maintenance, but may be less expensive depending on your geographic location.

    Triple-shredded hardwood mulch. This material can be used for primary, secondary or tertiary pathways. Mulch is the least expensive initial investment, but it breaks down over time and must be replenished. Mulch is not considered an accessible material and not recommended for creating wheeled toy and accessible pathways.

    Stepping stones/flagstones. Stepping stones can be used for secondary or tertiary pathways. Using natural stone provides a rich, textural quality that creates a sense of discovering the natural world.
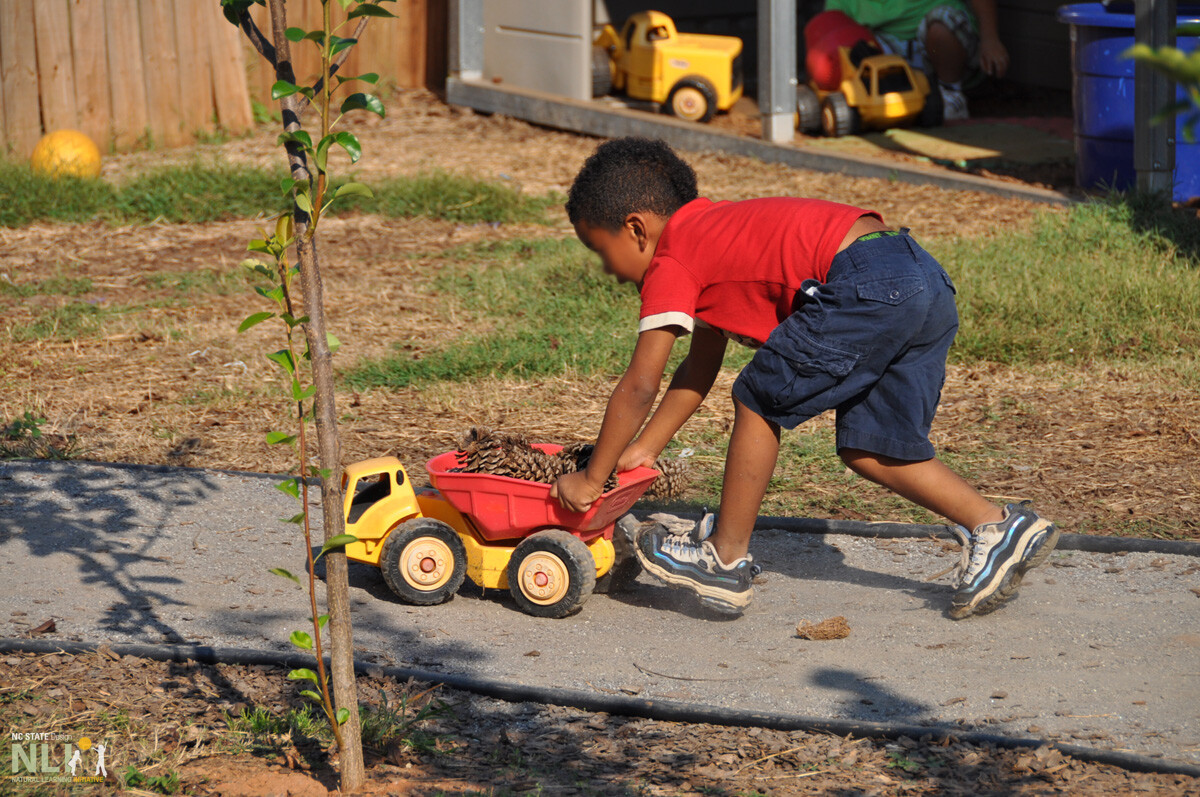
    child using a wheeled toy on pathway

    Primary pathway surfaces should accommodate wheeled toys
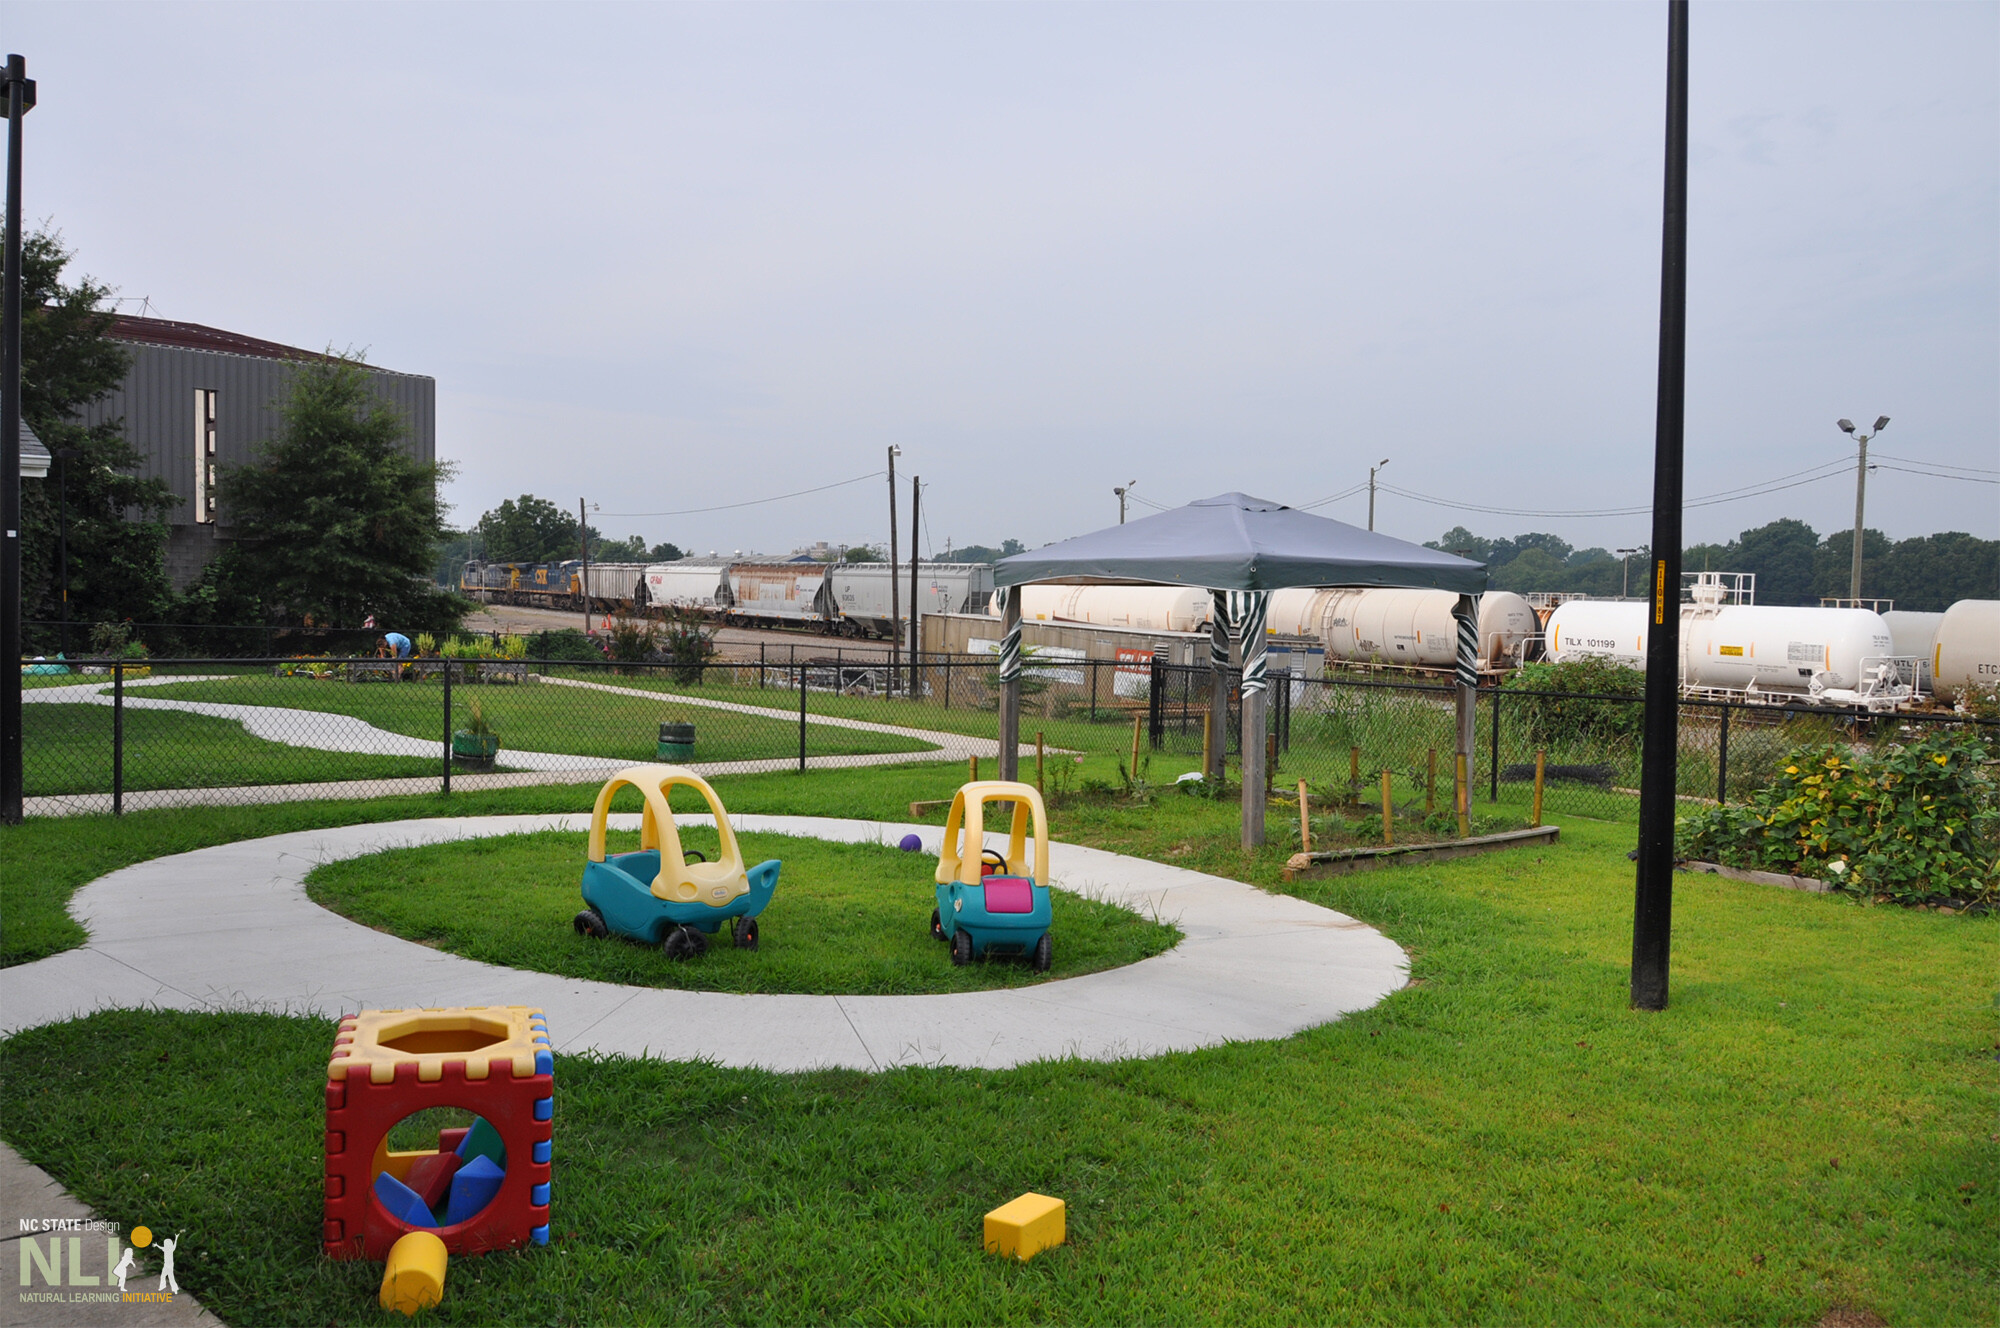
    looped pathway within a multi-purpose lawn setting

    Concrete loops invite physical activity
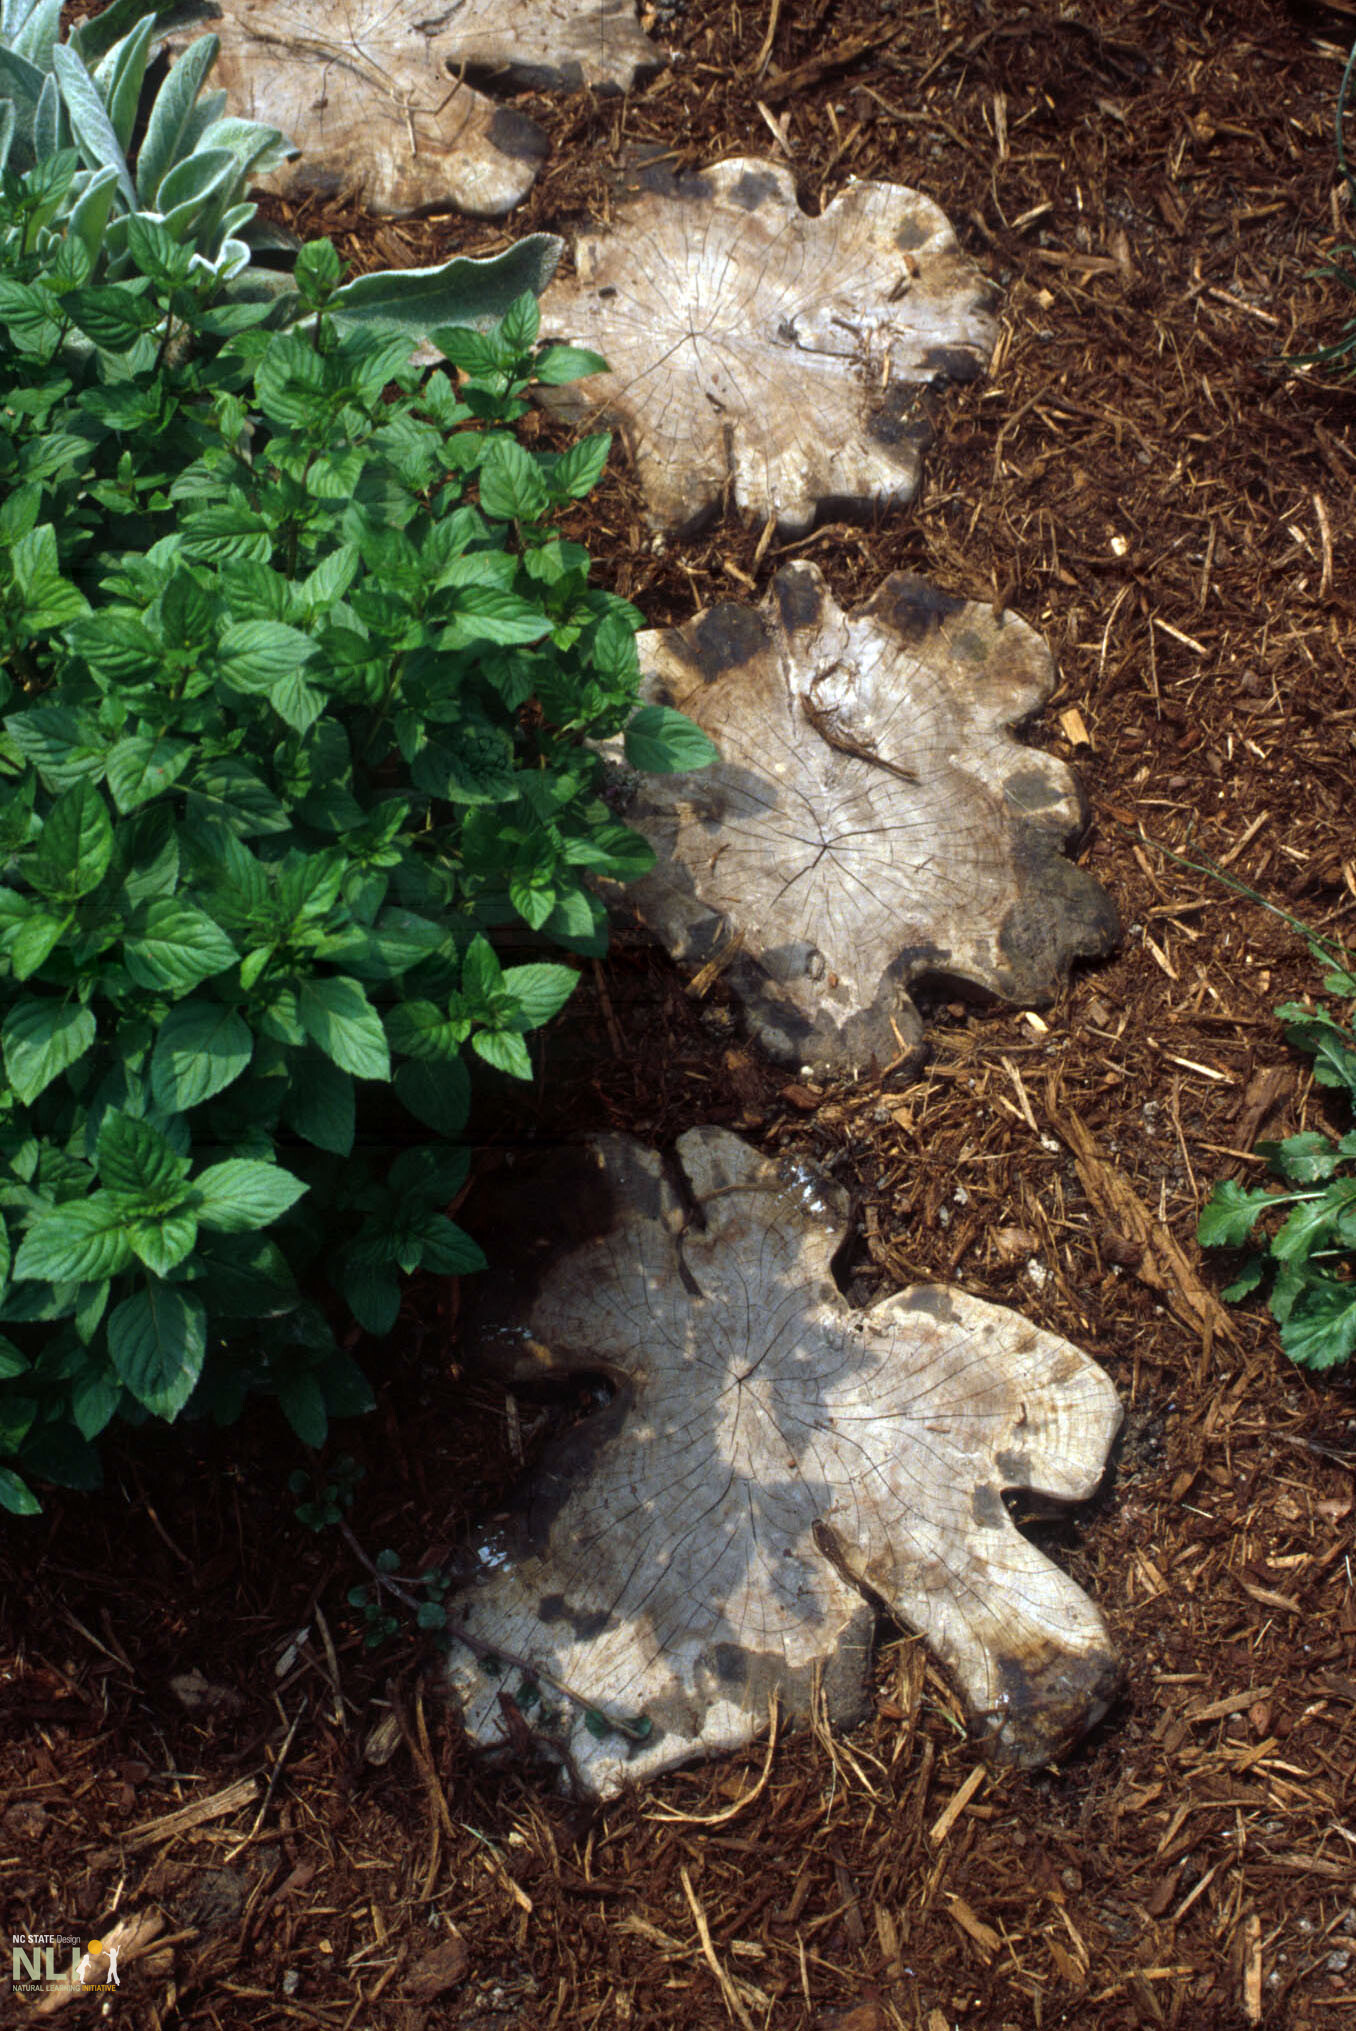
    tree cookies in mulch

    Tree cookie pathway

    flagstone pathway in nature

    Secondary paths can lead to adventure
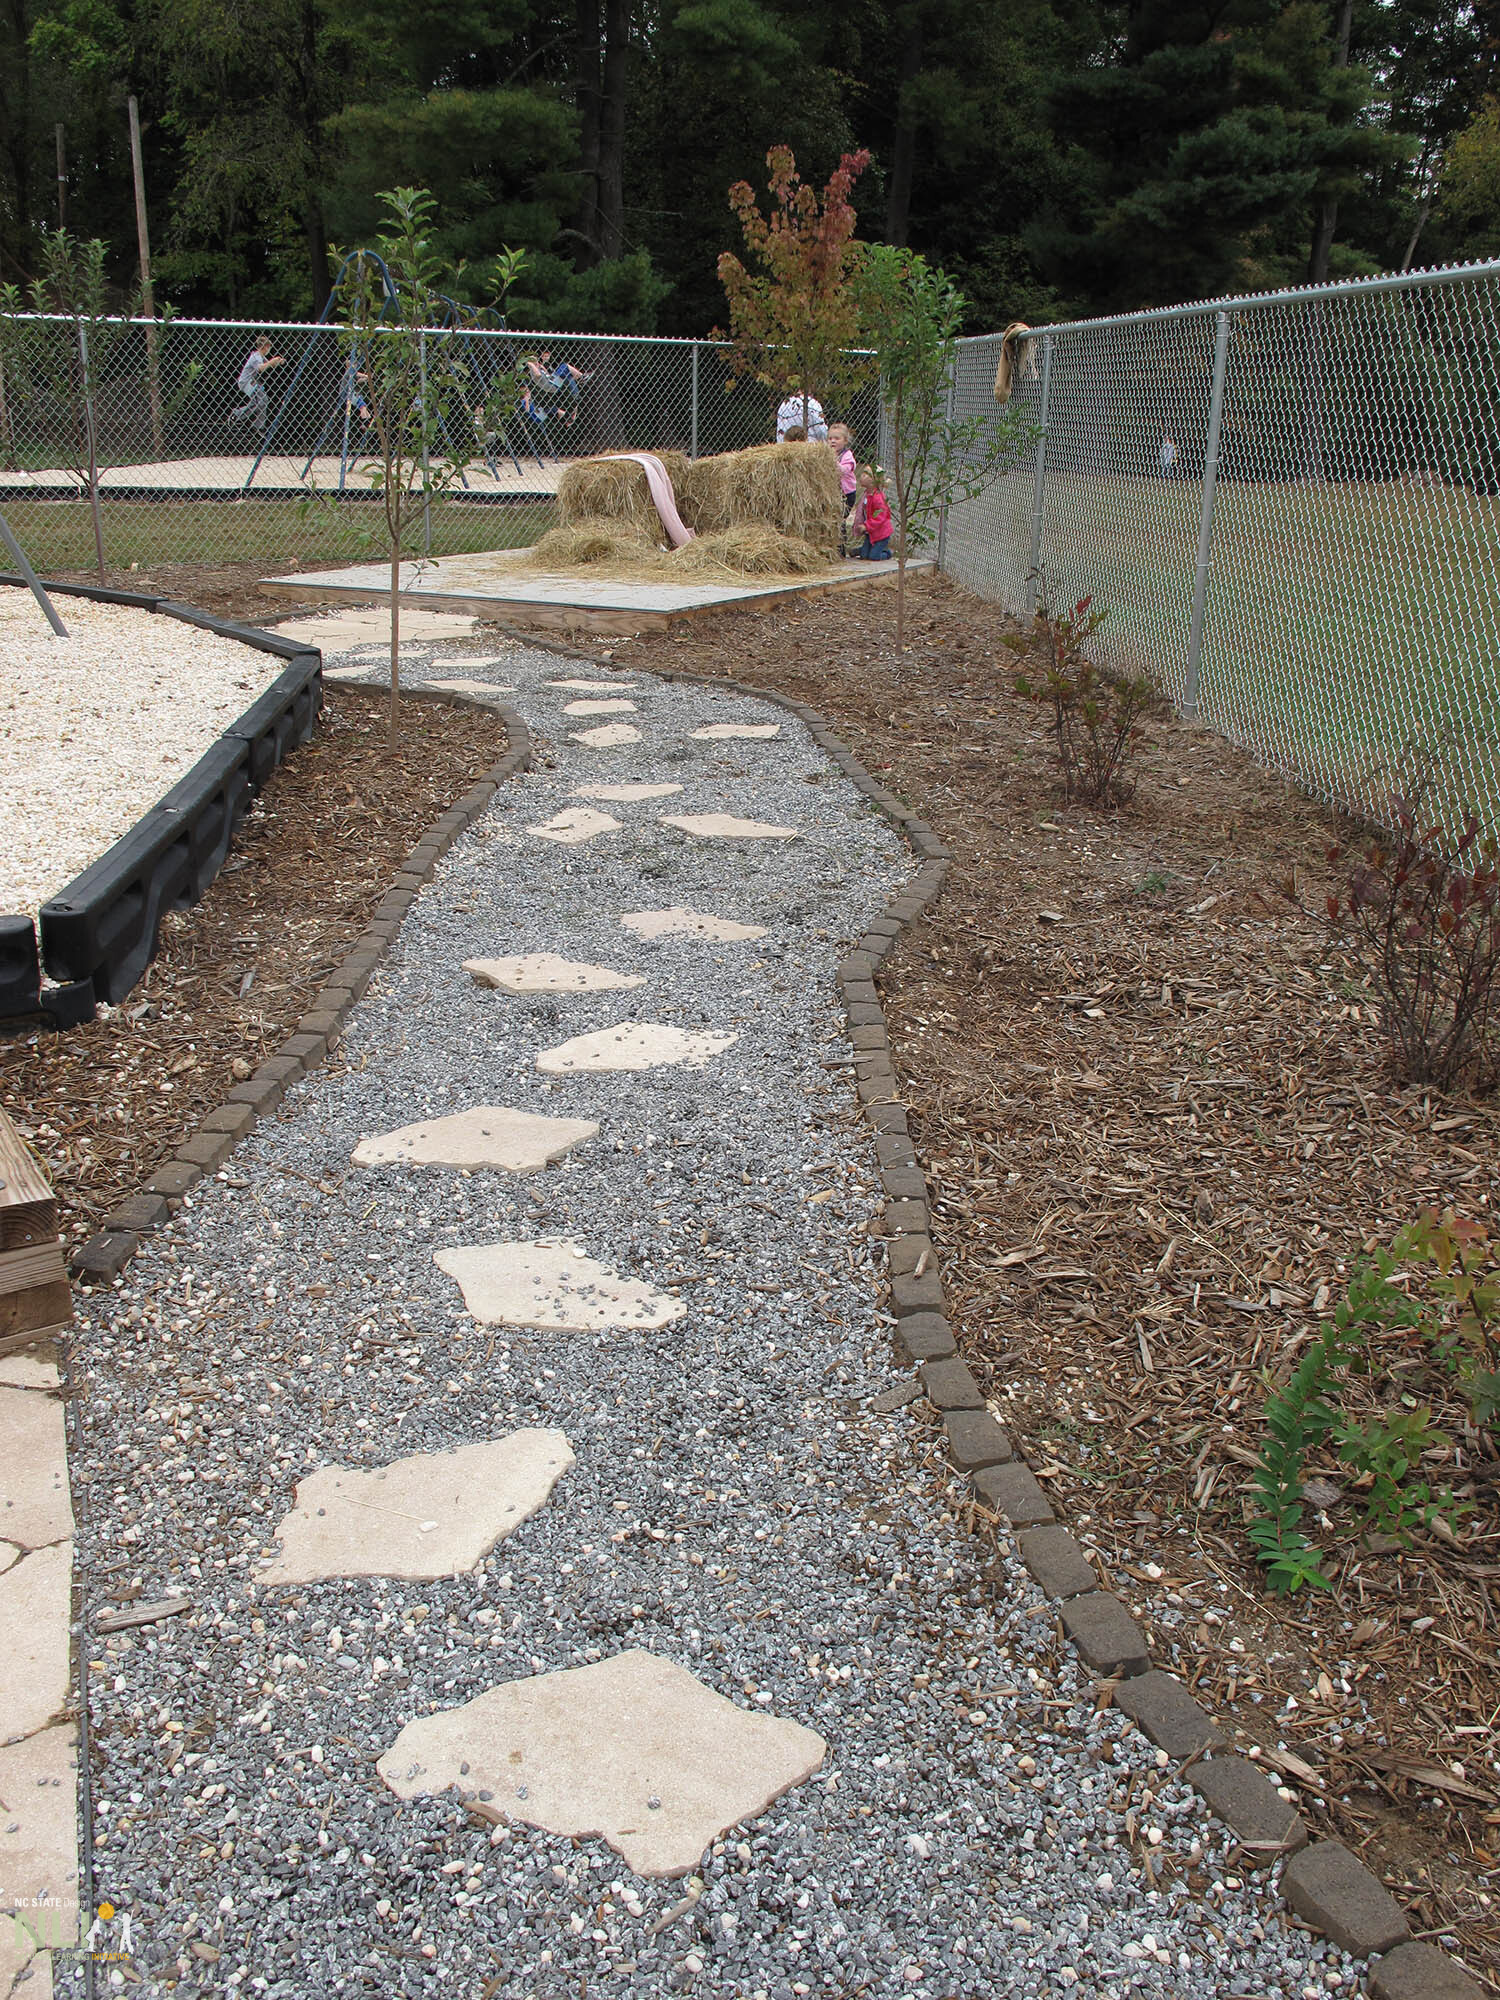
    flag stone and gravel pathway

    Flag stone set in gravel

    child on wheeled toy on primary pathway

    Primary pathways connect different activity areas through the OLE
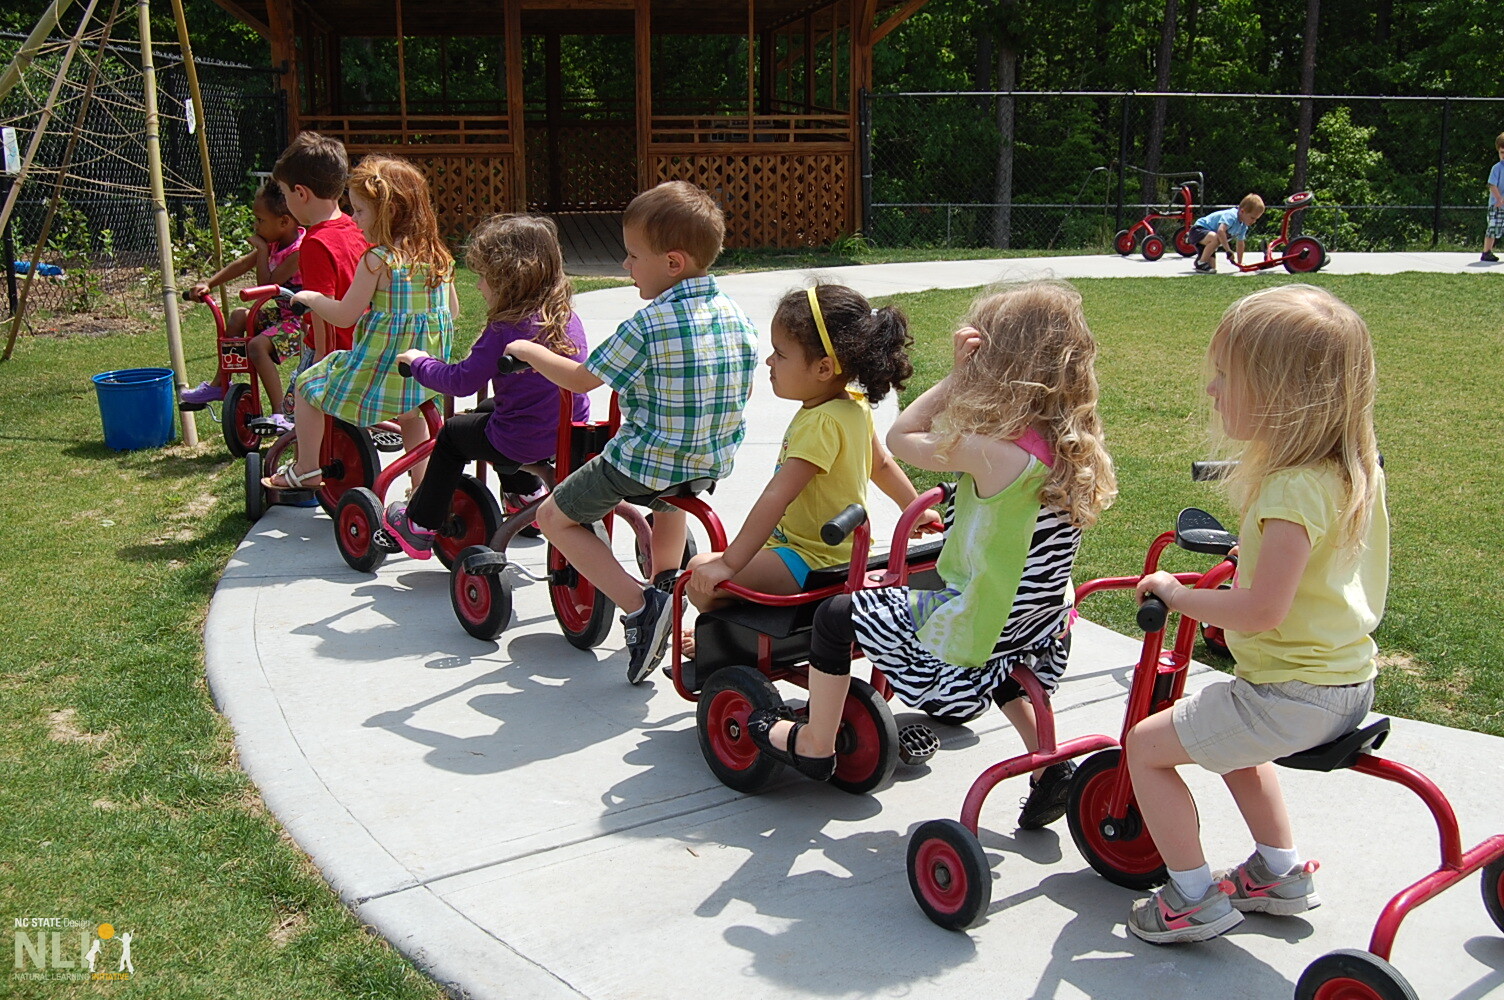
    children on wheeled toys on a concrete pathway

    Concrete is the best practice recommendation for primary pathways

  • 12. Arbors, Pergolas, & Trellises

    Infosheets

    12. Arbors, Pergolas, & Trellises

    Download the PDF – English

    Arbors, pergolas, and trellises emerged centuries ago in Graeco-Roman gardens. Then as now they accentuate the third dimension, immersing users in nature by enveloping them with climbing plants. Constructed of wood or metal and naturalized with vines, these inexpensive, easily installed items serve similar purposes in outdoor play and learning spaces. Small versions can be purchased as kits.

    DEFINITIONS

    Arbors. Arbors are simple arched structures that may include side trellises to support vines on each side. Metal arbors may include continuous latticework from one side to the other.

    Pergolas. Pergolas are colonnaded structures with wide cross-sections and larger dimensions than arbors. Posts support open, roof-like structures. Large footprints provide space for extravagant growth of climbing/cascading plants. Pergolas with circular or rectangular footprints offer shady outdoor classrooms and gathering spaces. Wood construction requires moderate skill, knowledge of carpentry, and some structural experience. Pergolas are larger and more elaborate than arbors and more challenging to install. Wood construction requires moderate skill, knowledge of carpentry, and some structural experience.

    Trellises. Trellises provide a vertical, open lattice of wood or metal to support climbing plants.

    PURPOSES

    Arbors and pergolas can accent an entry, add interest to a pathway, create a transition space, enclose a setting, and provide shade. They offer attractive perching and nesting places for birds—animating the scene with color, song, and movement. Together with trellises, arbors and pergolas make “outdoor rooms” such as classrooms, gathering spaces, and secret hideaways. Combined with settings such as primary pathways, decks and stages, sensory impact can be reinforced using fragrant vines and colorful, wind-sensitive accouterments attached to the structure such as chimes, flags, banners, streamers, and windmills. Trellises can be attached to the sides of buildings or used as freestanding components to create green walls. They can subdivide space, allowing children to feel they are hiding, without blocking caregiver views. Make sure trellises are made from sturdy material that will last.

    LOCATION

    Arbors can serve as setting entrances and transitions. They can arch over and add spatial interest and naturalization to pathways. An arbor arched over a comfortable bench with trellises and climbing plants on three sides, becomes a “bower” – a quiet, shady resting place for children and caregivers, terminating a pathway or tucked into a corner.

    Pergolas installed at building entrances create indoor-outdoor transitions. As freestanding structures they serve as outdoor classrooms or multipurpose, shady gathering spaces, where children’s work can be displayed and learning resources stored. Covered with fragrant climbers, grape vines, or gourds, pergolas provide settings that extend outdoor stays and learning potentials. A bird nest may appear overhead to the great excitement of children.

    Trellises can be used as freestanding green “walls” that stimulate hiding and chase games.

    For successful plant growth, always locate arbors, pergolas, and trellises in adequate sunlight.

    MATERIALS

    Arbors and Pergolas are typically built of wood, but can also be made from prefabricated metal. Use pressure treated wood for longevity and weather resistance, especially where the structure is in contact with the ground or below grade. Though more expensive, woods such as cedar and black locust are naturally rot resistant and recommended for longevity.

    Trellises are typically made using wooden or prefabricated lattice material, but can be improvised using found and recycled materials, including chicken wire, bamboo, tightly tied string, old bike rims, bed frames, ladders—anything that plants can use to climb on! Ensure vines are adequately “trained” to climb by periodically weaving the plant through desired trellis material.

    RECOMMENDED PLANTS

    Below is a list of popular vines for naturalizing arbors, pergolas, and trellises. Annual vines need to be replanted each year, while perennial vines go dormant during the winter and bloom again the following season. Consider available sunlight and soil quality when choosing climbing vines. Runner beans are a popular choice because they grow quickly, have beautiful blooms, and add an edible component to the outdoors.

    Annuals:
    Lagenaria siceraria, Bottle gourd
    Melothria scabra, Cucumber ‘Mexican sour gherkin’ (edible)
    Phaseolus coccineus, Scarlet runner bean (edible)
    Phaseolus vulgaris, Pole form beans ‘Blue Lake’ or ‘Red Noodle’ (edible)

    Perennials:
    Actinidia arguta, Hardy kiwi (edible)
    Akebia quinata, Chocolate vine (chocolate scent)
    Bignonia capreolata, Cross vine (prolific, red, trumpet flowers)
    Lonicera sempervirens, Coral honeysuckle (attracts hummingbirds and butterflies)
    Passiflora incarnata, Passion flower (exotic, intriguing flowers)
    Trachelospermum asiaticum, Asian star jasmine
    Trachelospermum jasminoides, Confederate star jasmine (incredible perfume)
    Rosa banksiae, Lady Banks rose or Banks rose (thornless, hardy to USDA Zone 7, drought tolerant, vigorous growth, full sun to partial shade)

    NOTE: Custom arbors and pergolas should be designed and built by licensed professionals. Sometimes, municipal construction permits may be required.

    Reference

    For a comprehensive, highly readable book on the subject, including construction details, see Pergolas, Arbours and Arches: Their History and How to Make Them, by Paul Edwards and Katherine Swift, 2001. London: Barn Elms.

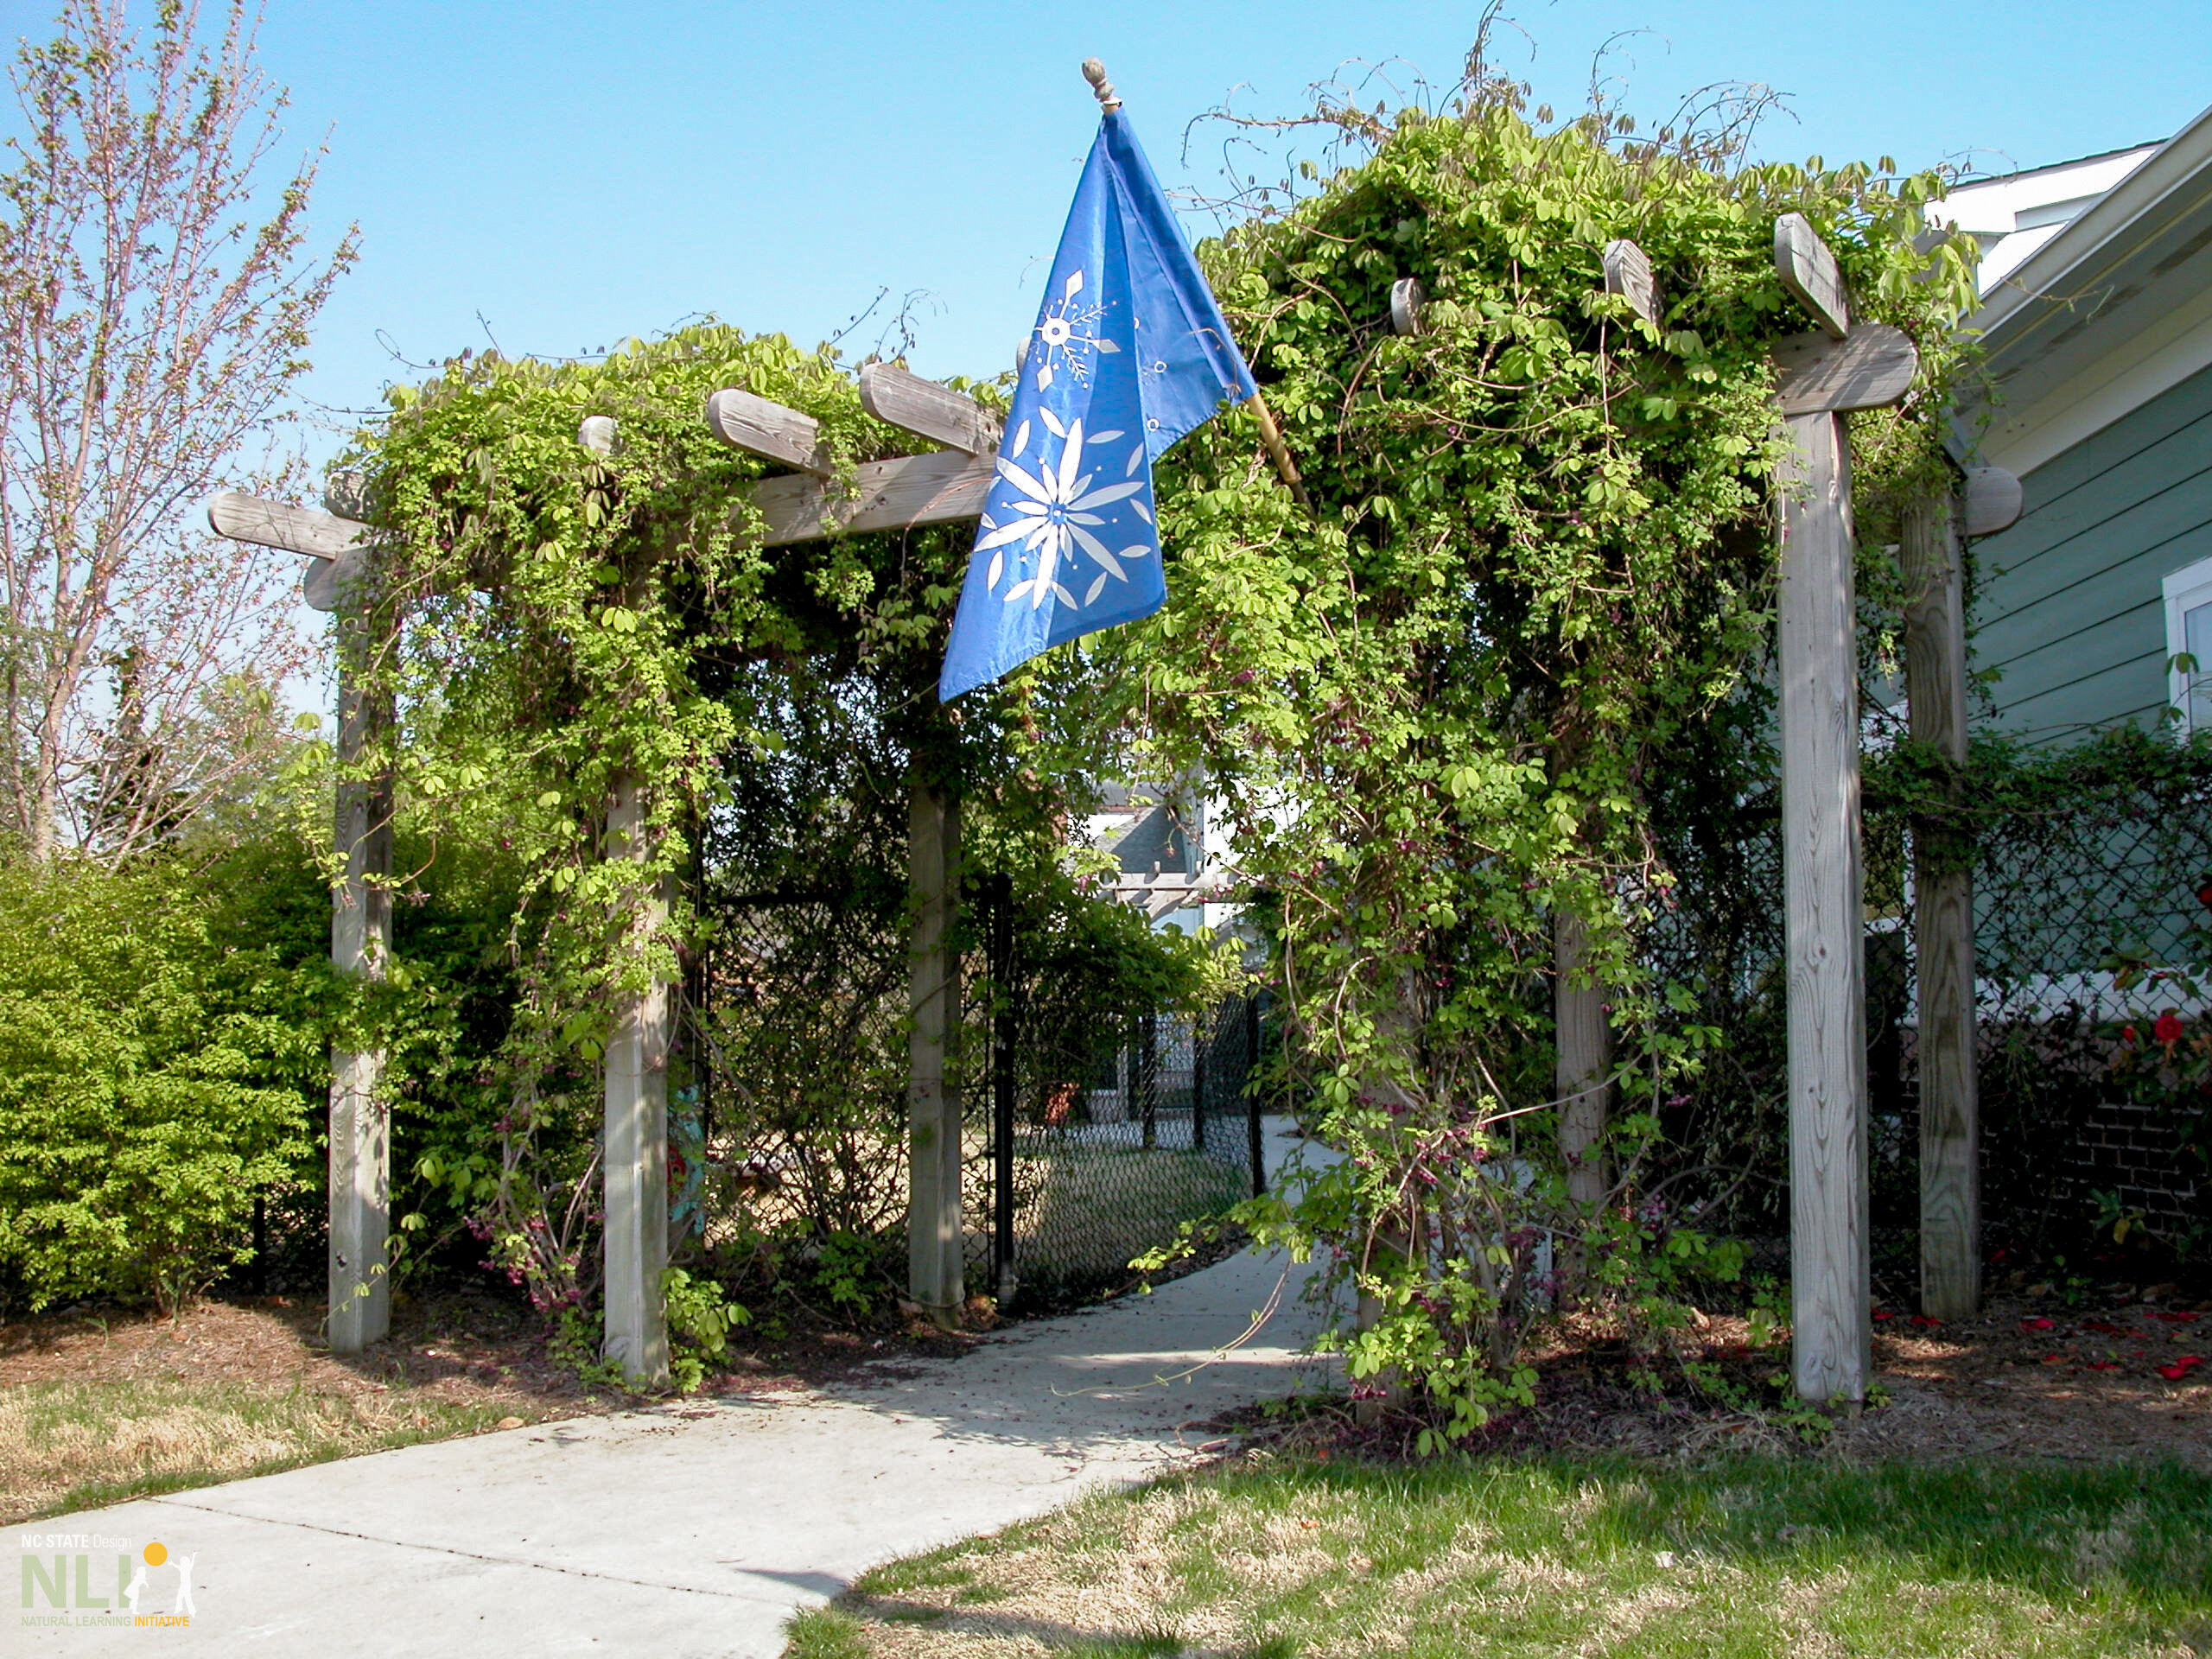
    pergola covered with vines

    Supporting a massive chocolate vine and flag, this 8-posted pergola welcomes children at the center entrance.

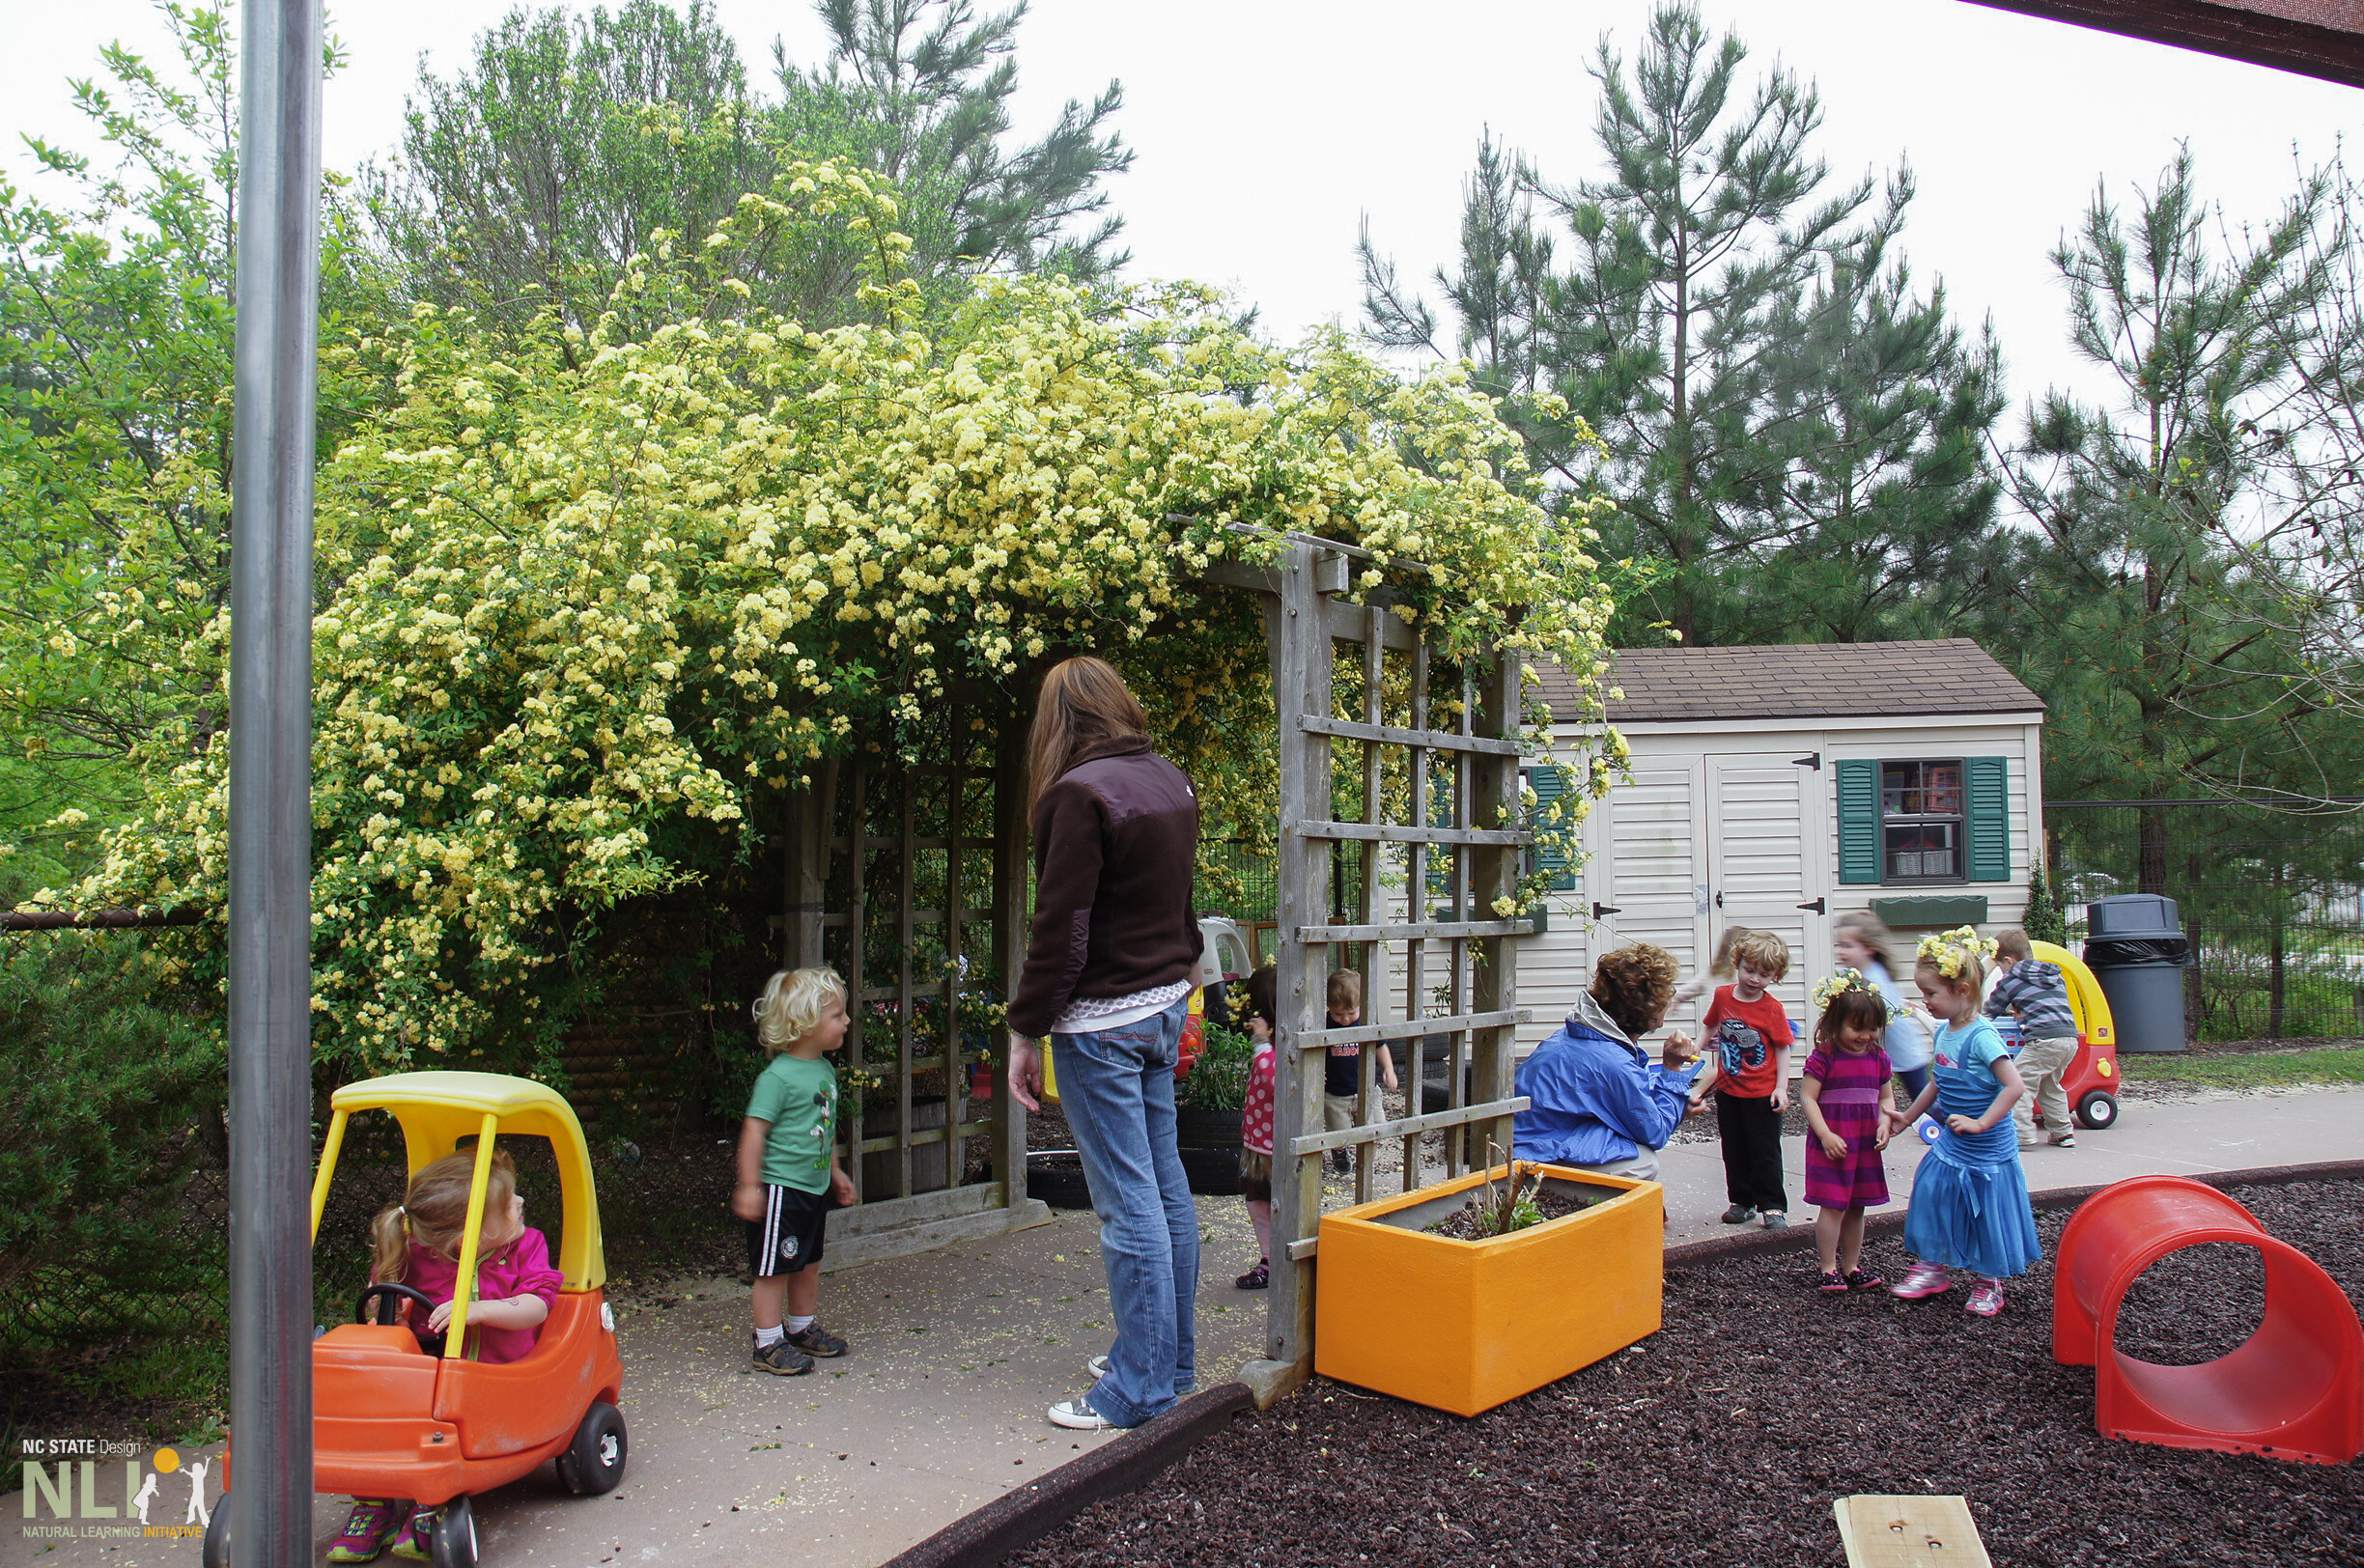
    children walking through arbor

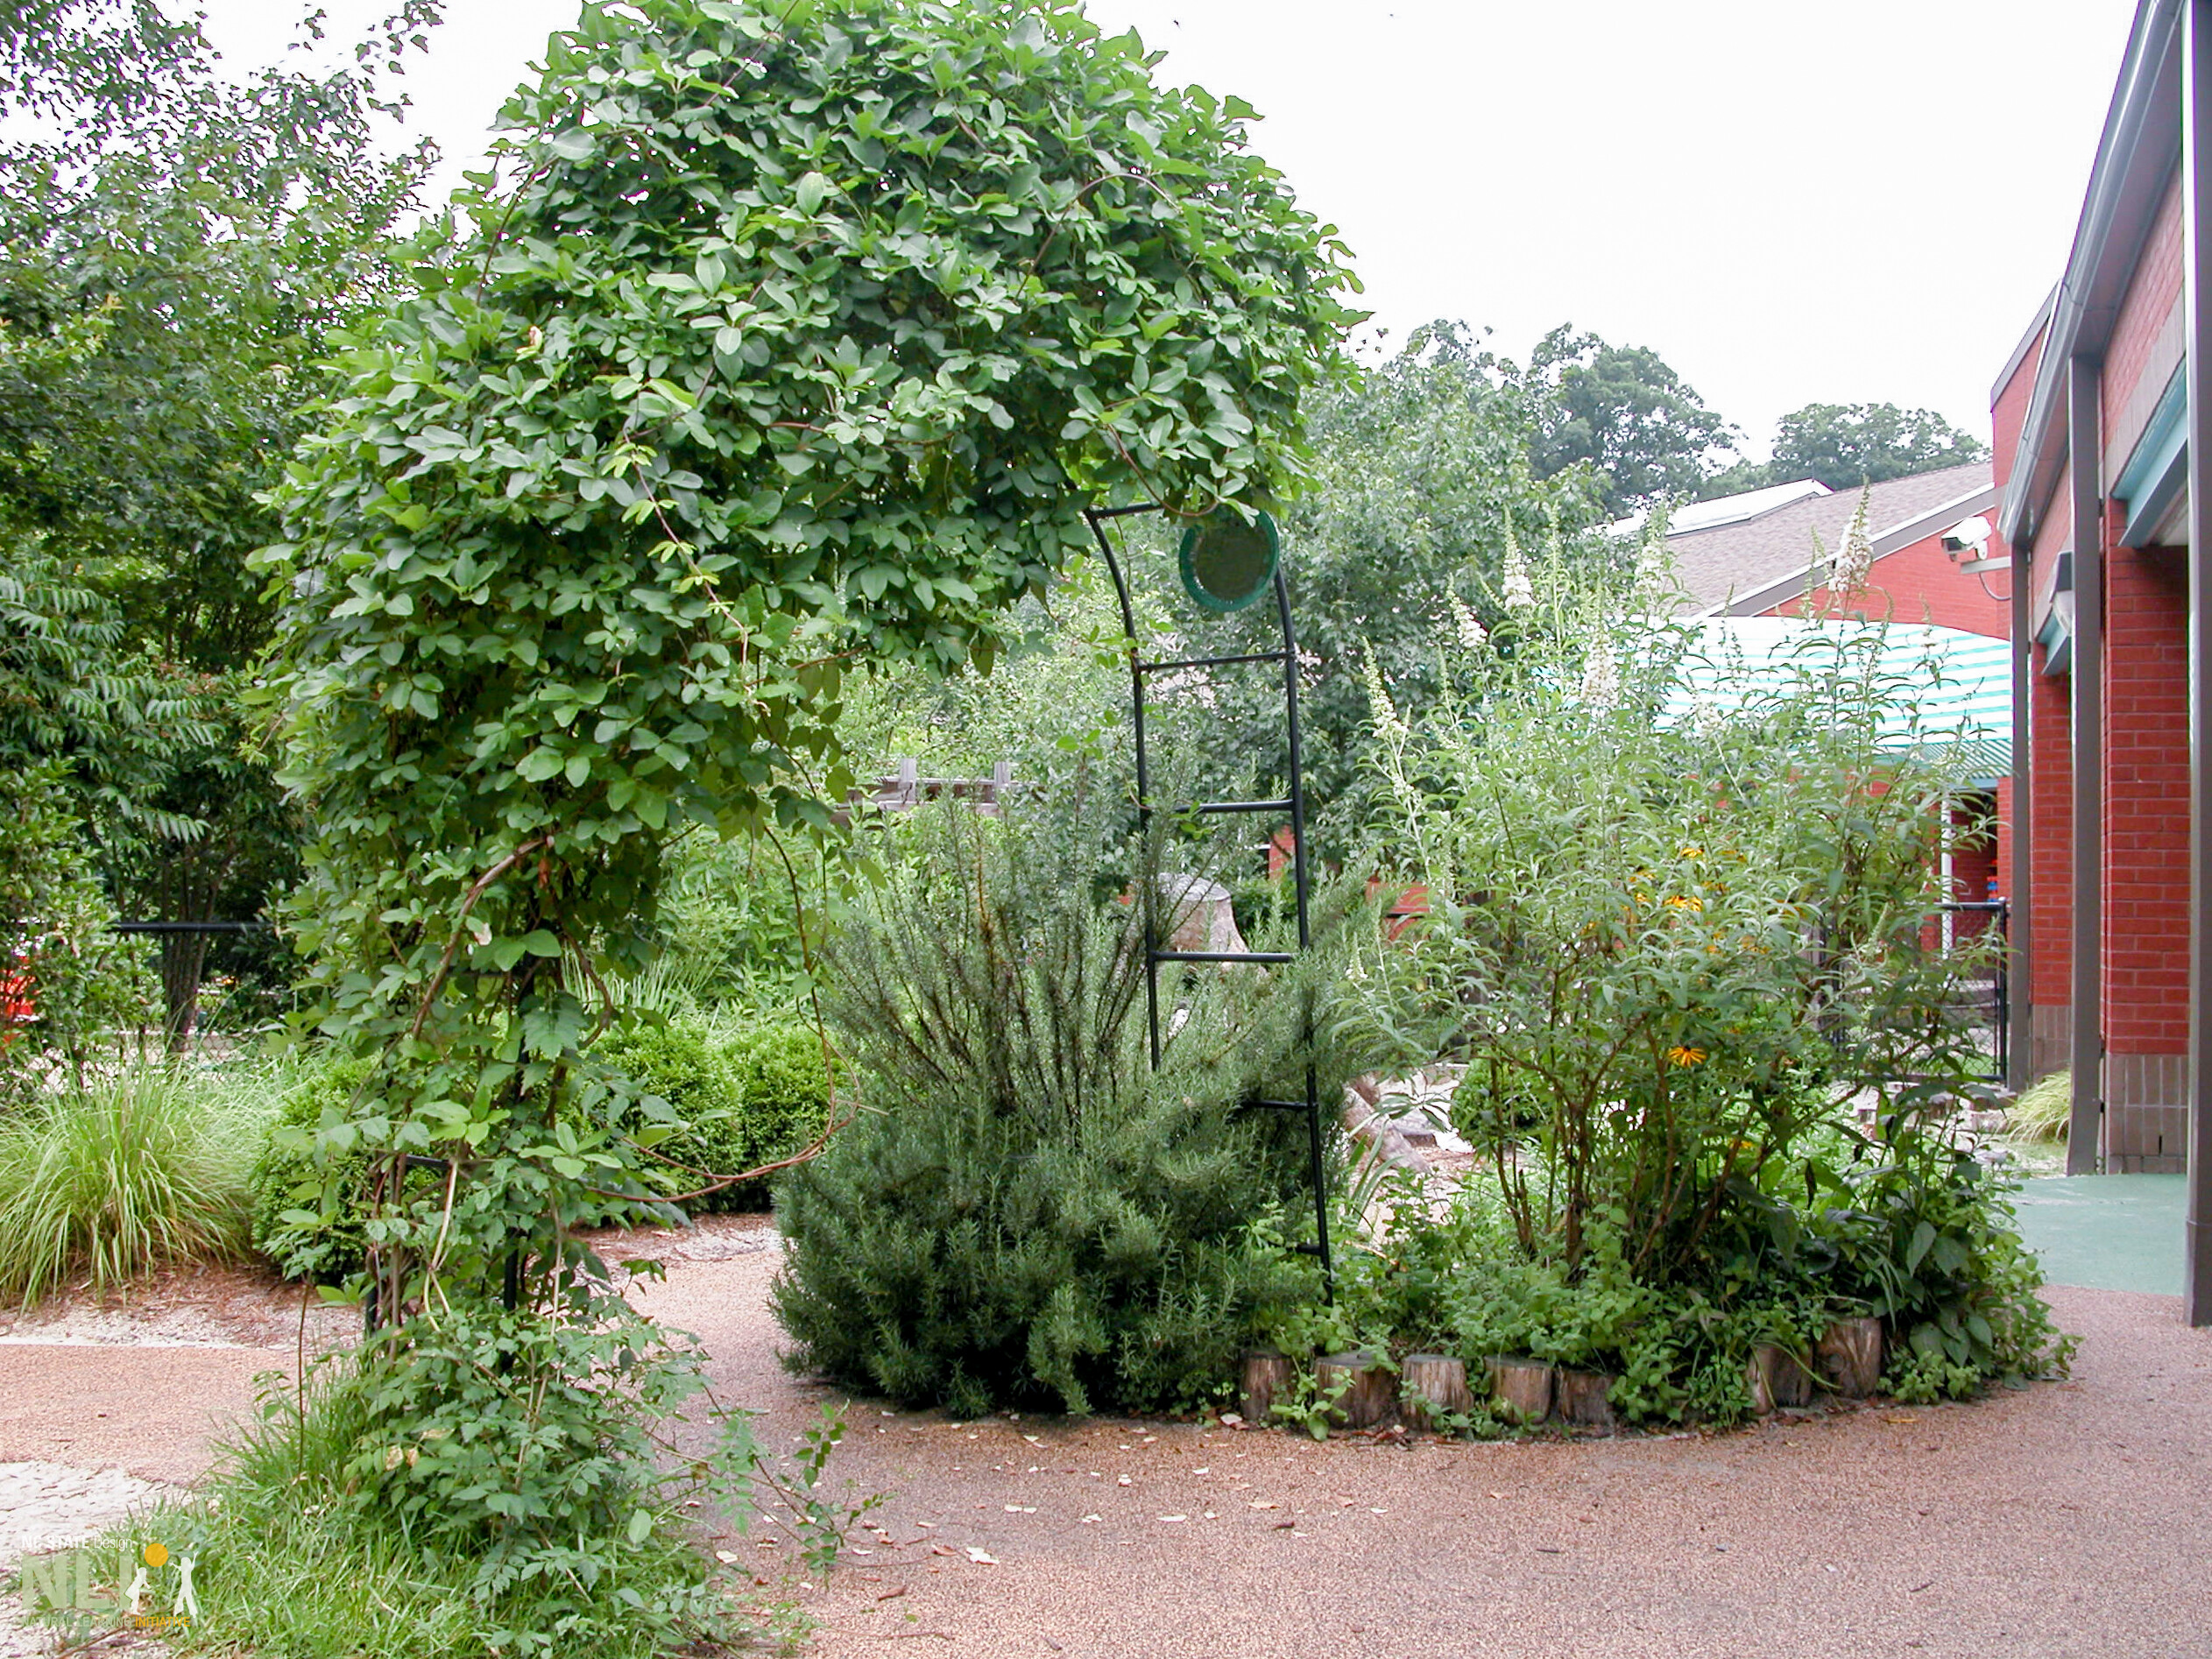
    Covered by a magnificent cream umbrella of Banks rose, this arbor spans a preschool primary pathway, affords a patch of shade and snipped stems for flowery garlands.

    metal arbor with vines

    Spanning a toddler primary pathway, this metal arbor may be narrow in width but it can sport a large, green, chocolate vine toupée!

    pergola covered with vines

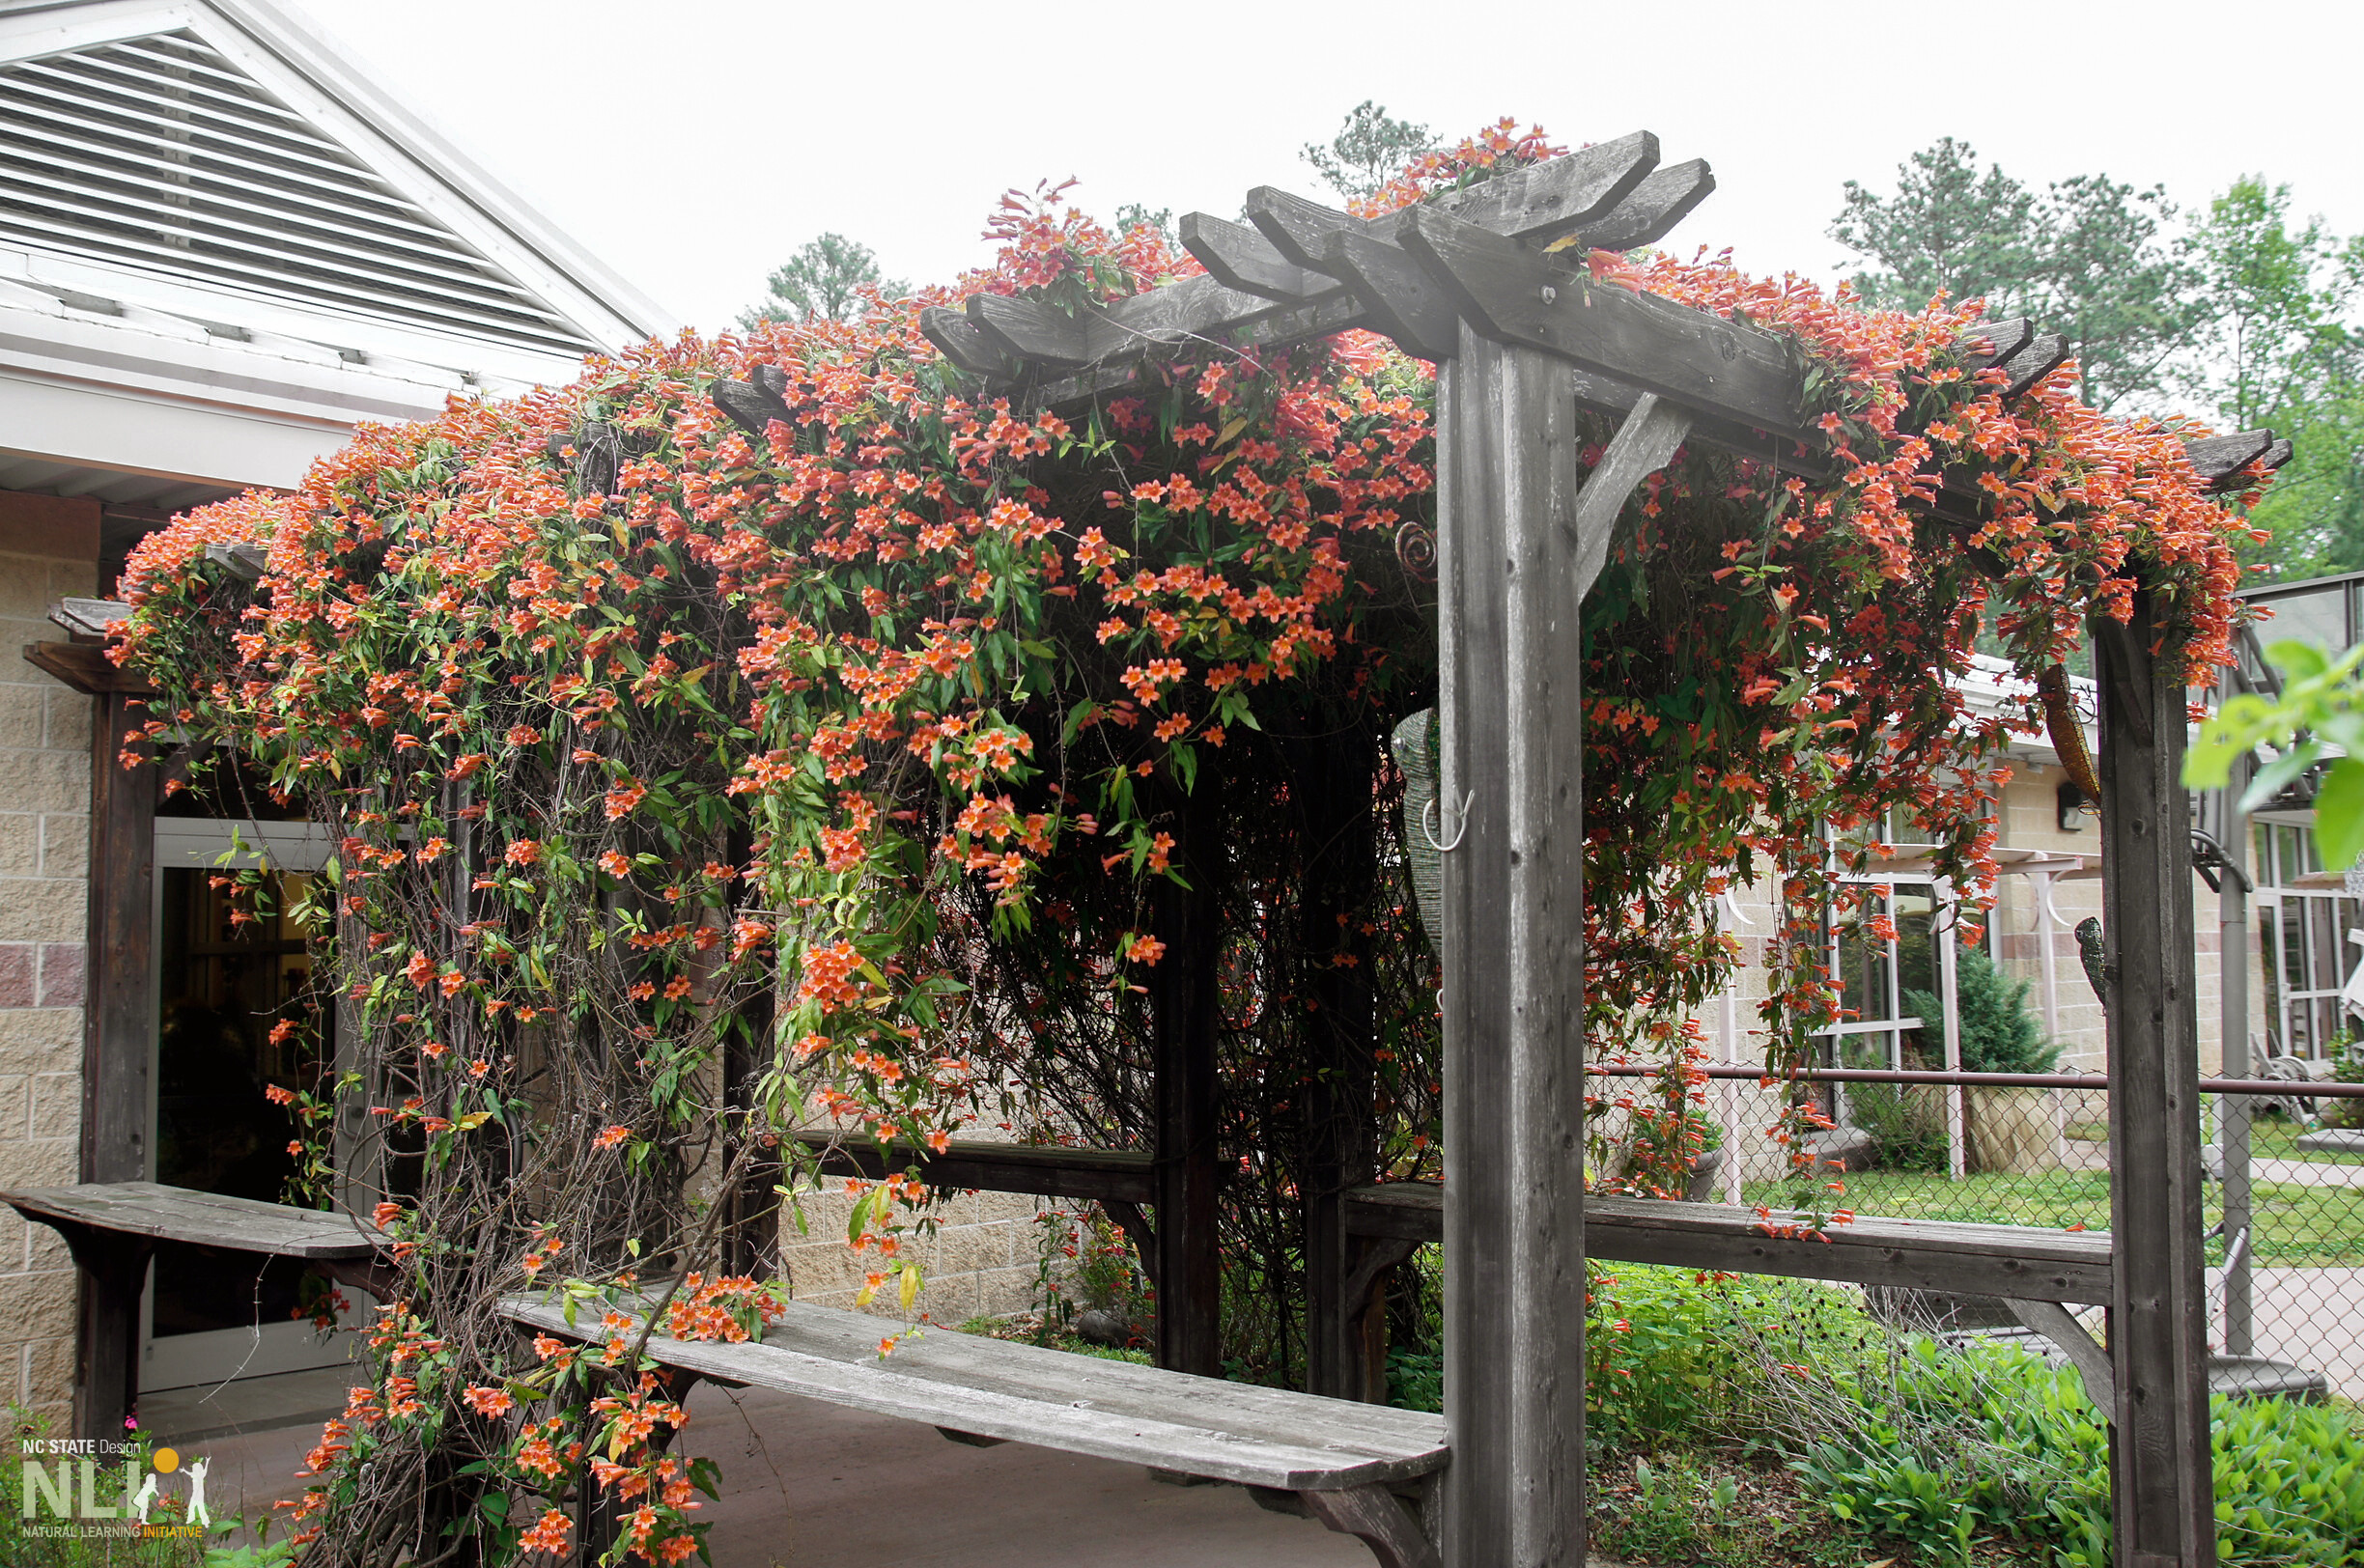
    This gathering space between center building and outdoors is a superb example of a cascading cross-vine pergola. Shelves provide temporary parking for clothing and play items.

    Trellise with built in bench

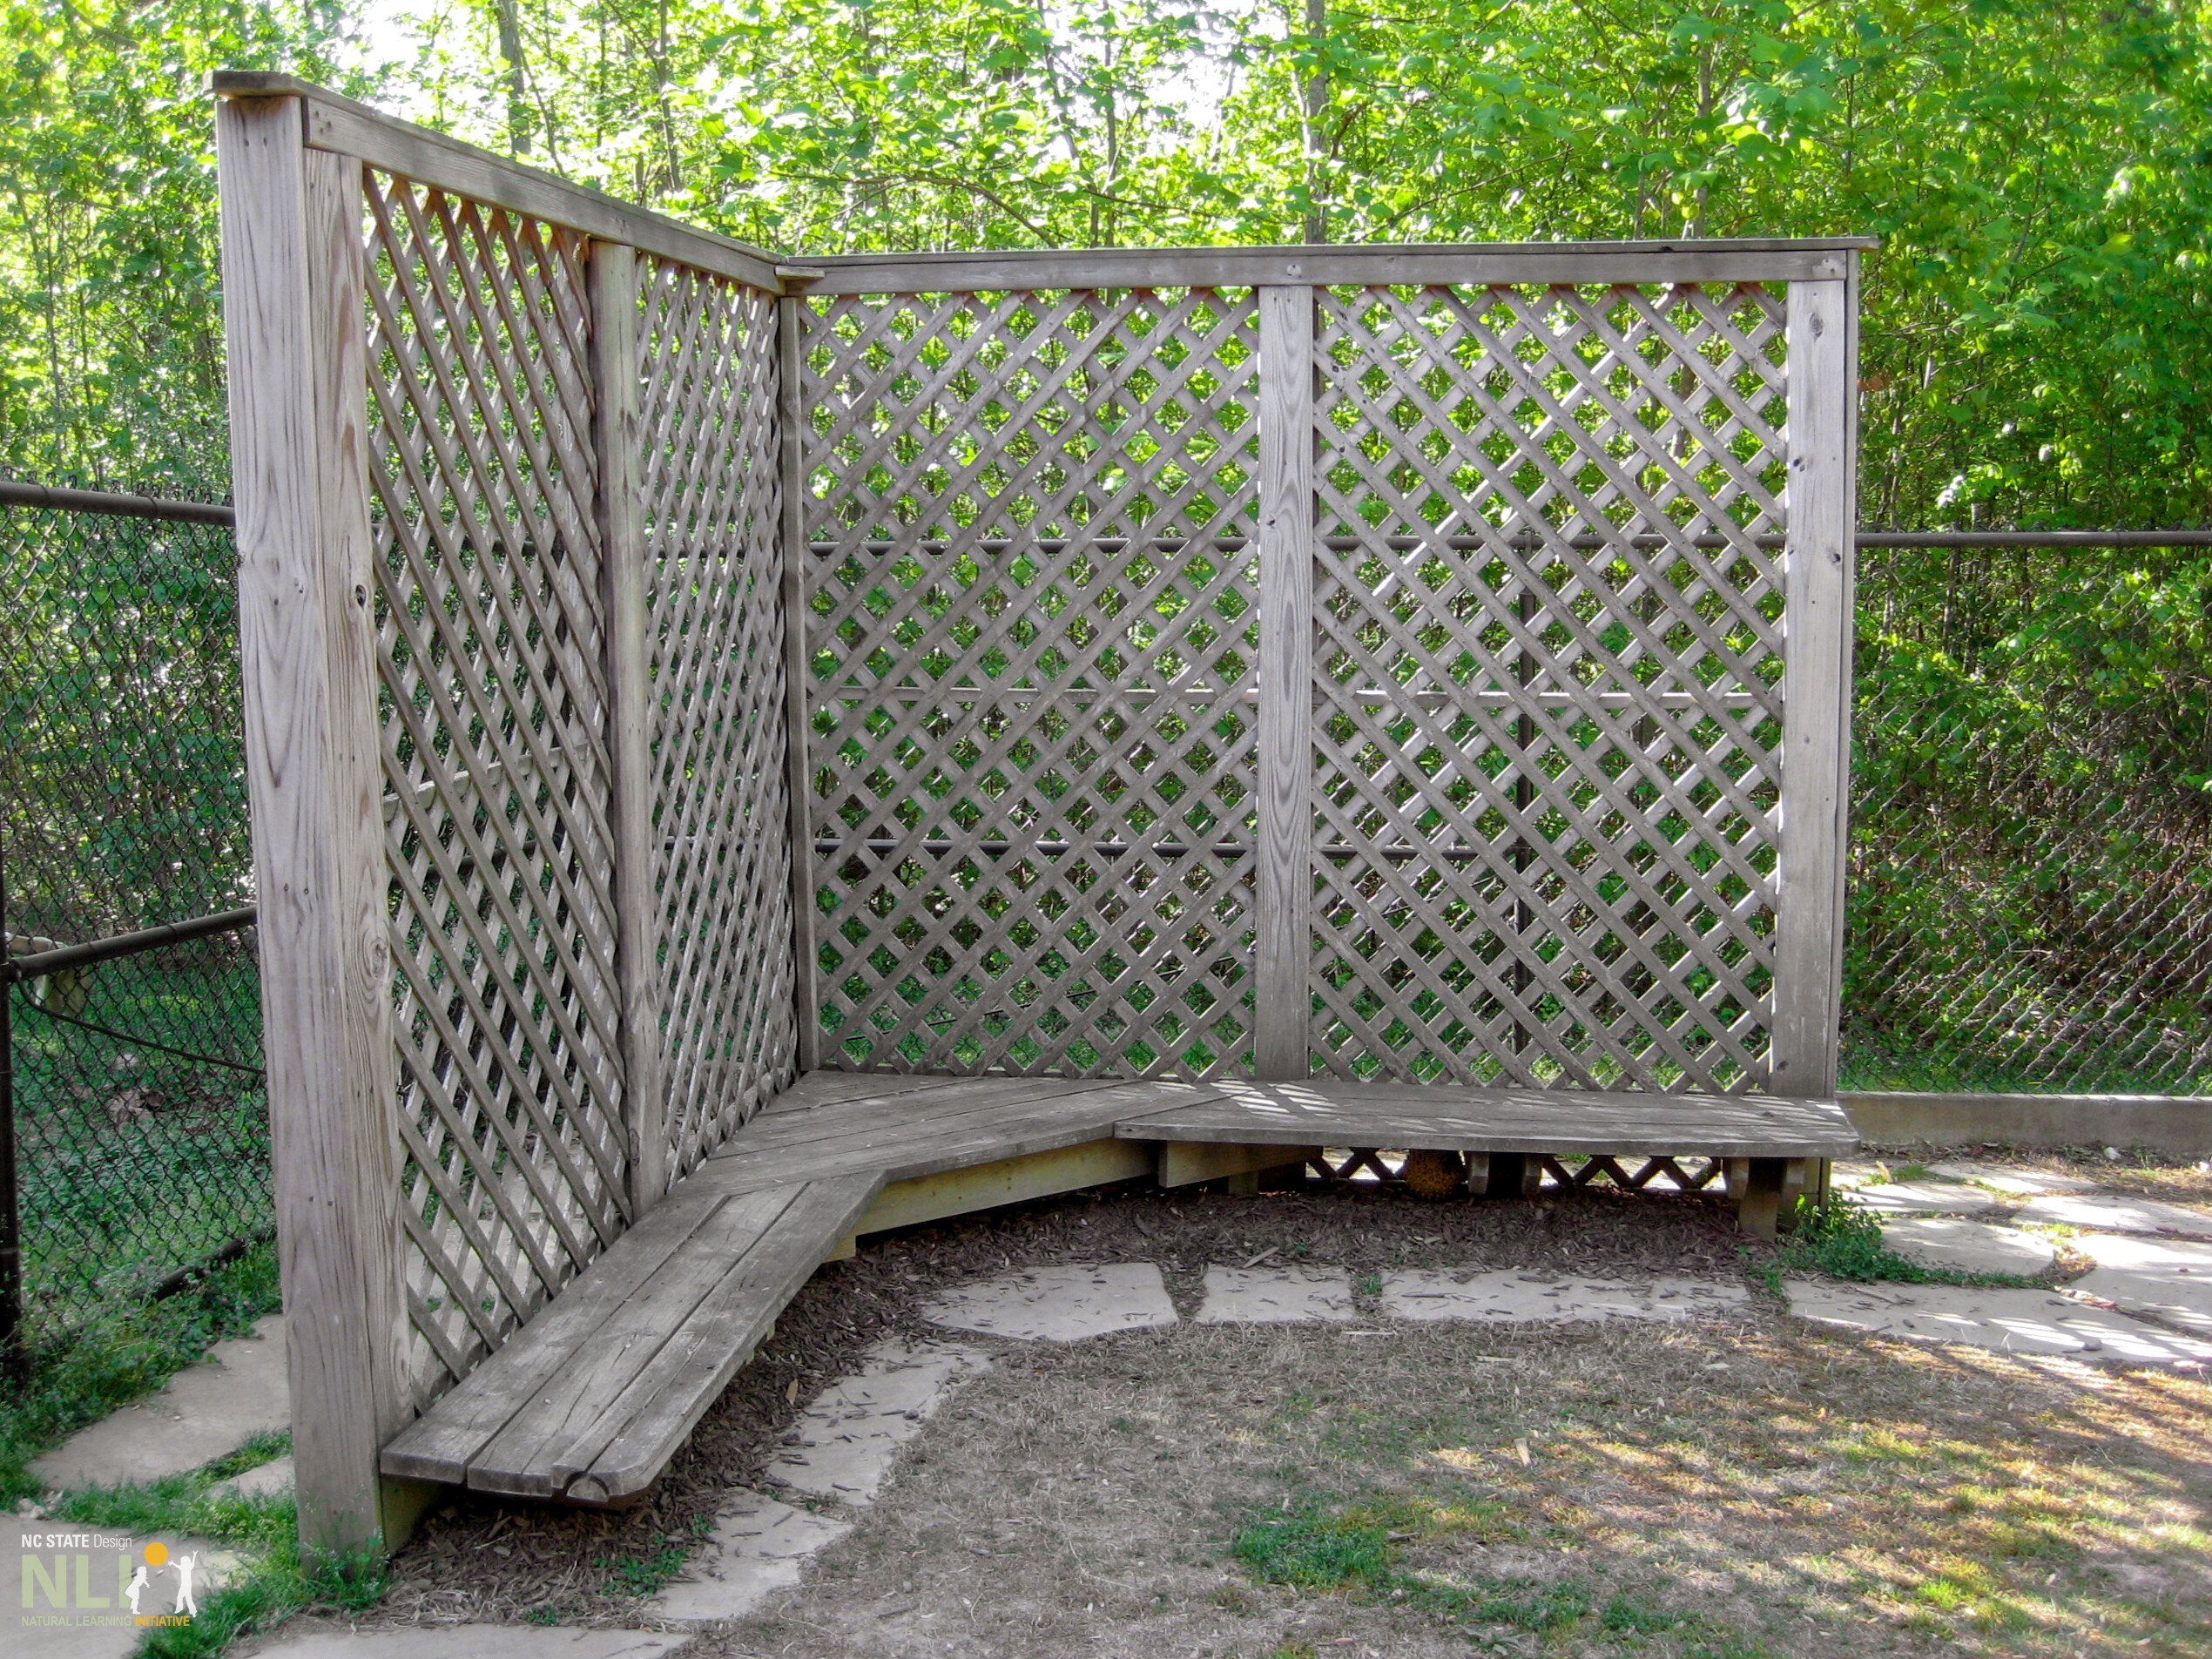
    This “privacy corner” trellis is hide-able for children and visible to teachers during chase games. It could be covered in vines in another situation

  • 11. Shade Solutions

    Infosheets

    11. Shade Solutions

    Download the PDF – English

    Adequate protection from the sun is essential for the health and comfort of young children outdoors. In addition to protecting children from harmful ultra-violet light, sun protection extends outdoor play and learning opportunities by prolonging time spent in the outdoor learning environment (OLE). A diversity of shade elements in a naturalized play area ensures that an OLE reaches it’s maximum potential, enriching each play setting with sun protection and comfort for both children and teachers.

    Trees

    Having a sufficient number of trees is crucial to achieve best practice sun-protection within an OLE. Trees anchor play settings and create cool, comfortable micro-climates where children can spend extending time learning outdoors. To achieve OLE best practice, a diversity of trees is recommended, with a preference for small and medium-sized trees which are scaled to young children. To approximate the number of trees required for an OLE, use the following formula, rounding to the nearest whole number:
    Area of OLE in square feet, divided by 600.
    To ensure a diversity of trees, follow the guidelines below:

    • 10—15% canopy/shade trees
    • 15—25% evergreen trees
    • 30—40% small-medium under-story trees
    • 15—25% fruiting trees

    Trees require time to mature before they can provide adequate shade, making shade structures or temporary shading solutions necessary for outdoor play. The following shade settings include vegetated, structural, and temporary solutions that respond to OLE needs, including budget, volunteer availability, and space limitations.
    Shrubs, vines, and ornamental grass

    While waiting for trees to grow to maturity, planting a variety of other vegetation can help an OLE meet it’s shade requirements and add sensory variety to outdoor play settings.
    Shrubs. Perennial shrubs installed next to a play setting where children sit for extended periods can provide much-needed pockets of shade. Cluster large shrubs around decks, sand play settings, and gathering areas to create well-defined plays settings. Edible shrubs, such as blueberries, add additional play value.

    Vines. Whether grown on fences, teepees, pergolas, or tunnels, vines create a naturalized, shady play setting. Vining edible plants, such as pole beans, are low-cost and easy to maintain—once planted, they’ll grow quickly and define a sensory playspace for children.

    Ornamental Grass. Tall perennial grass, such as common rush, can create rich, textural shade settings for children to hide and play in. Planted in clusters, ornamental grass can create a maze for children to endlessly explore.

    PERMANENT STRUCTURES

    Arbors, pergolas, tunnels, and trellises scattered throughout the outdoor learning environment create patches of shade and comfortable, three-dimensional spaces scaled to young children. Structures can be custom built or purchased as kits. Permanent structures may be expensive to install, but they become attractive play settings in their own right.

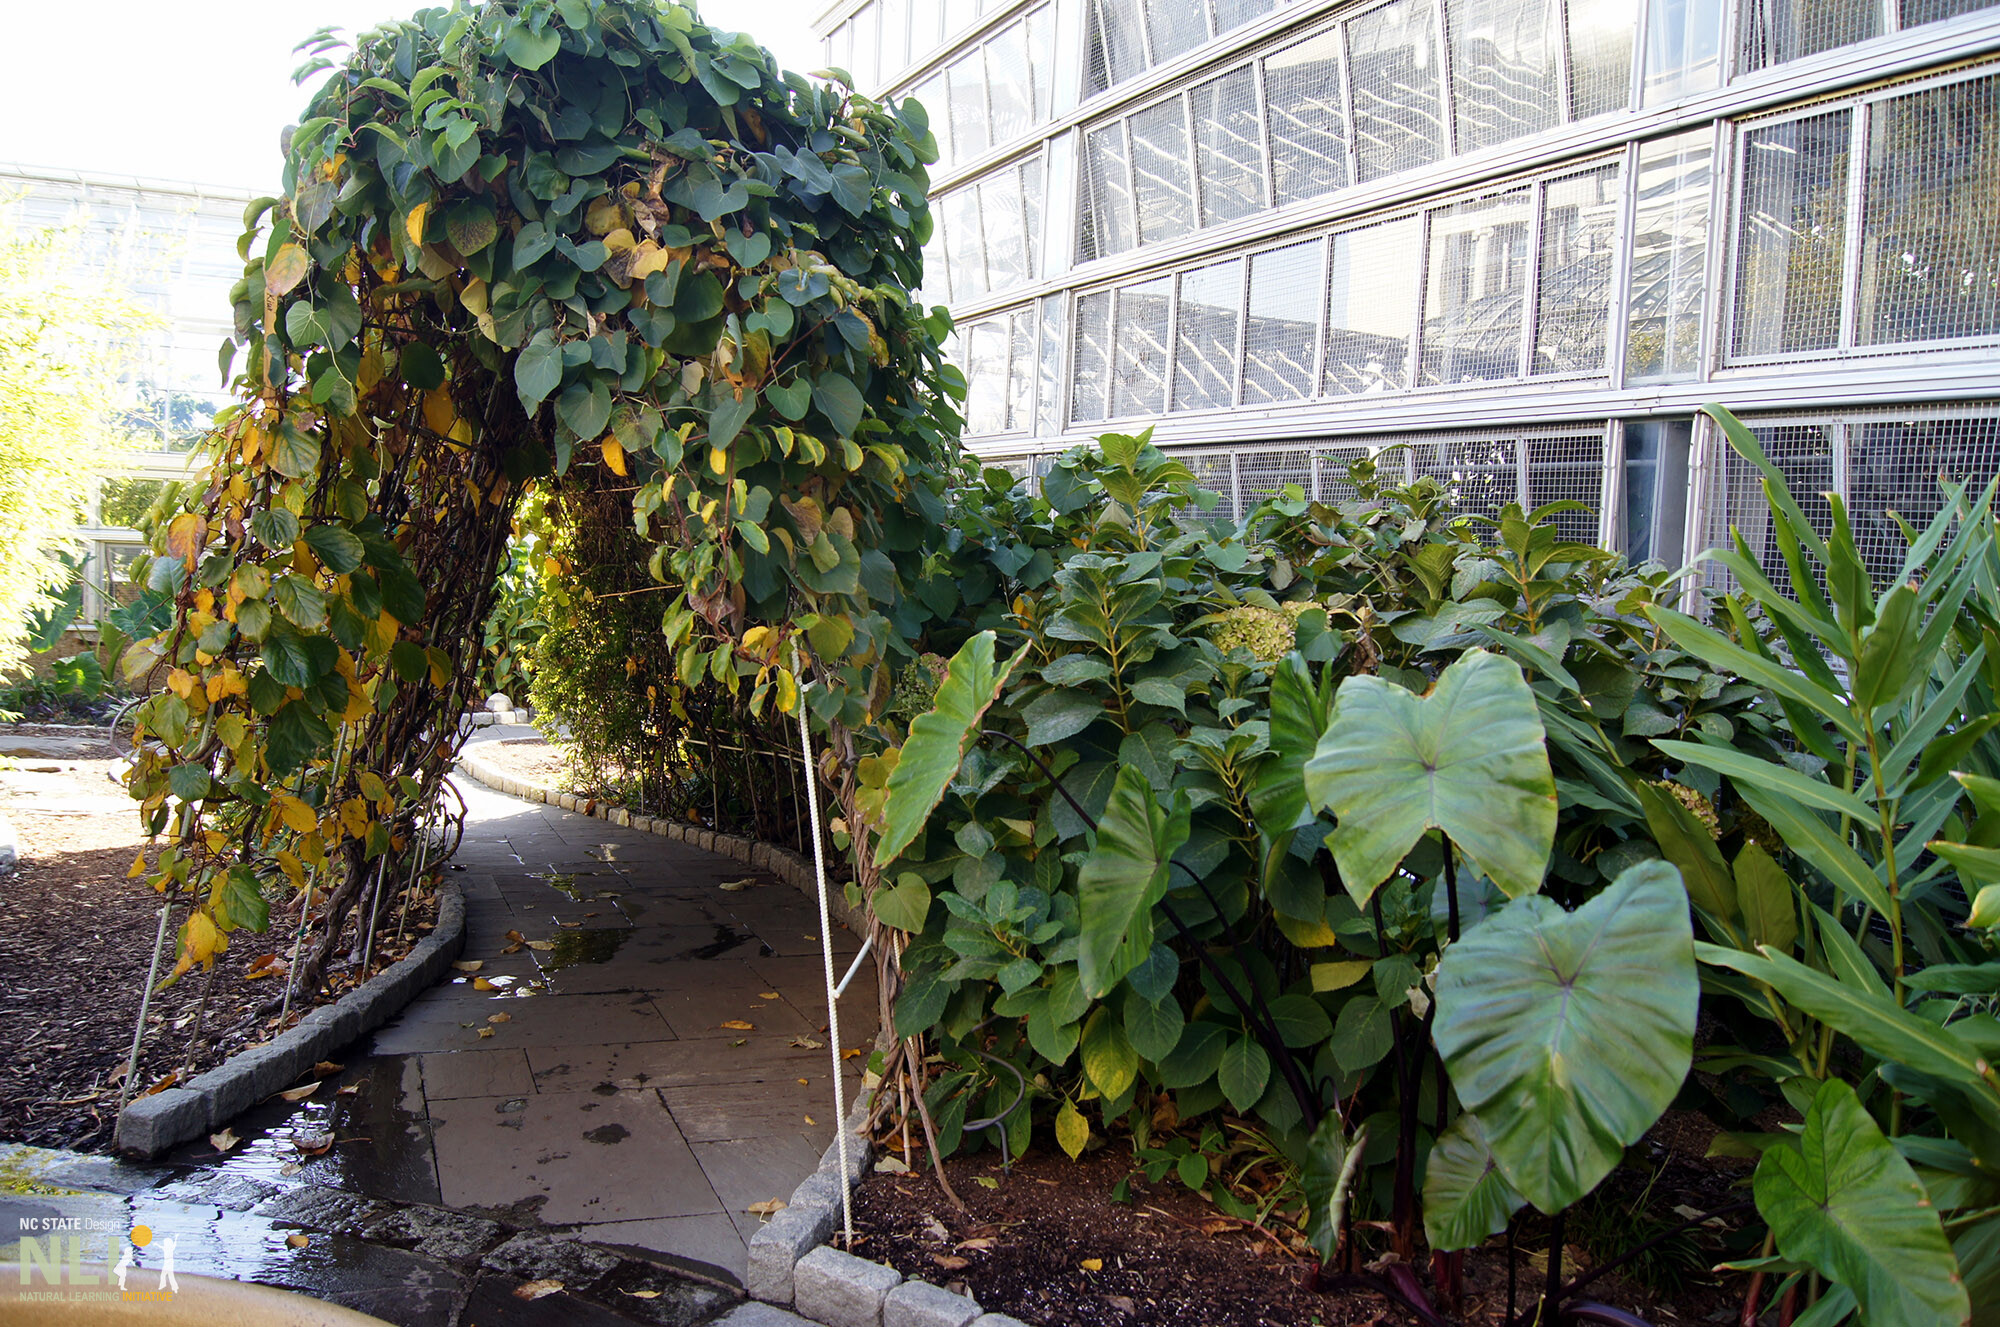
    Arbors. An arbor usually incorporates a trellis into its structure, creating a rounded, tunnel-like passageway of climbing plants. Arbors can be designed around a primary pathway, creating a shady and exciting moment for children engaged in active play. Arbors can also mark the entrances and exits of different play areas, creating a distinct identity for an OLE.

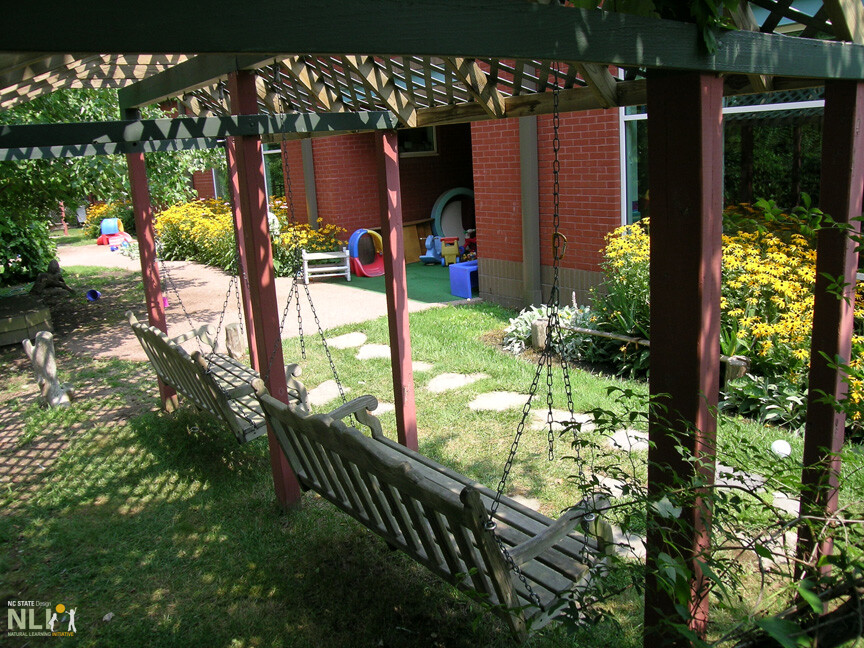
    Pergolas. Pergolas also support climbing plants and create shady environments, but they typically have posts that support an open, roof-like structure. Pergolas are often built to shade an outdoor classroom, deck, or swing (Figure 5).

    Trellises. A trellis is a plant-supporting structure made of an interwoven lattice of wood, metal, or bamboo. Trellises provide an architectural foundation for climbing plants to grow in a desired fashion, creating green walls, tunnels, shelters, sculptures, and other outdoor fixtures.

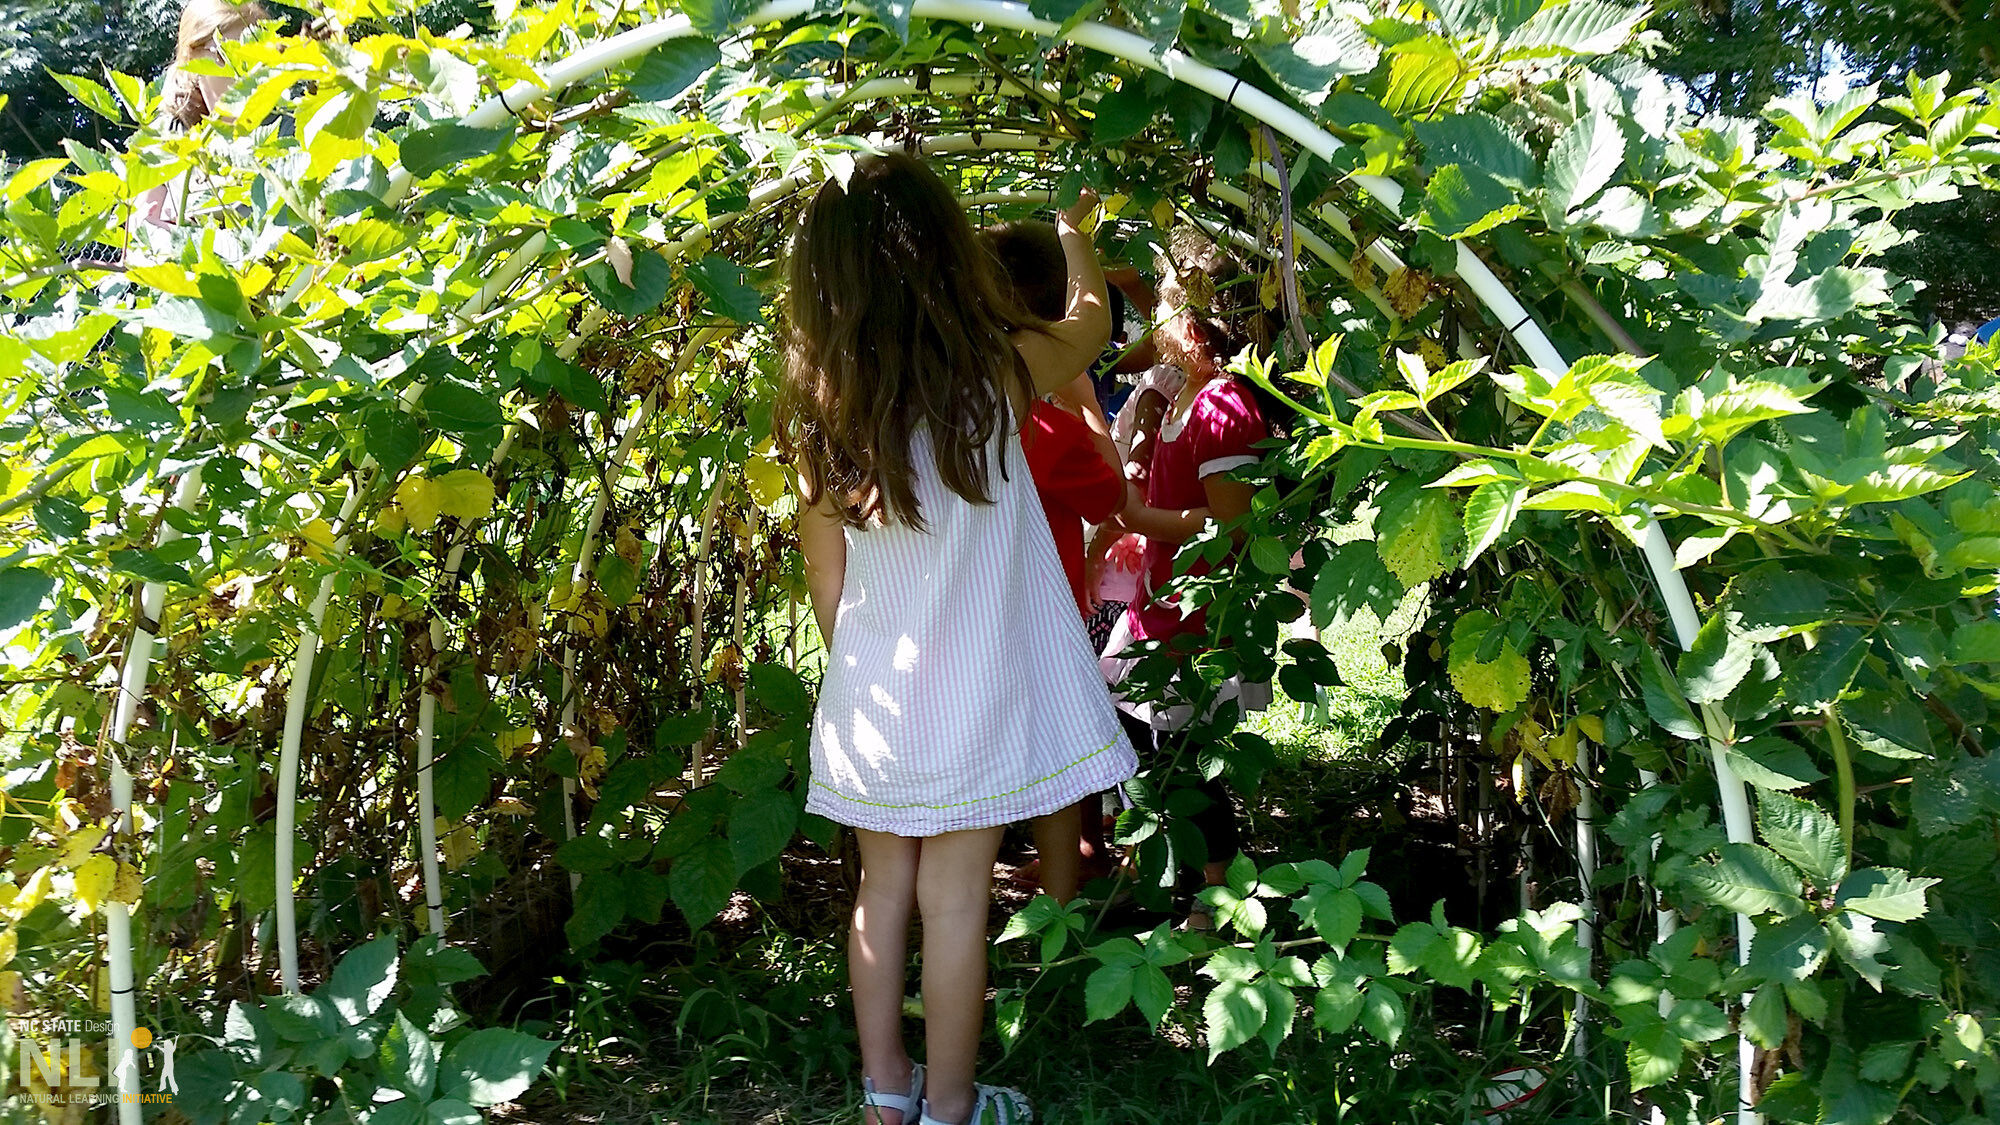
    Tunnels. Made from PVC, netting, live willow-fencing, or metal wire armature, tunnels are a sensory and adventurous play setting for children in an outdoor environment. A large willow tunnel can serve as a peaceful gathering setting or an adventurous hideaway, while a tunnel of edible vines can provide endless opportunities for exploration, tasting, and play.

    TEMPORARY STRUCTURES

    Vegetation takes time to grow, and permanent structures take time and money to build— if your OLE needs instant, temporary shade, consider the following solutions:
    • Pop-up canopy
    • Sheet/tarp attached to a fence or tent poles
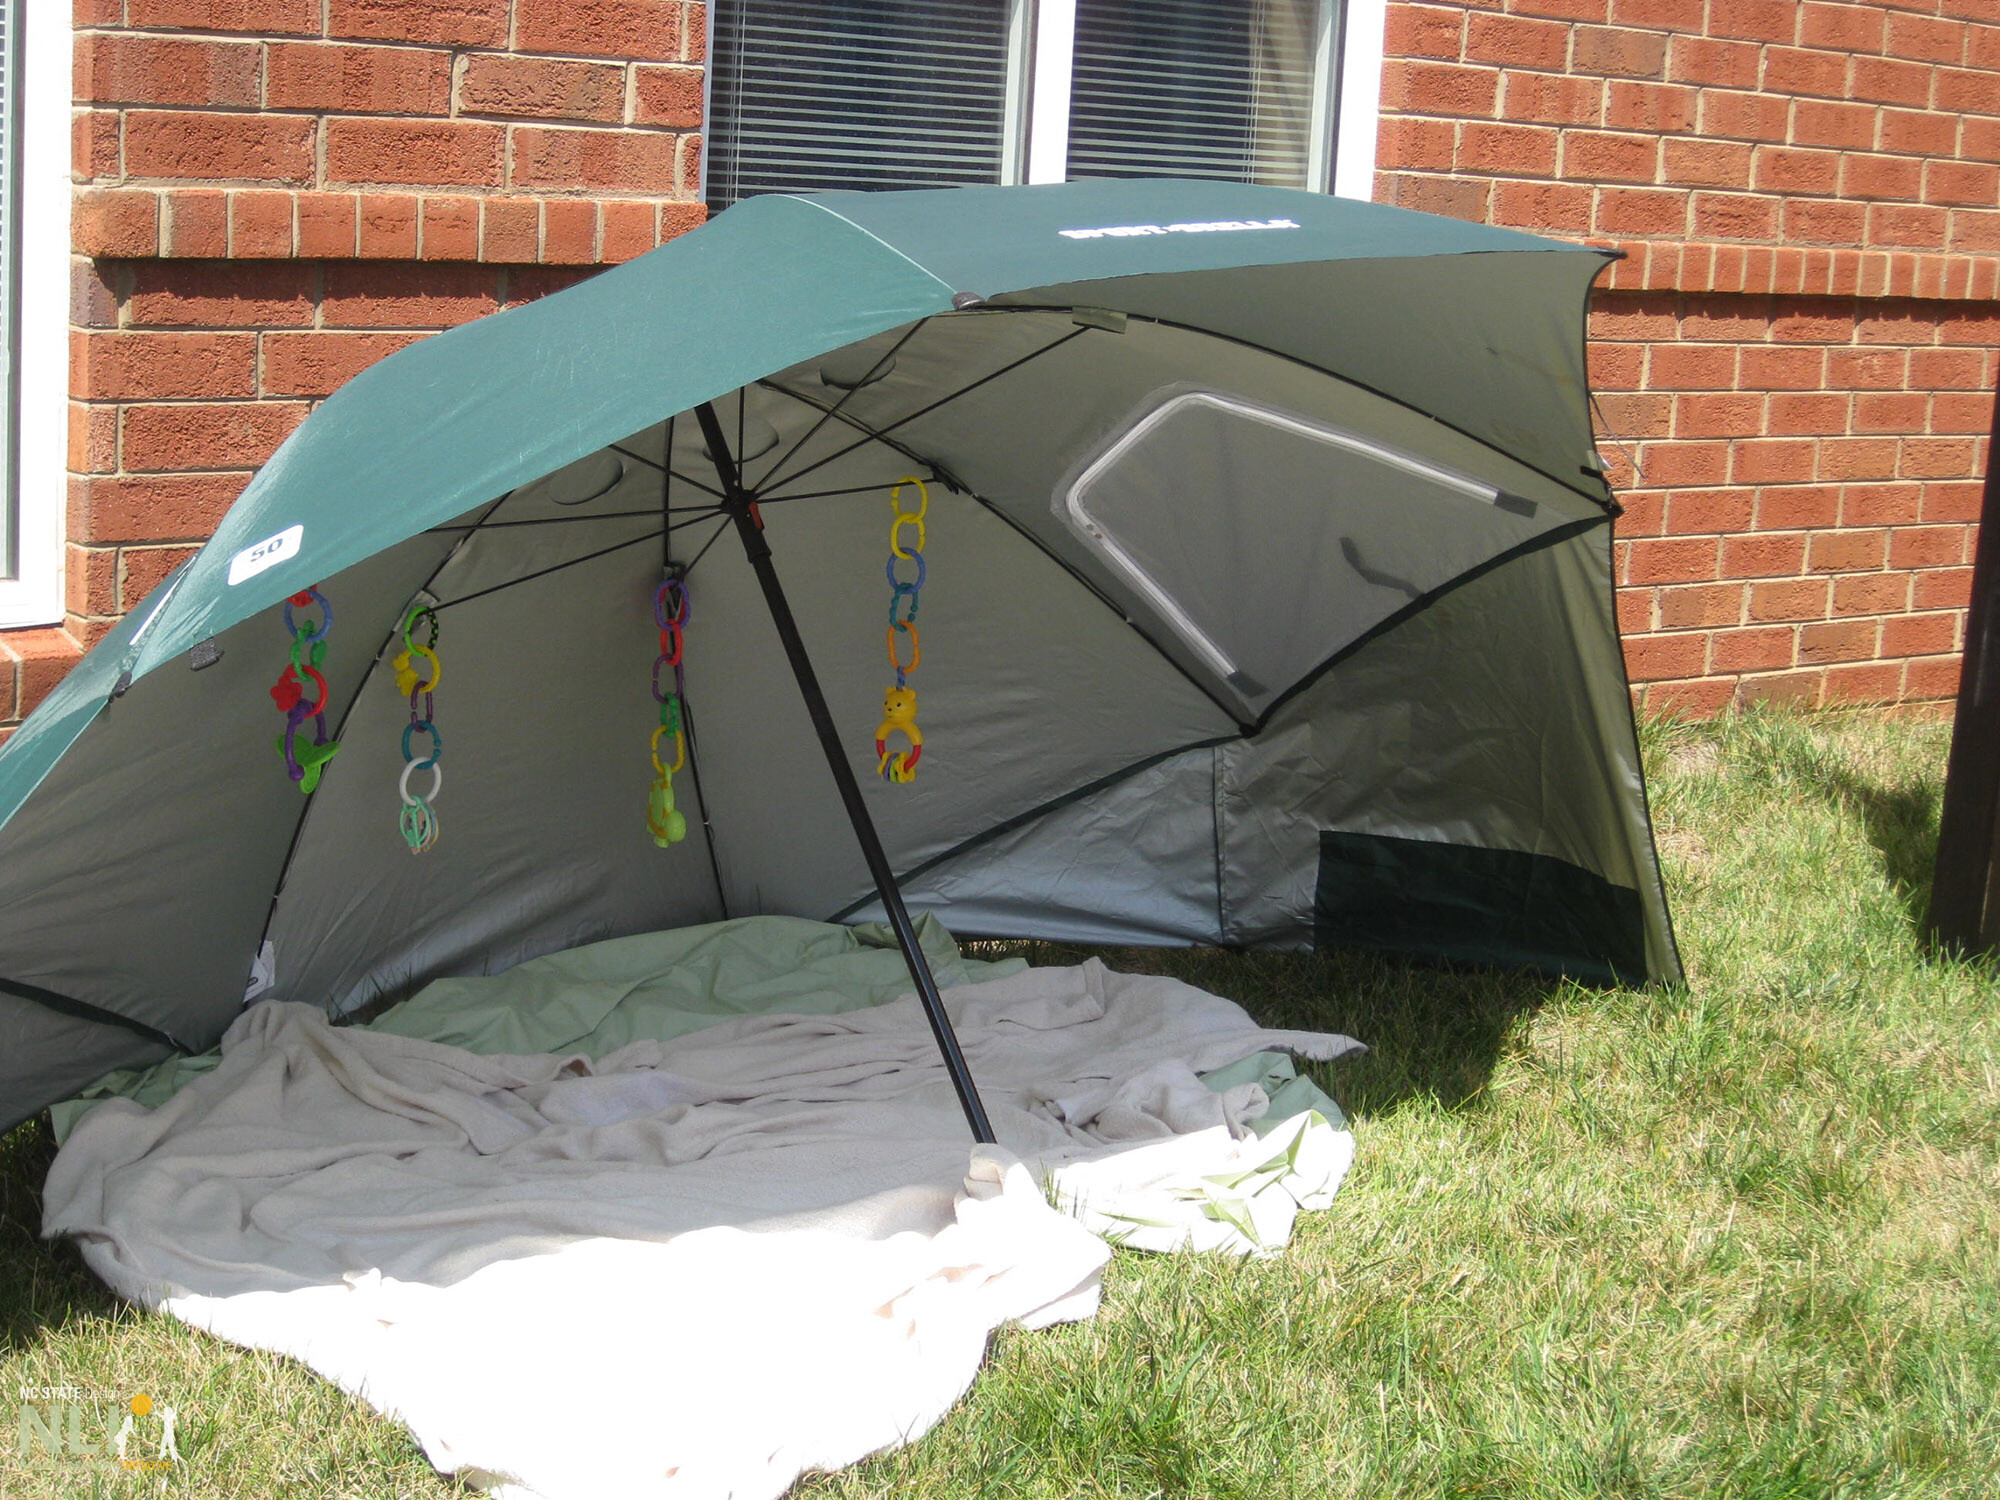
    • Umbrella
    • Bamboo teepee and fabric
    • Cardboard box playhouse
    children and caregivers with children under shade structures

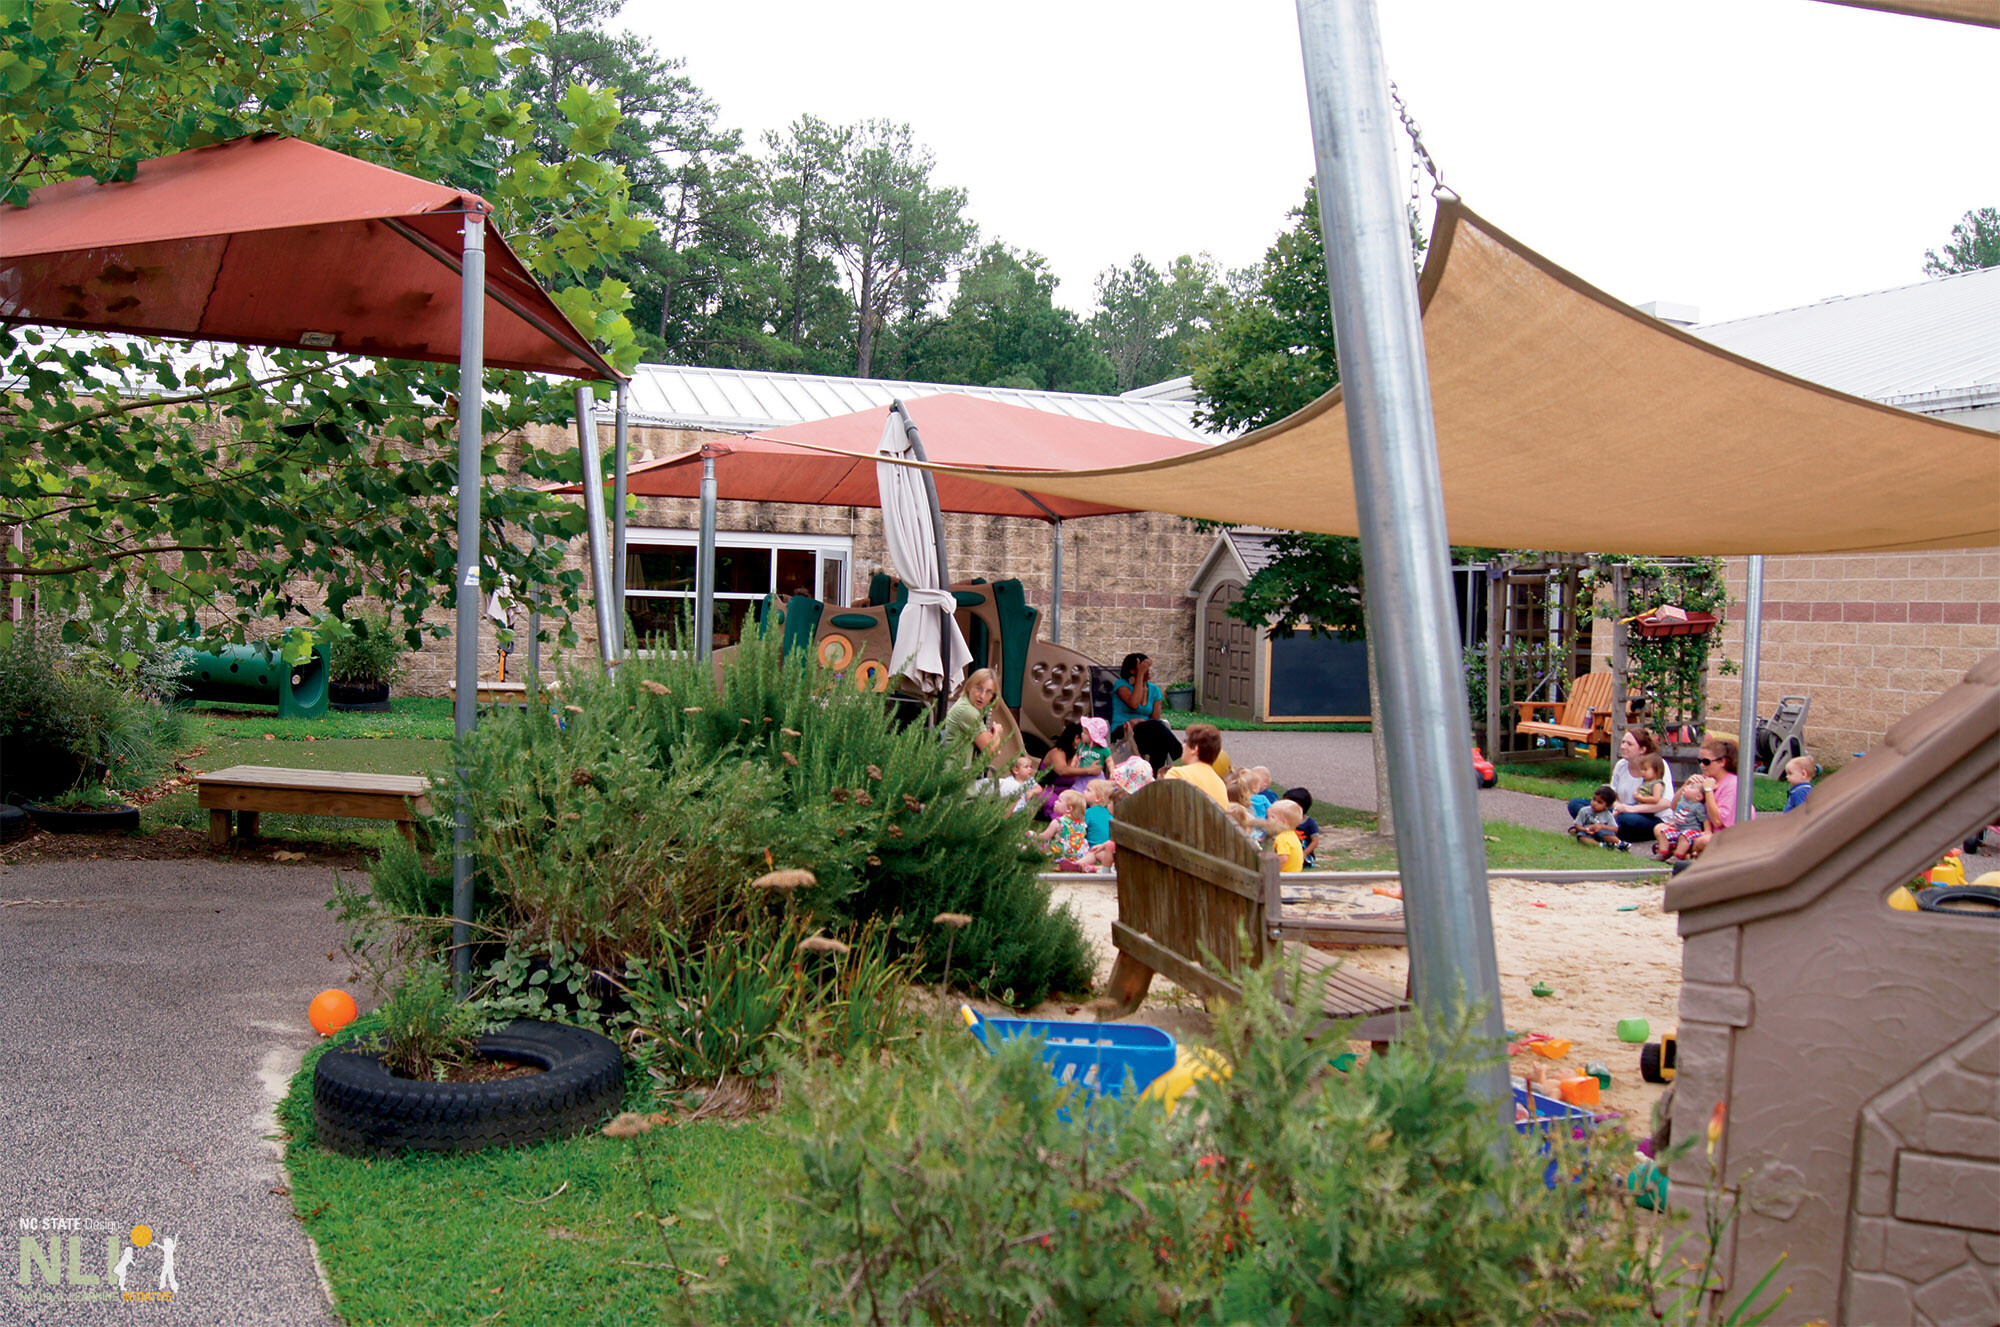
    1. Shade sails can be temporary shade solution in an OLE

    walkway covered by a vine tunnel

    2. Walkway shaded by vine tunnel

    children walking through a vine tunnel

    3. A vine tunnel made from PVC and netting is a place for exploration and wonder

    improvised shade solution made with an umbrella

    4. A large umbrella with blankets creates improvised shade for infants

    pergola swing

    5. A pergola swing provides comfort for caregivers while watching children

  • 13. Gross Motor Logs

    Infosheets

    13. Gross Motor Logs

    Download the PDF – English

    Gross motor logs may be as simple as a single, horizontal log installed on the ground or a low grouping of various sized logs and/or limbs installed to provide a natural alternative to fixed, manufactured play structures. Logs installed this way may afford balancing, climbing, scrambling, jumping, and leaping. Logs can usually be found locally for free from tree care companies. Make contact to reserve lengths of trunk or large limbs before being chipped. Installation using hand tools is an excellent volunteer activity. The shared sense of accomplishment can motivate assistance for other installation projects.

    RECOMMENDED TIMBERS

    Black locust (Robinia) and cedar species are the best choice because they are uniquely rot- and pest-resistant and can last many years before needing to be replaced. However, they may be challenging to source with sufficient diameter. Other hardwoods are a viable alternative, especially if protected against rot. Longevity of all hardwoods can be extended considerably when best practices described below are followed.

    PREPARING LOGS

    • Use seasoned logs (at least 12 months since felling). Logs harvested from dead trees may be used but seek advice from a certified arborist.
    • Use logs 8 in. or larger in diameter. Useful lengths with smaller diameters start at 24 in. Larger diameter lengths may be limited by ability to move heavy logs.
    • Logs with sturdy branches attached and/or multi-branched limbs should be carefully considered as potentially stable stand-alone log structures or offering the possibility to be combined to add play value.
    • Debark logs (easier with seasoned timber) using a curved draw knife. Ensure child safety by using a disc-sander to create smooth surfaces, including rounding crosscut edges and exposed ends.
    • NOTE: Bark on horizontal logs not in contact with the ground may be left on. Bark will dry out and may attract insect life underneath, which can be an interesting learning experience for children to observe. Eventually, bark will fall off to become playful loose parts until fragmenting into smaller and smaller pieces, eventually decomposing into the ground surface.
    • Remove branch stubs, sharp protrusions, and sand smooth.
    • Protect debarked logs from rot by using waterborne copper naphthenate (nontoxic). Apply several coats, leaving to dry between applications (about 1 hour). Apply coats until no more liquid is absorbed. Attend especially to surfaces that may be in contact with the ground or buried below grade. Further protect logs annually with Thompson’s WaterSeal.
    • Treat exposed ends with two coats of polyurethane varnish. DO NOT varnish upper ends of vertical logs used by children, as they may become slippery and hazardous when wet.
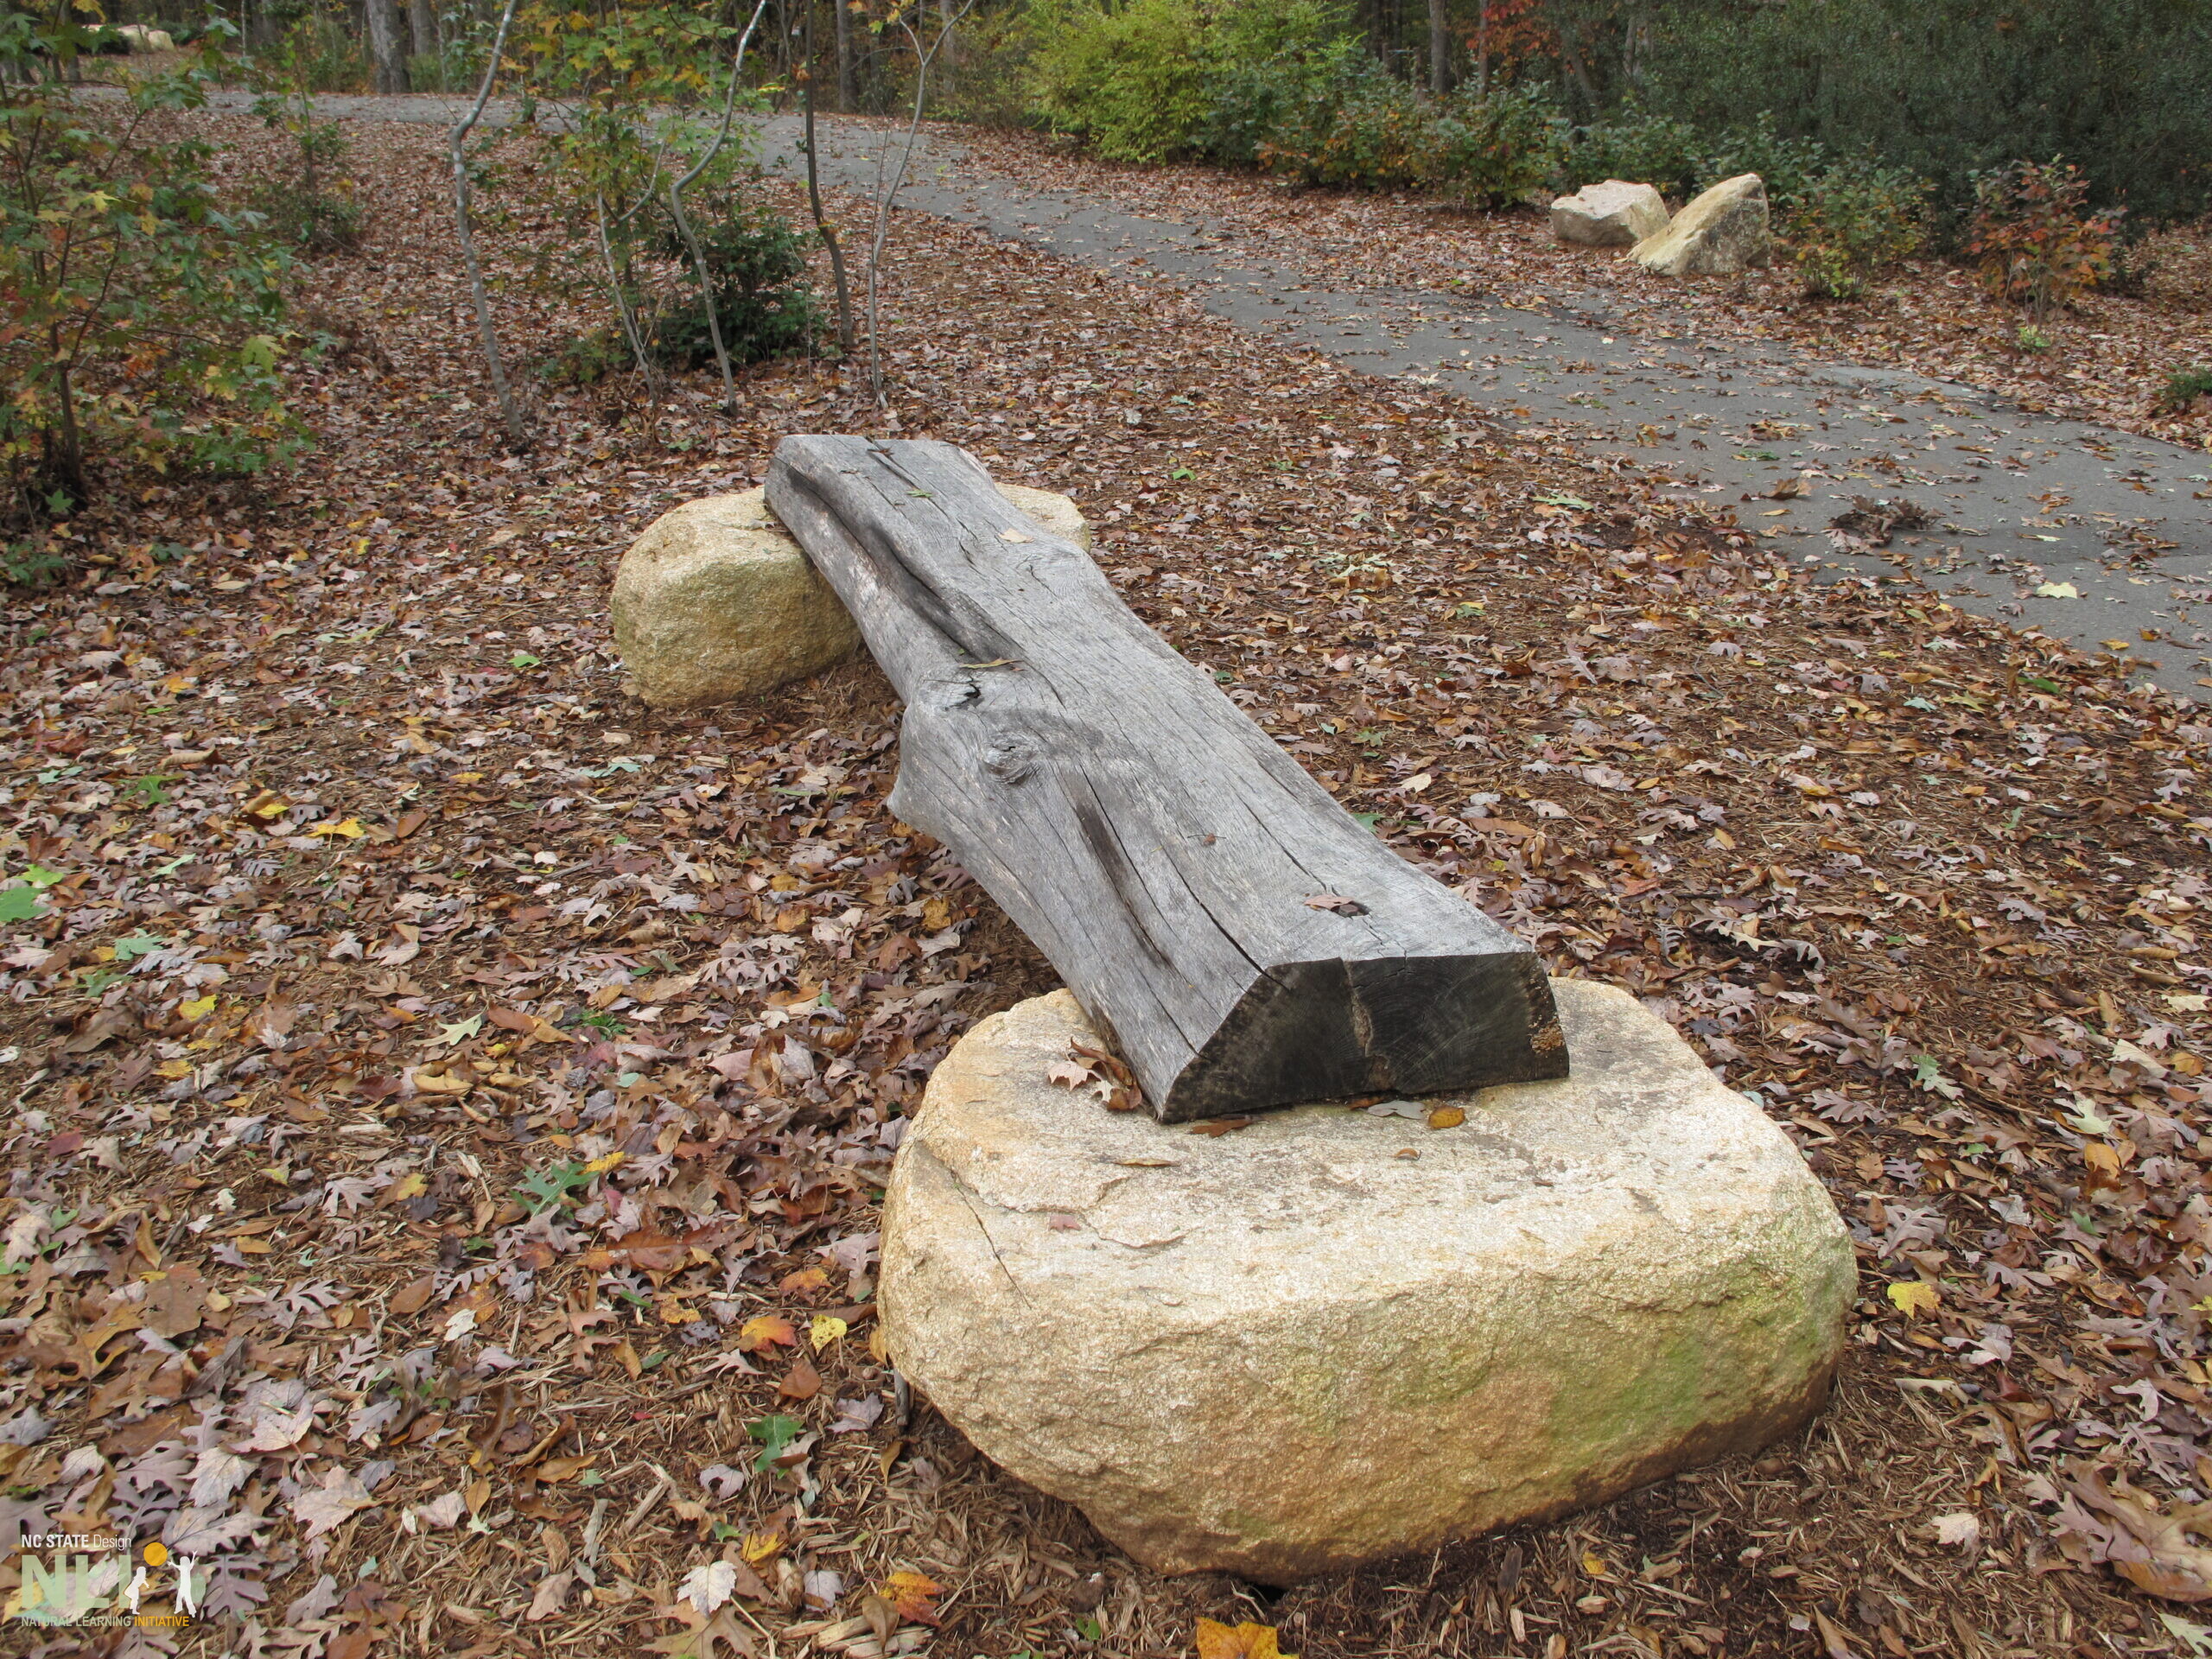
    • Logs of sufficient diameter and straightness may be sawn in half lengthwise and laid flat side down to increase stability, preferably supported by a flat stone at each end to avoid contact with the ground. Installed flat side up, logs afford toddlers a more appropriate “beginners” experience.

    INSTALLING HORIZONTAL LOGS

    Small horizontal logs (8-18 inches diameter). Install vertical logs at each end for structural support and fasten with log screws of appropriate length. A series of logs thus arranged can offer a continuous, gross motor circuit and/or be combined with a stand-alone circuit of vertical logs (described below).

    Large horizontal logs (18 inches or greater diameter). Dig a shallow, rounded-bottom trench and install the log up to 1/3 of its diameter on a 2-inch bed of pea gravel (separating log from ground). Pack gravel back around the log. Log will remain stable under its own weight. If the upper surface is more than 18 inches above ground, some state licensing rules may require a standard, 6-foot use zone.

    INSTALLING VERTICAL LOGS

    Vertical logs may be installed to support horizontal logs (as described above) or as stand-alone additional components. In either case follow the steps below.

    • Dig log holes. Make holes 4 in. wider than the log diameter (to allow for 2 in. side lining of gravel). Make hole depth approximately 1/3 of the log height above ground, plus 2 in. (to allow for bottom lining of gravel). Measurements may be adjusted according to soil conditions. Undisturbed, heavy clay soils require less depth. Light sandy/loam or disturbed soils may need more depth. Ensure log will be no more than 18 in. above the ground when set in place (otherwise, a standard use zone may be required. Distribute excess soil elsewhere on the site.
    • Add drainage. Fill the bottom of the hole with approximately 2 in. of pea gravel, adjusting to the required height of the log above ground. Tamp the gravel.¹
    • Place treated log upright in center of hole. Gradually fill the 2 in. gap around the log with pea gravel, tamping continuously² until gravel is flush with the surrounding ground.
    • For a stand-alone log circuit, place logs 1.5 ft. apart (safe stepping distance) in a circular or semi-circular shape to fit the space. Allow for circulation also around the outer edge of the setting. Consider placing an extra-large log in the circle, or facing a semicircle, as the teacher’s designated seat for circle/story-time.
    • Plant shade trees and shrubs around the gross motor setting to add shade, multi-sensory interest, and a sense of enclosure.

    RECOMMENDED PLANTS

    • Before digging, call 811 ahead of time to check for underground utilities. The service is free but can take several days.
    • Wear sturdy boots and gloves during installation.
    • Regularly inspect logs for signs of decay. If unstable, replace before they become a possible hazard.

    ¹ To tamp the bottom, use a regular 8”x8” steel-headed tamper.
    ² To tamp the sides, use a length of capped steel pipe.

    MATERIALS & TOOLS:

    • Black locust (Robinia) and cedar species logs (recommended)
    • Other hardwood logs and limbs (acceptable)
    • Log screws
    • Shovel
    • Eight-inch square tamper
    • Capped steel pipe tamper
    • Power drill
    • Power disc-sander
    • Pea gravel
    • Flat stone supports (optional)
    child on balancing log

    Partially buried log offers a young preschooler a balancing challenge.

    logs stacked on each other

    Horizontal log supported above ground by vertical logs.

    horizontal log on stones

    Sawn horizontal log supported by flat stones.

    repurposed oak limbs

    Large multi-branched oak limbs (downed by a hurricane) provide a unique archway entry and climber made from two limbs screwed together. Photographed 10 years after installation.

    child jumping from log

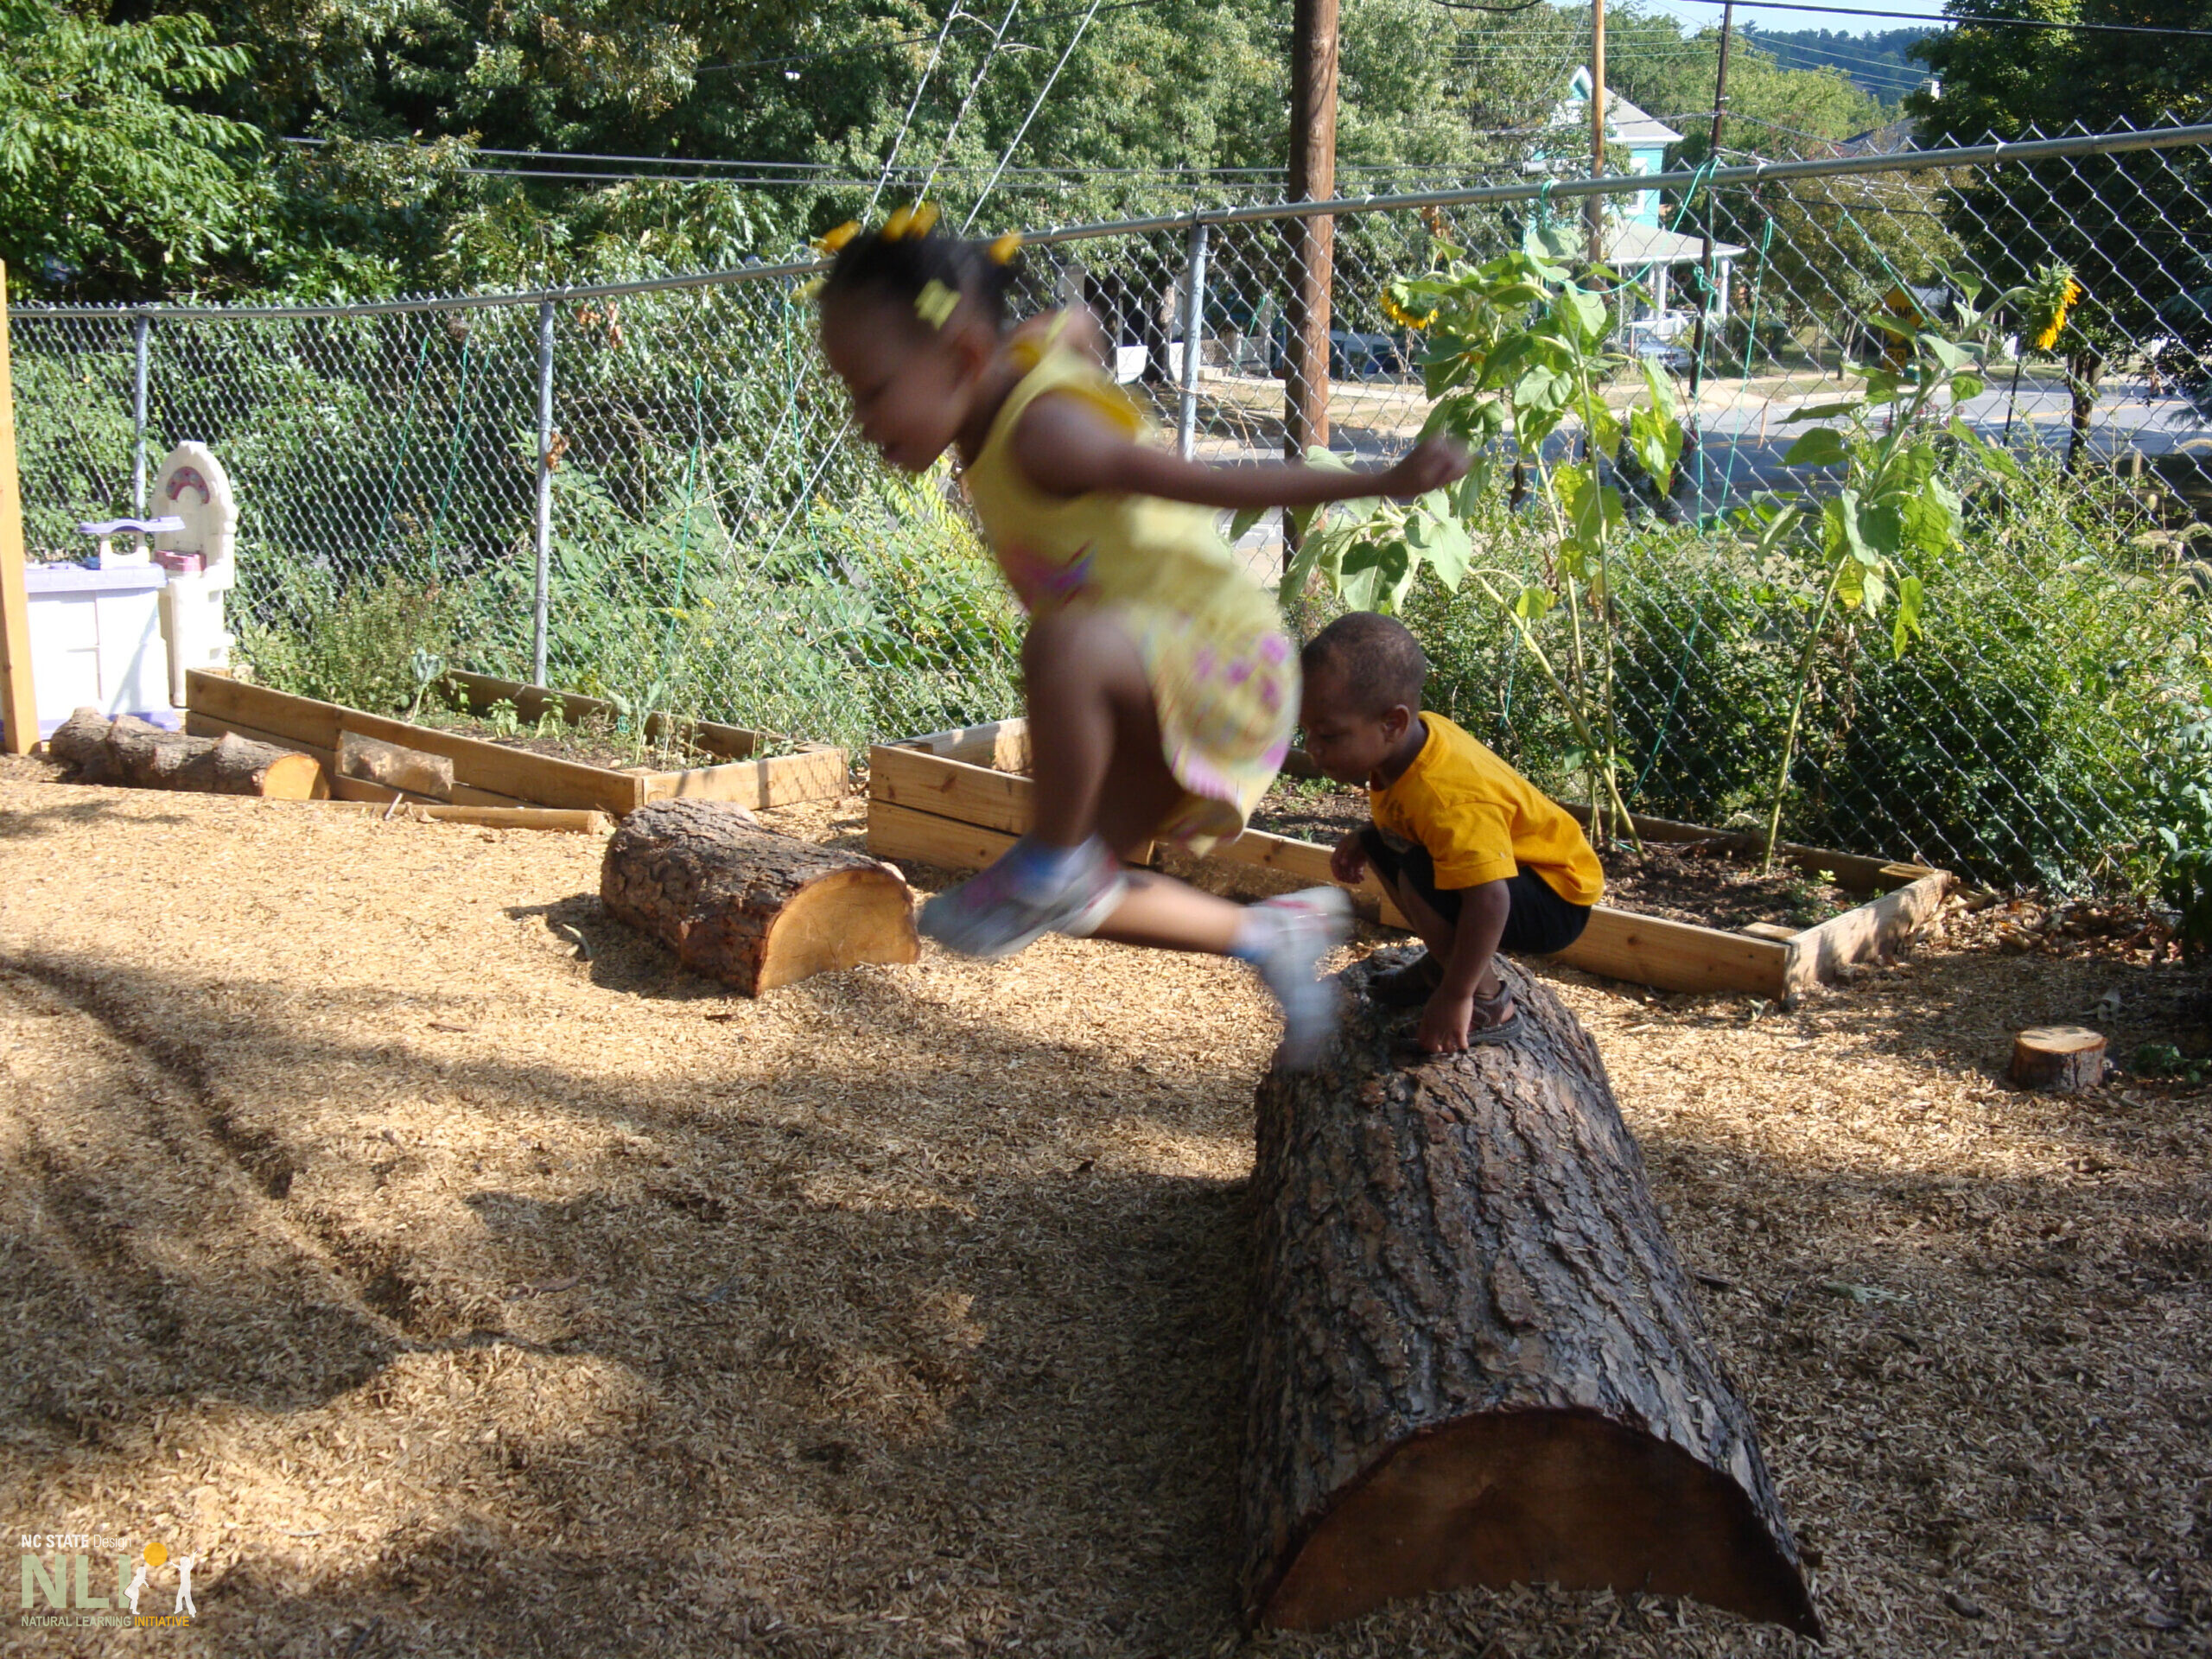
    Horizontal log, anchored to the ground, surrounded by wood mulch, motivates jumping for these agile preschoolers.

  • 14. Plant Bed Protection

    Infosheets

    14. Plant Bed Protection

    Download the PDF – English

    Plant protection boundaries prevent children from inadvertently running through planting beds, especially in compact, high use areas adjacent to primary pathways. Protective edging prevents plants from being uprooted or trampled, delicate tree branches from being hung on, and roots from being compacted. Investing in plant protection boundaries will keep plants healthy and happy, allowing children to enjoy a naturalized outdoor learning environment for years to come.

    Dimensions

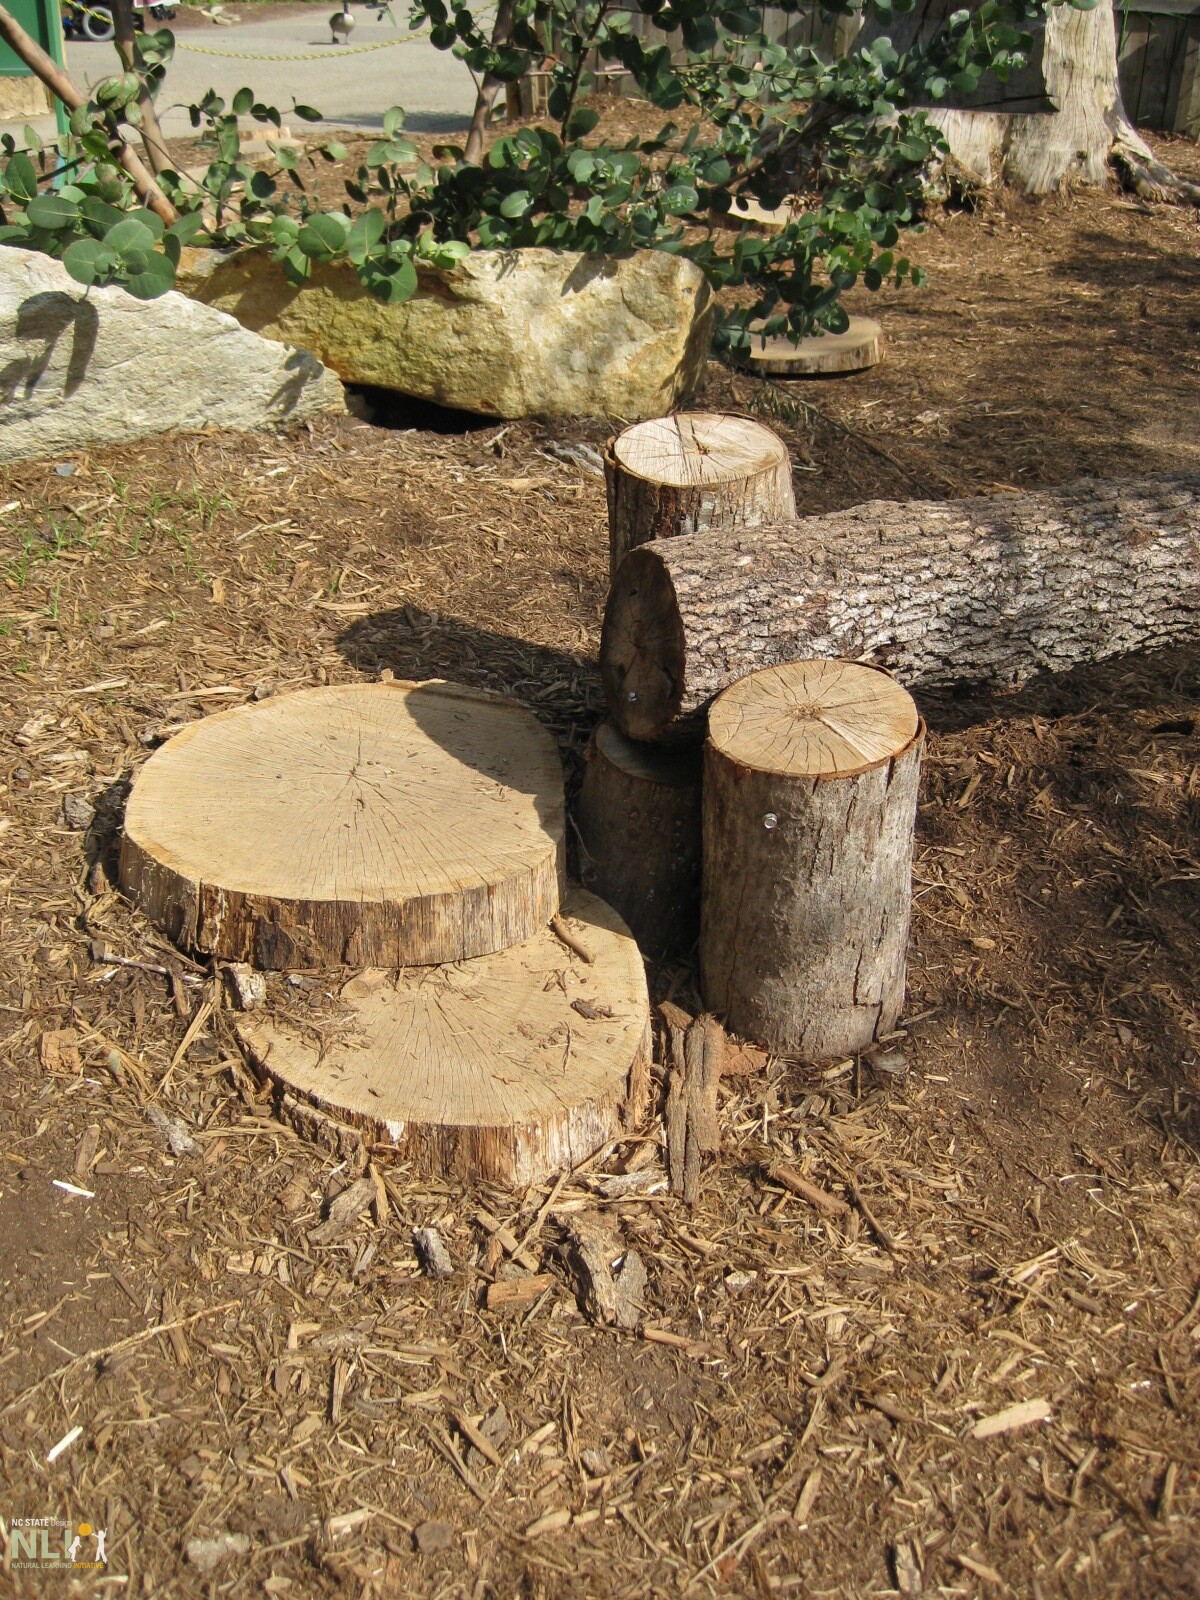
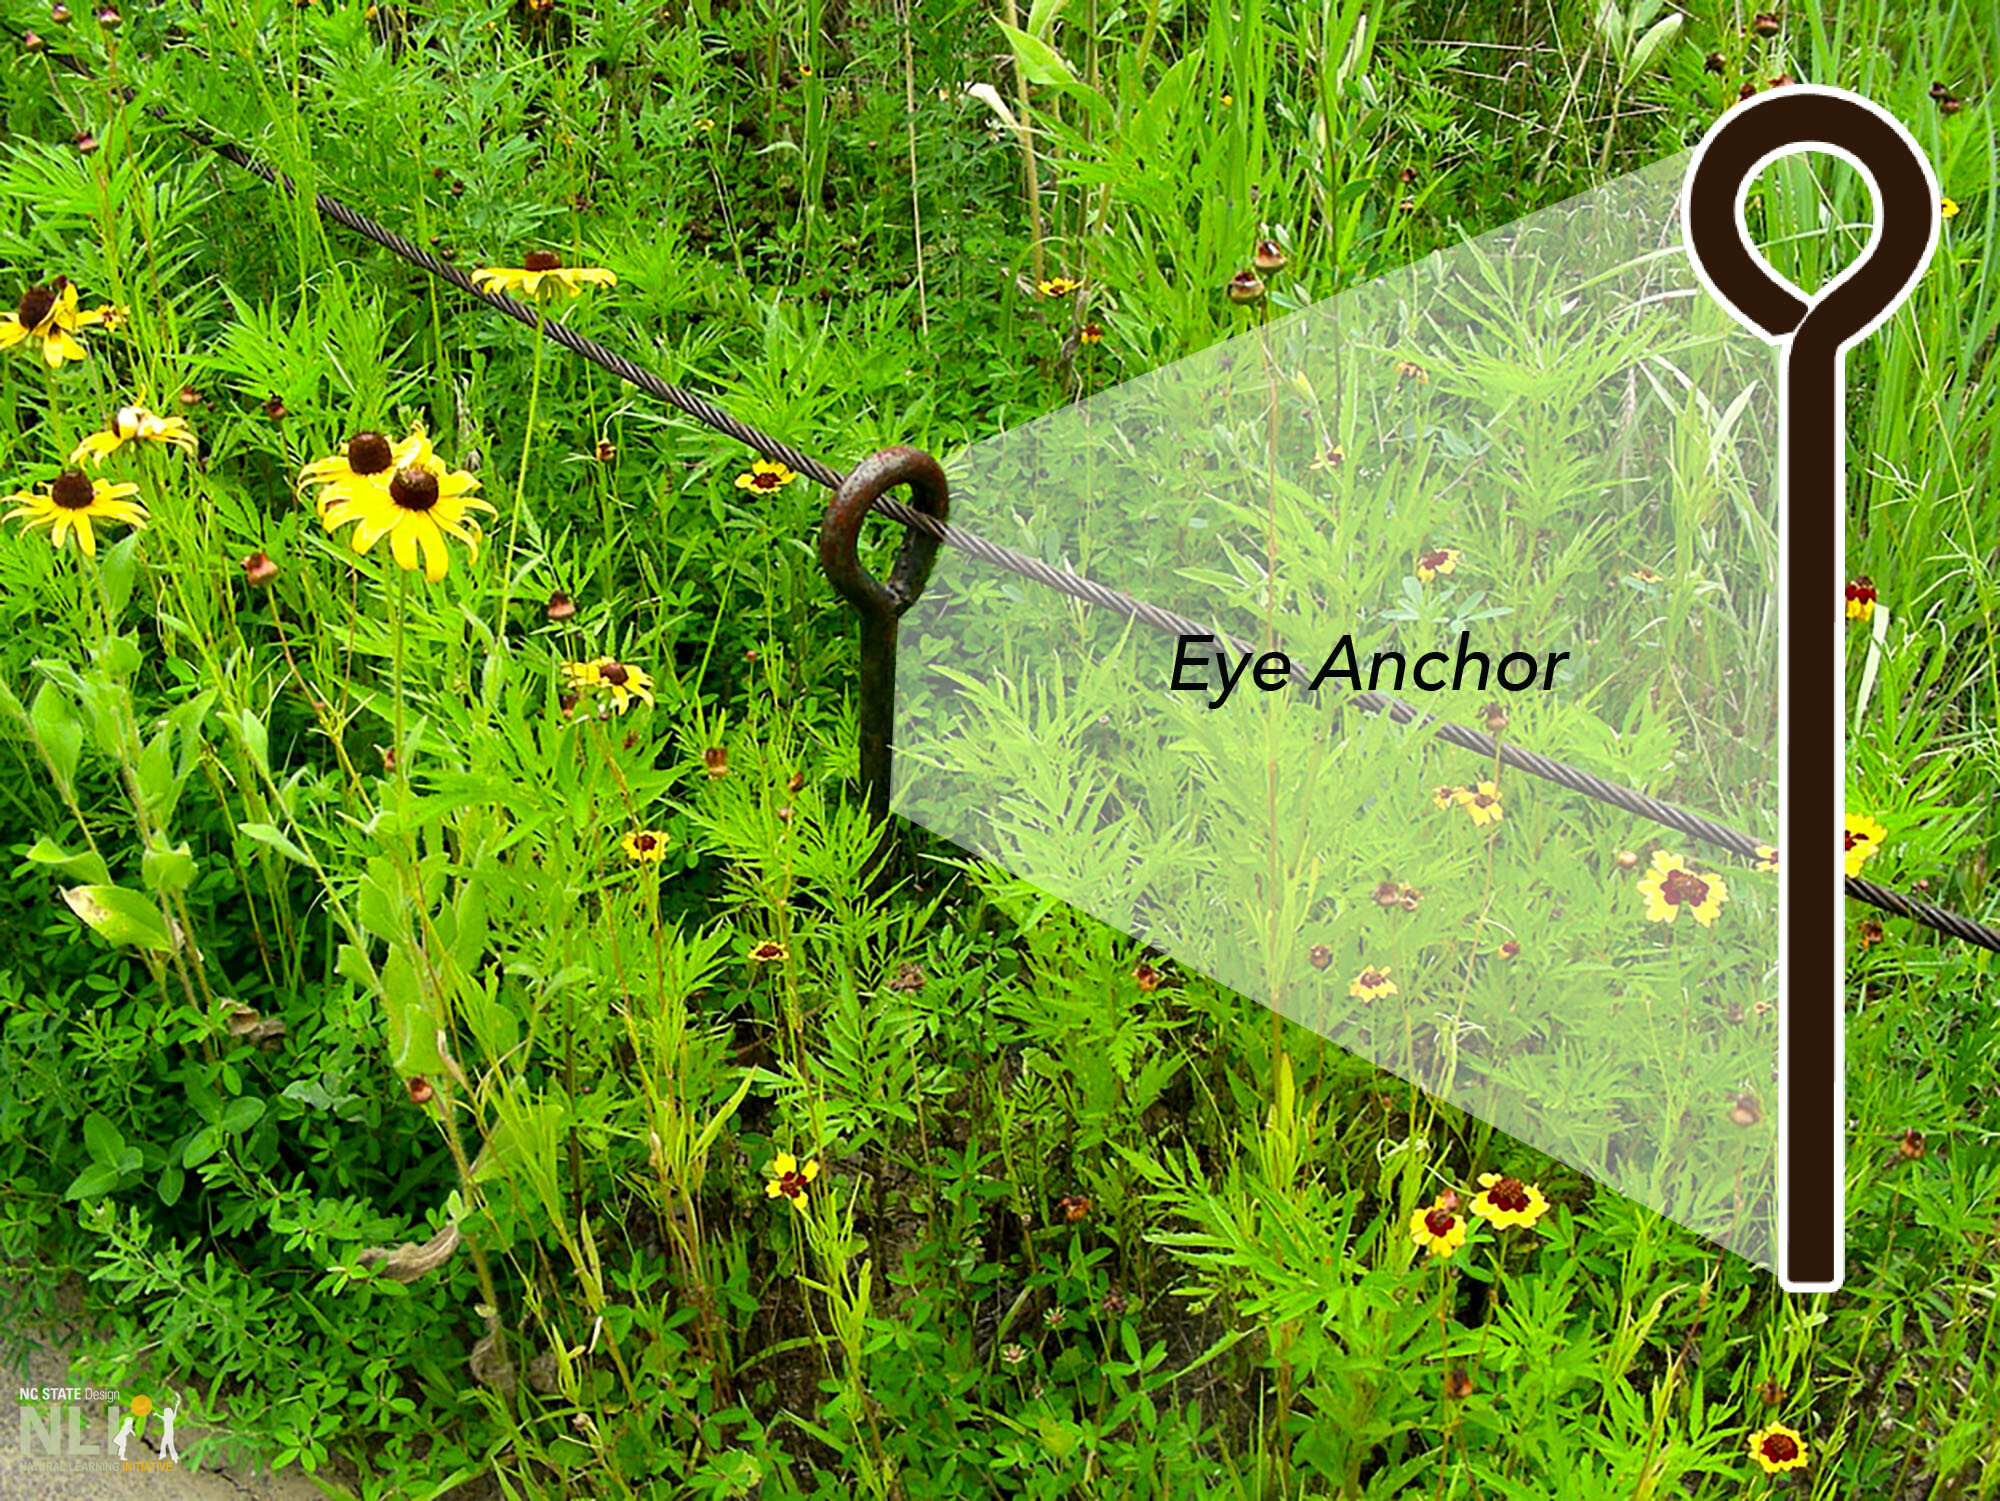
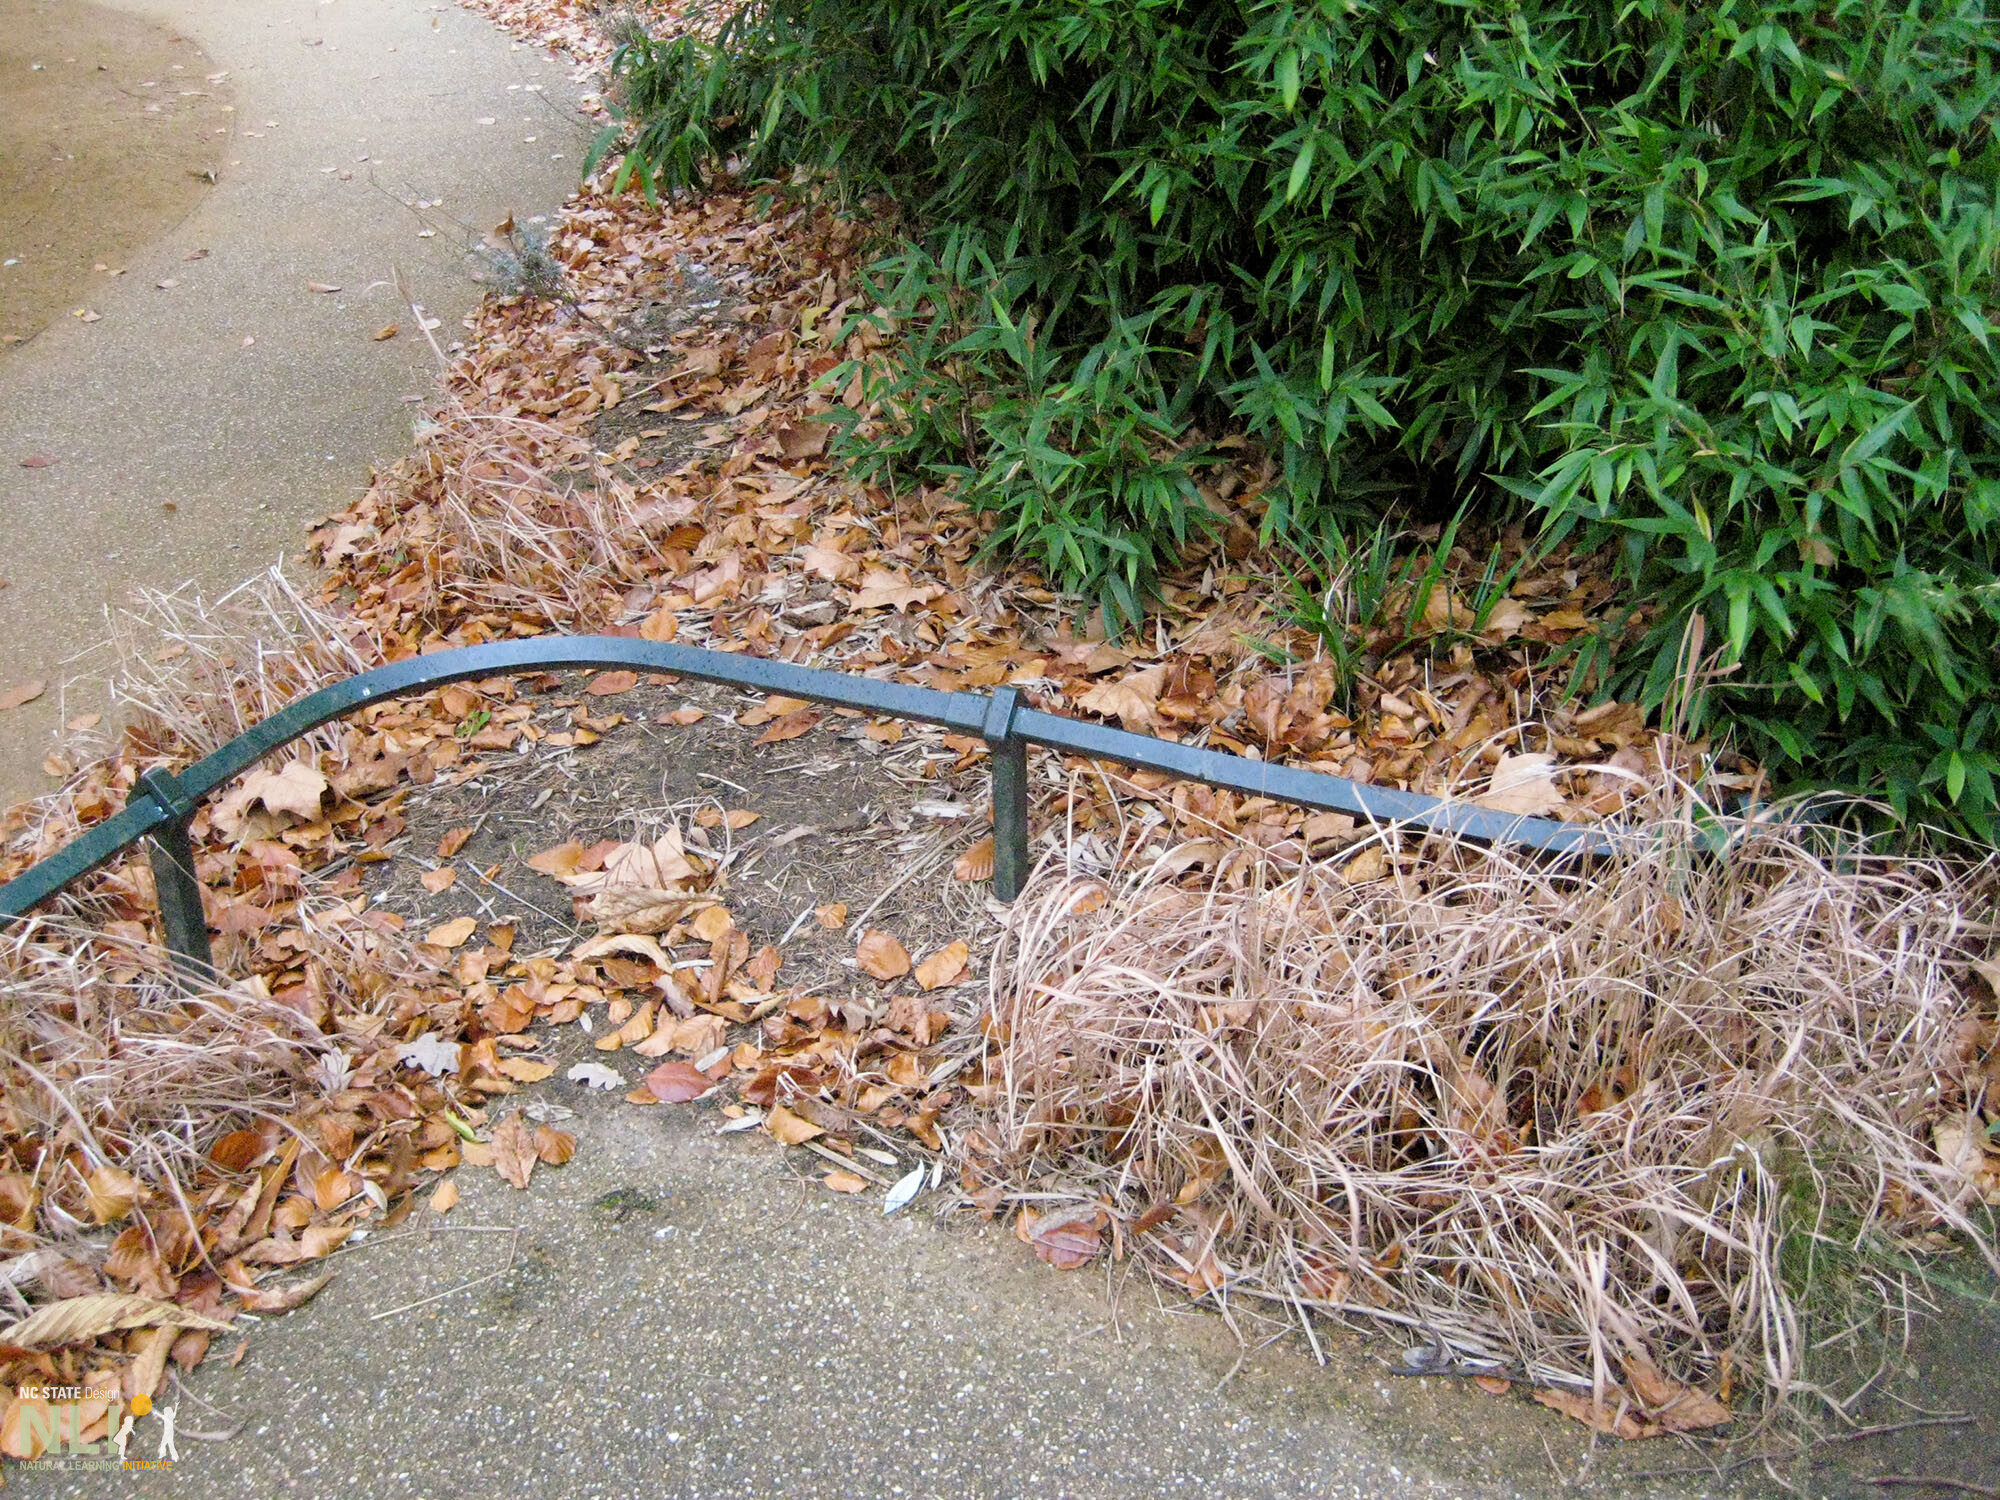
    In children’s areas, effective plant protection edging should range from 18–24 inches high. The burial depth of support will vary according to the material used. Thick wooden posts, depending on soil conditions, usually need 1/3-1/2 of length below ground to ensure stability. For logs used as edging, see details in RESOURCES, p2. When working with a lighter material, such as PVC, or wire, install difficulty is lessened. Sturdy “eye anchors” (top photo) are the easiest to install.

    Design Principles

    • Install plant protection edging immediately after plants are installed.
    • Install plant protection edging just beyond the planting hole (ideally 3x the width of the root ball) to protect newly amended soil from compaction.
    • Use plant protection edging to define edges of pathways, lawns, settings, and to direct circulation.
    • Plant protection edging should be in place for a minimum of two years while plants get established.
    • In high traffic areas, such as primary pathways, permanent edging may be necessary. Temporary edging may be sufficient in areas with minimal foot traffic.
    • Free-standing trees can be protected individually or entire planting beds can be edged for protection.
    • Create exploratory pathways with stepping stones or tree cookies to define routes through new planting beds.

    Materials

    Plant protection boundaries can be made from a wide variety of materials that respond to specific landscape types, available materials, and budgetary constraints. The simplest variations can be installed inexpensively with minimal skill. The most common materials used for plant protection, along with their benefits and drawbacks, are highlighted below.

    Wood is a readily available, inexpensive material depending on its source and how it is treated. Re-purposed logs laid horizontally can be acquired at little or no cost and require very little time to install. Vertical wooden posts or logs will require significantly more labor to stabilize. While less expensive, untreated wood fencing will need to be replaced once it begins to decompose. To increase longevity, treat wood with an outdoor sealant.

    Metal plant protection edging such as steel will likely be pre-fabricated and have a high initial cost. The benefit of metal plant protection, however, is that it is extremely durable, requires very little maintenance, and lasts longer than most other materials3.

    Rope is an inexpensive and flexible material that can be used for plant protection in conjunction with wood posts or PVC piping. In addition to being low-cost, rope is a convenient material because it can easily be moved or modified as an OLE changes. However, rope fencing may be susceptible to damage from the elements.

    PVC materials can be used as affordable, lightweight plant protection when coupled with rope. PVC works well for temporary protection but may not withstand long-term wear and tear.

    Steel or aluminum wire fencing is an inexpensive and easy-to-install choice for plant protection. This type of fencing is also simple to store and move, with no additional tools required. While most wire fencing is durable to the elements, it is flimsy upon impact and may need replacing in the long-term.

    Weed and Lawn Migration

    Certain types of “solid” plant protection, such as logs and stacked stones, have the added benefit of slowing the migration of weeds, mulch, and lawn turf. This type of edging can greatly reduce time spent maintaining gardens.

    Resources:

    1. Infosheet: Gathering Settings Created with Logs
    2. Eye Anchors: Minute Man Anchors www.minutemanproducts.com 828-692-0256 ; 800-438-727
      Part 7648A; 5/8” / Black / Make sure to order “no disk
    example of an eye anchor

    A metal “eye anchor” post with galvanized cable running through it. See details under resources.

    example of log and branch barrier

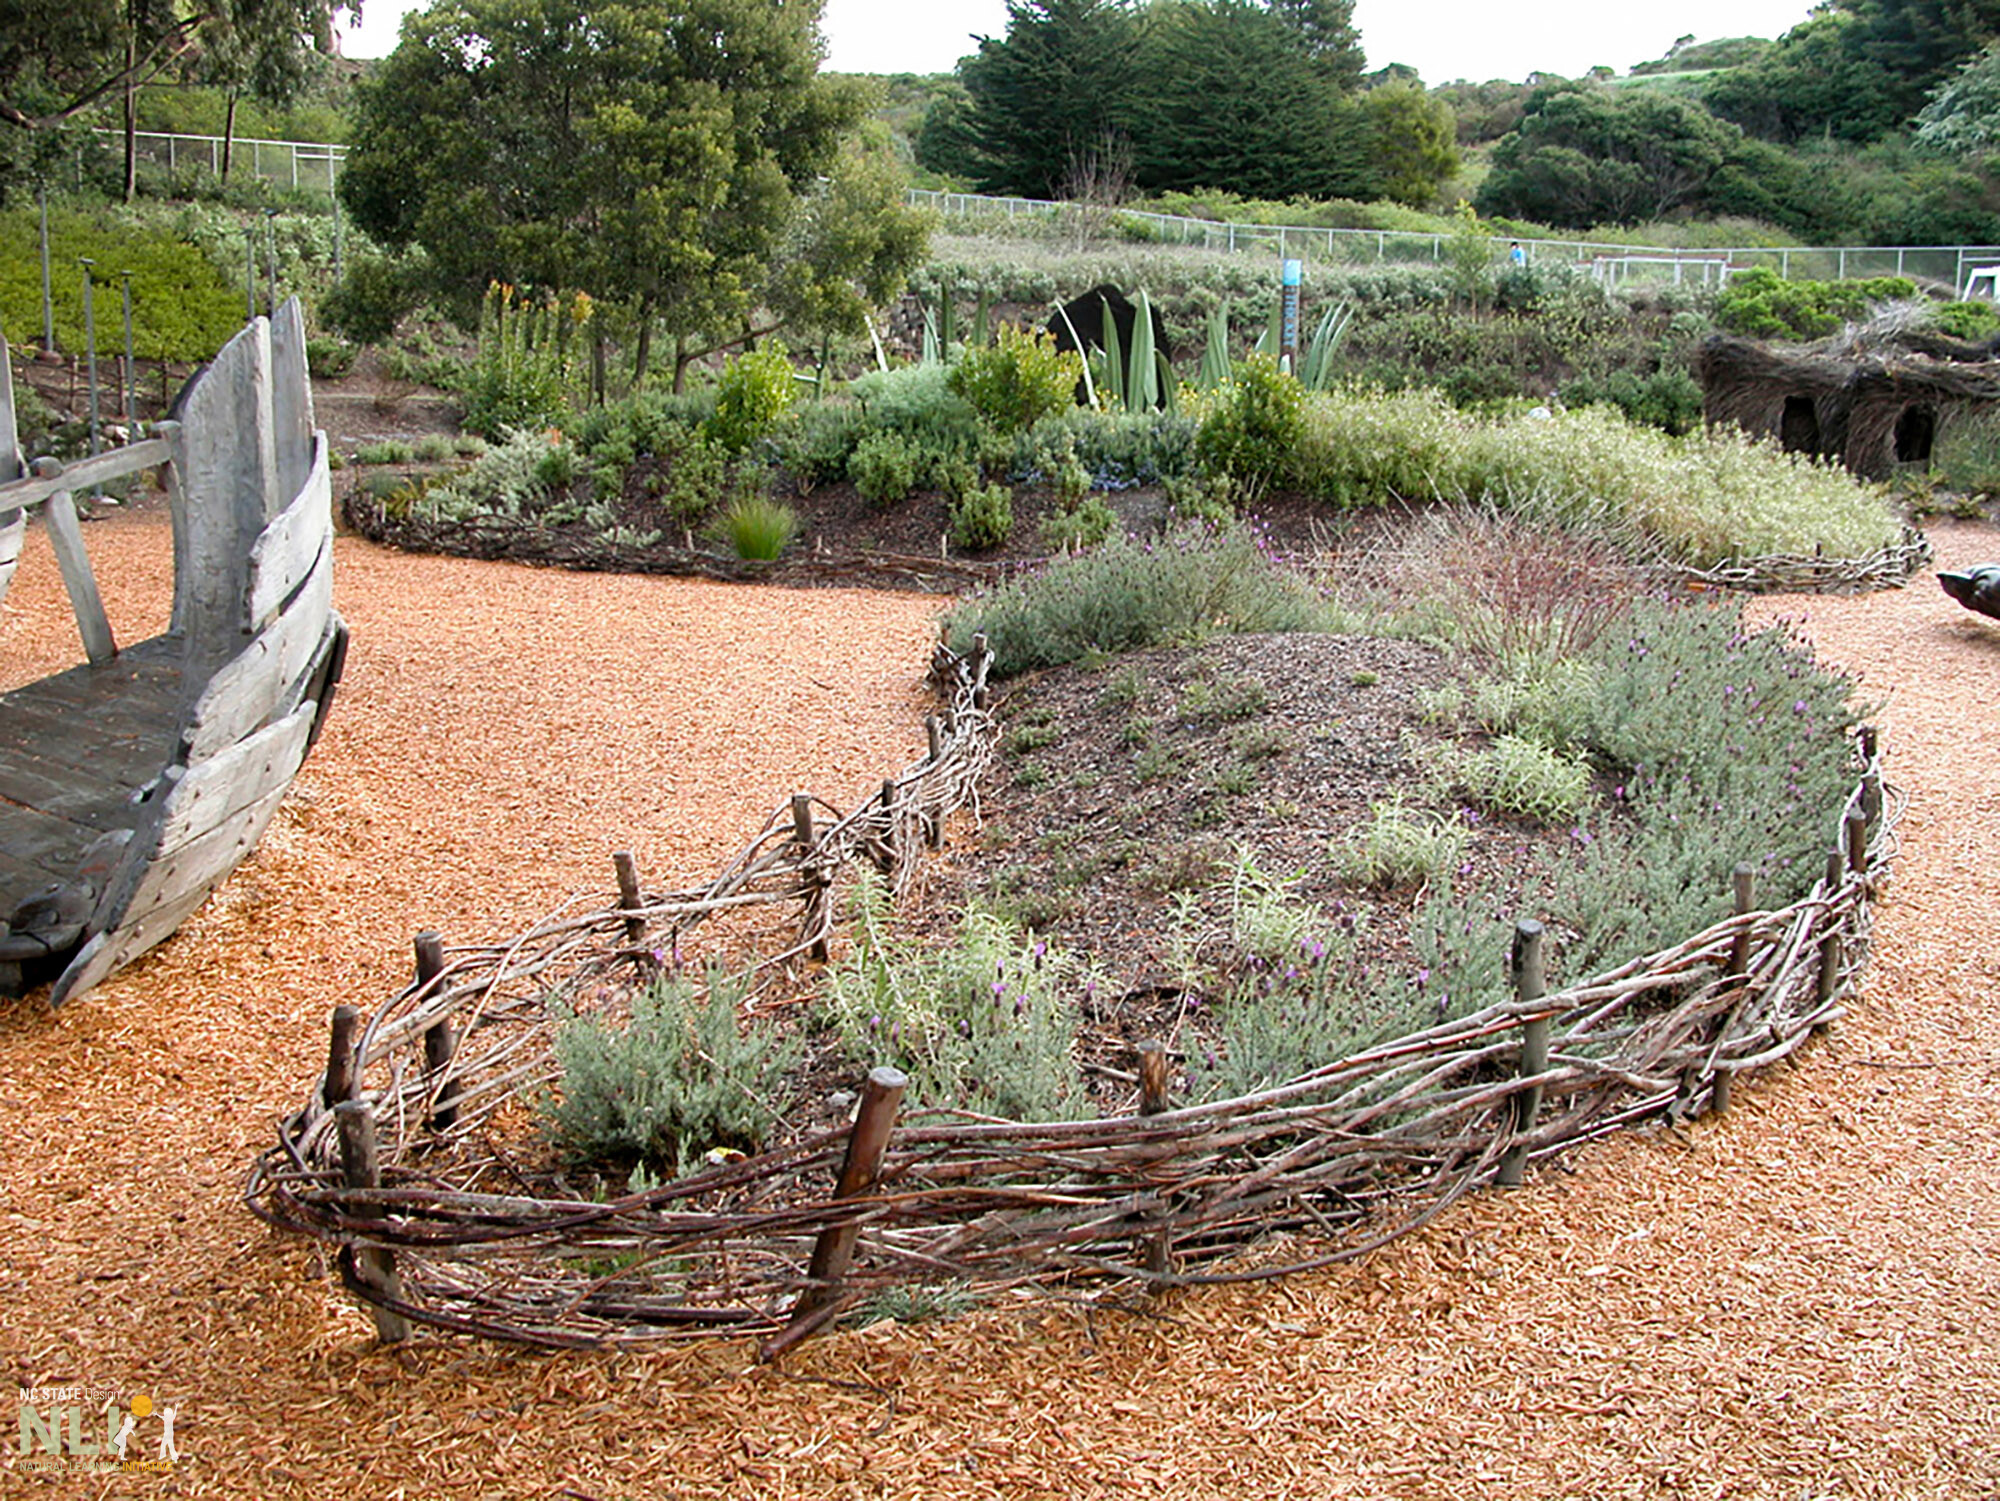
    Logs and branches re-purposed for plant protection.

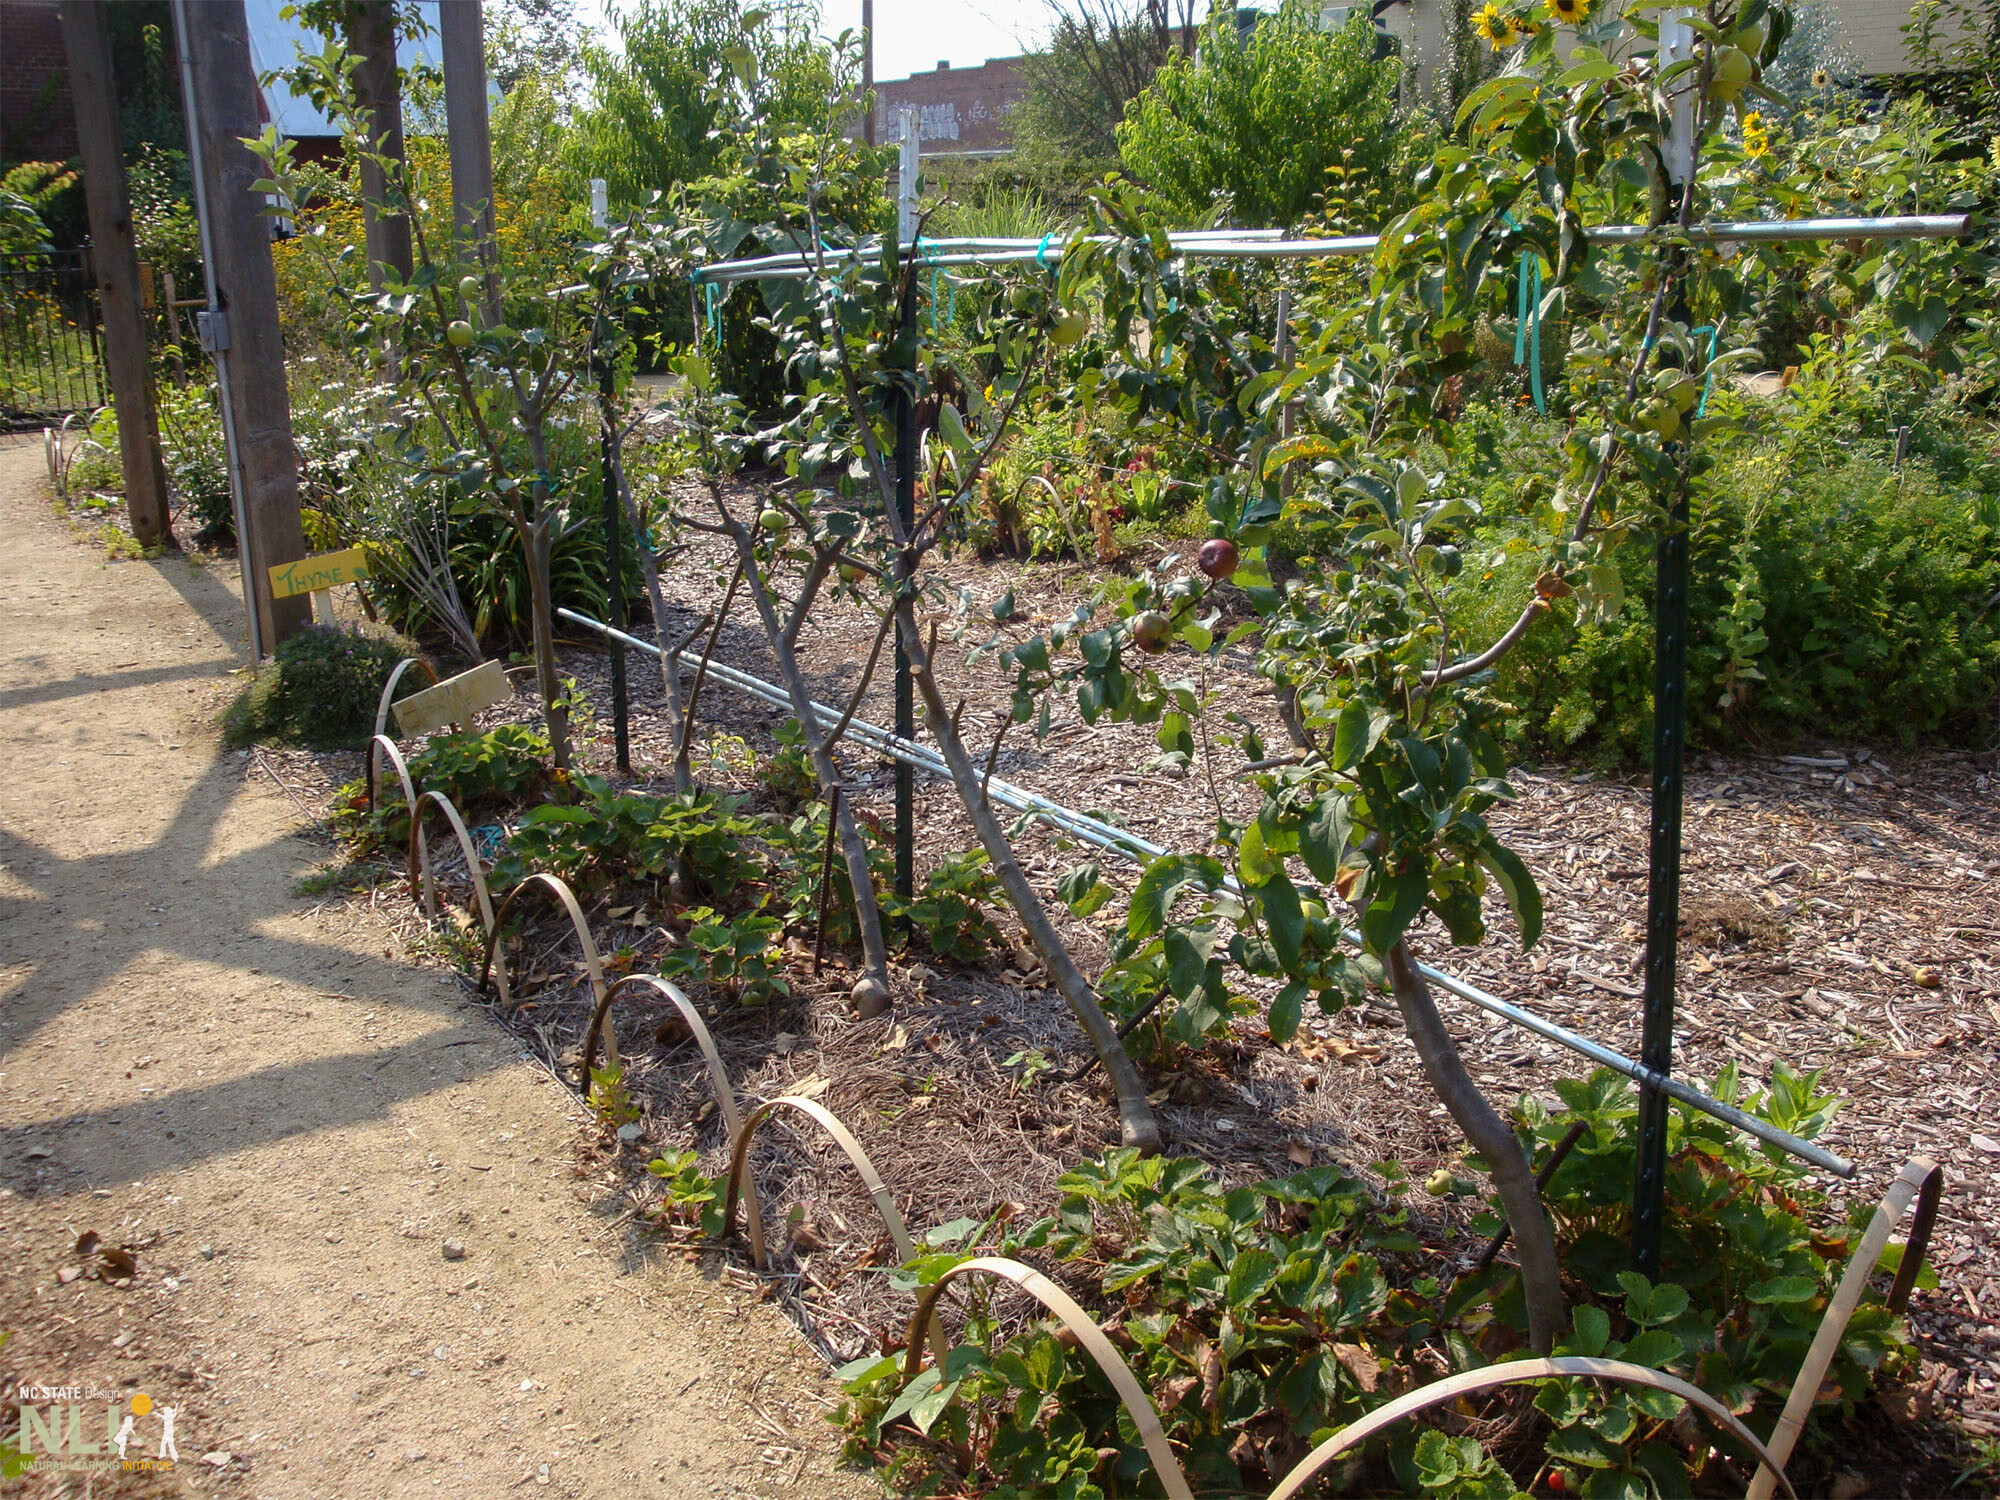
    example of flexible bamboo barrier

    Flexible arcs of bamboo act as plant bed protection.

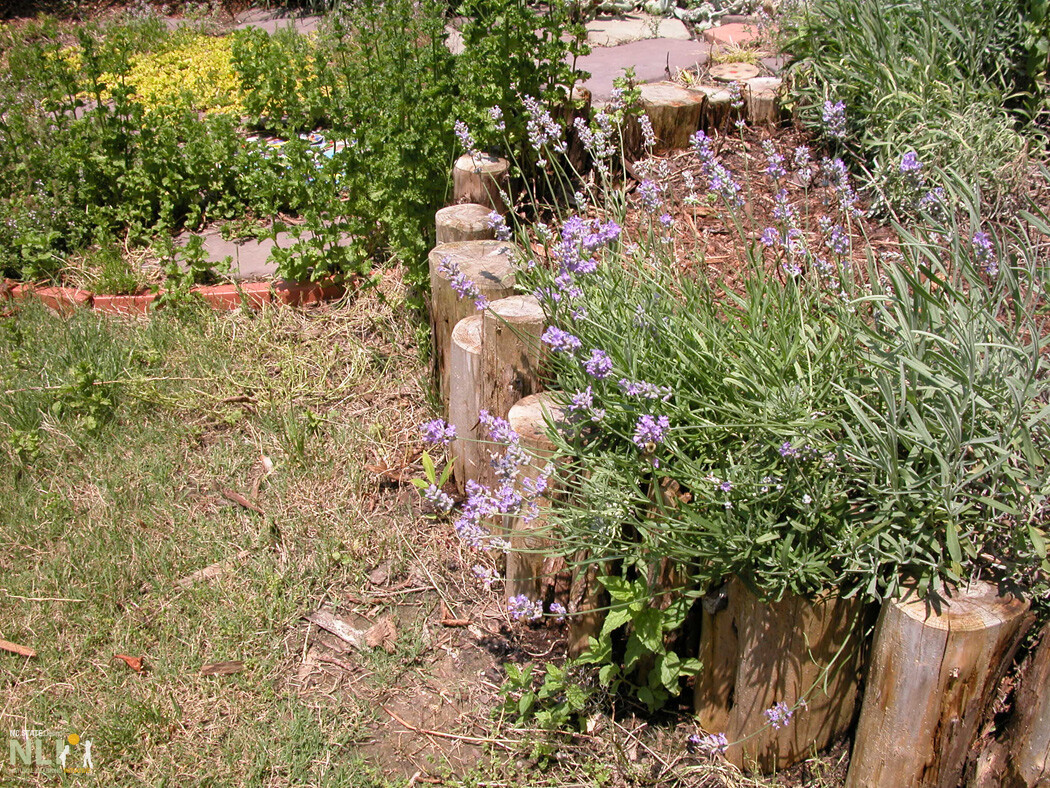
    example of a log barrier

    Log edging slows the migration of weeds, lawn turf, and mulch.

    example of a rope barrier

    Barrier made from wooden posts and rope.

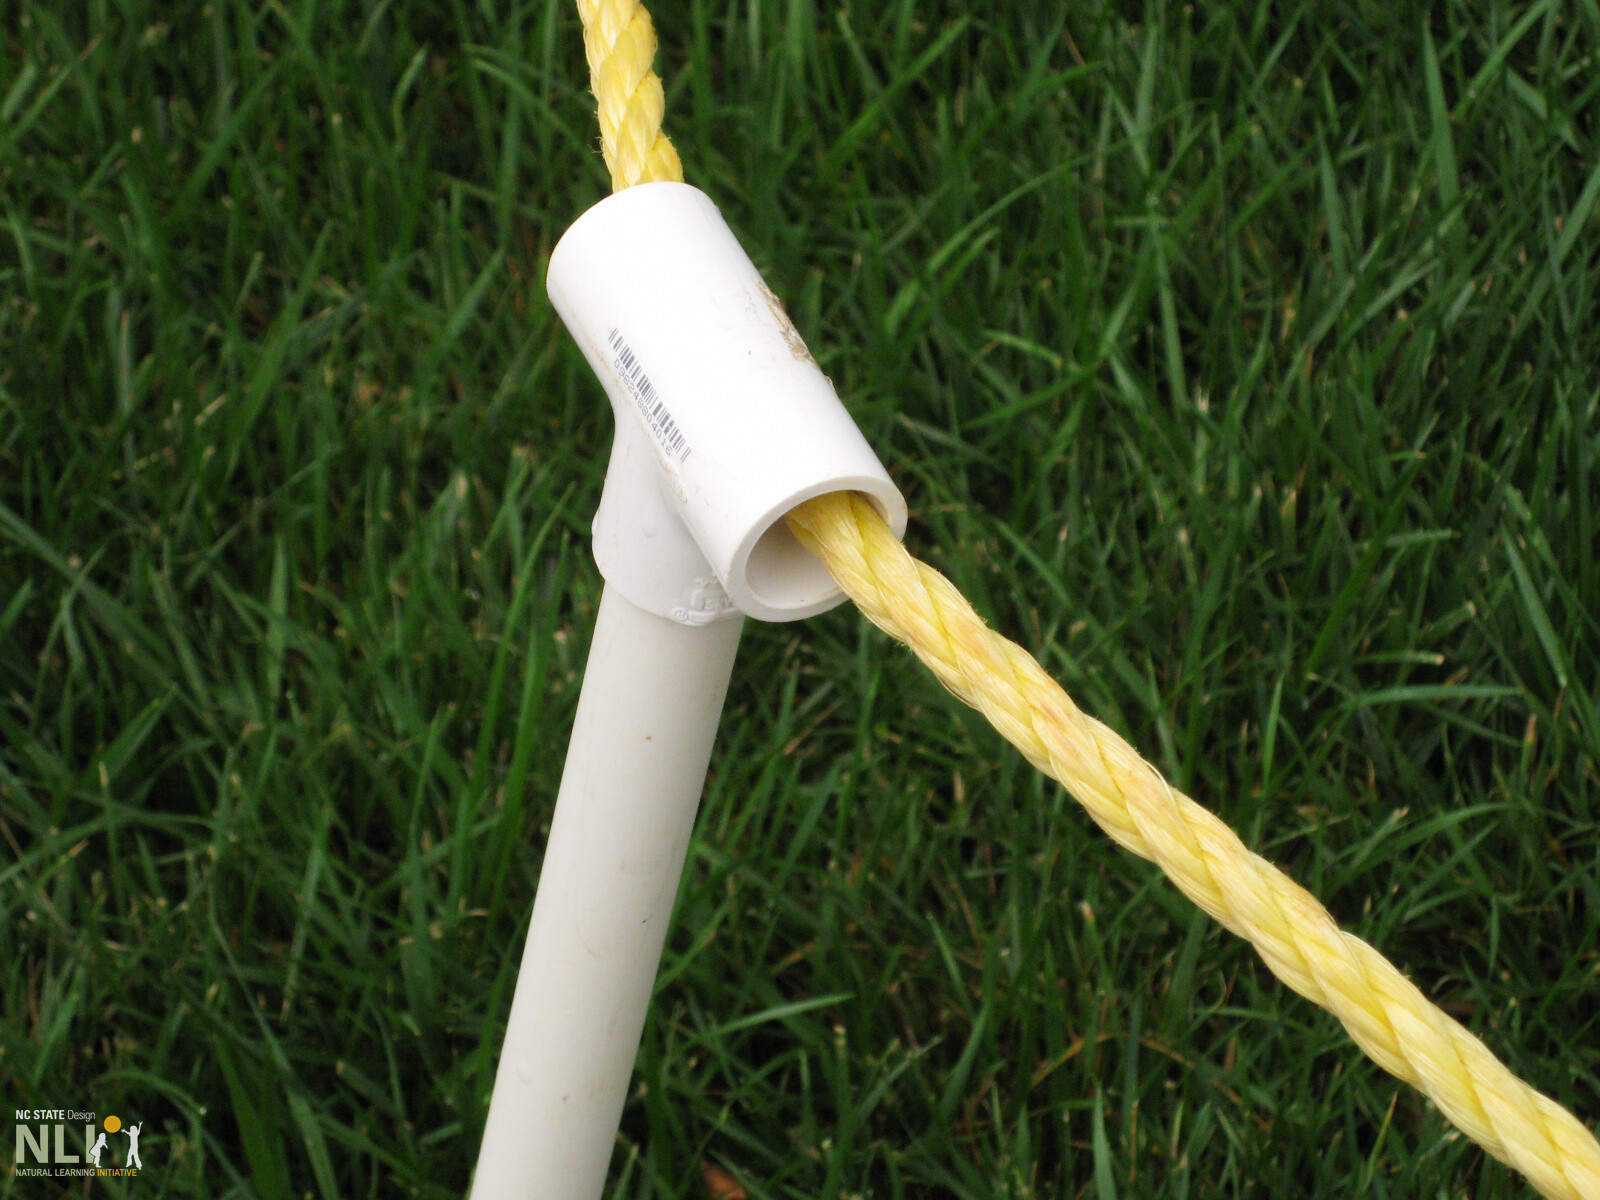
    example of pvc and rope barrier

    PVC and rope can create affordable, lightweight plant protection.

    example of woven branch barrier

    Woven branches create a beautiful, low-cost plant protection barrier.

    example of a metal barrier

    Although pre-fabricated metal fencing has a high initial cost, it lasts longer than other materials and requires very little maintenance.

  • 15. Sand Play Settings

    Infosheets

    15. Sand Play Settings

    Download the PDF – English

    Sand play is a universal, early childhood activity from toddlerhood through the early school years. The manipulable quality of sand stimulates endless play sequences combining imaginative, social, and constructive play that also support informal STEAM learning. Size and construction methods include custom-designed containers made from dimensioned lumber and sand play bounded by anchored rocks or logs. Easy-to-install “sandbox” kits or ready-made plastic versions are usually too small to meet best practice standards for childcare centers. Good drainage is essential.

    Materials

    Dimensioned lumber, because of its design flexibility, is the best choice for constructing an enclosed, high quality sand play setting. Use cedar, pressure-treated lumber, or manufactured composite lumber. Consult licensed contractors and/or design professionals for help with construction details before installing.

    Logs, partially buried or laid horizontally, can provide an alternative, cost-effective enclosure method, especially if locally available.* Using large stones or smooth rocks is a similarly cost-effective, more permanent method, especially if locally available or “unearthed” on site.

    Play sand is recommended as it is graded and washed to remove fine silica dust, which can be harmful to lungs. Play sand is safe for children and can be purchased from local hardware stores.

    Manufactured sand play toys such as shovels, buckets, molds, trucks, and figurines can greatly extend play value.

    Natural loose parts such as sticks, fallen leaves, pine needles, flower heads and petals, and large seeds such as acorns will enhance sand play and connect children to nature. Point out nearby plants or flowers they can pick to decorate sandcastles and other creations.

    Design Considerations

    Location. Locate sand play settings against a boundary fence or tucked into a corner away from more active areas. This will reduce “sand migration” (a serious maintenance issue). Do not place immediately next to a concrete pathway where sand can be a slip hazard. Locate away from building entrances to keep sand from tracking indoors. Avoid low spots where drainage may be challenging.

    Water adds play value when combined with sand. Include a water source within the setting operated via a spring-loaded button/faucet, with built-in drainage. Alternatively, locate the setting close to a water source and leave children to carry water in pails or recycled containers.

    Setting size. A sand play setting can range between 40–300 square feet, depending on available space and age of children served.

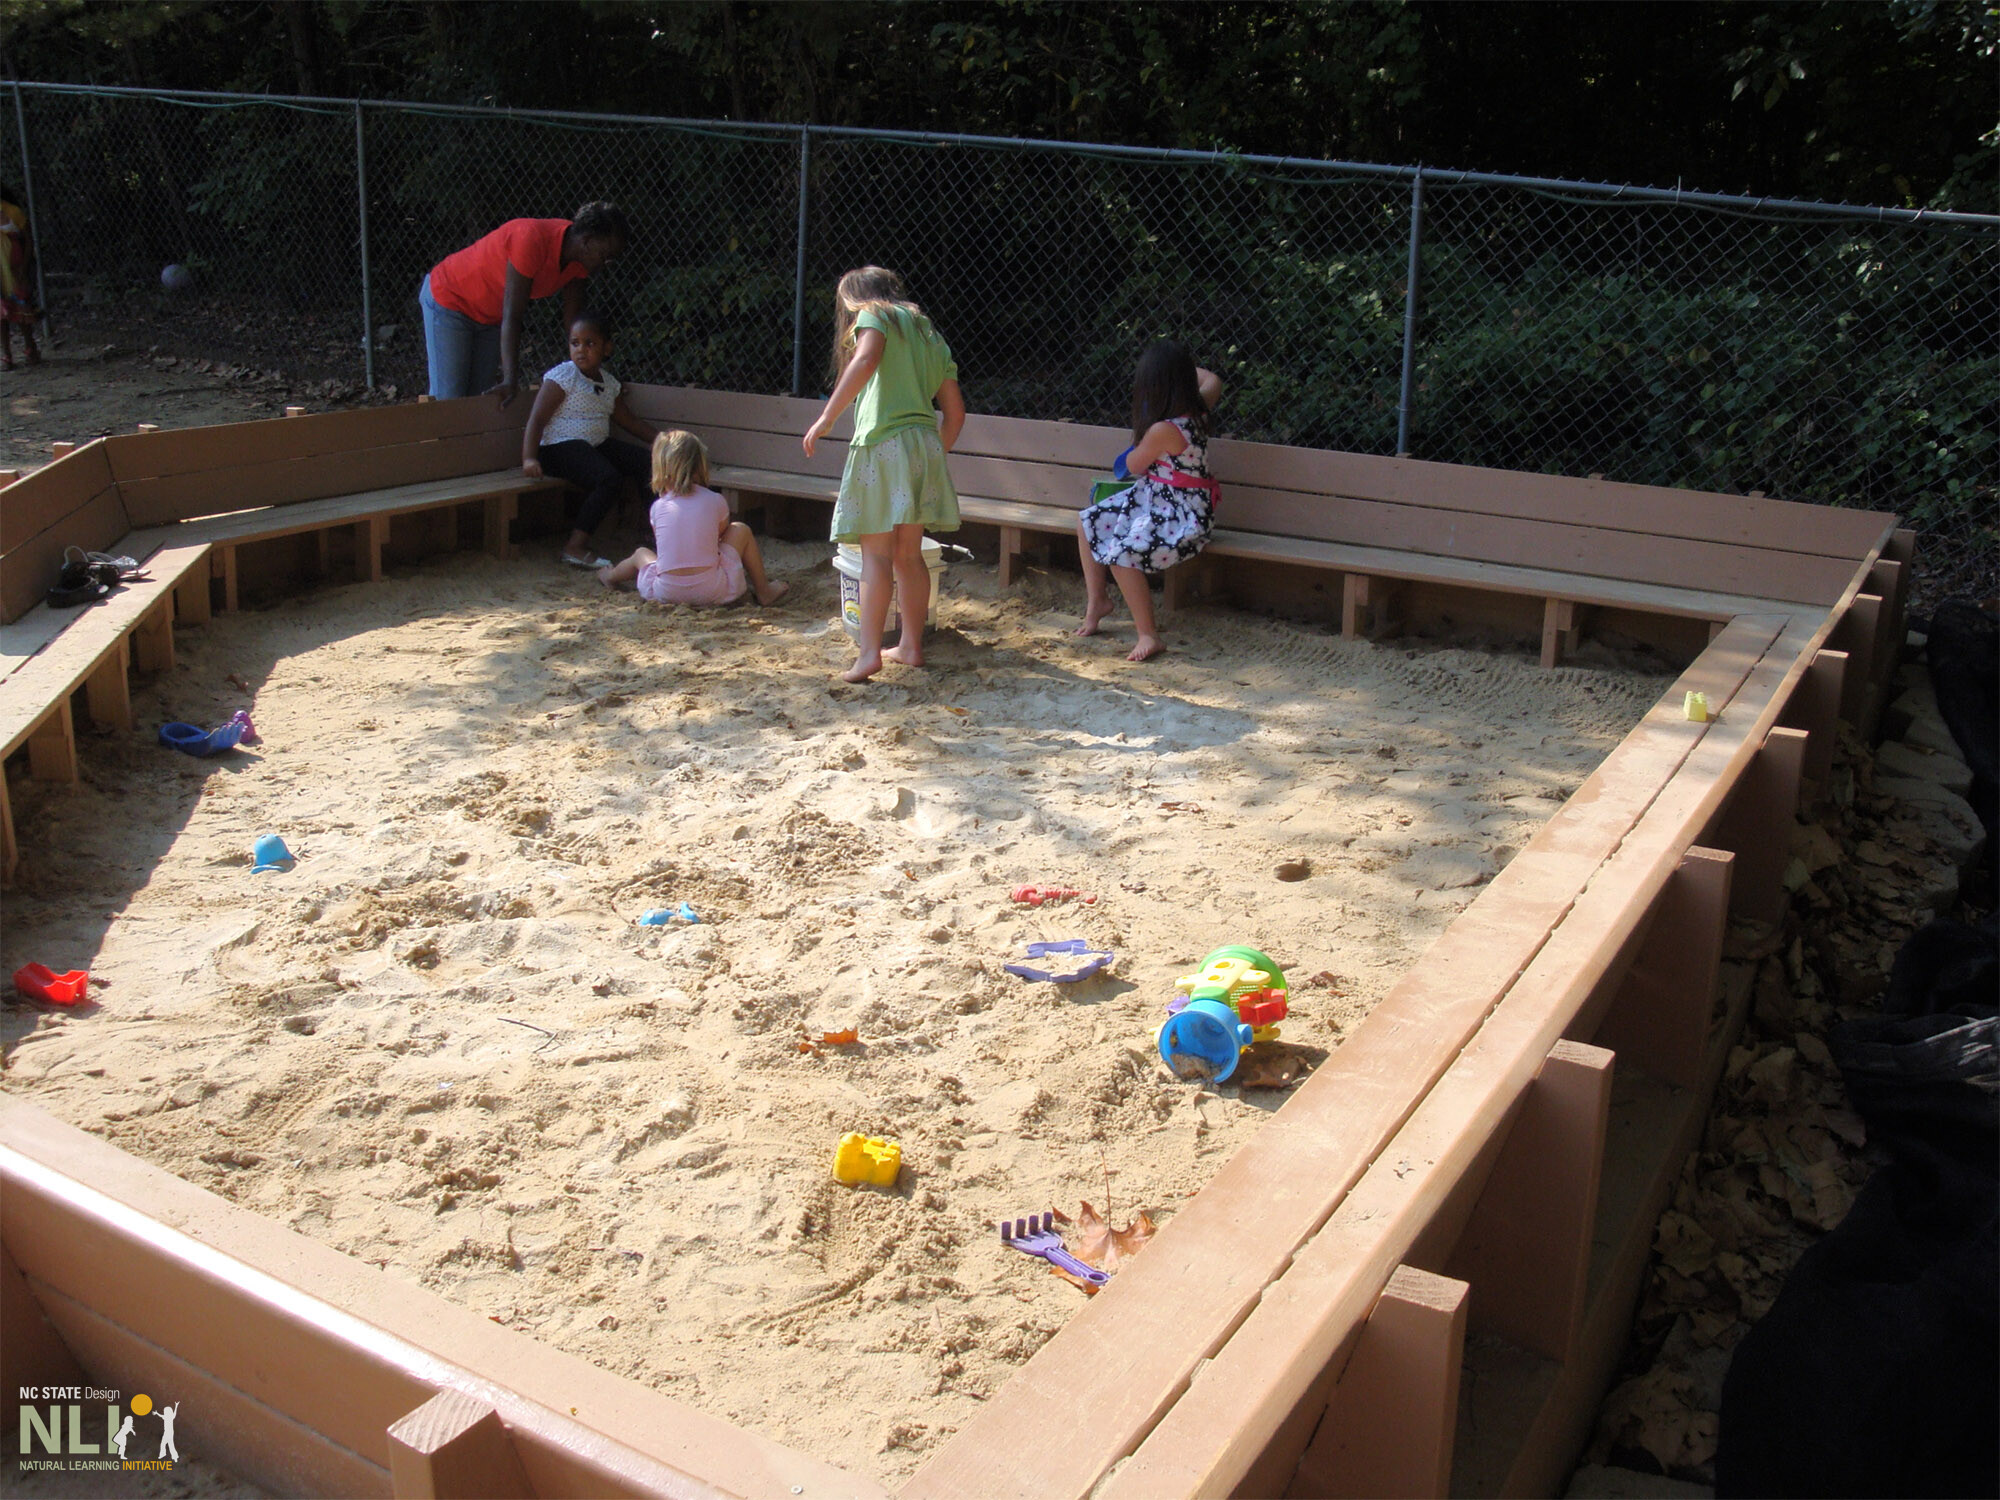
    Configuration. Design with raised edges and a single entry/exit to keep sand contained. Consider continuous, benched edges and/or a central rock or table to increase play surface area and seating options. Make the space large enough for several groups to play simultaneously.

    Depth of sand between 18–24 inches is best practice, allowing kids to really dig without reaching the bottom. Substrate between sand and native soil protects against contamination and weed growth. Best practice is concrete pavers with gaps between for drainage, laid on landscape fabric. Fabric alone will become exposed and torn over time. Ensure excavation accommodates depth of sand and substrate.

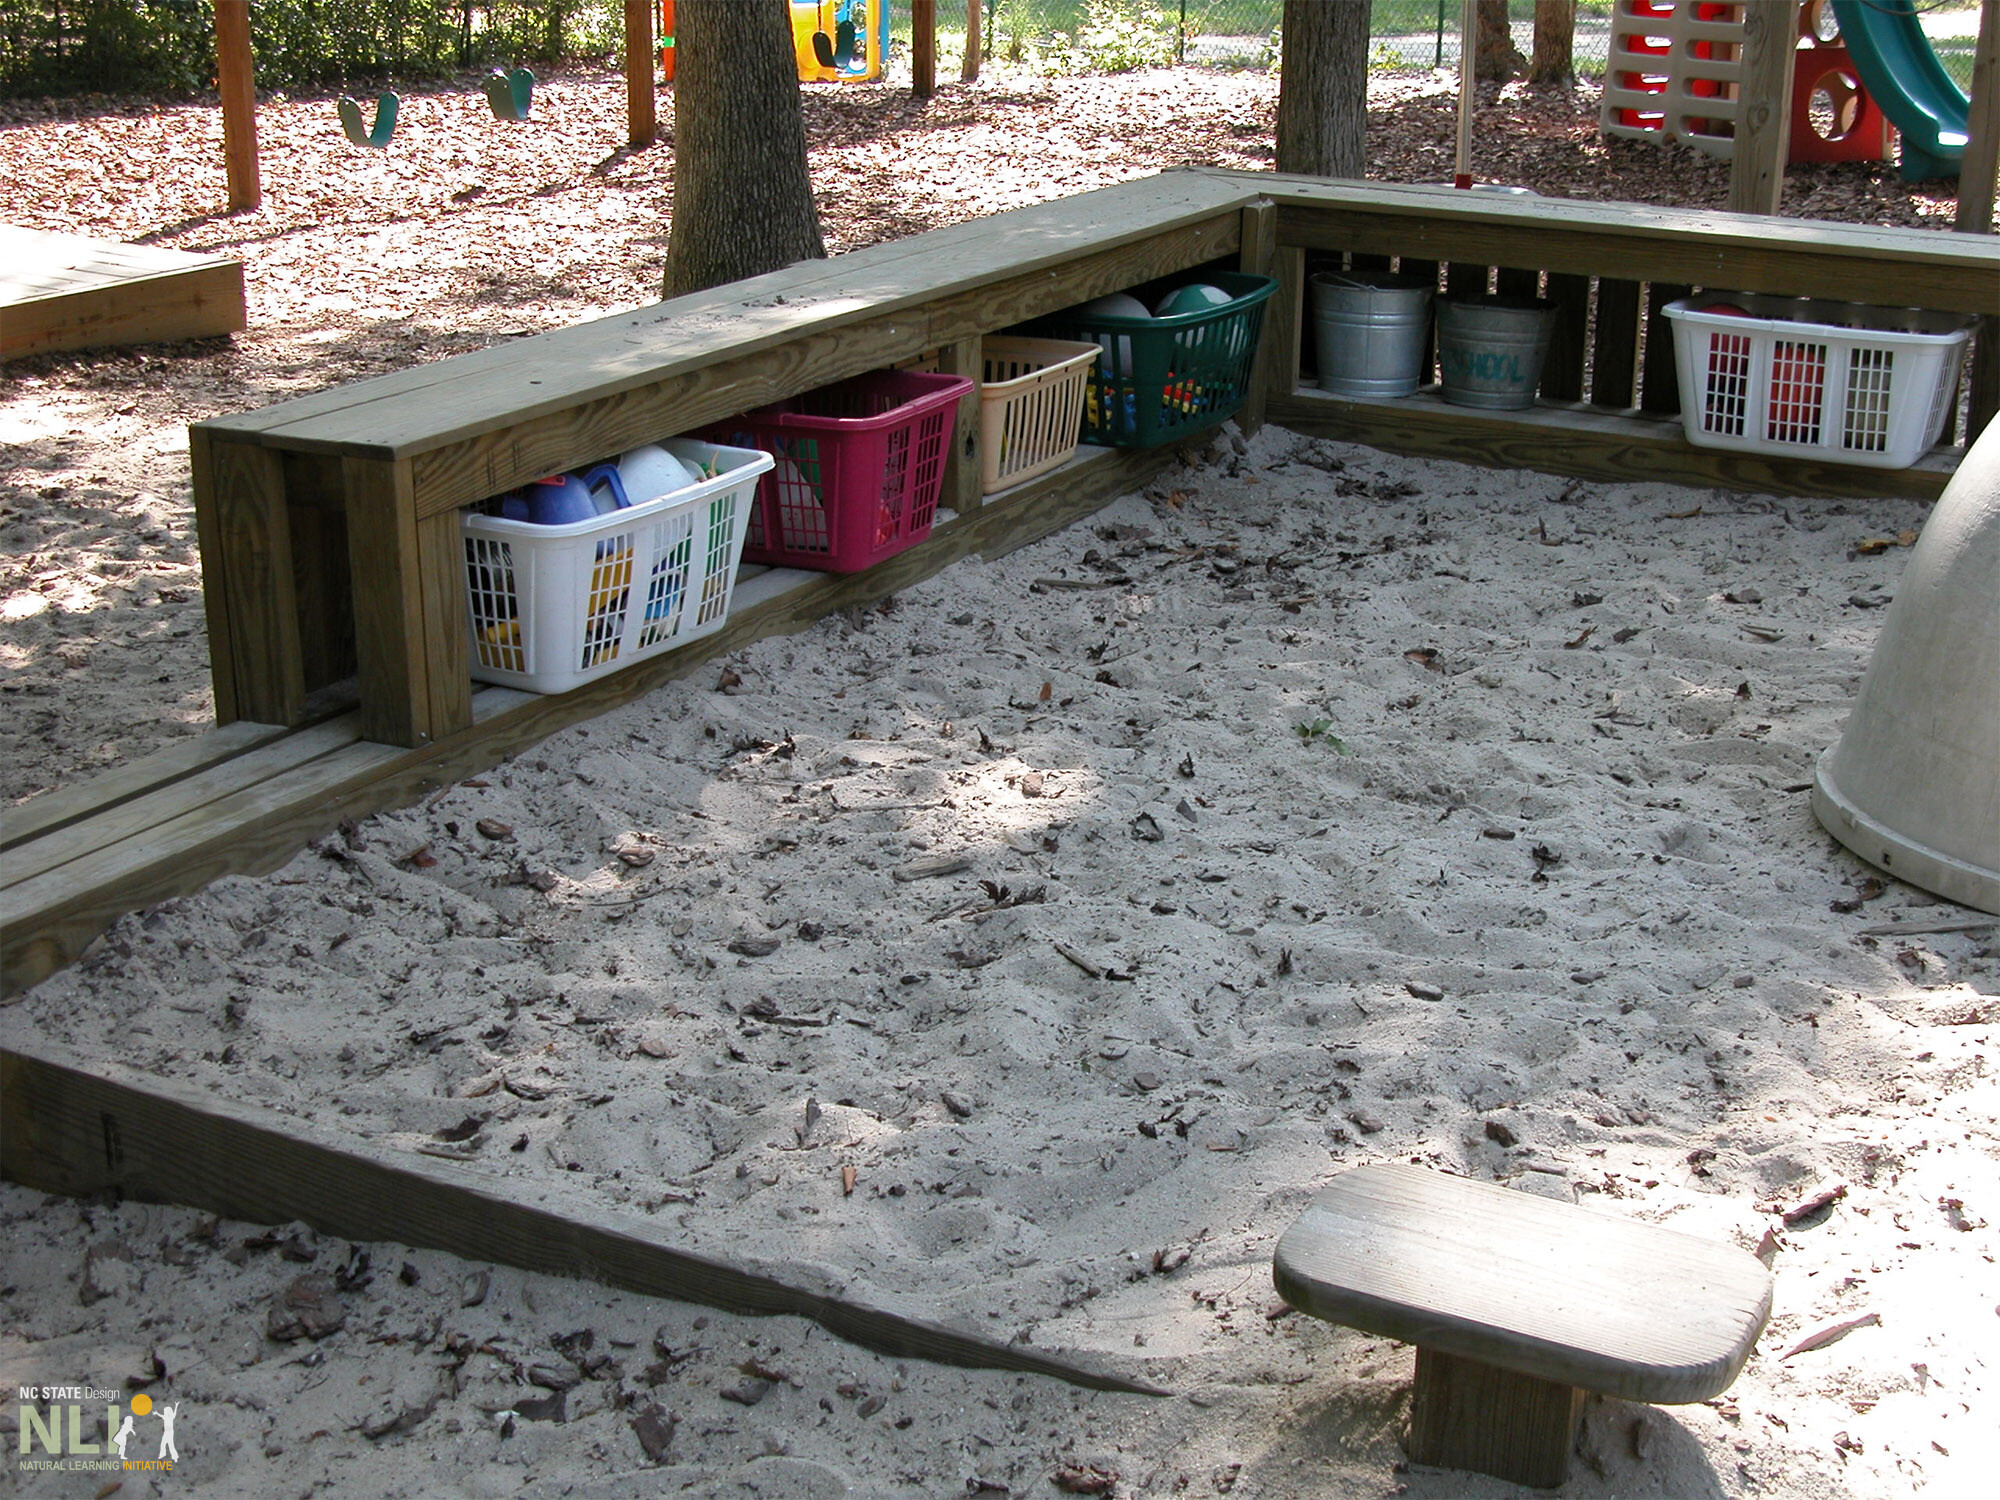
    Storage cubbies for play props (shovels, trucks, molds and other loose parts) can be located under seating benches or along the sides of the setting, easily accessible to children.

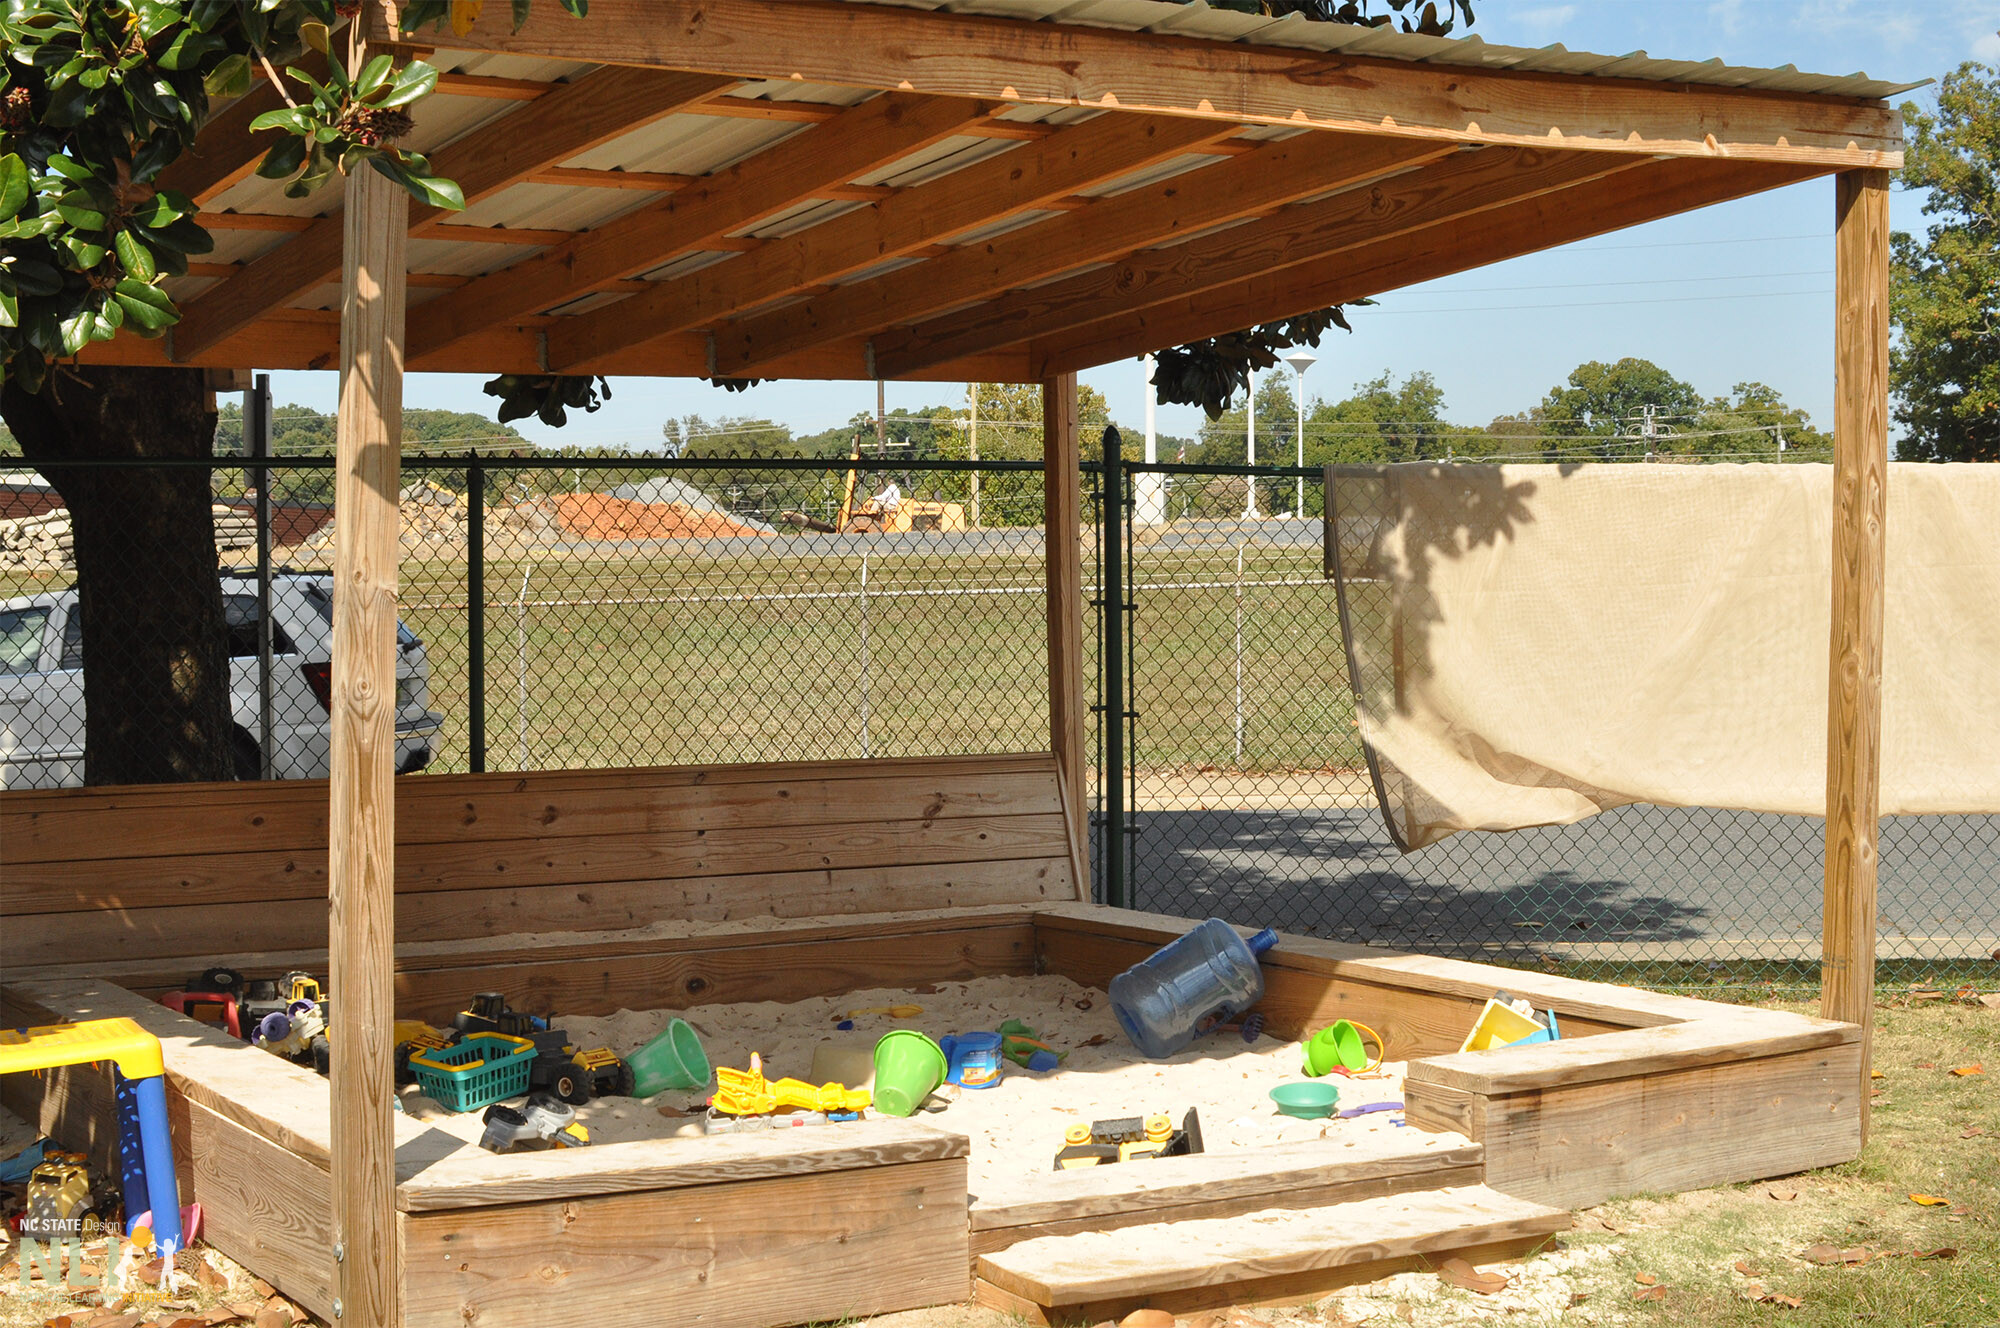
    Shade is critical to protect children from harmful sun exposure. Shade can be provided by “shade sails,” suspended over the setting or with vine-covered pergolas constructed from lumber or welded rebar. Shade trees can replace temporary structures once they are mature.

    Adjacent planting, including vines on an adjacent fence, flowering plants, and overhanging shade trees, can provide rich, seasonal sources of natural loose parts. A plant buffer also helps to contain “migrating” sand. Large shrubs, grasses, and hardy perennials work well.

    Health and Safety

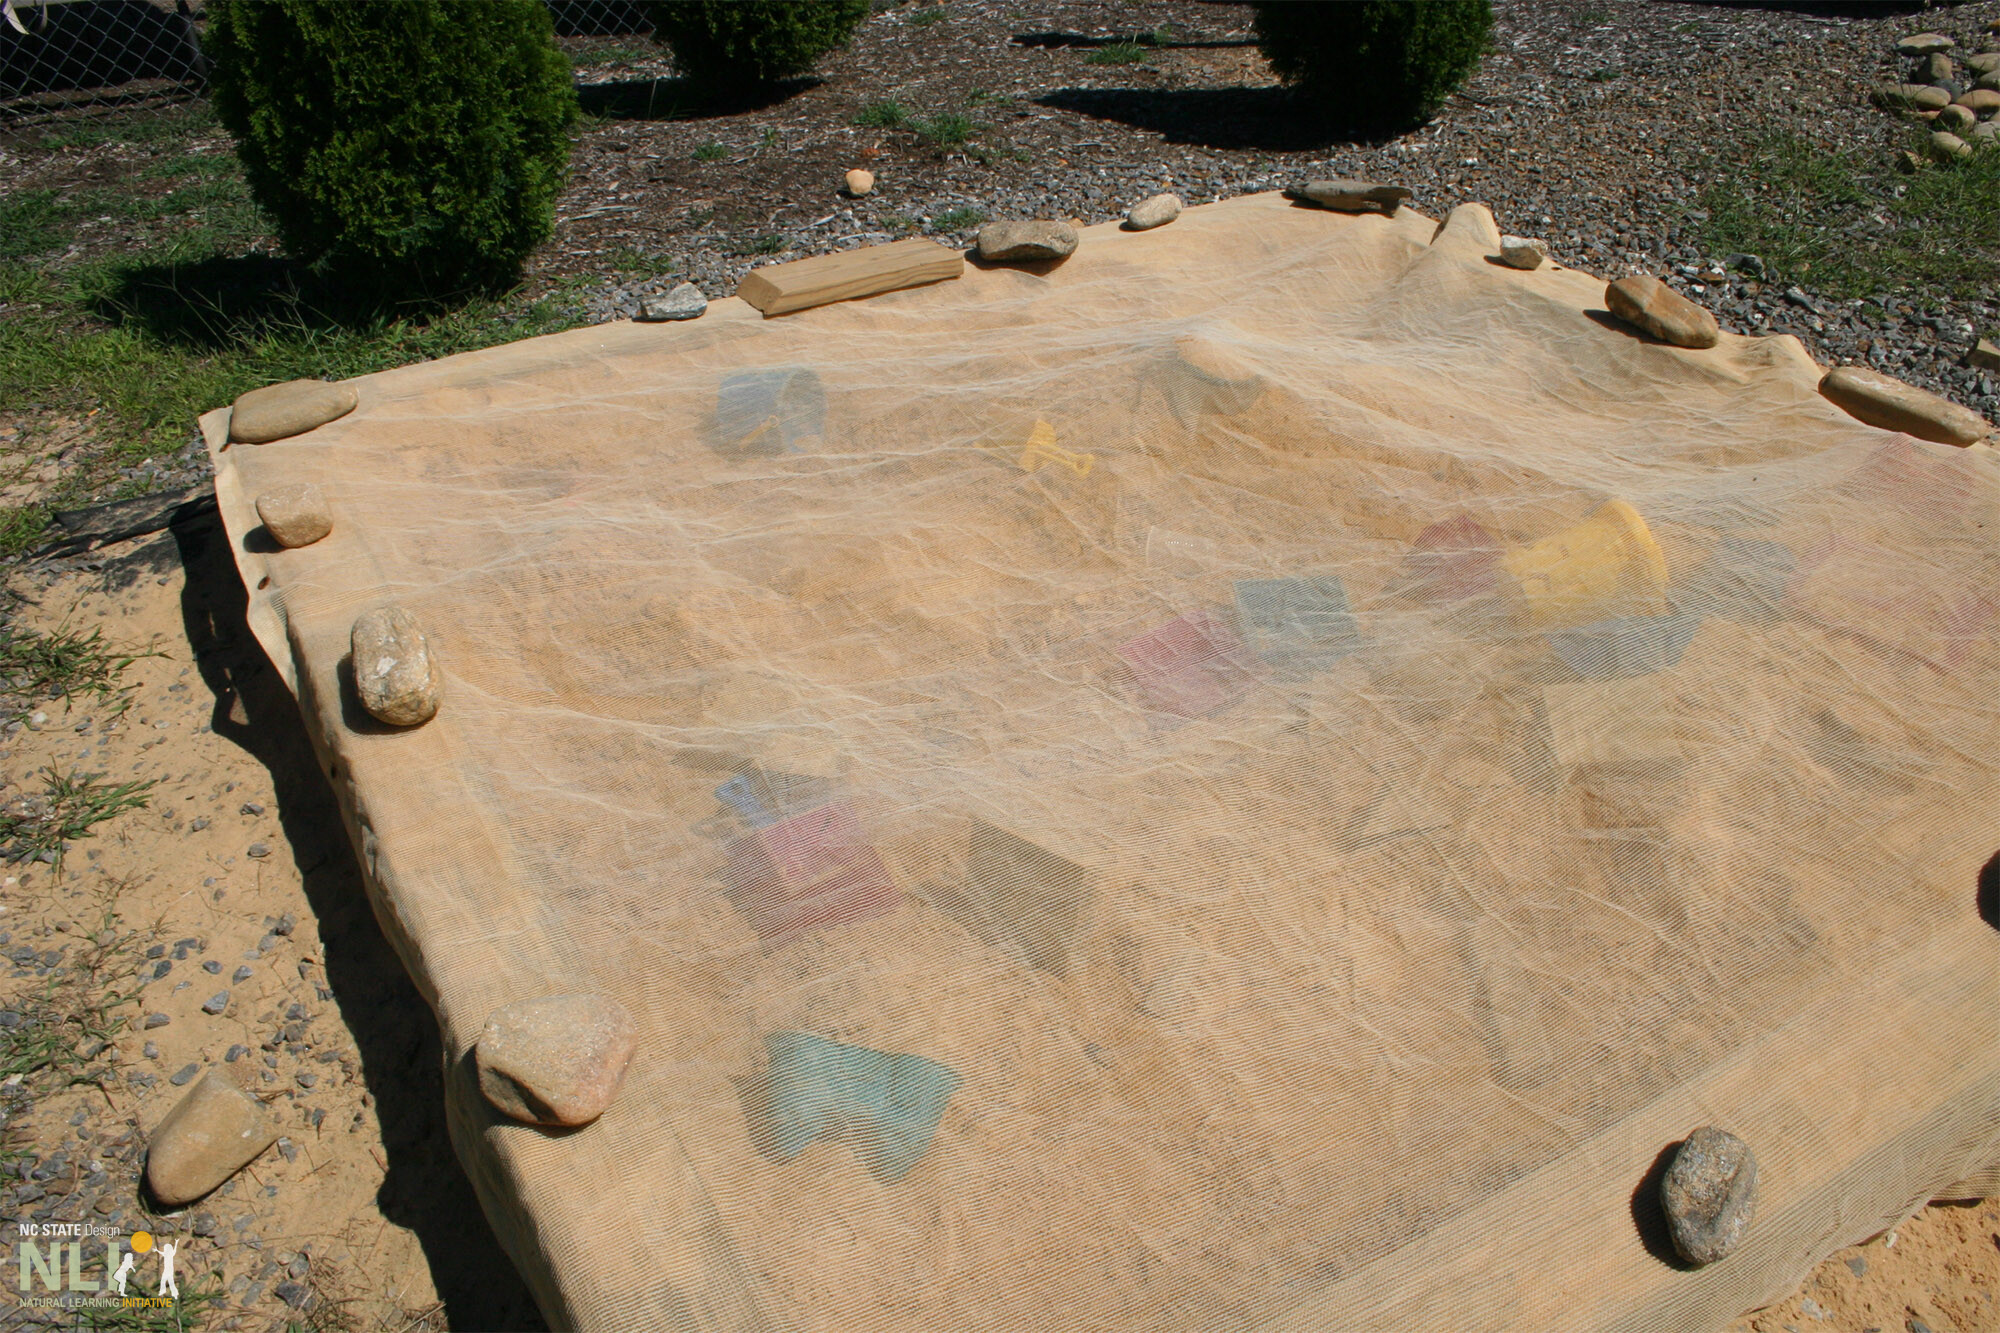
    • To deter animals when not in use (a common licensing requirement), cover sand with a light, fine mesh net (not tarp material, which is difficult to manage and causes sand to become rancid). The net covering will prevent contamination by cats and other critters but allow sun, rain, and air to keep the sand fresh. As net is light and does not catch the wind, it can be held down by small weights tied to each corner (small repurposed bottles filled with colored water, large metal nuts, or pipe unions from the local hardware store).
    • Maintain boundary fence required height. Typical licensing requirement for boundary fence height is a minimum of 48 inches. A sand play setting built against a boundary fence may reduce the effective height so the height requirement is no longer met. In such a case, extend the fence height behind the setting by adding lattice or similar material. Check local licensing and regulatory policies to ensure that minimum height requirements are met.
    • Use “play sand,” as mentioned above.

    Resources

    *See InfoSheet: Gathering Settings Created with Logs for details on how treat logs for longevity and to ensure that they are child-safe.

    children in a sand play setting with built in benches

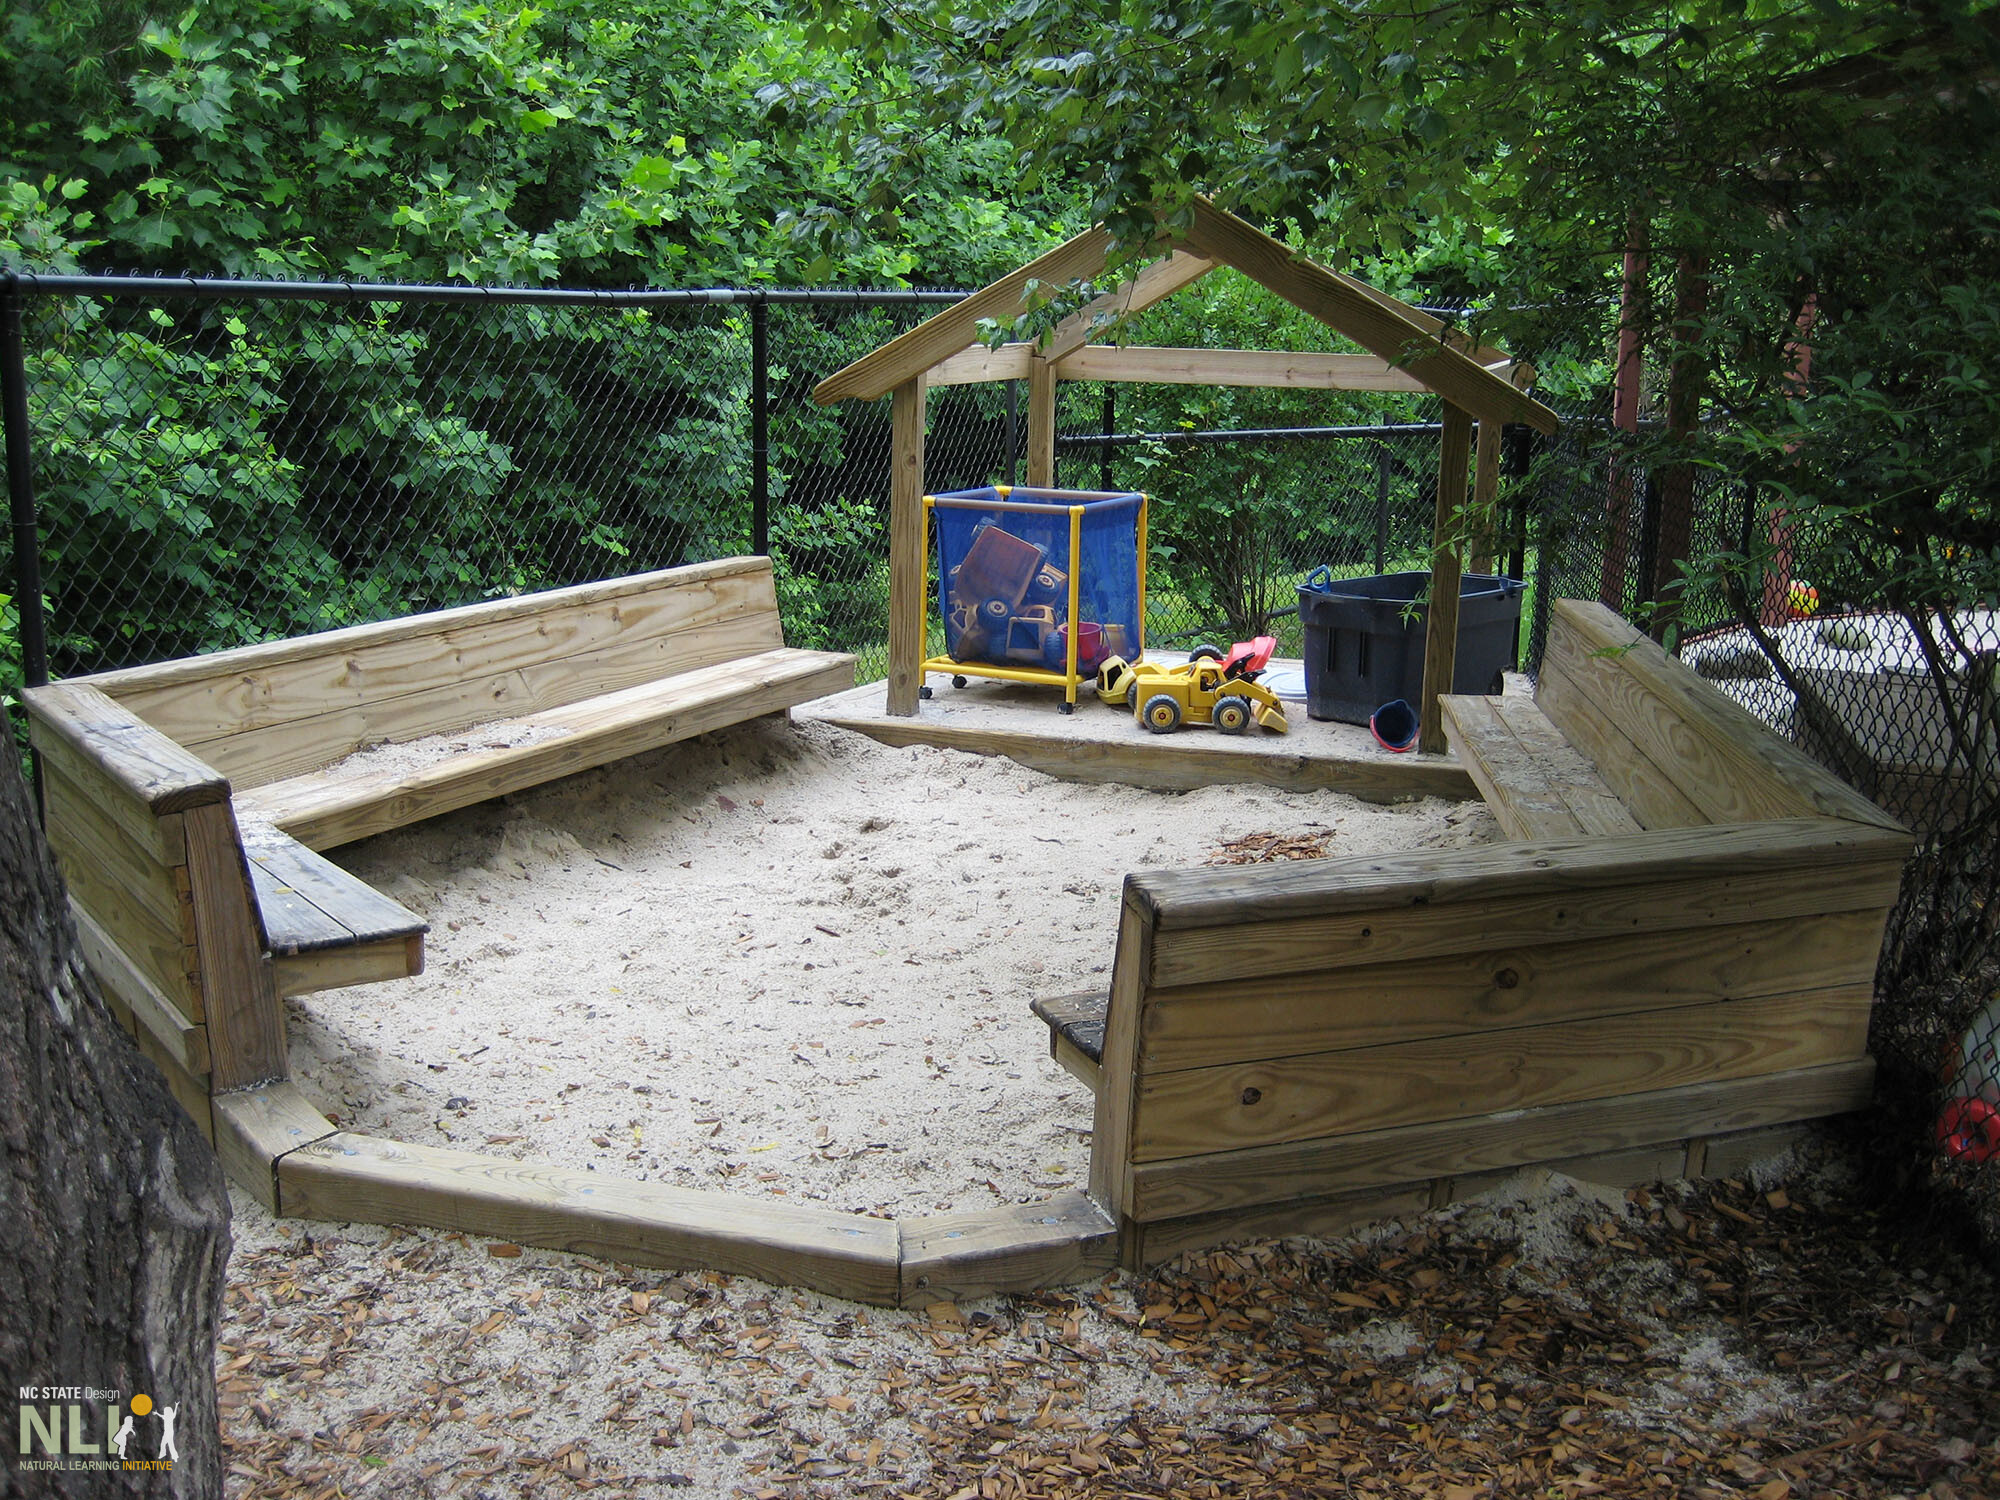
    Sand play setting with a continuous, benched edge

    sand play setting with built in storage

    Storage for loose parts and play props incorporated into benches

    sand play setting with build in benches

    A best practice sand play setting with adjacent toy storage

    shade structure over sand play setting

    A permanent shade structure over a sand play setting

    covered sand play setting

    Light-weight netting material weighed down with rocks keeps sand fresh and keeps critters out!

  • 16. Multi-Purpose Lawns

    Infosheets

    16. Multi-Purpose Lawns

    Download the PDF – English

    Multi-purpose lawns provide a soft surface for active play such as ball games, parachute play, and group activities, as well as a place for quieter activity such as story-time. Undulating ground surfaces and peripheral shade trees, shrubs and/or flowering perennials add play value. Plant Protection Rails with designated entrances can be installed to reduce crisscross pedestrian traffic, which may wear the lawn unnecessarily. May be combined with an adjacent Deck.

    Location

    Multi-purpose lawns should be in a central location of the outdoor learning environment (OLE) for ease of access. A sense of enclosure will add to the experience of group activities, such as story-time or social games. Best practice is to have the lawn bounded by a curvy, looping concrete pathway to prevent the spread of aggressive grass and create an anchor for active, physical play. The easiest place to grow grass is in full sun: although shade tolerant varieties are available, it’s best to locate lawns in areas that receive 3-4 hours of afternoon sun per day.

    Shape

    Toddler and preschool lawns should be designed with a naturalistic form, using a circular or semi-circular shape whenever possible. Multi-purpose lawns should have clear physical boundaries with defined edges in order to focus group activities. Looping and curvy adjacent pathways allow for a naturalistic edge.

    Size

    Infant/Toddler. Size of the lawn depends greatly on the age of children served and their stage of development. Lawns can be less than 100 square feet for children crawling or just learning to walk.

    Preschool. In preschool areas, a lawn ranging from 150 to 300 square feet will accommodate the vigorous physical activity of older children, including ball play.

    School-age. Lawns should be at least 400 square feet for school-age children. To accommodate this larger size within a limited space, carefully consider the trade-offs between traditional outdoor uses, such as a paved ball area, and a multi-purpose lawn.

    Selecting Grasses

    Warm season vs. Cool Season. Warm season grasses are green in the summer and dormant (brown) in the winter. Cool season grasses are the opposite, staying green throughout winter months. Consider local seasonal cycles when selecting grass species.

    Annual vs. Perennial. Annual grasses are used for temporary lawns and erosion control. Many seed mixes will have a percentage of annual grass to allow for initial establishment. The annual grass provides a boost of green within just a few weeks, but will die out after a season and not return, allowing the perennial grass to establish. Perennial grasses go dormant, but return every year after dormancy.

    Clumping vs. running. Clumping grasses grow from a single root system and do not spread, but the “clump” gets larger as the plant matures. Clumping grasses are easier to manage, but require re-seeding and fertilization to maintain a lush green lawn. Running grasses are more difficult to manage: these types of grasses provide thick mats of turf, but often out-compete other plants and end up spreading into nearby garden beds.

    Common grass types:

    • Fescue is a clumping cool-season grass that has been cultivated in many varieties. There are varieties that are suitable for sunny or shady conditions, but as a general rule, fescue lawns need both sun and shade to thrive.
    • Bermuda grass is a common warm-season running grass that is often used on golf courses or athletic fields because of its ability to live in hot, dry conditions. Because this grass spreads so vigorously, it is very popular for low maintenance applications. The danger of planting Bermuda grass, however, is that it can quickly take over outdoor areas, creating a difficult management scenario.
    • Zoysia grass is the recommended grass type for high traffic multi-purpose lawns. It is a warm-season running grass that is wear-resistant and forms a thick mat, similar to Bermuda. Zoysia grass is easy to manage and shade tolerant.

    Drainage

    Good drainage will allow a lawn to dry out at an appropriate rate after rainfall or irrigation. Providing positive drainage is important for lawn health, and will maximize usage through all seasons. Inadequate drainage is the most common reason that new lawns fail. Types of lawn drainage include:

    “Run-off” drainage. By very slightly sloping or “doming” the lawn, excess water will flow off of the lawn toward a drainage feature, such as a catch basin or dry stream bed. Slope is defined by the amount of elevation change across a surface. The minimum slope required for this type of drainage (also known as “sheet drainage”) on a lawn is 2% (1/4” change in height per foot), unless combined with another draining method.

    Underdrains or “French” Drains. These types of drainage structures are installed below the ground in trenches filled with 1–2″ size gravel. Water travels vertically through the soil and into the gravel pit, entering pipes that are perforated or slotted to allow water in. Underdrainage allows a lawn with less than 2% slope to have adequate drainage.

    Successful Establishment

    Soil Amendement. High-quality soil is critical to successful lawn establishment. When choosing a grass, test the pH of the existing soil and its ability to drain. The proper soil texture would be considered sandy loam, a type of soil that has less clay and more sand than common soil types. Depending on the pH of the soil, various fertilizers and additives may be needed to keep lawns healthy and beautiful. Till and aerate the desired lawn area, removing any large roots, rocks, and weeds, and mix in compost. If planting in heavy clay or sandy soils, mix 1–2 cubic yards of compost per 1,000 square feet into the top 6­–8 inches of subsoil. For further guidance on soil quality of how to test it, contact the local cooperative extension office.

    Seeding Times. Seeding is the most economical method of establishing grasses. NCSU Cooperative Extension recommends seedign cool-season grasses in early fall, but fair results may be obtained from seeding in early spring. Warm-season grasses are best planted in late spring and early summer. Unlike cool-season grasses, some warm-season grasses must be planted either by sod or other vegetative means because seeds either are not available or do not result in uniform stands.

    Temporary fencing. After seeding or laying down sod, put up temporary fencing around the perimeter of the desired lawn area. This will keep children from trampling on the growing lawn, which may prevent successful establishment.

    Watering. To prevent grass from drying out during establishment, keep the top 1.5 inches of the soil moist. This may require light watering two or three times a day for 7 to 21 days.

    Resources

    1. NCSU Cooperative Extension Gardener Handbook, Chapter 9: Lawns.
    experts leading kids in yoga play

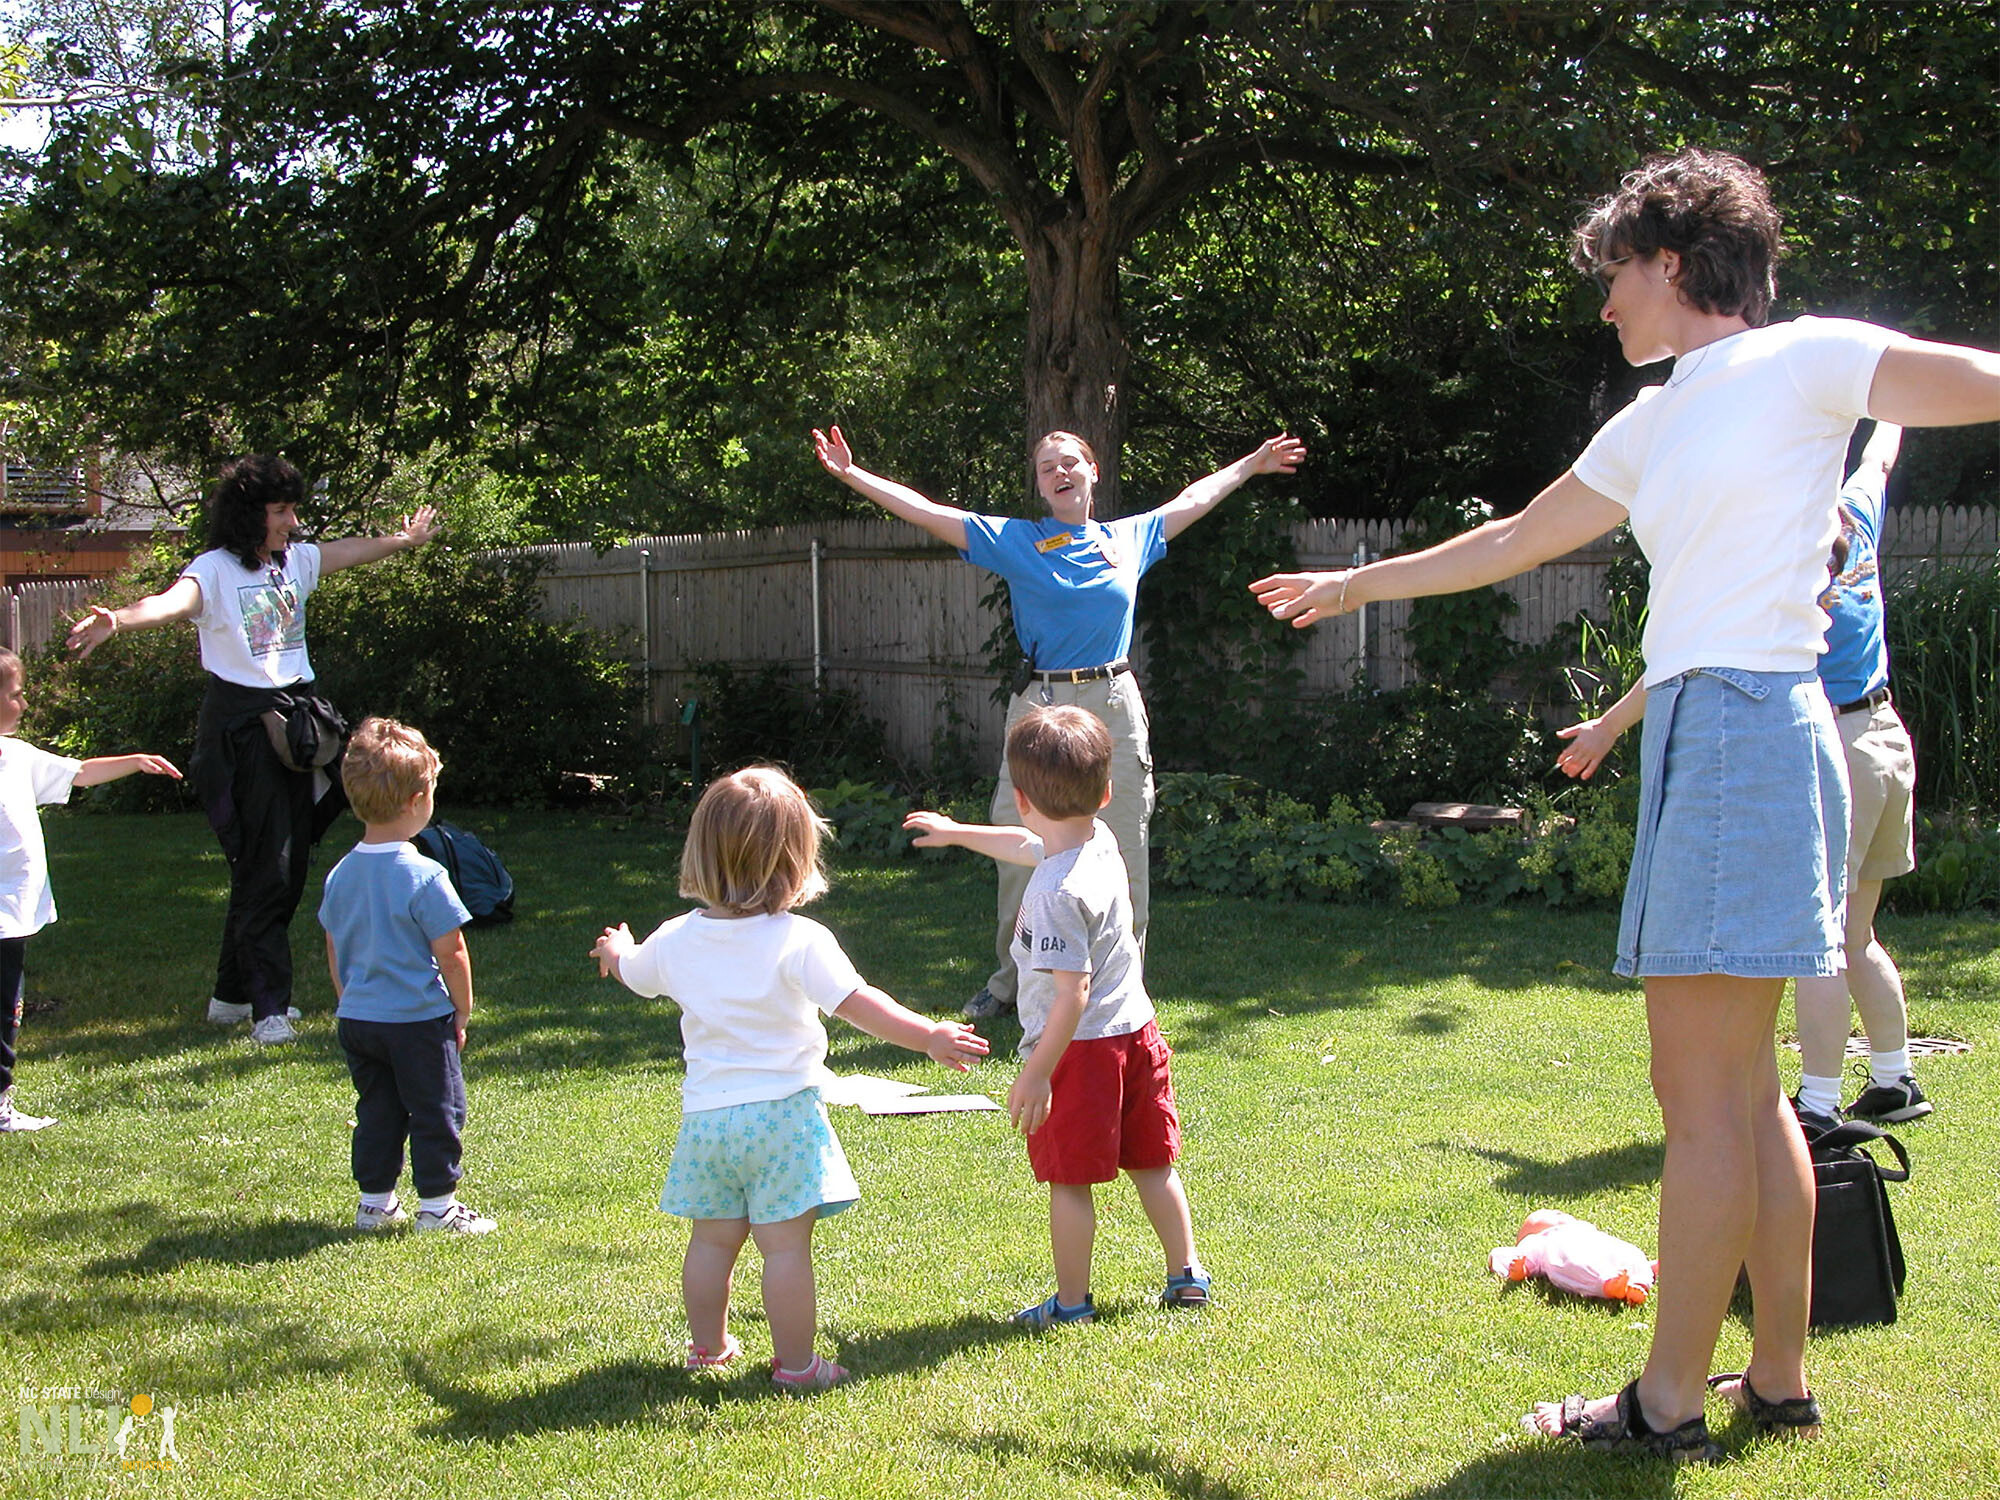
    Animal yoga lead by a play expert on a multi-purpose lawn

    lawn with covered deck

    A thriving lawn with an adjacent covered play deck and stump seating

    pull-up bar for infant/toddlers in environment

    A pull-up bar in an infant/toddler OLE made from stumps and PVC

    toddlers laying in grass with shade canopy

    Infant/toddler lawn setting with shade canopy, flag stone, and child-safe perennial plantings. Soft lawn surface facilitates tummy time outdoors.

    child running on primary pathway with lawn on either side

    A multi-purpose lawn with an adjacent concrete pathway facilitates diverse, active play.

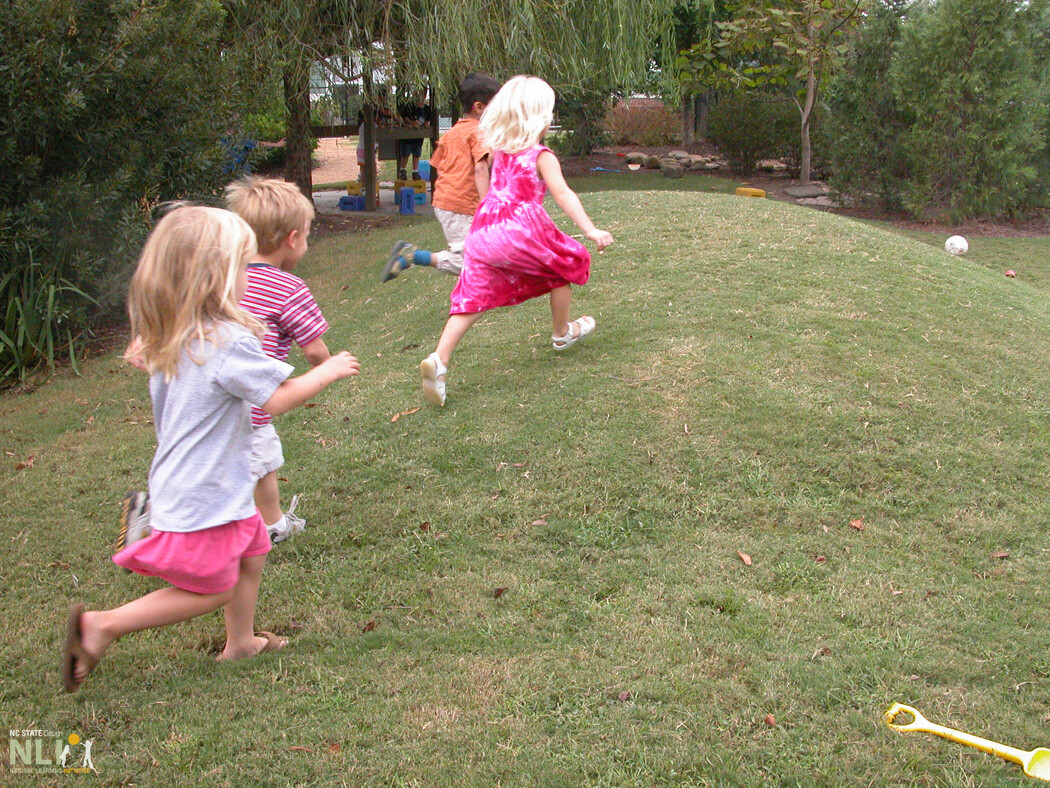
    children running on a grassy hill

    A grassy play mound creates a focal point for active play and allows children to roll, slide, and run.

    lawn with bordering plants

    A thriving lawn with perennial border plantings

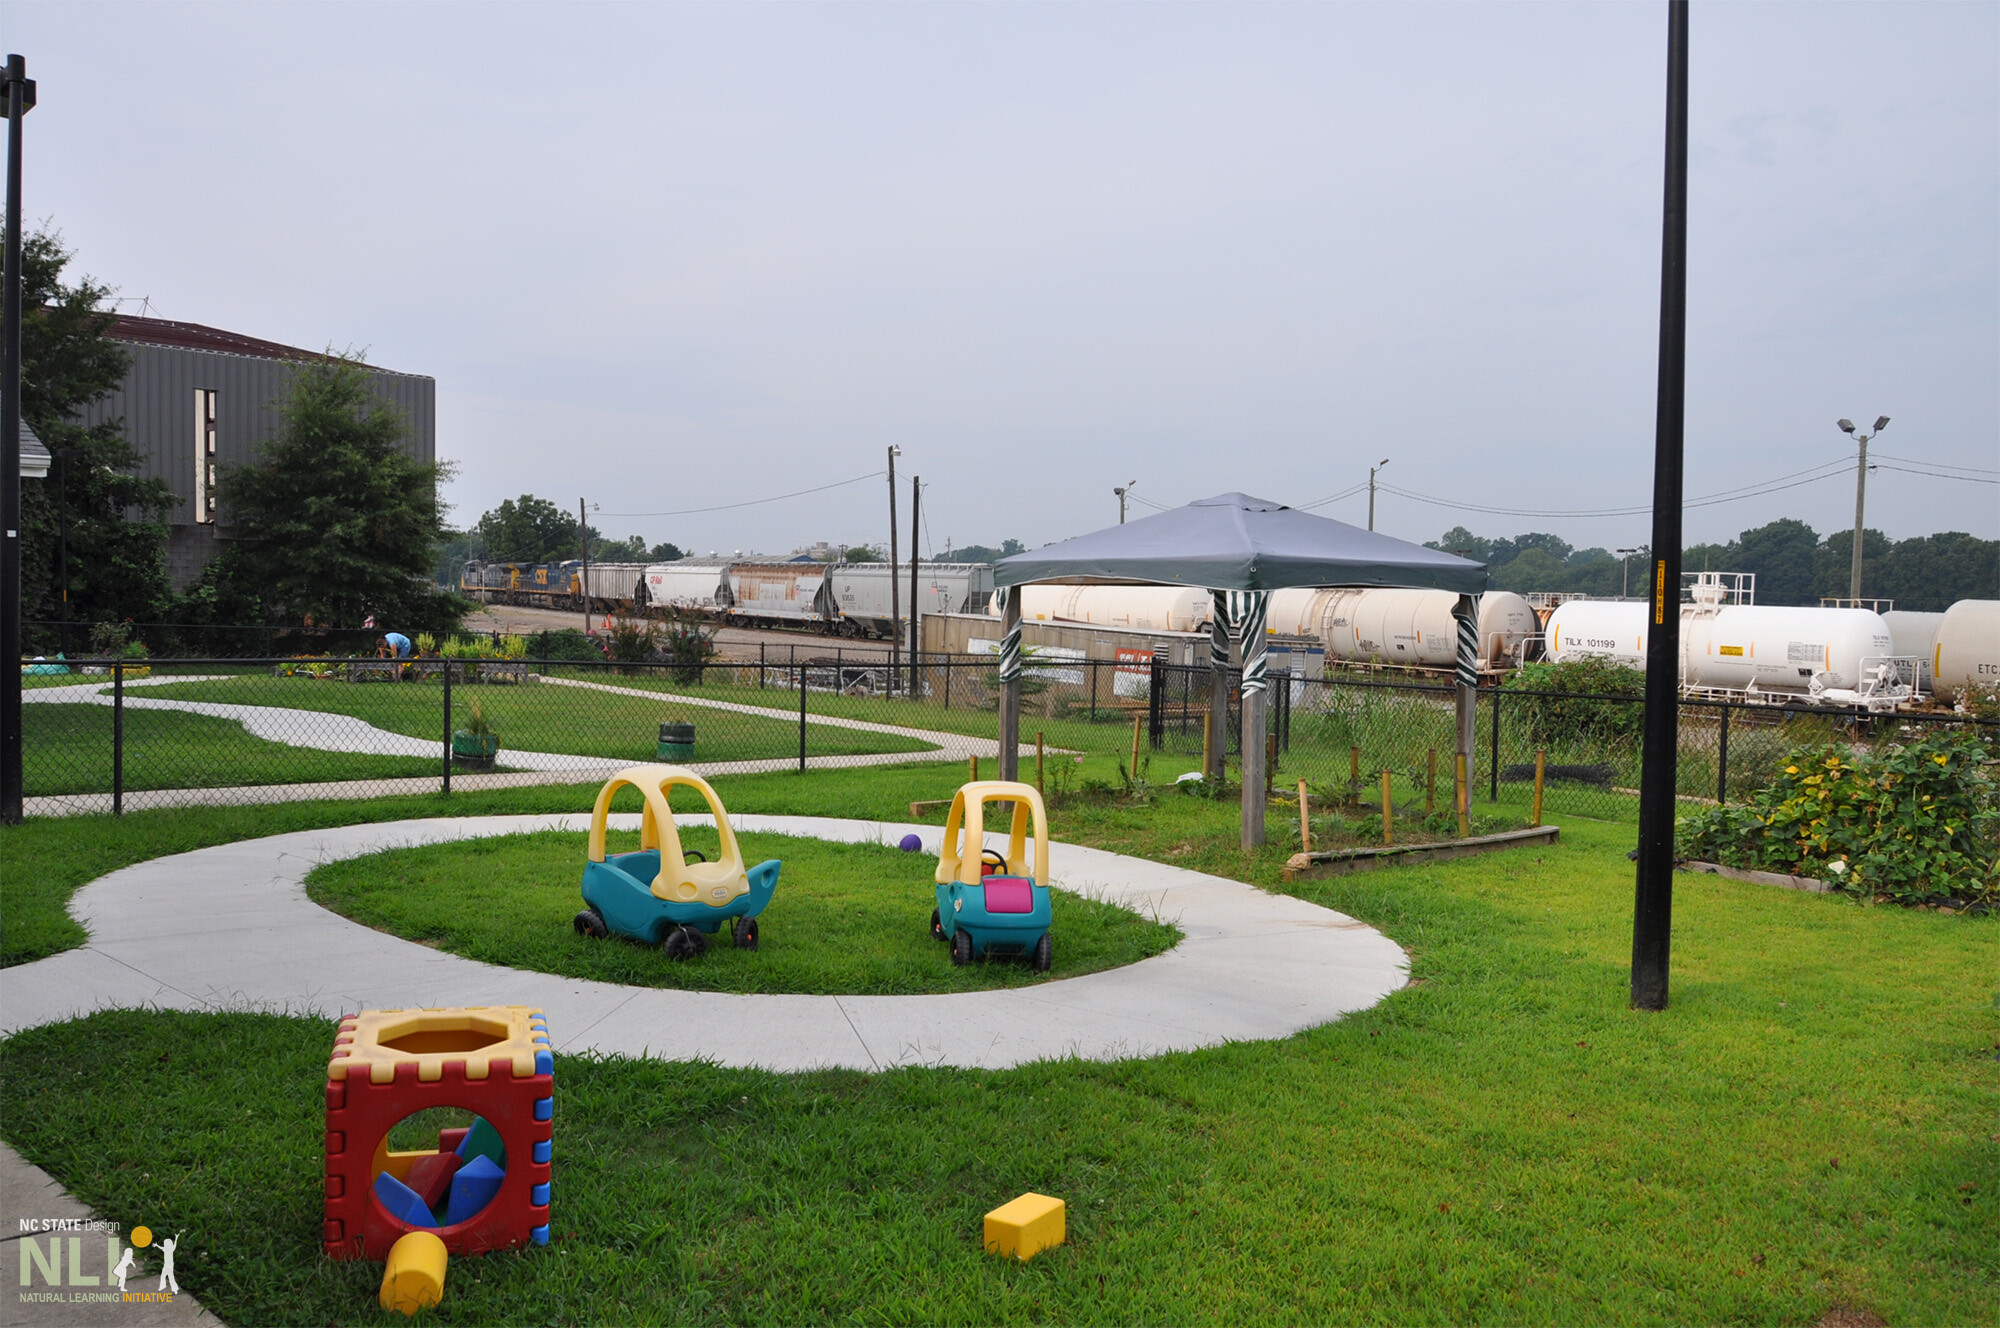
    looped pathway within a multi-purpose lawn setting

    A small, looped concrete pathway bounds a multi-purpose lawn designed for younger children

  • 17. Acoustic Play Settings

    Infosheets

    17. Acoustic Play Settings

    Download the PDF – English

    Acoustic play settings provide opportunities for “making music” and enjoying beautiful sounds. Settings can be created from recycled/re-purposed items such as pots, pans, and pipes, or manufactured items including drums, cymbals, xylophones, gongs, bells, and rattles mounted on a fence or structure designed for children to engage in percussive play. Settings include hand-held implements (drumsticks, spoons, etc.) to “play” the instruments. May be installed on a Deck, beside a Pathway, or on a Fence. 

    MATERIALS

    Sound-making objects can be found in local second-hand stores, a nearby kitchen, or right in the classroom. Bells, chimes, pots, pans, and PVC pipes are commonly used for acoustic play settings. Options for noise-makers are endless. Re-purposed and recycled objects can be given playful new uses­­—get creative by testing the sounds of everyday household items. Provide sticks, spoons, and spatulas to create “drumsticks” or “strikers.”

    location

    When choosing an acoustic play location, remember that children will have the opportunity to make different sounds at various volume levels­­—sometimes acoustic play can be very loud. Consider locations where noise will not bother neighbors or adjacent classrooms.

    structure

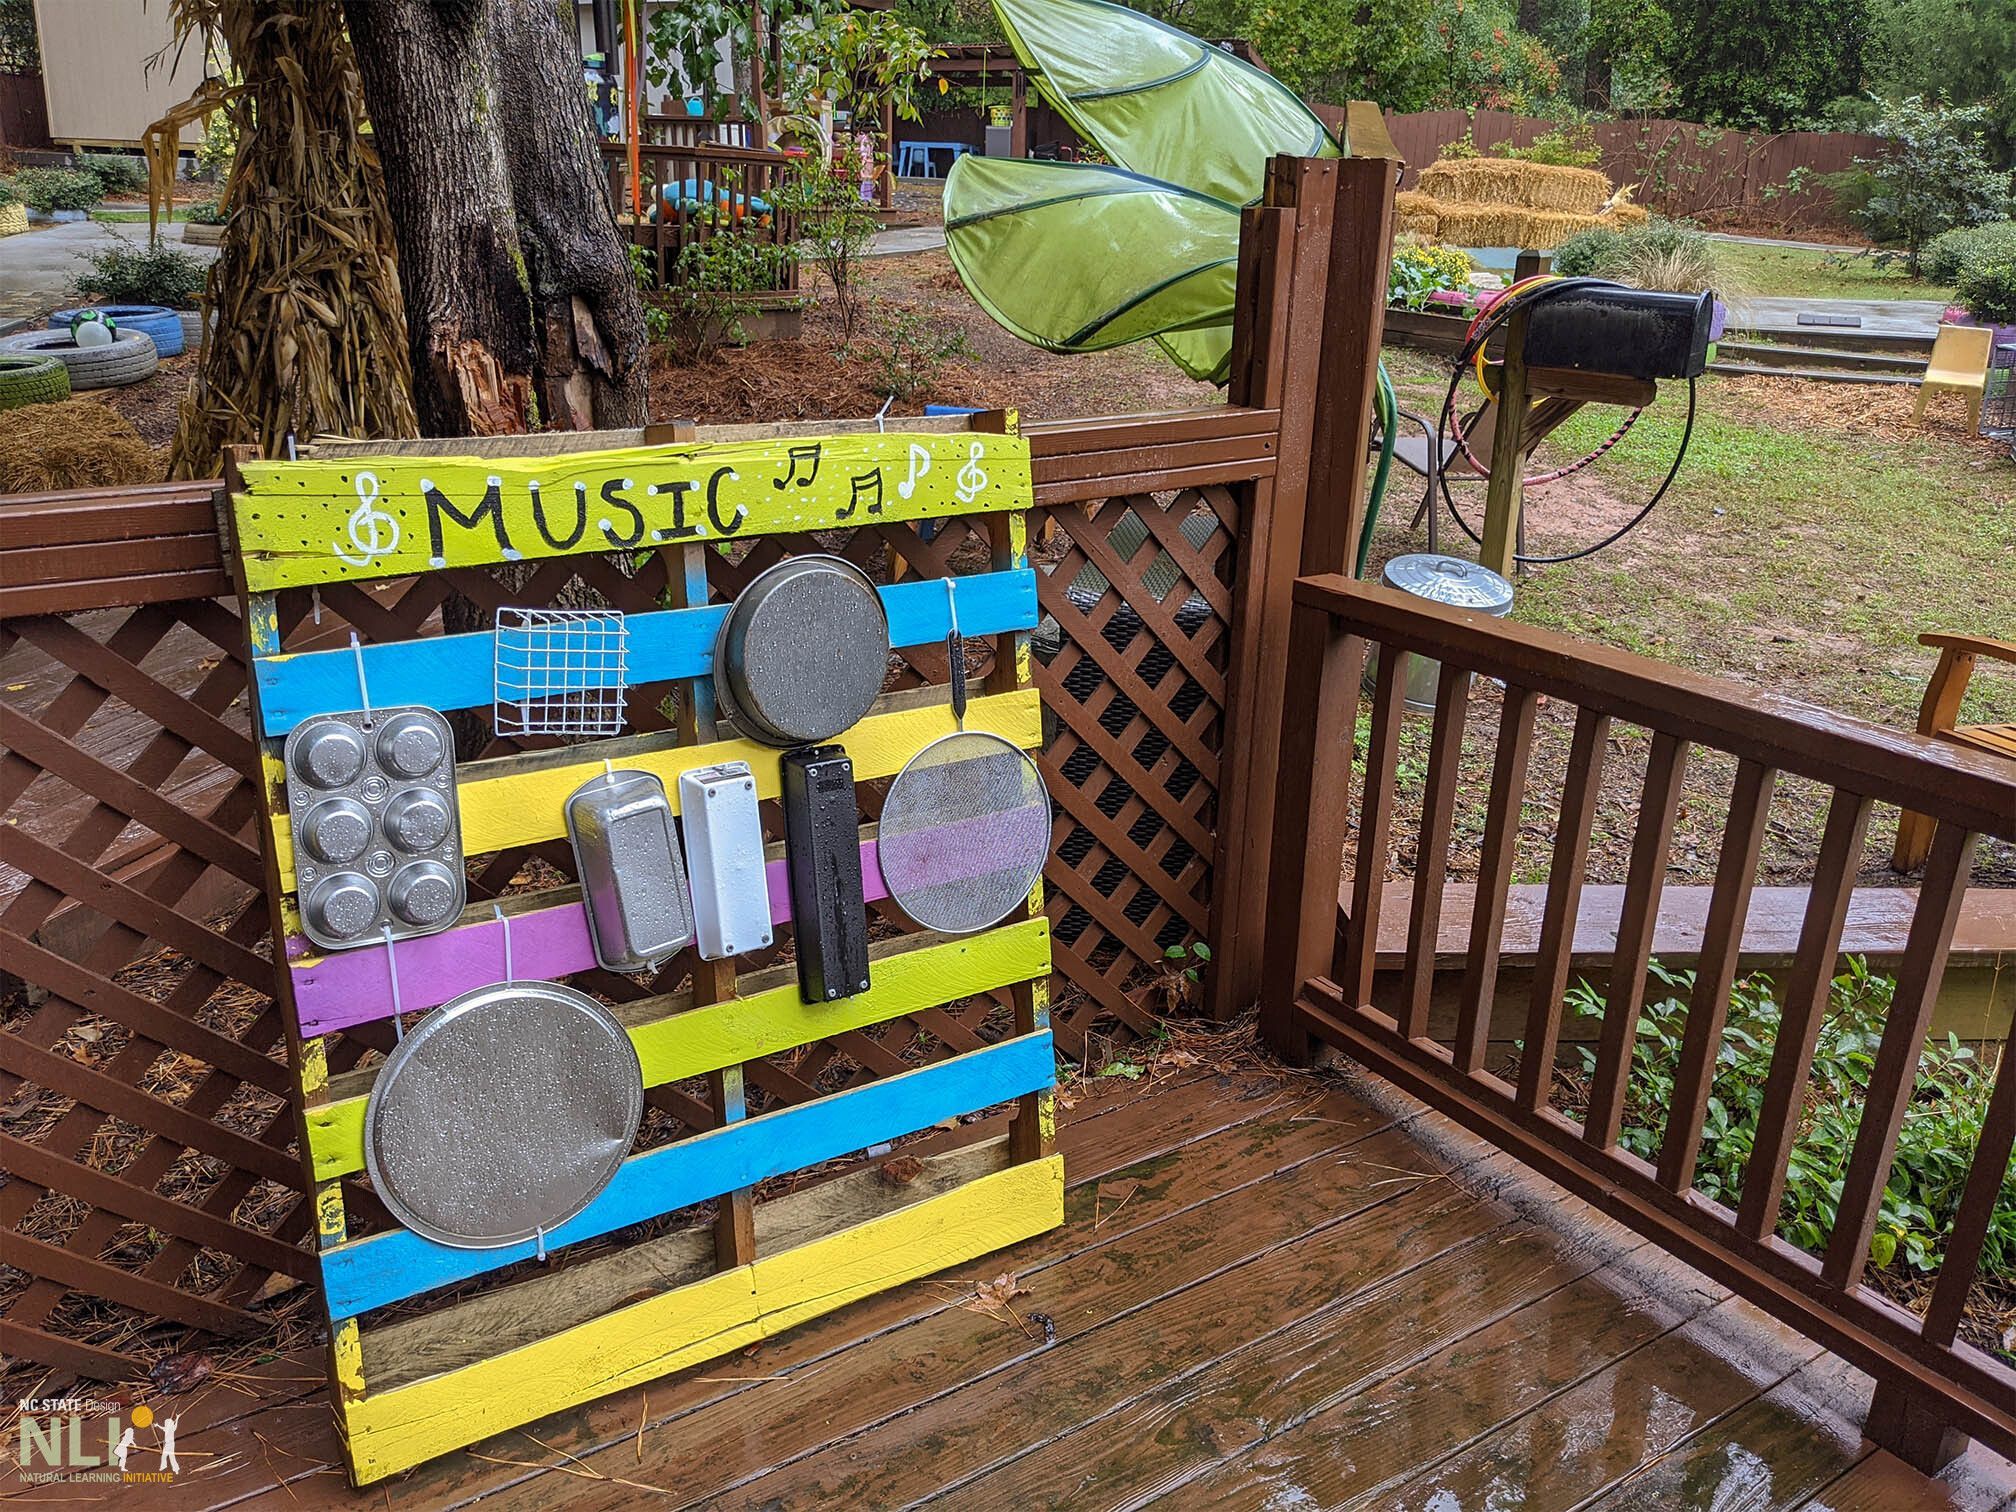
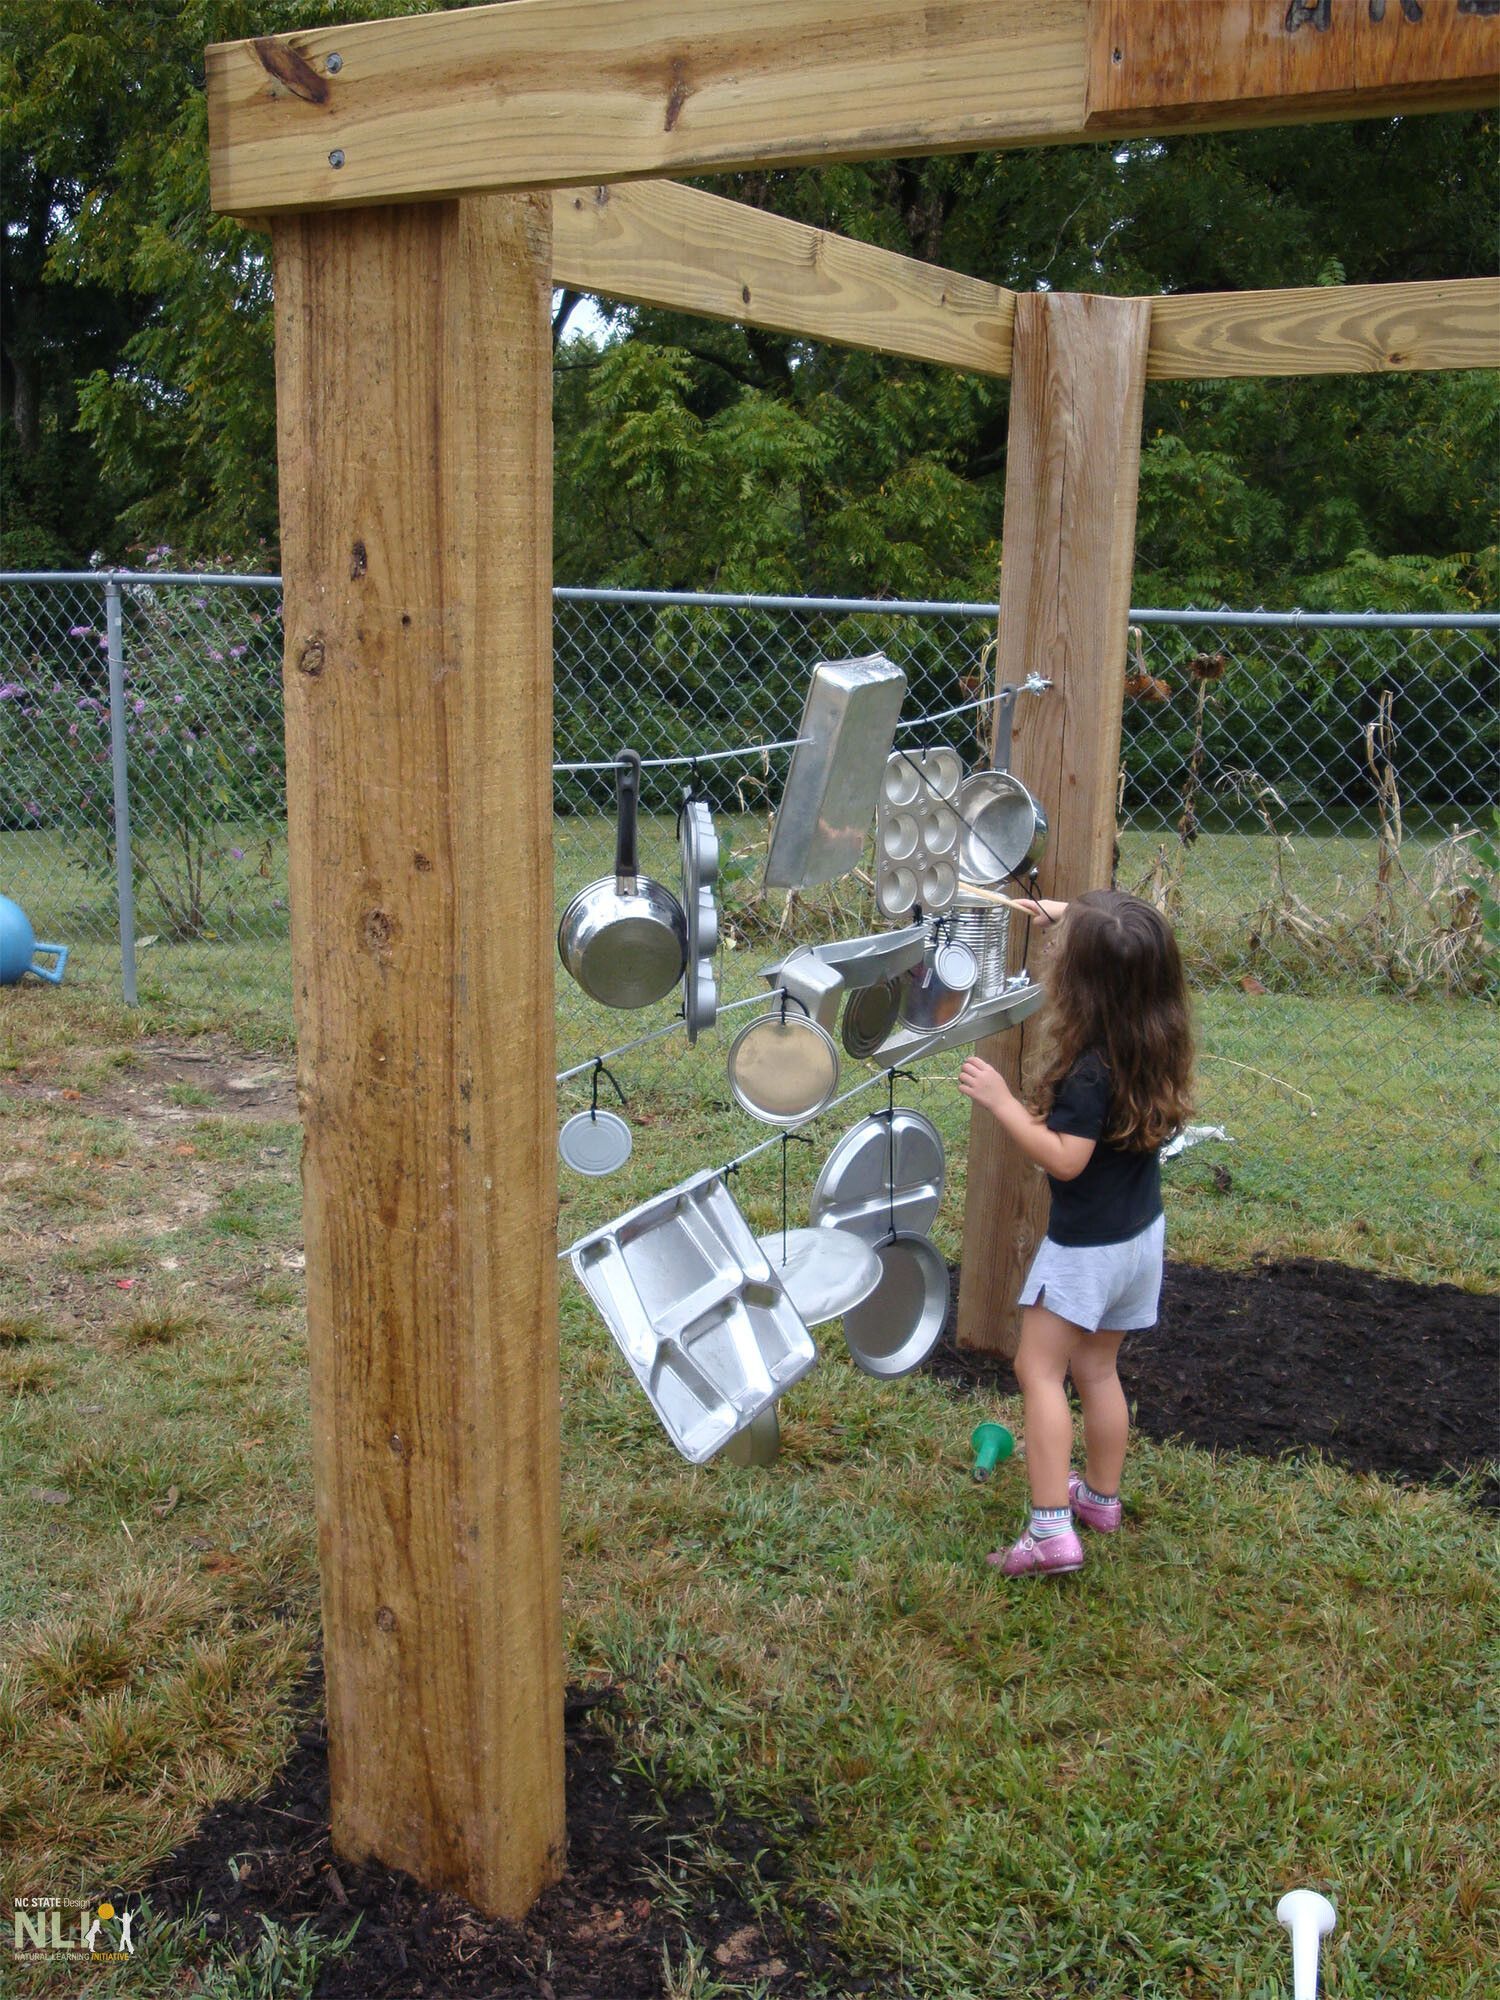
    Sound-making instruments can be supported on a fence, a post, the side of a shed, or a secured wooden pallet (Figure 1). Free standing structures created using posts (Figure 2), trees, or prefabricated materials allow children to access acoustic play from several angles, encouraging social play. Be sure that the selected structure can support the weight of instruments. Carefully consider how objects will be attached.

    hanging musical instruments

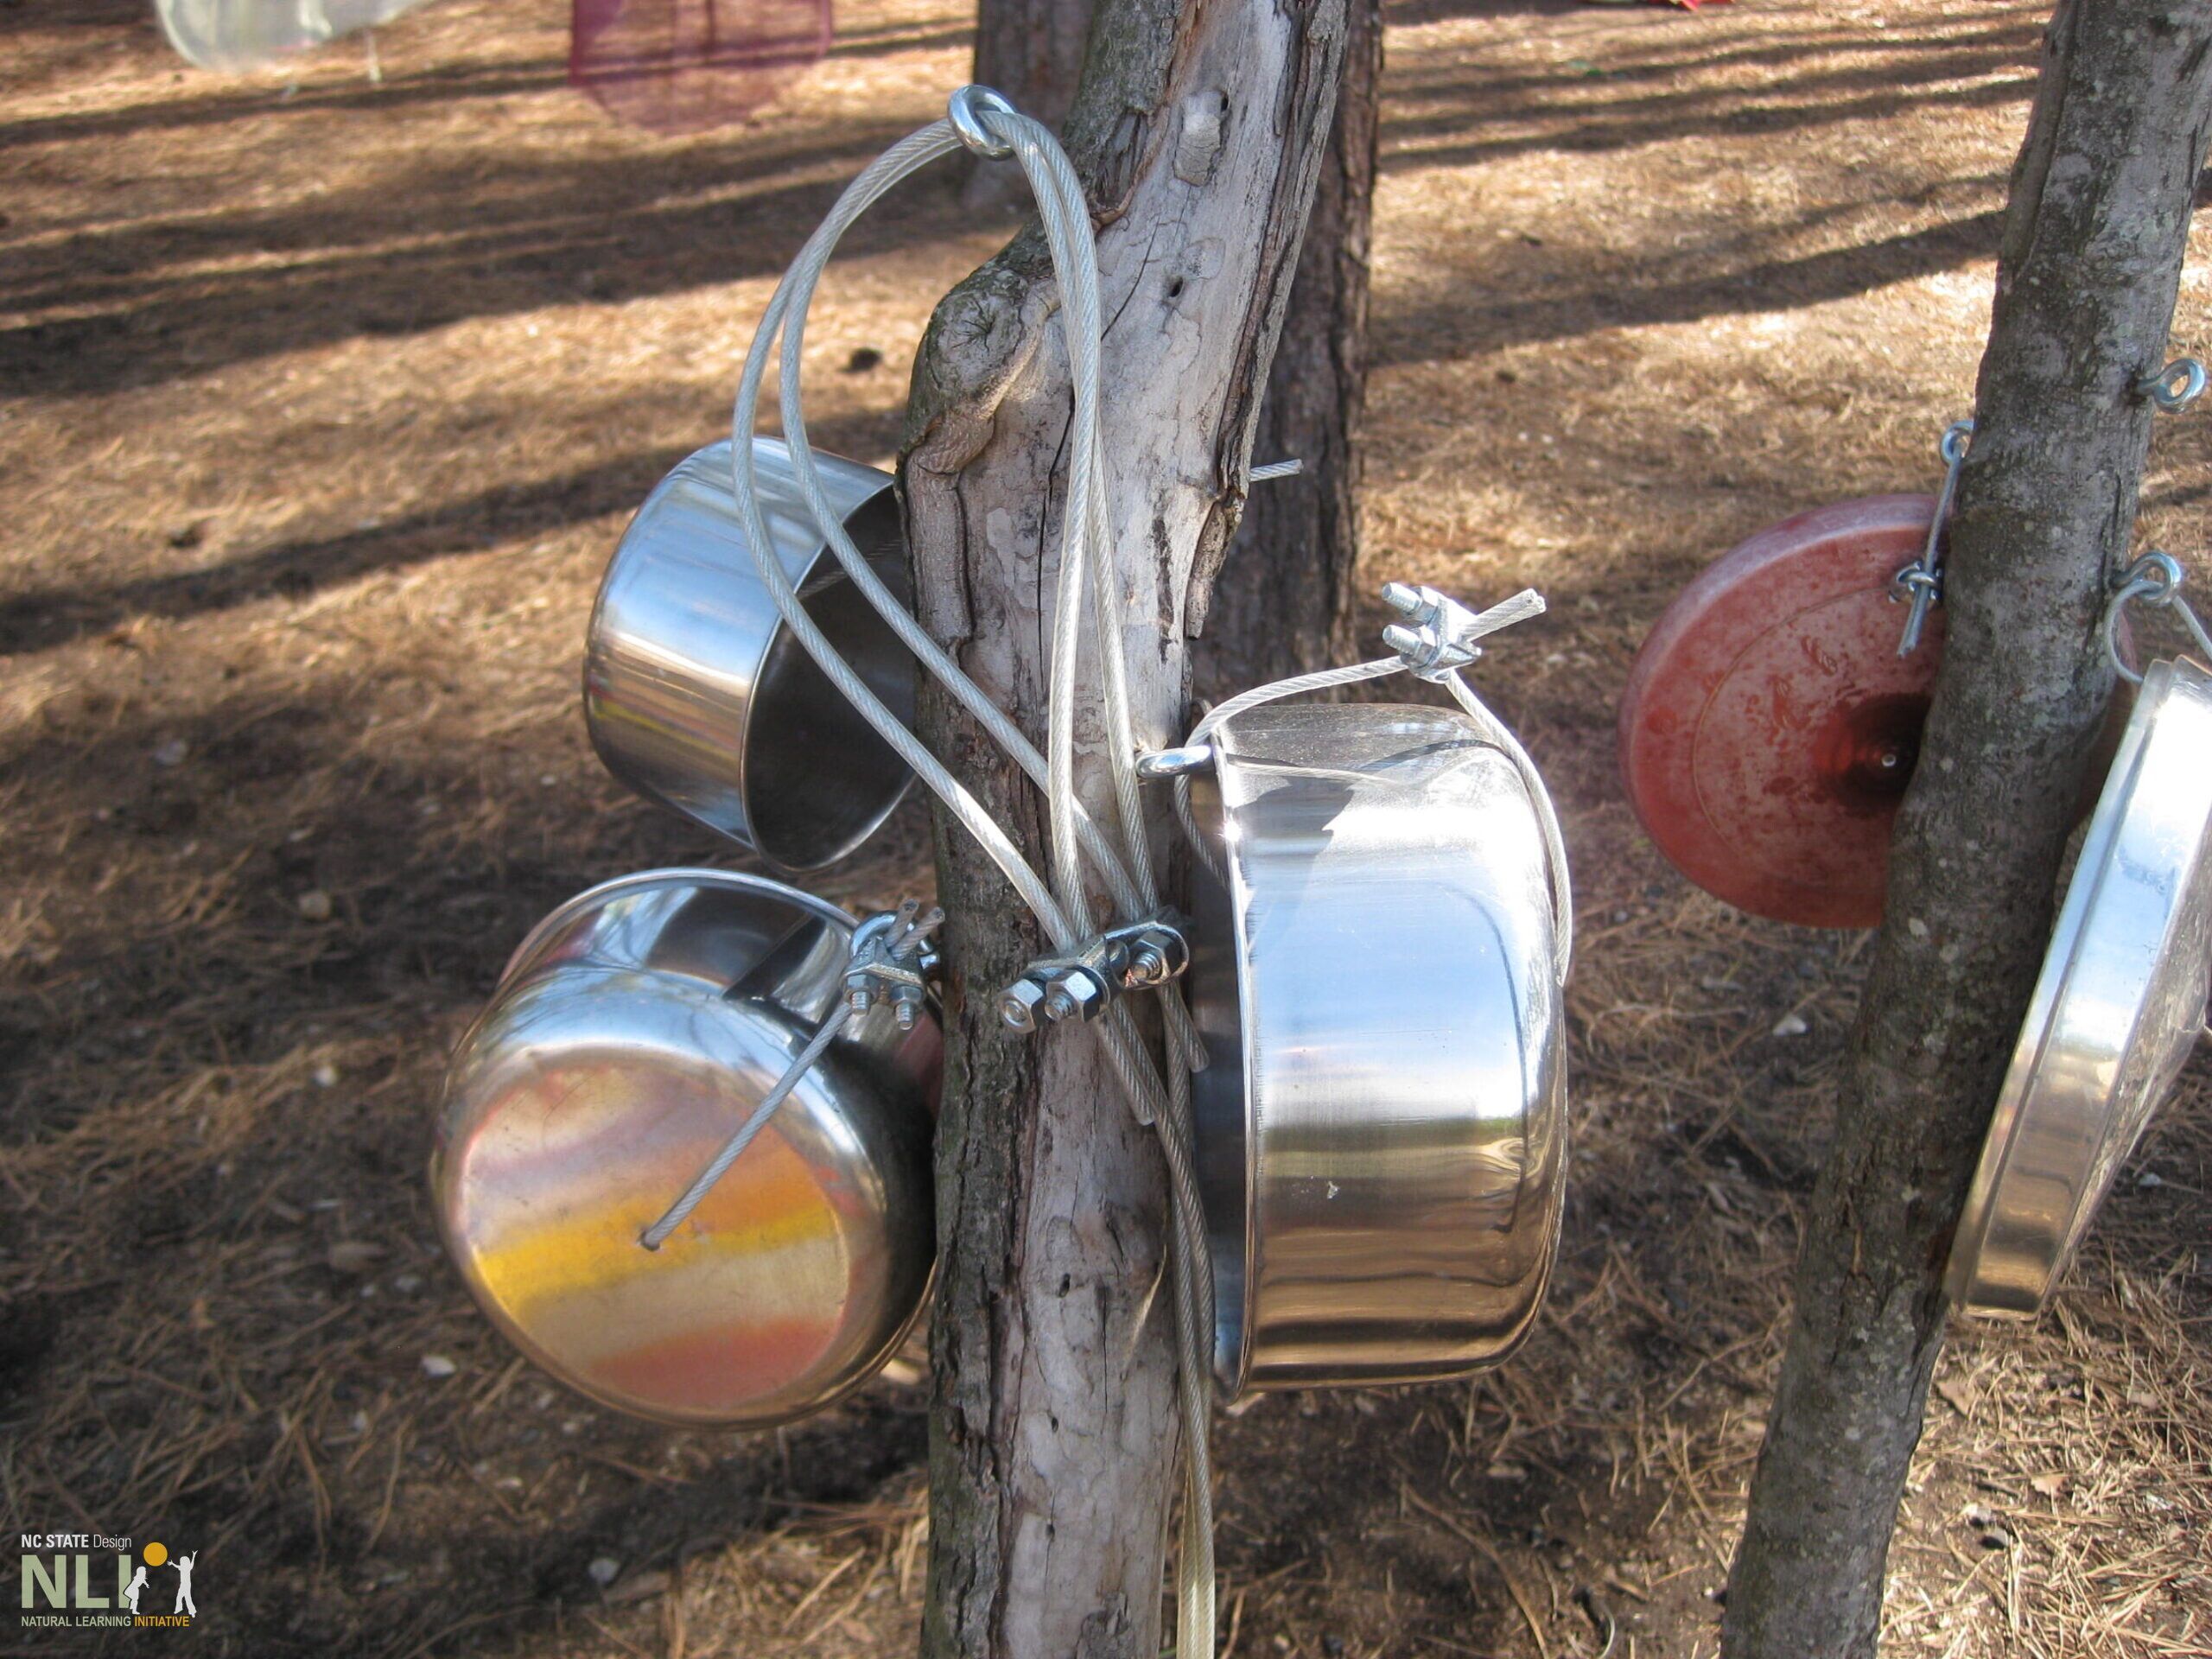
    Secure sound-making instruments with outdoor quality zip-ties, cords, cables (Figure 2), screws, and brackets. Make sure that once attached, each object still makes a clear sound when played and does not clang against adjacent items. Physical separators may be needed. Keep in mind that instruments will be banged and tugged by children—for their safety, regularly inspect the acoustic play setting for loose or broken parts.

    SECURING STRIKERS

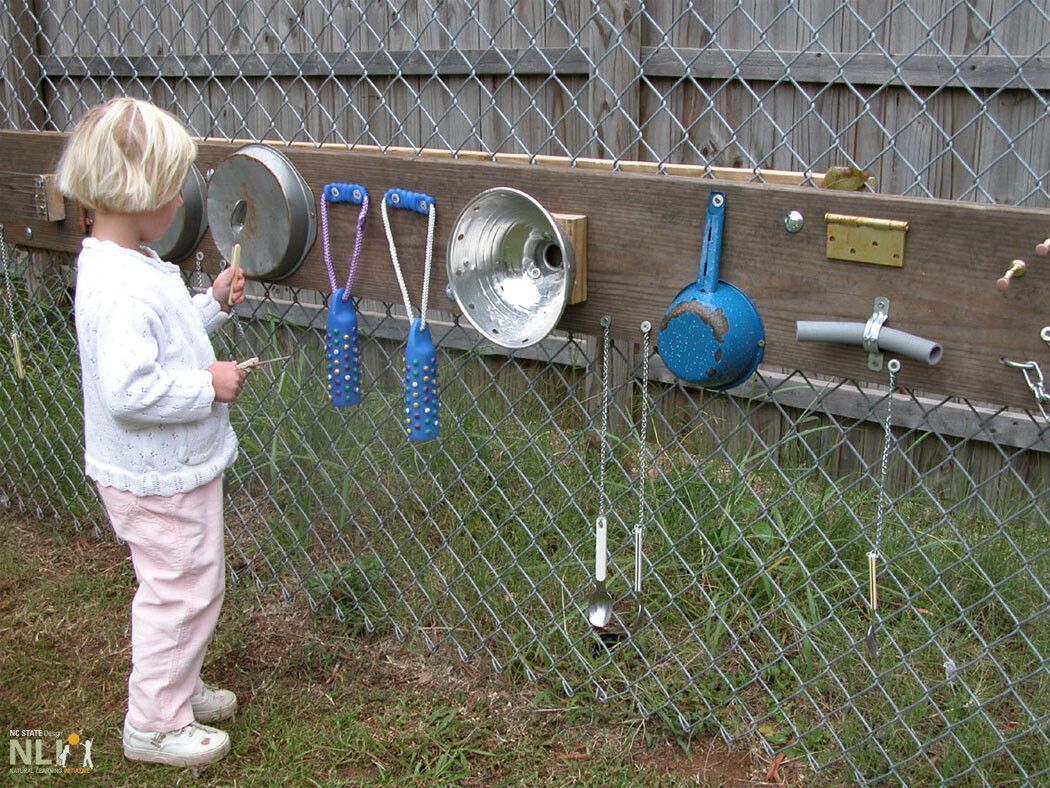
    Strikers are crucial for acoustic play. Found and recycled items such as prepared hardwood sticks, spoons, and spatulas work well for making a variety of sounds. Consider how strikers will be stored or accessed by children to encourage independent play, but also recognize possible “migration” around the play and learning space. Buckets for storing strikers near the acoustic play setting give children ready access but require time to collect misplaced strikers at the end of the day. Best practice is to tether strikers using light gauge chain and a clasp, eye hook, or screw (Figure 3). This method will work best with “hard” strikers that have existing holes in their handles, such as ladles or serving spoons.

    PROVIDING SHADE

    Providing shade to protect children and instruments from rain and sun is critical. Consider placing acoustic play settings in the shade of existing trees. Otherwise, use alternative shade structures such as pergolas, shade sails, or umbrellas.

    CONSIDERING MANUFACTURED INSTRUMENTS

    For centers focused on music and movement beyond informal play, well-designed outdoor instruments have become commercially available in recent years, installable as stand-alone, inclusive, covered music settings (see links below). As this is a more expensive option, carefully evaluate musical quality, sturdiness of construction, striker design and tethering, maintenance requirements, and diversity of instruments available. Check online reviews. Consider percussion instruments tuned to the five-note pentatonic scale. This is the most inclusive option as prior skill is unnecessary for making pleasant, improvised music. If local talent can help, create a Western version of the pentatonic Javanese”gamelan orchestra.” Hangdrums may also inspire appropriate equivalents for young children.

    Materials & Tools

    • Pots, pans, and lids
    • Chimes and bells
    • Bottles filled with dry beans
    • Sticks, spoons, and spatulas to use as drumsticks
    • PVC pipes cut to different lengths
    • Industrial zip ties, screws, mounts, or brackets
    • Outdoor musical instruments
    • Fence, pallet, or wooden structure
    acoustic play items attached to a wooden pallet

    1. Acoustic play items attached to a wooden pallet with zip ties

    child engaging in music play, instruments suspended on cable

    2. Acoustic play using household items suspended from cable

    child engaging in music play attached to a fence

    3. Using re-purposed spoons as acoustic play strikers

    different pots attached to a music wall

    4. Acoustic pans and bells mounted on a shed

    pots attached to tree

    5. Pots attached to a post with eye hooks

    music wall

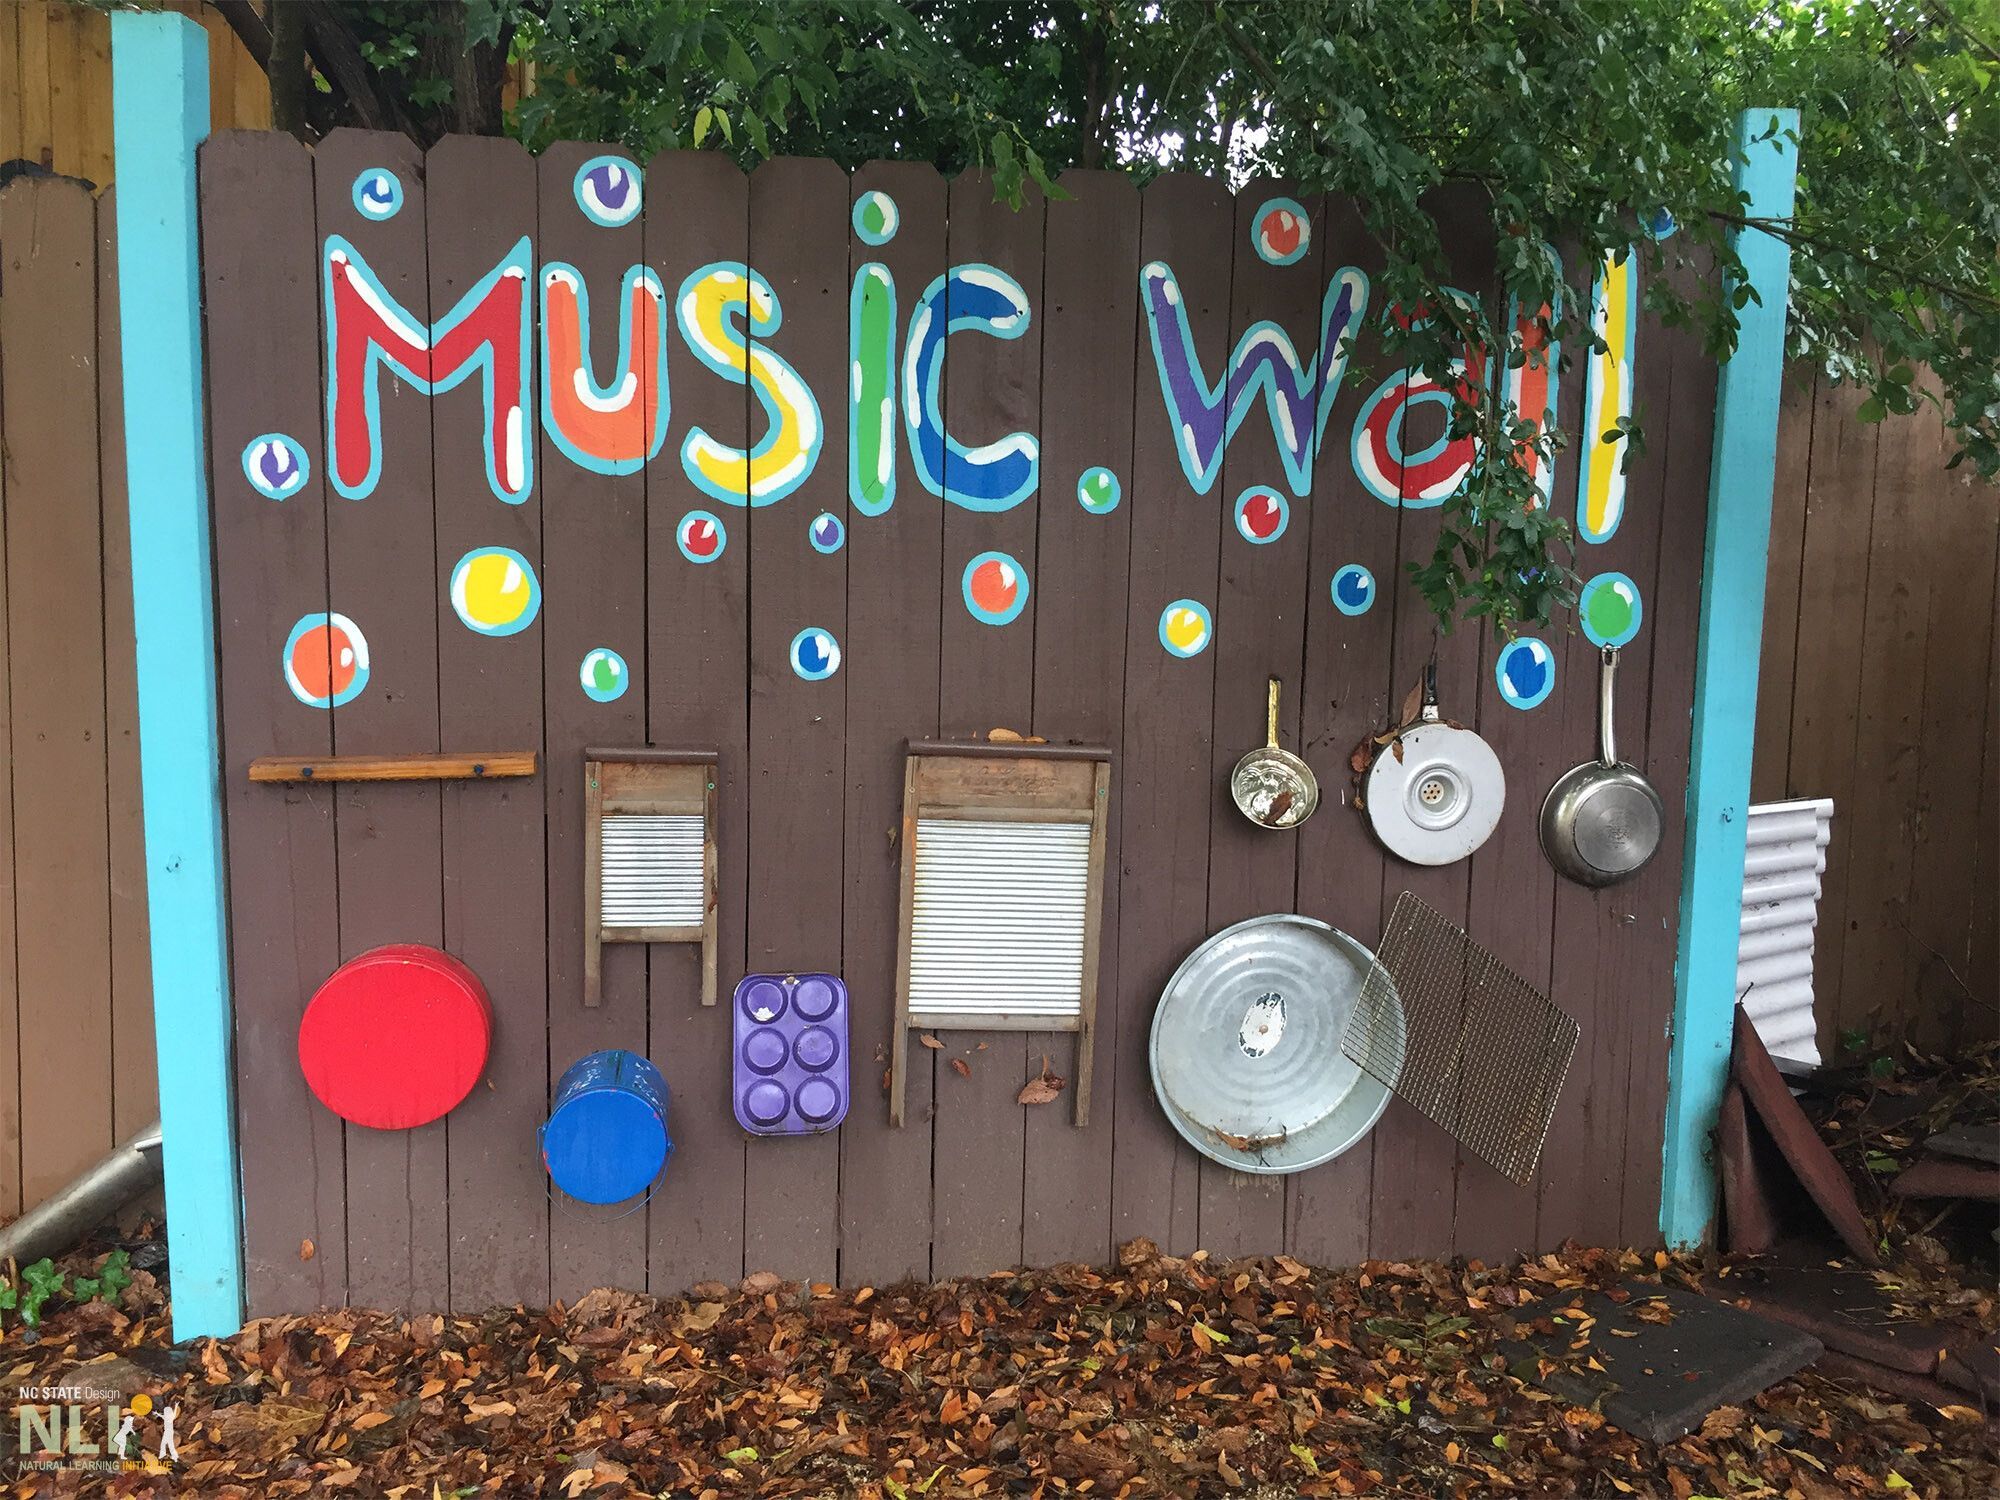
    6. A music wall made by mounting different noise-makers to a fence

    Resources

    1. Percussion Play: www.percussionplay.com
    2. Freenotes Harmony Park: www.freenotesharmonypark.com
    3. Bobby McFerrin – from Notes and Neurons, The Pentatonic Scale: www.youtube.com/watch?v=ne6tB2KiZuk
    4. Space City Gamelan: www.youtube.com/watch?v=ioeVkPBvU2E
    5. Steel drums: www.youtube.com/watch?v=KrxQEQC0MaU
    6. Hangdrums: www.youtube.com/watch?v=xk3BvNLeNgw
  • 18. Making Newspaper Seedling Pots

    Infosheets

    18. Making Newspaper Seedling Pots

    Download the PDF – English

    STEPS

    1. Fold newspaper strips.
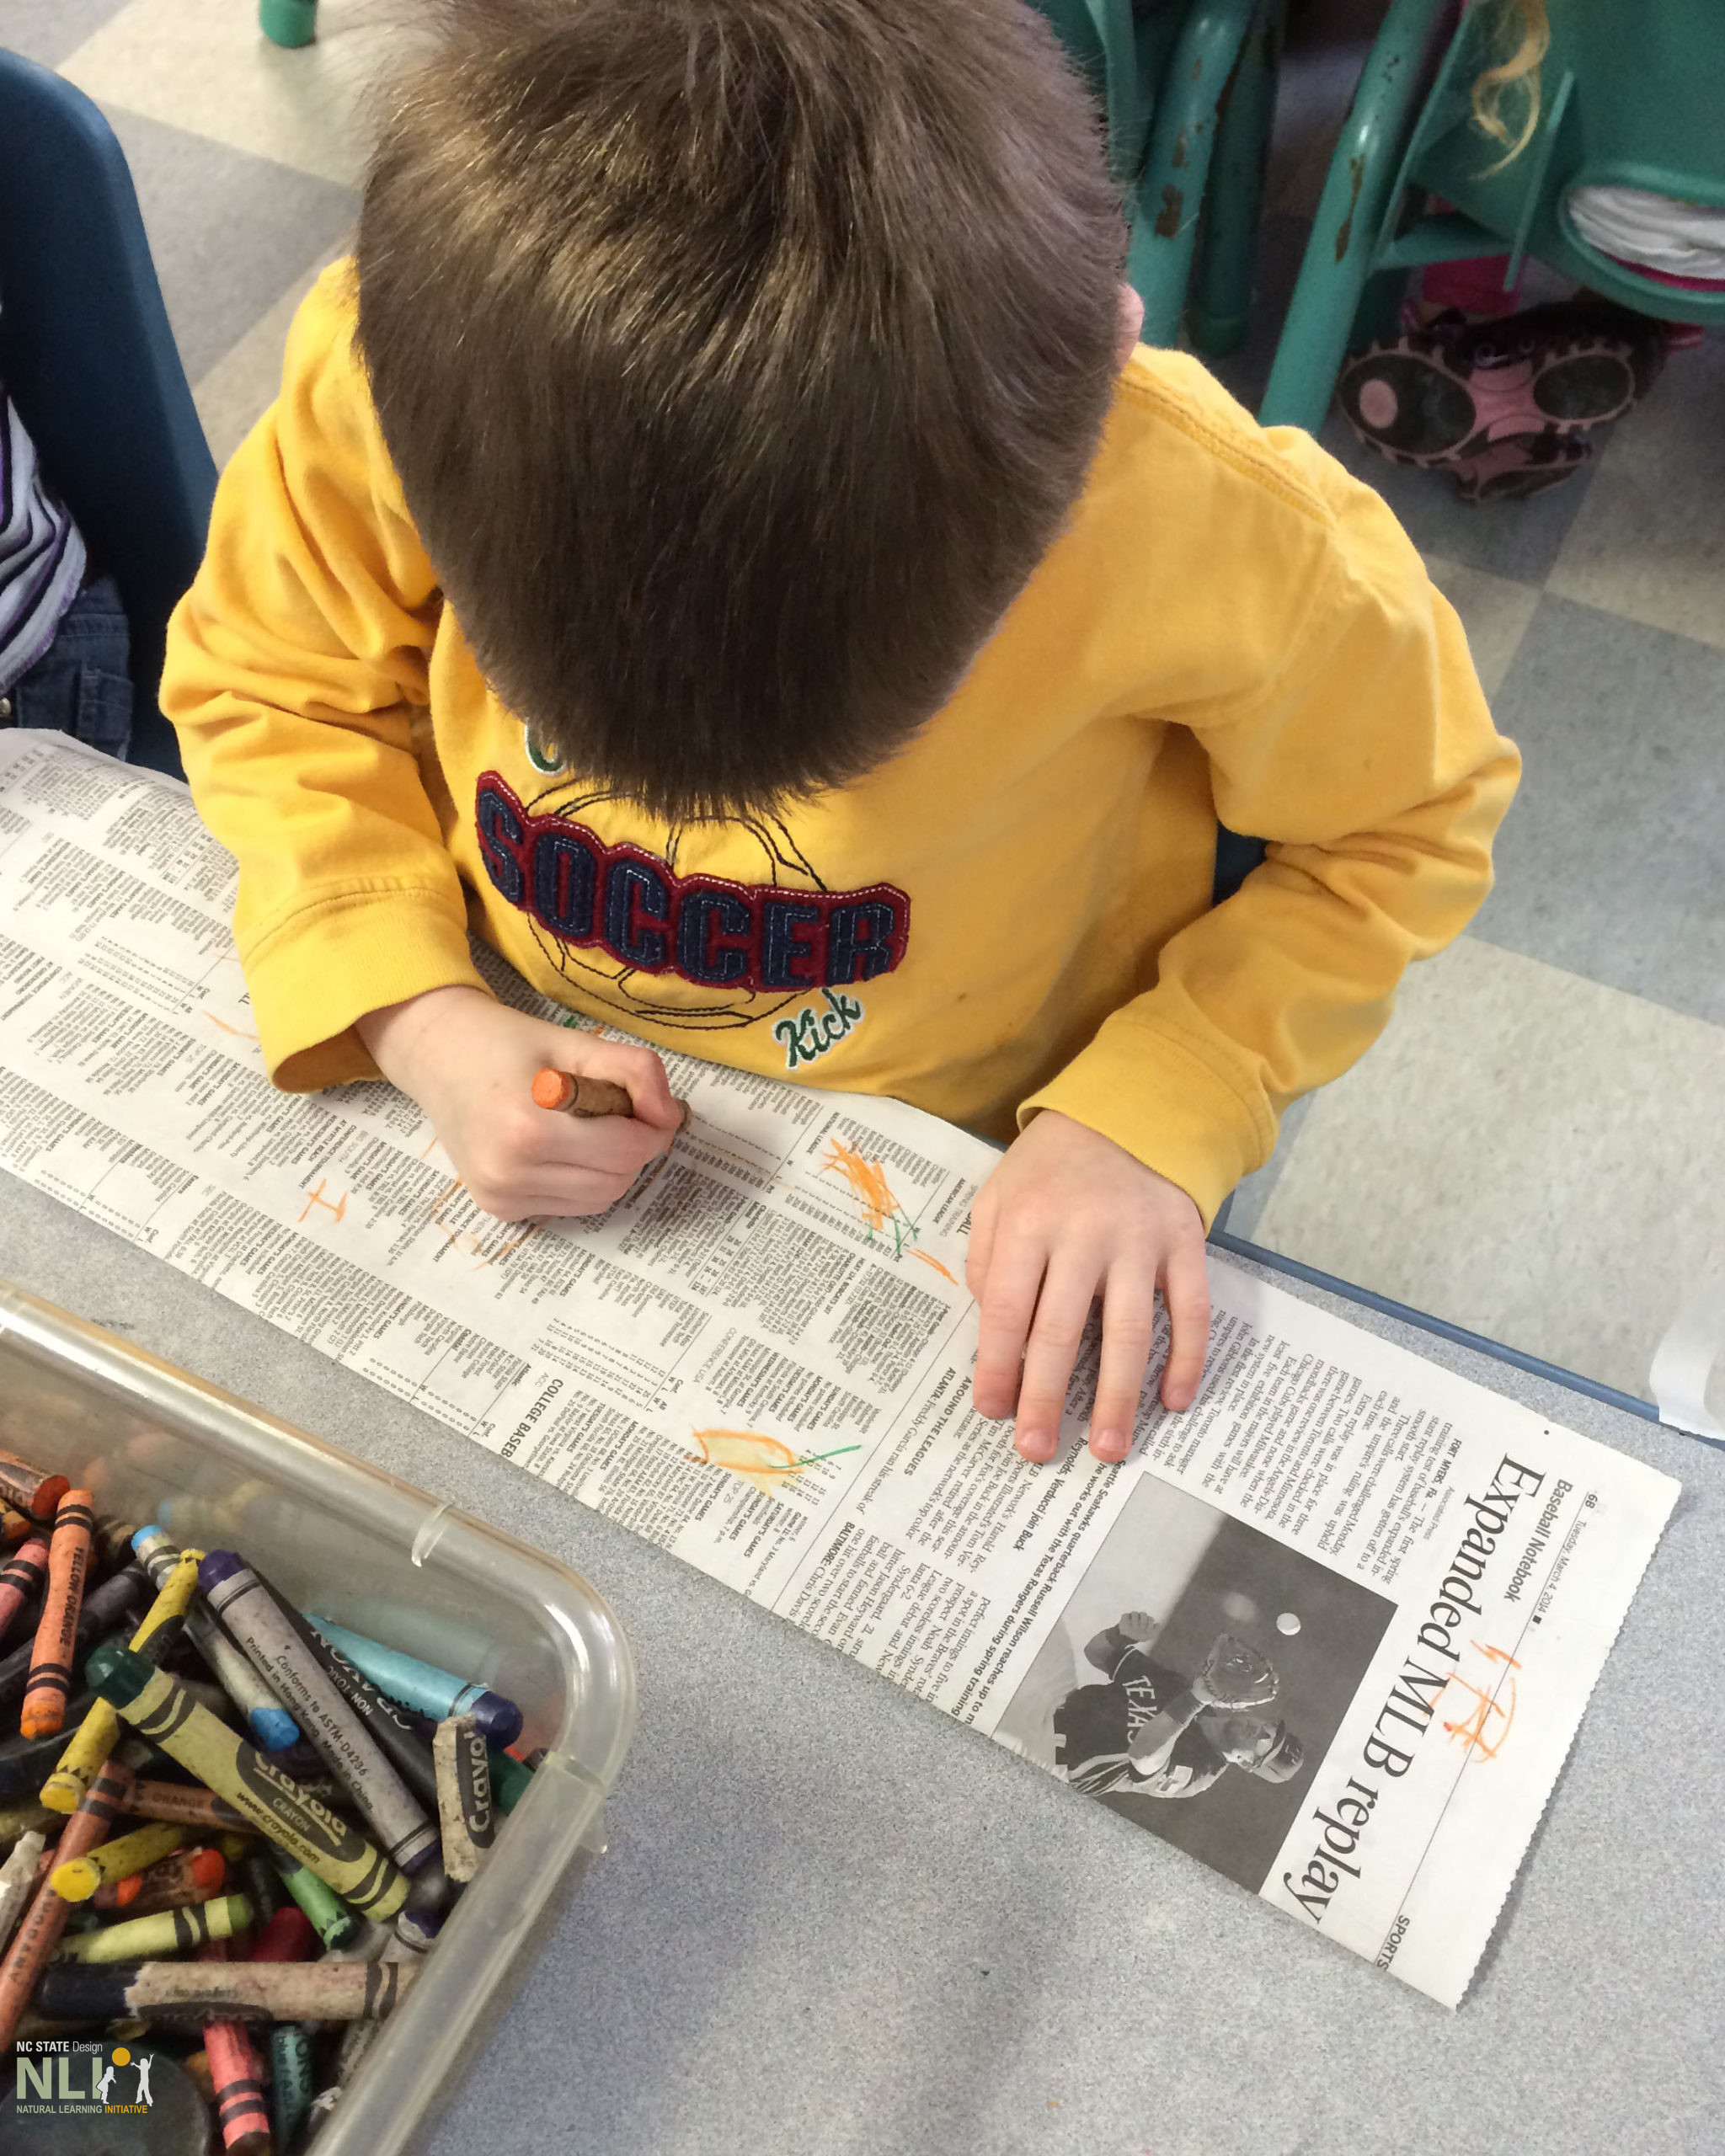
    2. Choose a recycled newspaper page that has more text than images, if possible. Newspaper pages with black and white ink are preferred over colored ink. Begin by folding the paper lengthwise until you have a strip around 7 inches wide.

    3. Decorate.

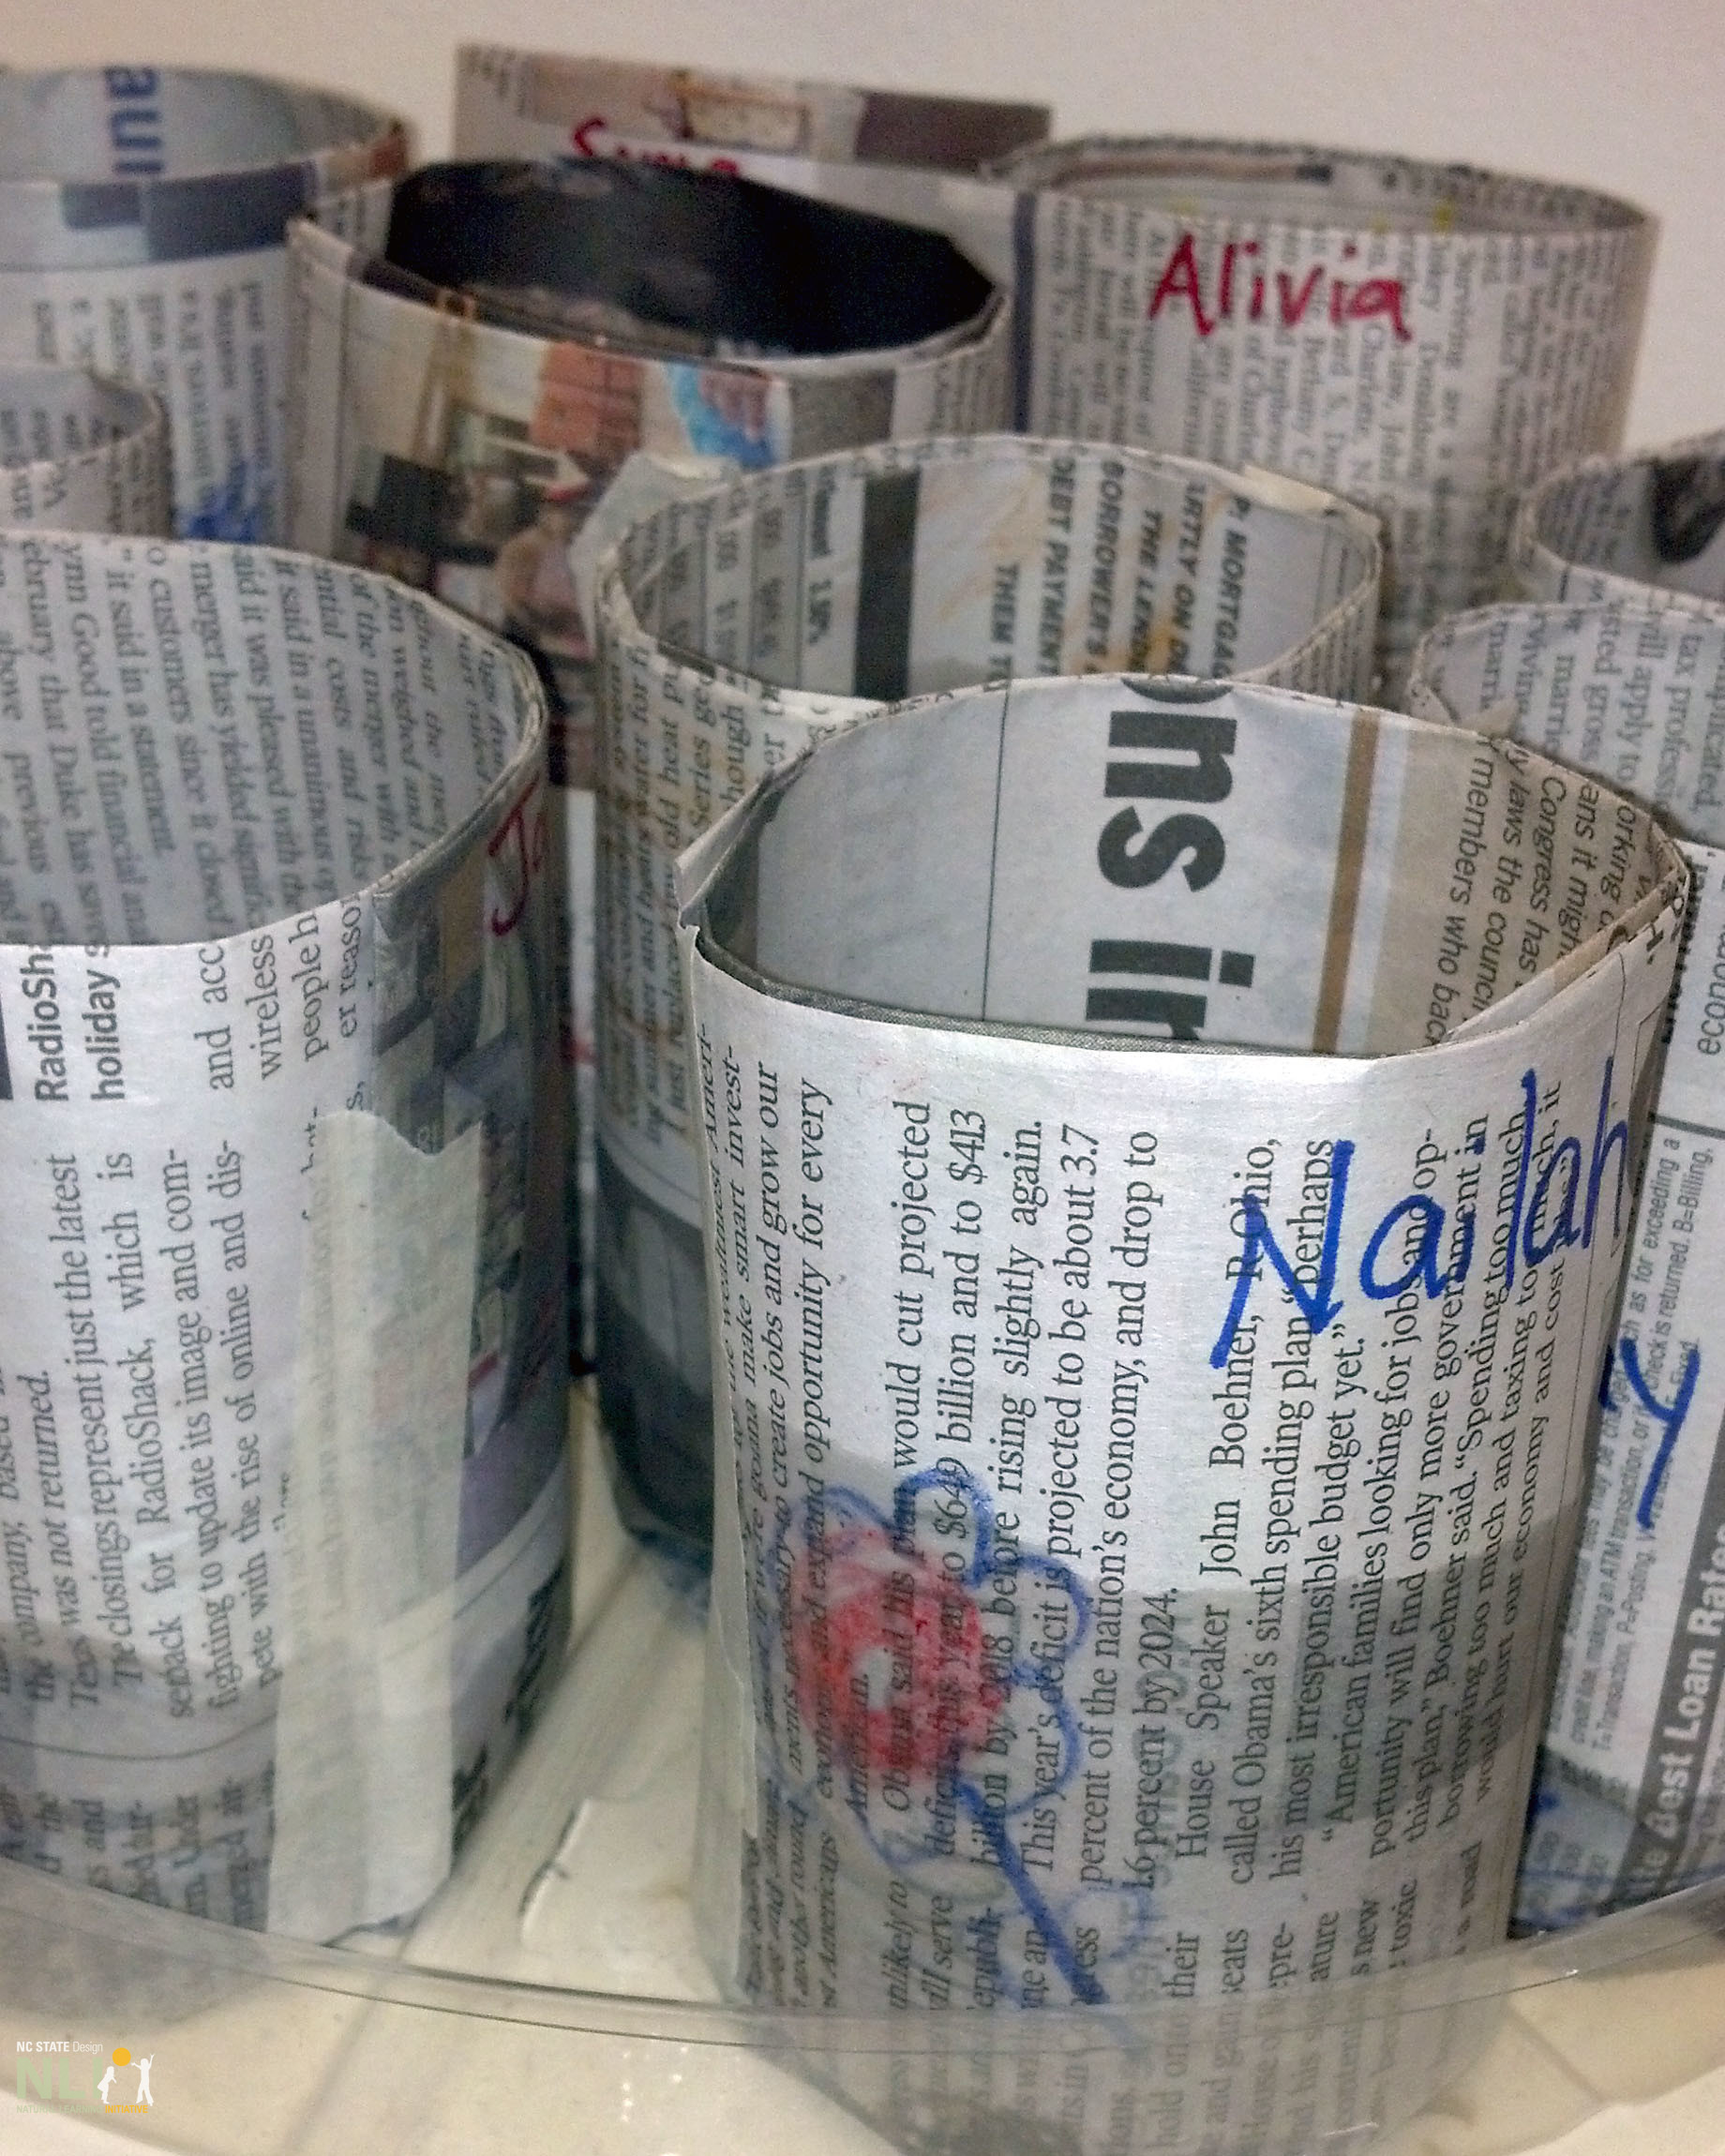
      Using crayons and markers, encourage children to decorate their pots. Ensure that when newspaper is rolled on the can, the decorations are visible (Figure 2).

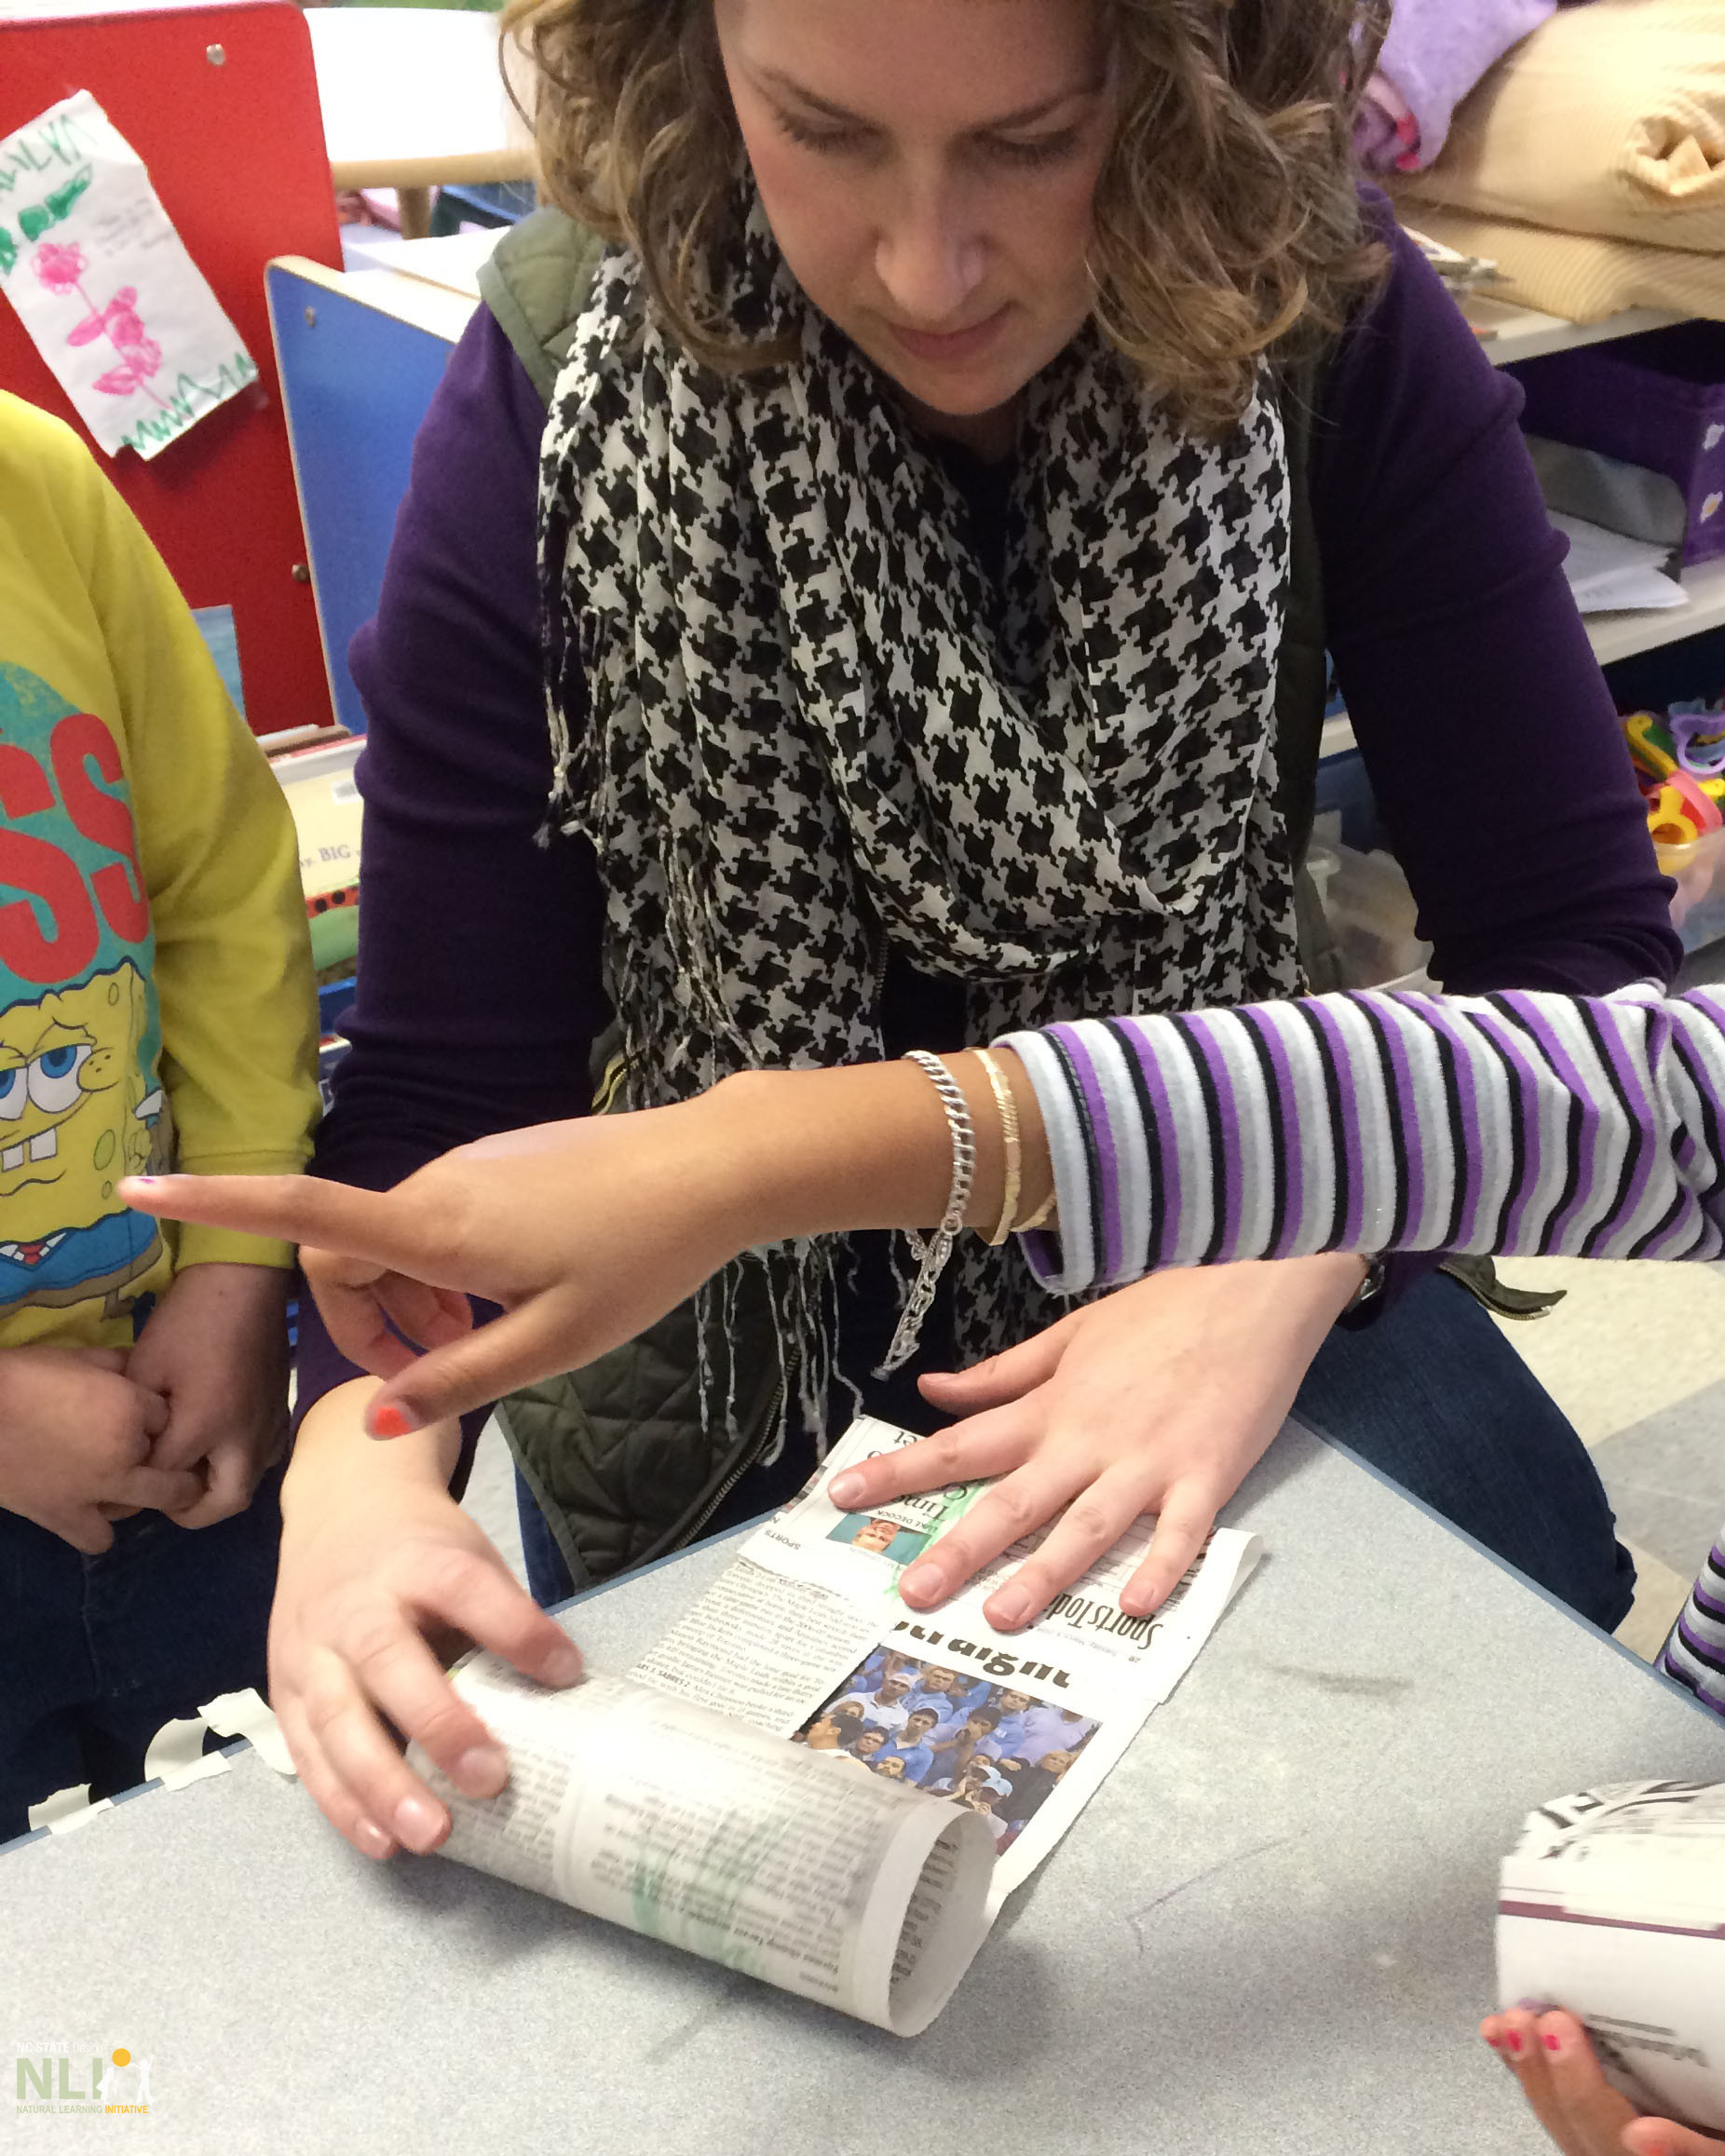
    4. Roll the strips.
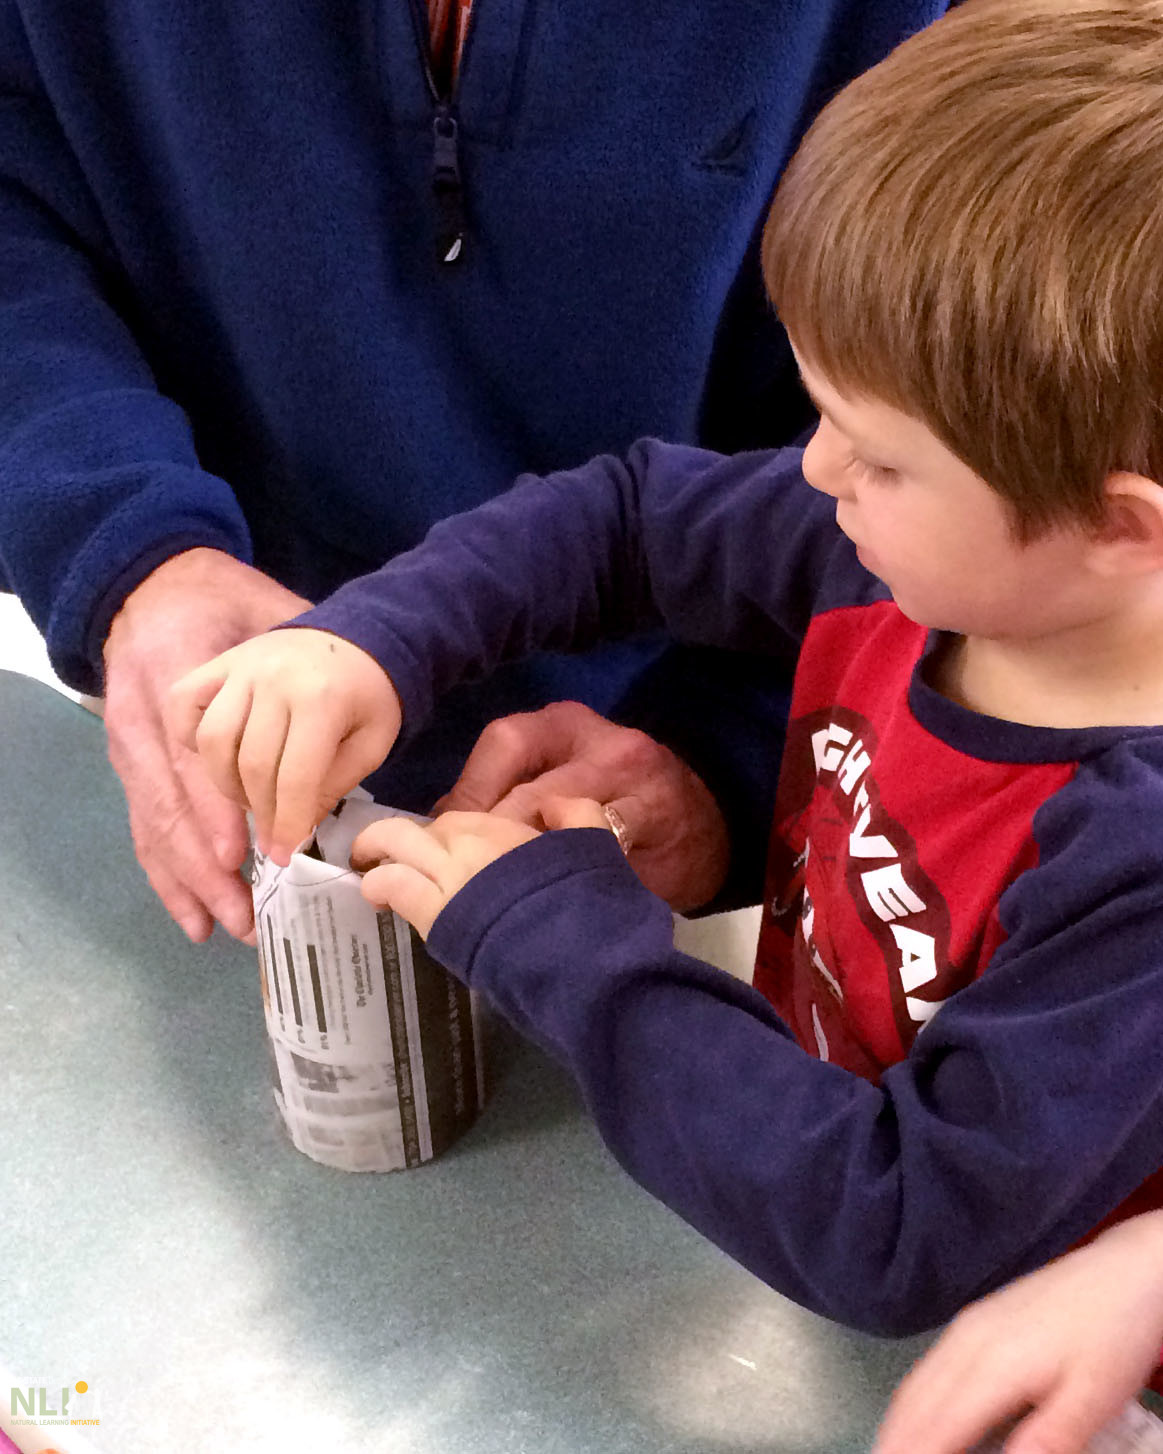
    5. Using the metal can, lay the newspaper lengthwise and roll the newspaper strip around the can, leaving 3 inches off the base. This paper margin will create the base of the pot in the next step (Figure 3).

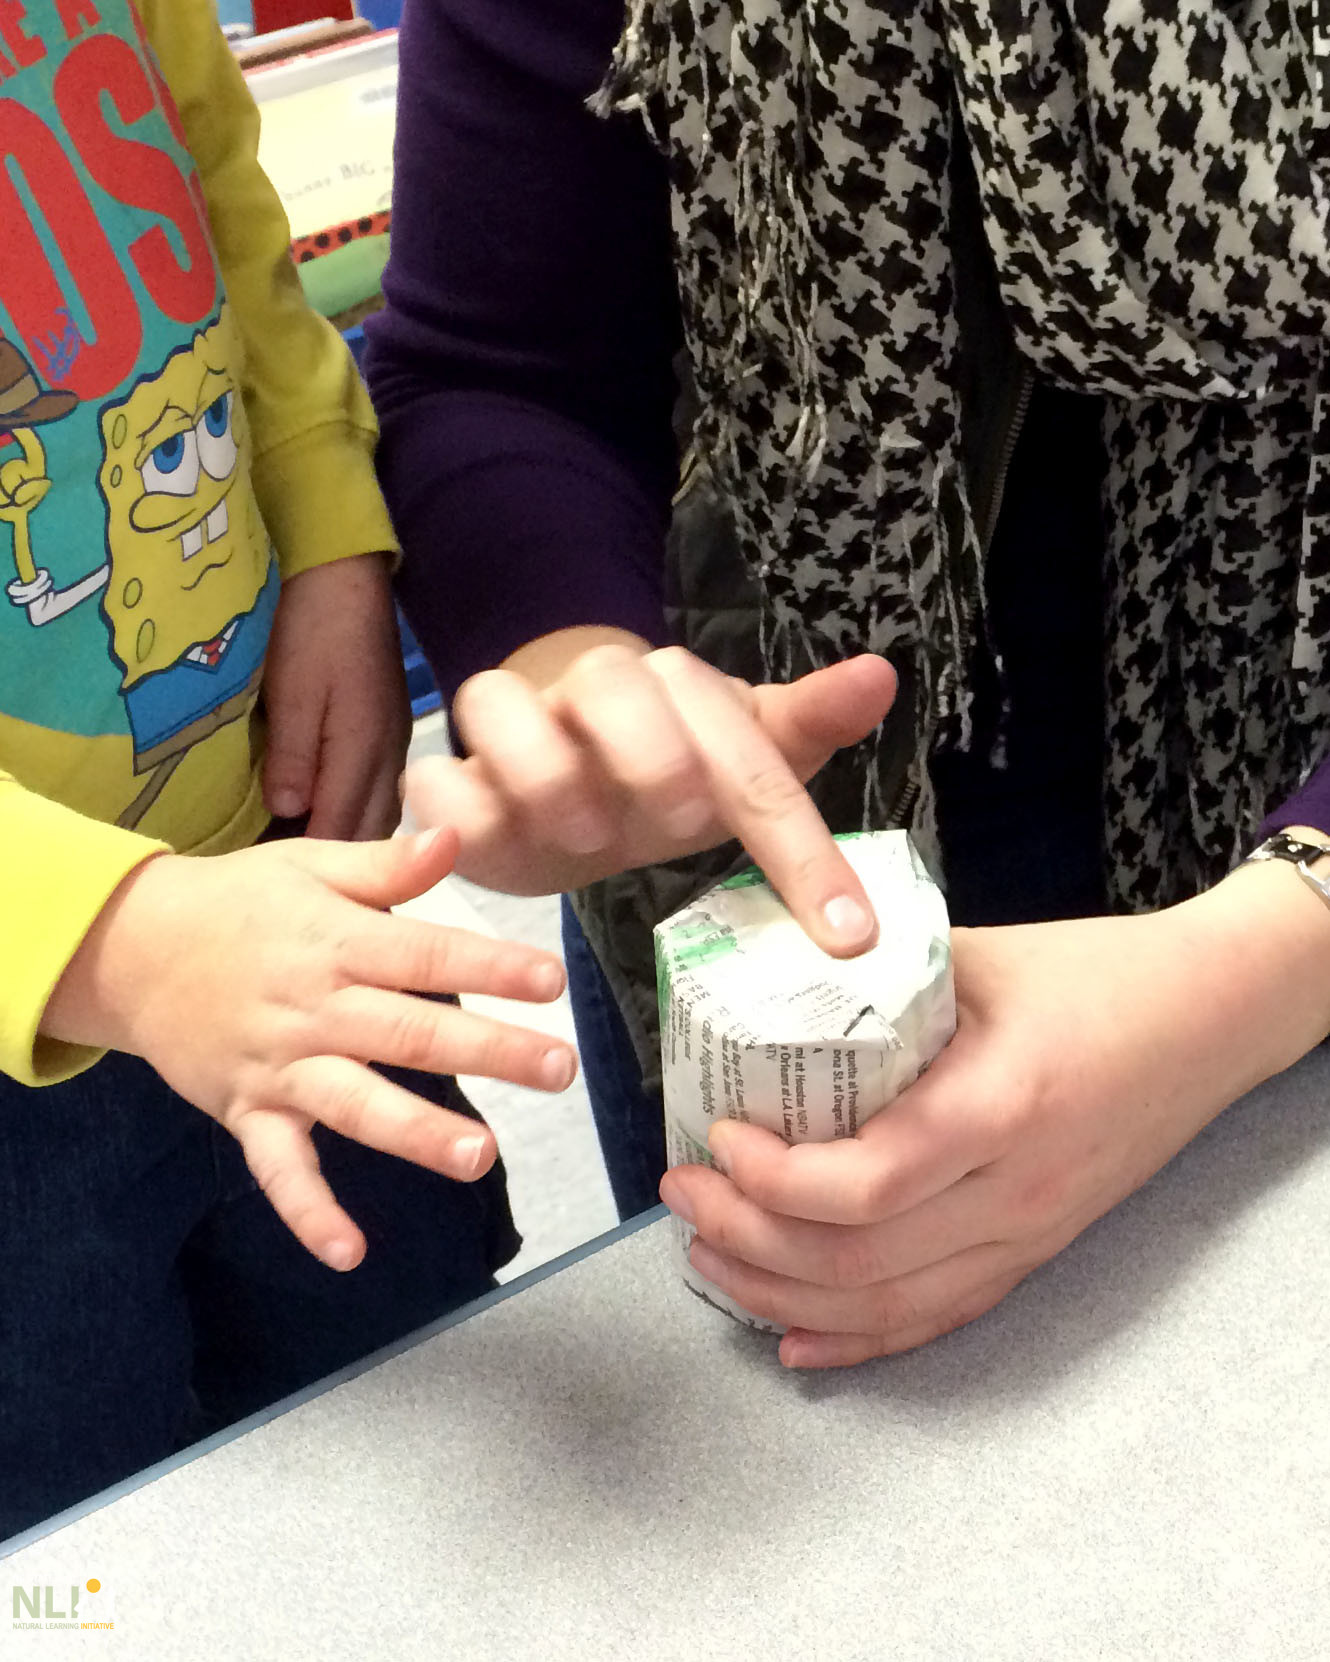
    6. Fold the base and remove the can.

      Using the 3-inch margin of paper, fold the excess paper towards the bottom of the can, moving around the base until the can base is covered. Use masking tape to secure the paper to itself, making a base for the newspaper pot (Figure 4). After the base has been folded and secured, separate the newspaper pot from the can by gently sliding it off.

    7. Fold the top rim.
    8. Sit the pot on its base. Around the top rim, fold the paper down and inwards 1 inch, creating a firm edge for the newspaper pot (Figure 5).

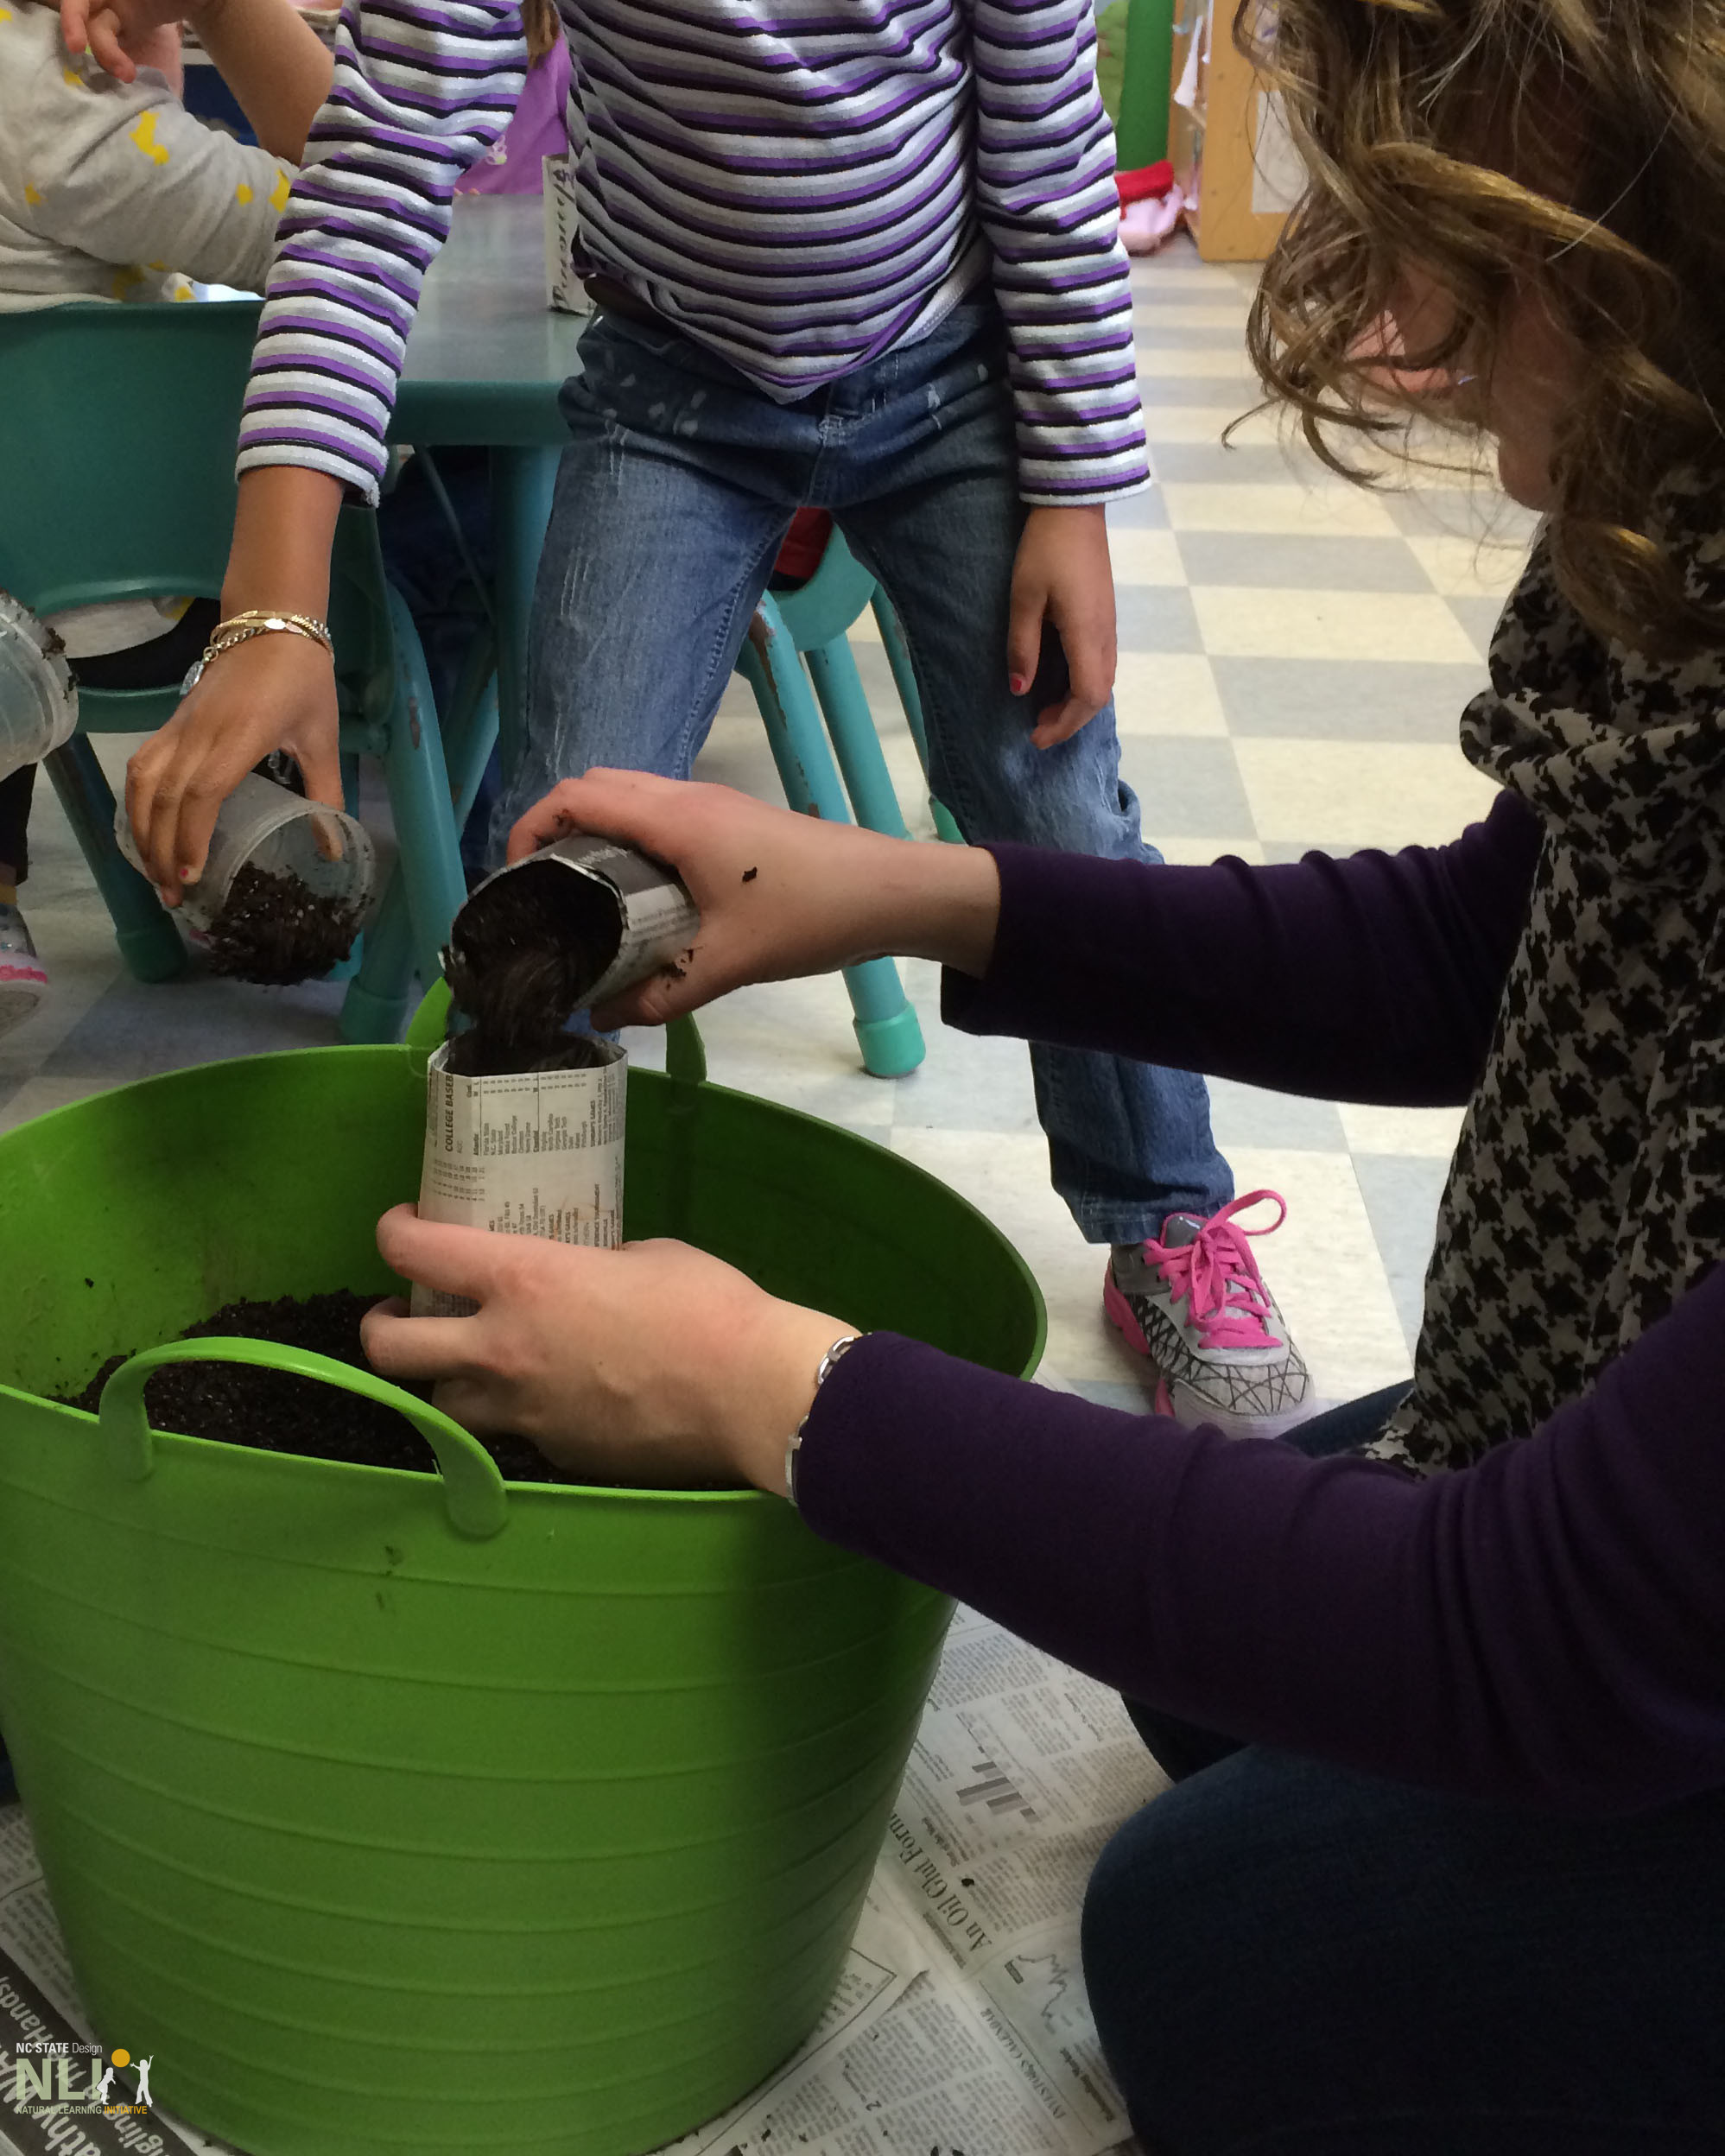
    9. Add potting mix.

      to the newspaper pot, leaving 2 inches of space at the top (Figure 6).

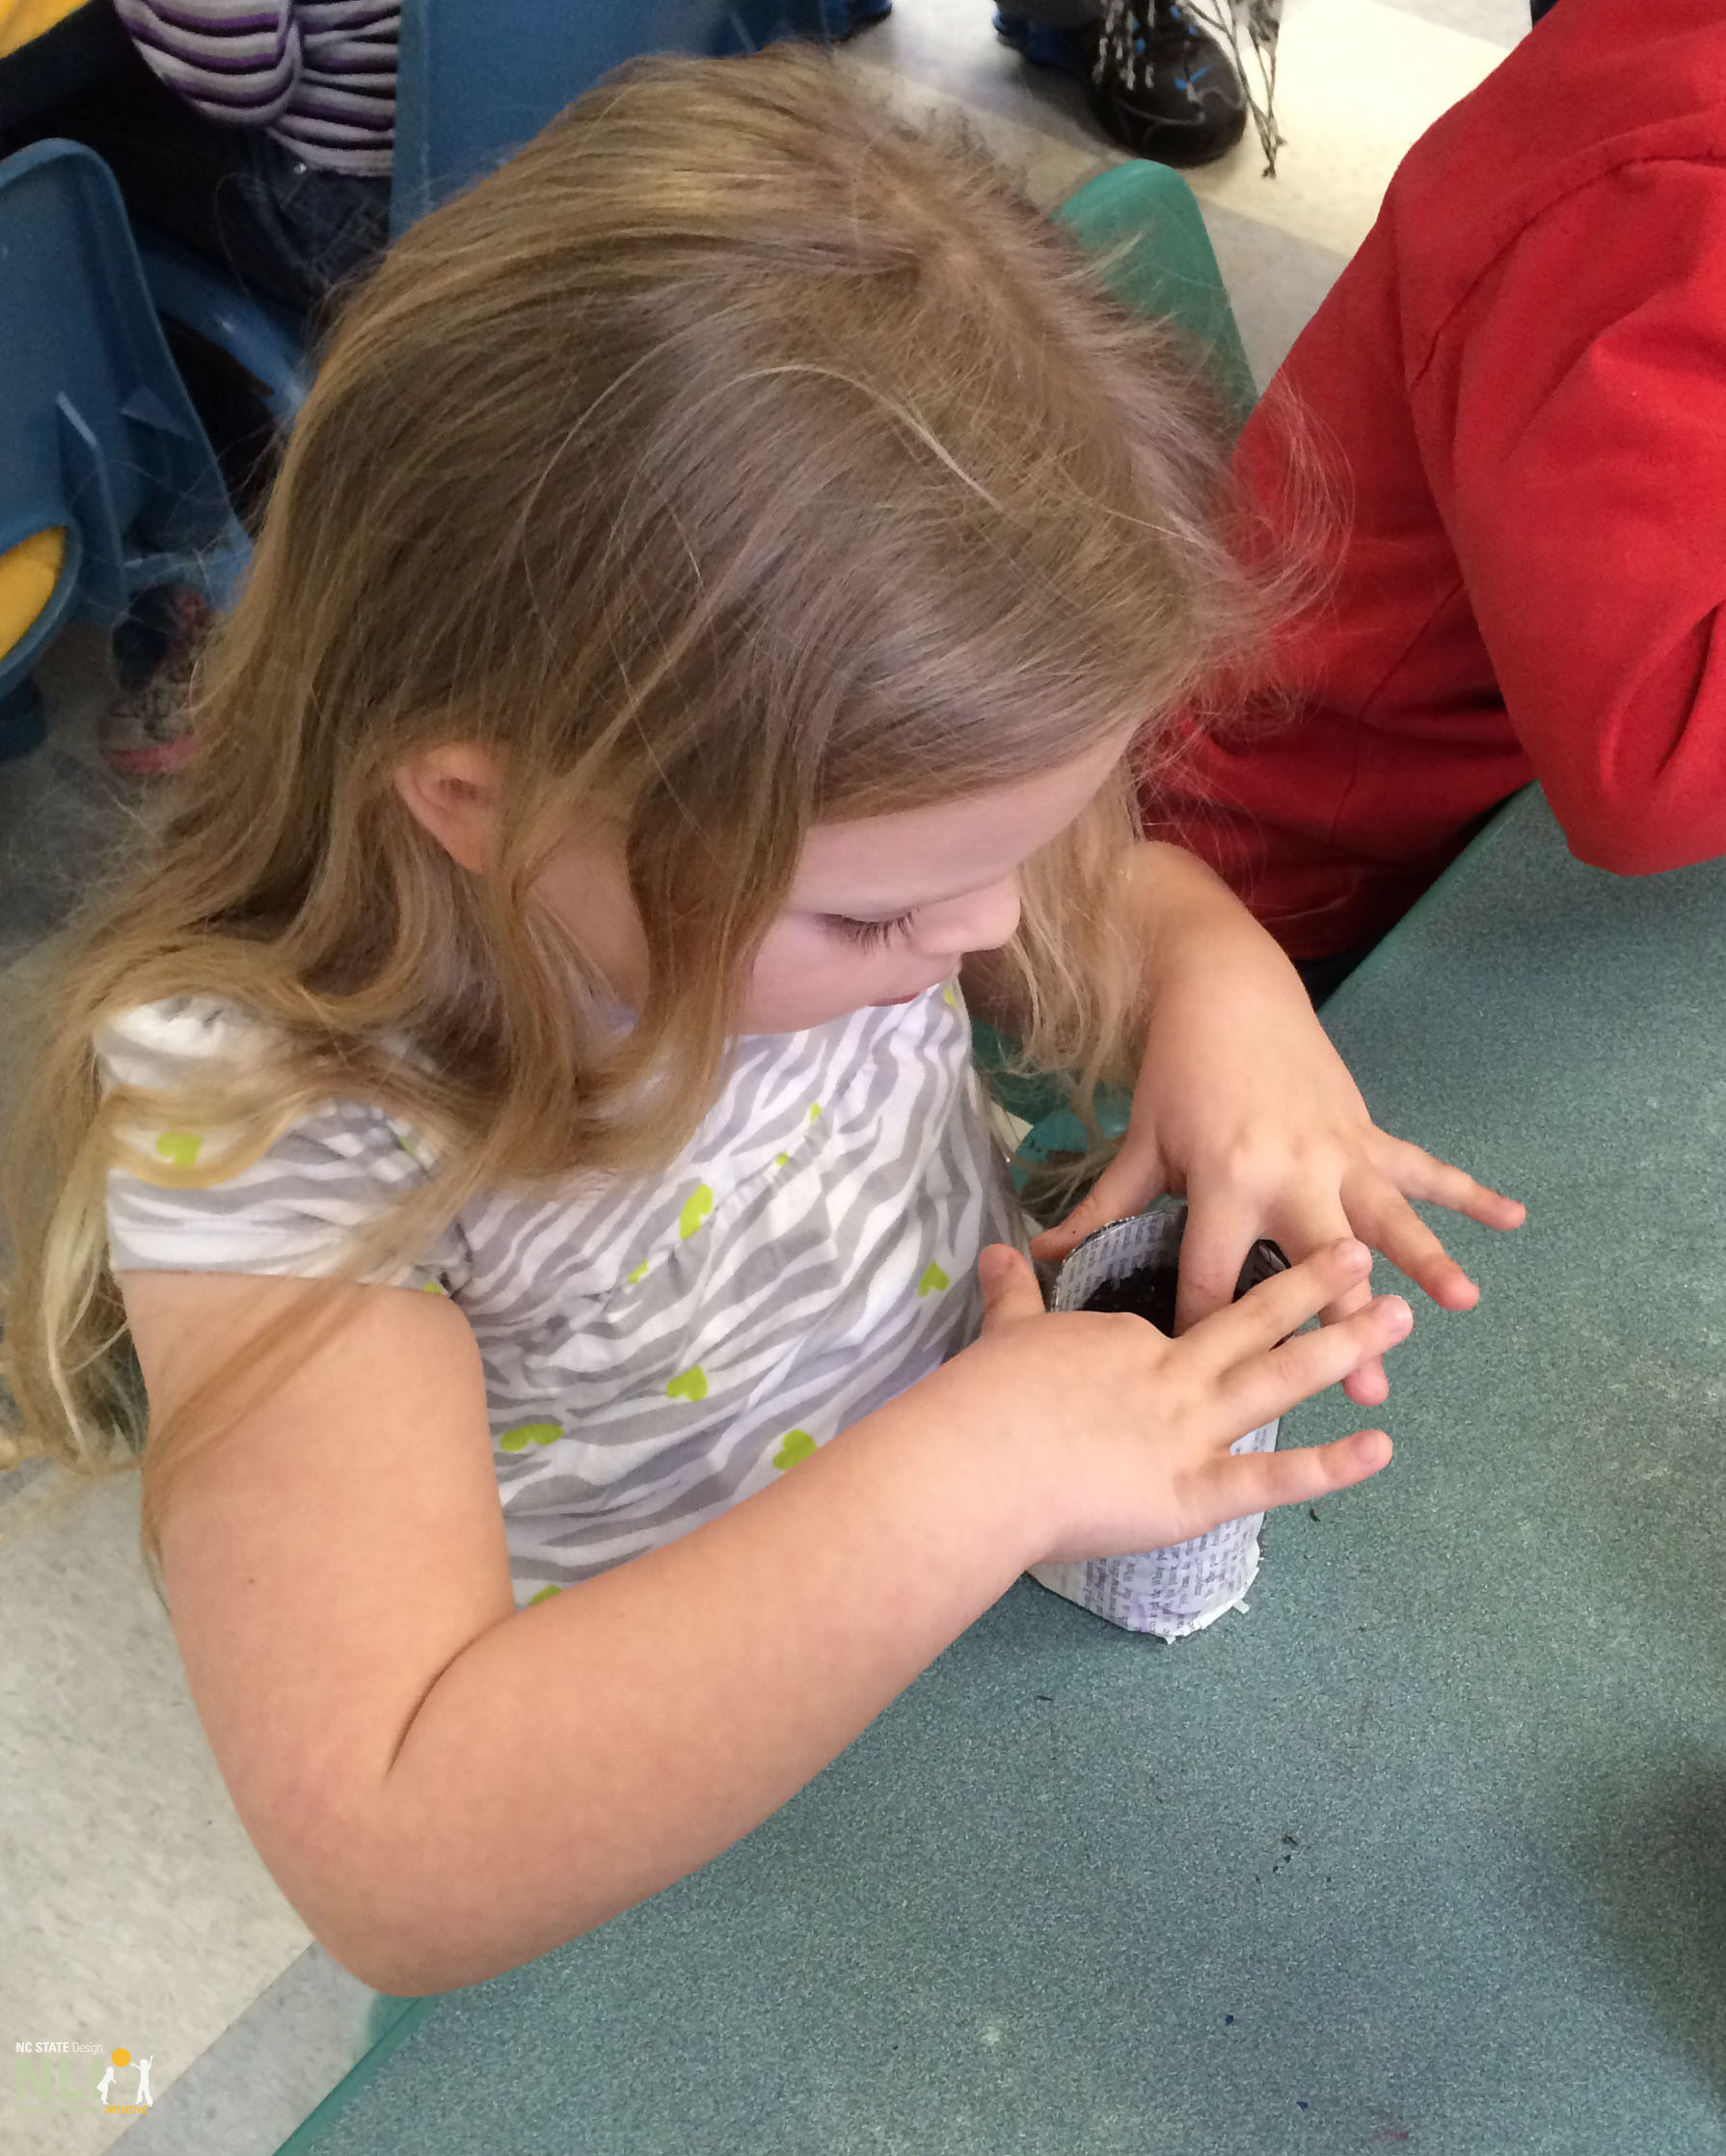
    10. Plant seeds.
    11. Read seed packaging for planting instructions, paying particular attention planting depth. Be mindful of watering and light requirements, which may vary between different plant types (Figure 7).

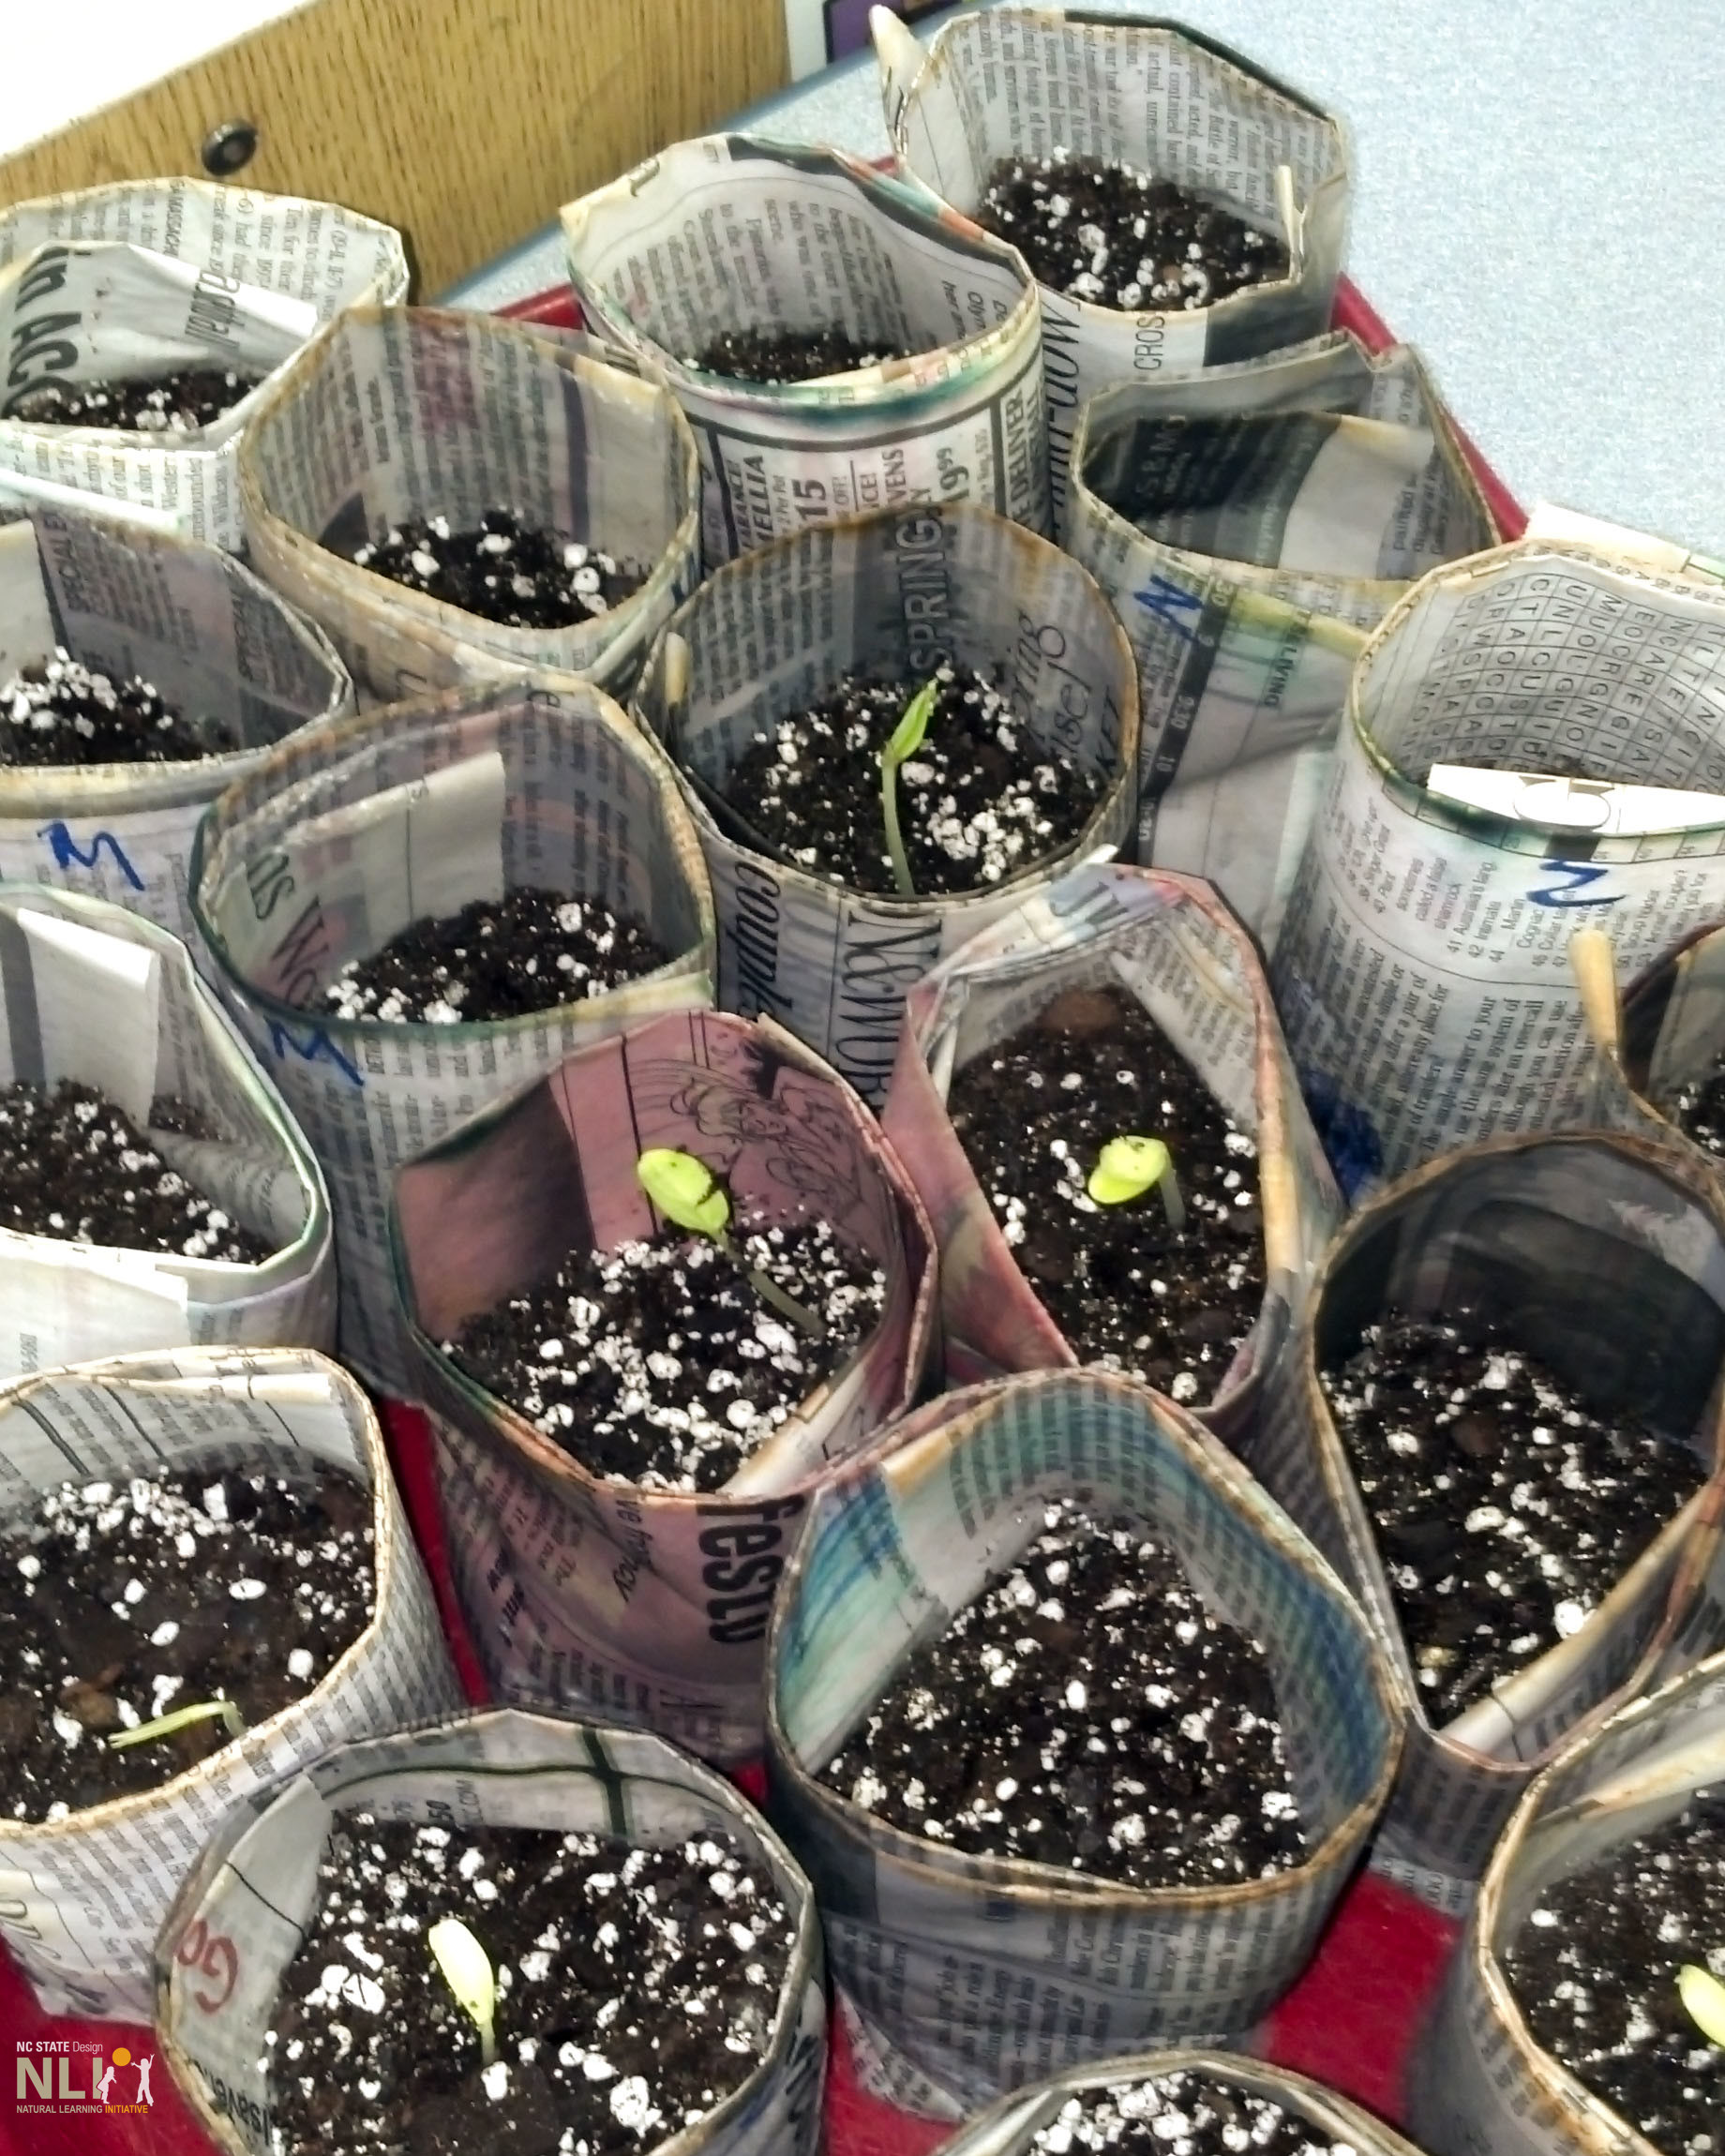
    12. Place pots in a sunny location

      in a waterproof tray and watch the seedlings grow! Check each day to ensure the potting mix stays moist (Figure 8).
       
      Keep a record of how long it takes seedlings to sprout. When ready, transplant pots to a raised bed, container (see InfoSheet: Growing Edibles in Containers), or directly in the ground. Masking tape is not bio-degradable, so be sure to remove it before transplanting seedlings.

    Materials & Tools

    • Recycled newspaper
    • 10-15oz. metal can (Soup can recommended)
    • Potting mix
    • Masking tape
    • Waterproof tray
    • Seeds
    • Popsicle sticks for labeling
    • Markers or crayons
    children's created pots

    1. Completed pots in trays

    child drawing on newspaper

    2. Decorating newspaper

    adult helping children roll newspaper strips

    3. Rolling newspaper strips

    adult helping child fold the bottom of the newspaper pot

    4. Folding pot bottom and removing the can

    adult aiding child in folding the rim of the newspaper pot

    5. Folding pot rim

    teacher adding soil to newspaper pot

    6. Adding potting soil to the newspaper pots

    child planting seed in newspaper pot

    7. Planting seeds in a pot

    seedlings growing in newspaper pots

    8. Watching seedlings grow!

  • 20. Indoor Plants for Homes and Classrooms

    Infosheets

    20. Indoor Plants for Homes and Classrooms

    Download the PDF – English

    Indoor plants provide numerous benefits to both classroom and home environments, including a reduction in stress levels, improved concentration, and improved air quality. Children enjoy the opportunity to care for plants through watering, pruning, and propagation: pieces of classroom plants can be rooted and sent home with students to engage families. This InfoSheet outlines low maintenance indoor plants, light and water requirements, and known levels of toxicity.

    LIGHT CONDITIONS

    Indoor plants thrive in a variety of lighting conditions depending on their species. Some plants can tolerate a wide variety of lighting conditions, while others have very specific requirements. It it crucial to understand the lighting that a home or classroom has available and choose plants accordingly. Keep in mind that lighting will change with weather and the seasons.

    Direct sunlight. If the sun’s rays directly hit a plant through a window, that is considered direct sunlight. This is most common in south-facing windows.

    Indirect light. Indirect light occurs when the sun’s rays are reflected off of something else before hitting the plant. Plants often receive bright, indirect light by being close to windows — place a sheer curtain on windows that receive direct sunlight to prevent plants from getting their leaves burned.

    Low light. Low-light conditions indicate that no direct light will touch the plant. Low-light plants can be placed a few feet away from a light source or in a room with artificial light. Low-light doesn’t mean “no light,” but if a window is unavailable, ambient artificial lights such incandescent bulbs, fluorescent lights, or LED lights will suffice.

    WATERING REQUIREMENTS

    Well-draining, high-quality potting soil and proper drainage are crucial for correctly watering indoor plants. Containers for indoor plants should have holes on the bottom to allow water to drain: place a small dish, plate, or shallow container under containers to avoid leaks. Check specific water needs for each plant and keep in mind that over-watering is the most common cause of death for indoor plants. Do not water on a regular schedule: instead, stick your finger in the soil to check if it’s moist or dry. Water the soil rather than the plant to avoid mold and rot.

    Toxicity level

    Some common, low-maintenance indoor plants can be toxic if extensively handled or consumed, though symptoms are often mild. Children getting sick by consuming indoor plants is extremely rare, and more commonly occurs in pets. The benefits of connecting children to plants and nature while indoors far outweighs the risks. However, be mindful of where plants are located indoors and the age of children in areas with indoor plants: even mildly toxic plants should never be brought into an infant/toddler area. If a child consumes any part of an indoor plant, call poison control immediately.

    For full list of plants see PDF

    PROPAGATING PLANTS

    Propagation is a free and educational method of sharing and multiplying plants. Below is an overview of the most common propagation methods for houseplants. For further information on plant propagation, refer to the Resources section of this InfoSheet.

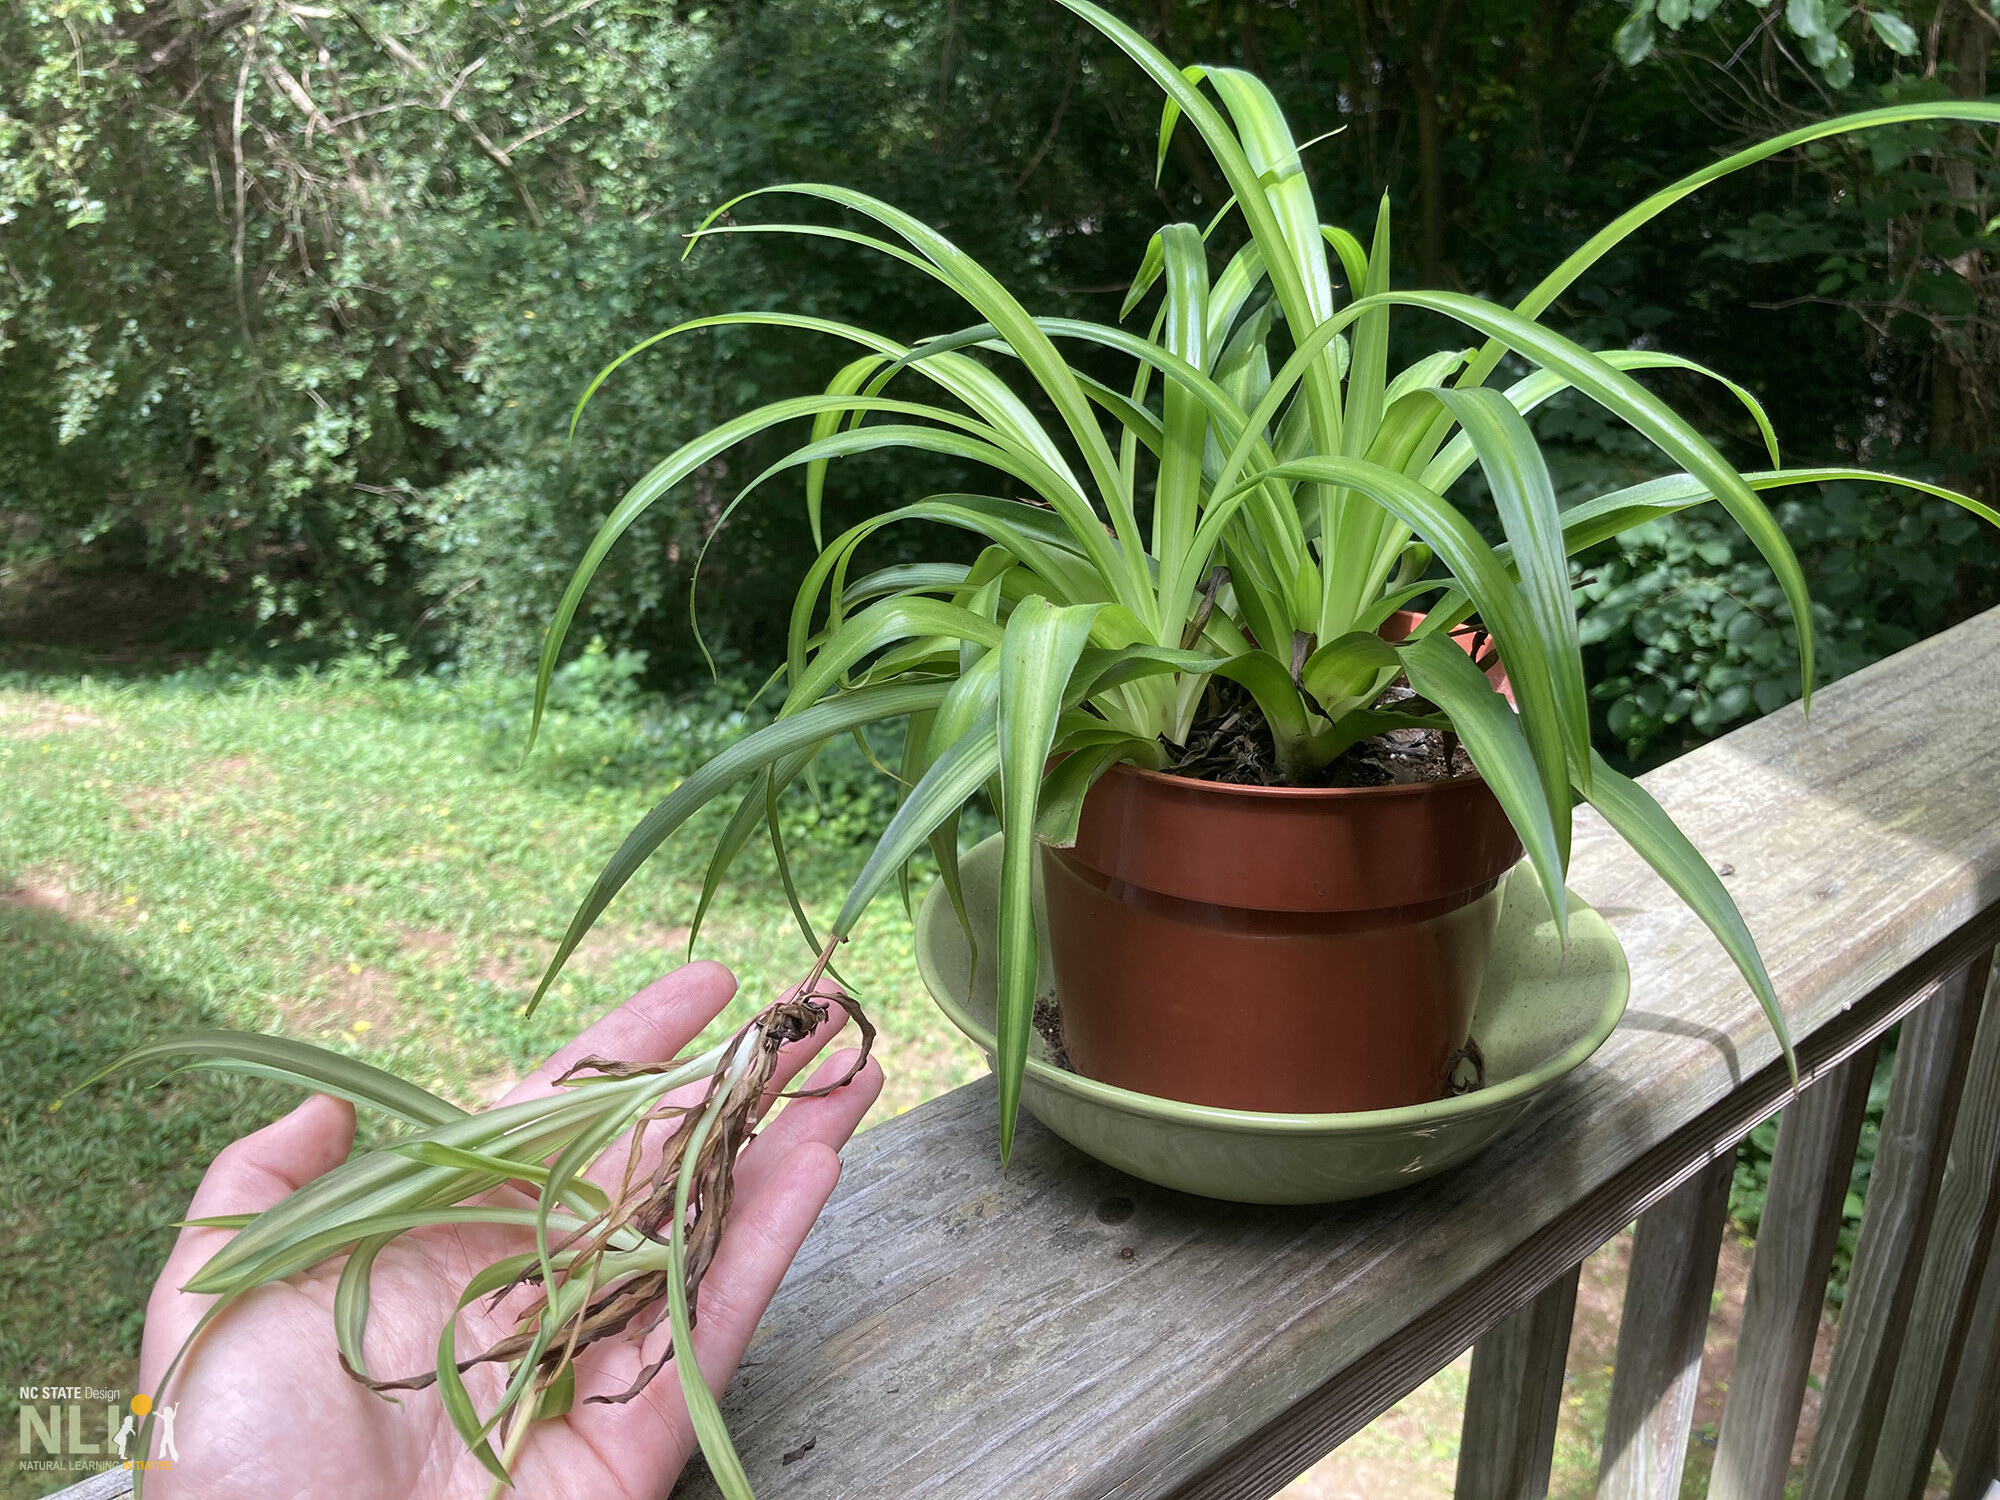
    Division. Division is a propagation method for multi-stemmed plants that produce stems at their base. Division also works for plants that have “offsets,” such as spider plants. To divide a plant, remove it from the container and separate it into smaller segments with a knife or your fingers. Ensure that each division has roots and re-pot the parent plant.

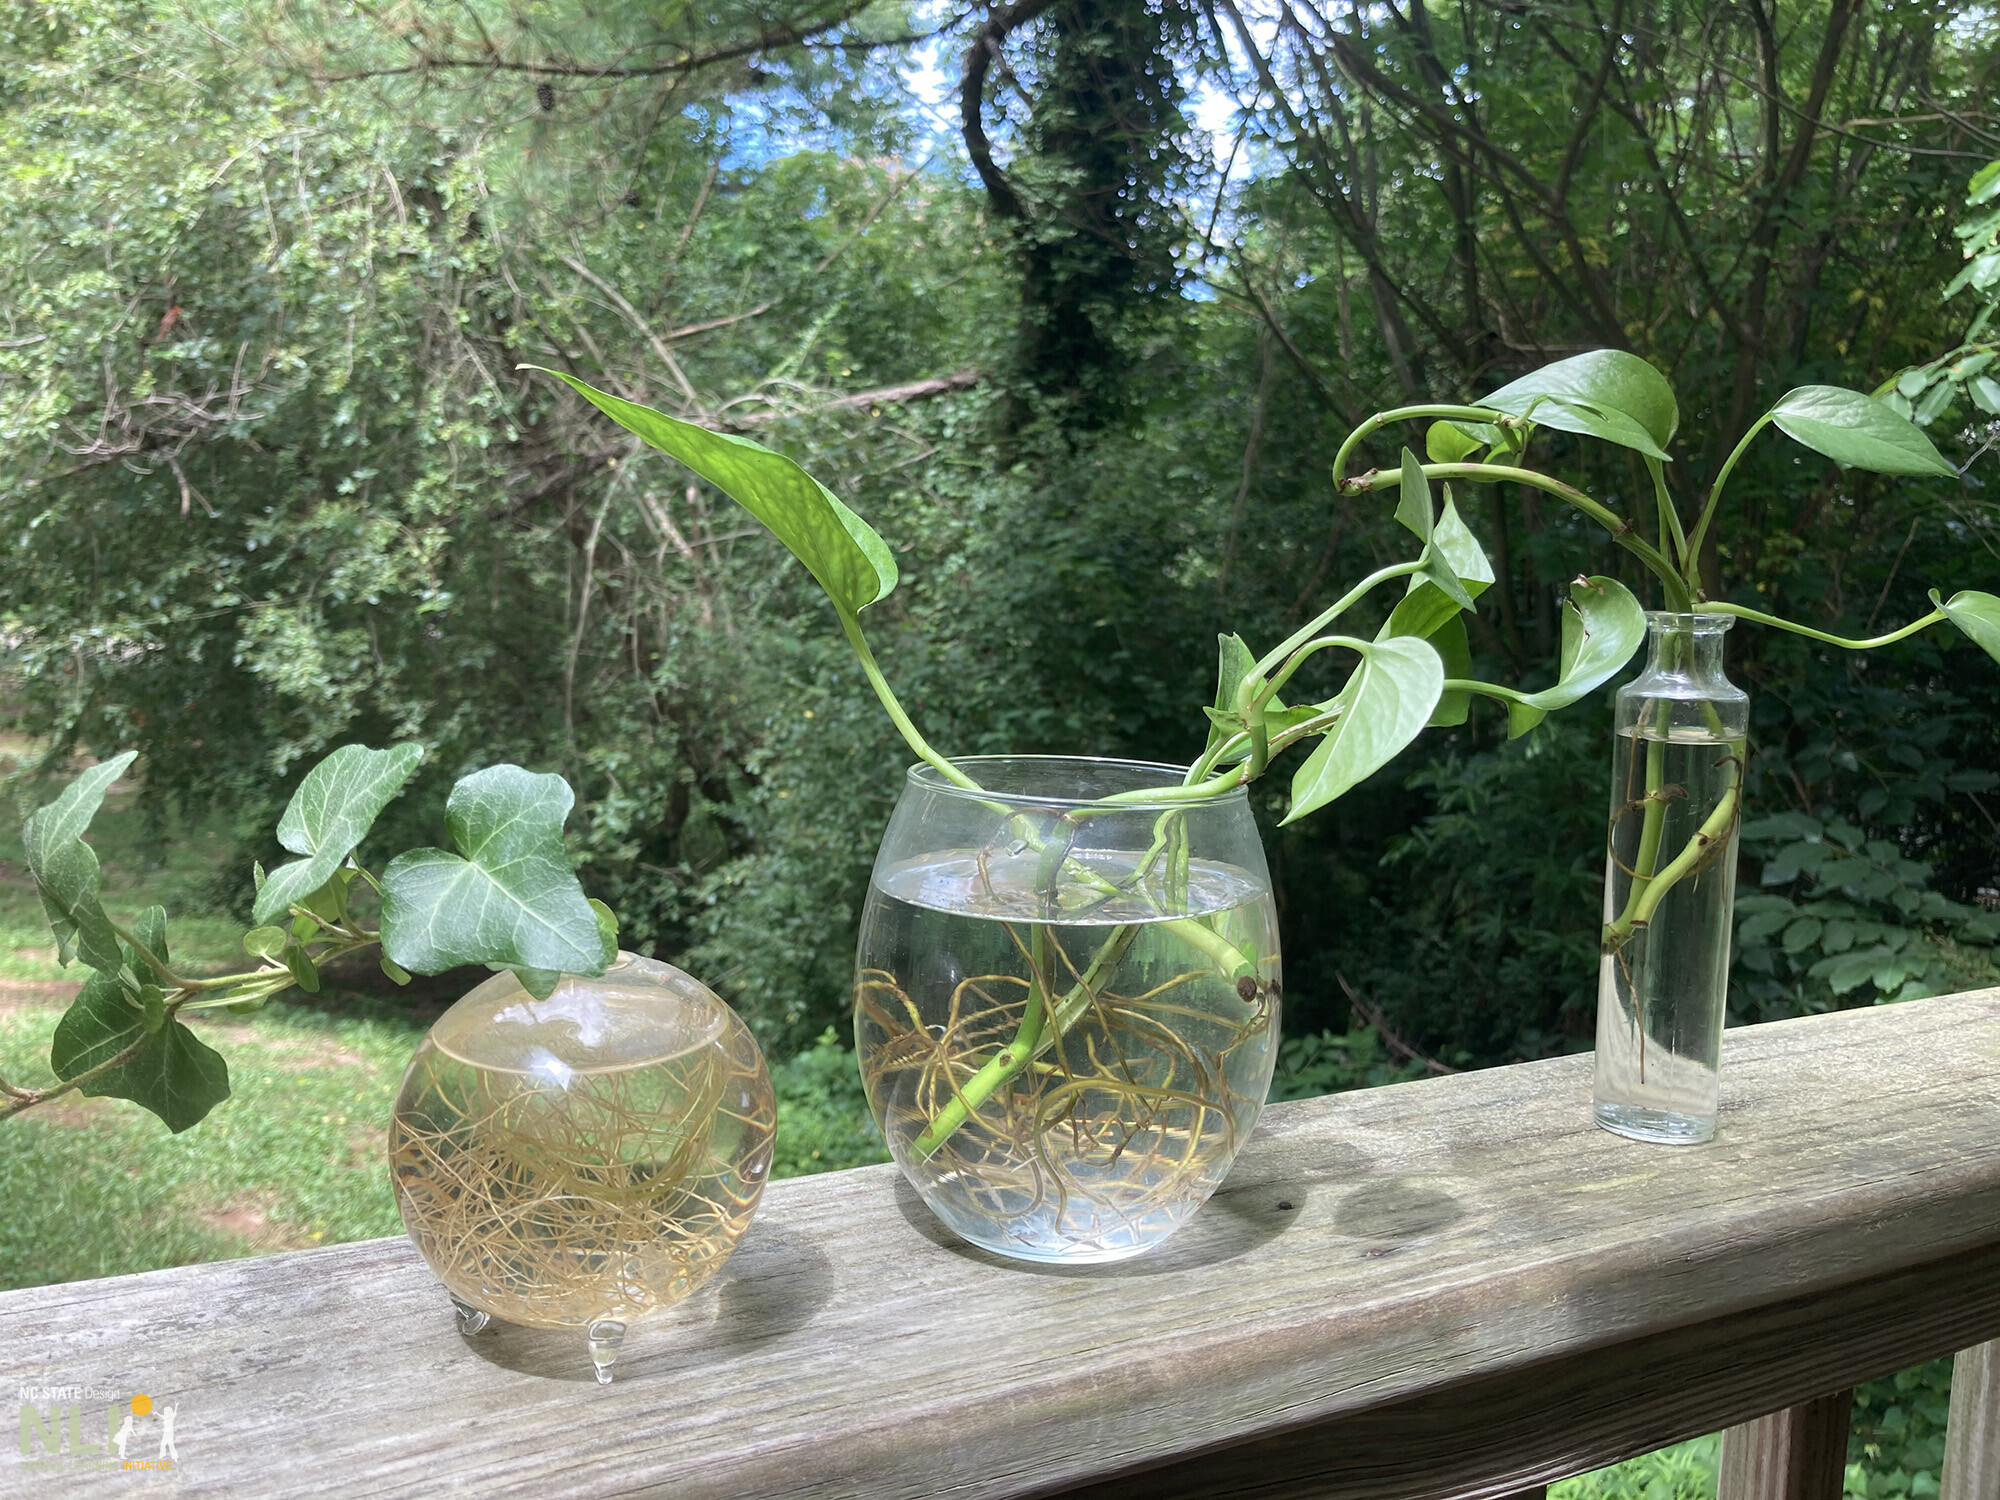
    Rooting stem cuttings. Stem cuttings are a simple method of propagating vining plants, such as pothos. Identify the plant’s nodes along the stem (small bump that produces roots). Make a diagonal cut between two nodes, creating a cutting between 3–5 inches long. Place the cutting in either soil or water to root. If placed in soil, keep consistently moist.

    Rooting leaves. Some plants can be propagated by rooting leaves. Snake plants, which have thick, fleshly leaves, can be multiplied by cutting the long leaves into smaller pieces and placing them directly in soil. Leaves with petioles (leaf stalks) can also be propagated for certain plants, including African violets. Place the leaf and leaf stalk directly in rooting medium (soil or water).

    Resources

    1. Home Propagation of Houseplants, University of Missouri, MU Extension (2012). 
    2. Propagating Houseplants, NC Cooperative Extension (2020). https://wayne.ces.ncsu.edu/2019/08/propagating-houseplants/
    various indoor plants

    Ivy and pothos cuttings rooted in water

    person holding part of a plant thumbnail

    Spider plant offsets can be snipped off and rooted in water or soil