Blog

  • 35. Natural Construction Settings

    Infosheets

    35. Natural Construction Settings

    Download the PDF – English

    Natural construction in the outdoor learning environment (OLE) supports open-ended, creative, and free play using diverse natural materials such as sticks, tree limbs, large leaves, and bamboo. Children can construct anything they desire. The only limit is children’s imaginations. The setting needs to be kept stocked with prepared natural loose parts (storage racks recommended). Dress-up props can add play value. Traditional, wooden block play may be combined with a Deck.​

    Materials

    Natural building materials. can be diverse in shape, size, texture, and type. Larger “structural” materials may include logs, hay bales, bamboo, tree limbs, and cookies. Limit the length of branches and bamboo poles according to age group.

    Natural loose parts, such as leaves, sticks, small pieces of wood, and movable stones can be stacked, manipulated, and re-arranged in infinite combinations. Use components found and pruned in the OLE for free materials. Show children how they can harvest their own play materials. Prepare all natural materials for child use by smoothing or removing sharp, splintered edges and protrusions. Ensure items are age-appropriate.

    Manufactured materials can support children’s creativity and “building” process, providing tools to expand play opportunities. Suitable materials include tarps, buckets, shovels, PVC pipes, cardboard boxes, tubes, used tires, light plastic barrels, and more. All manufactured materials should be child-safe, age-appropriate, and non-toxic. Engage families by asking them to contribute household items.

    Design Considerations

    Location. Choose a shady area that includes trees, logs, fences, walls, or posts to provide supports for children to build against. Alternatively, create a permanent armature to support children’s ever-changing, imaginative constructions. Consider storage.

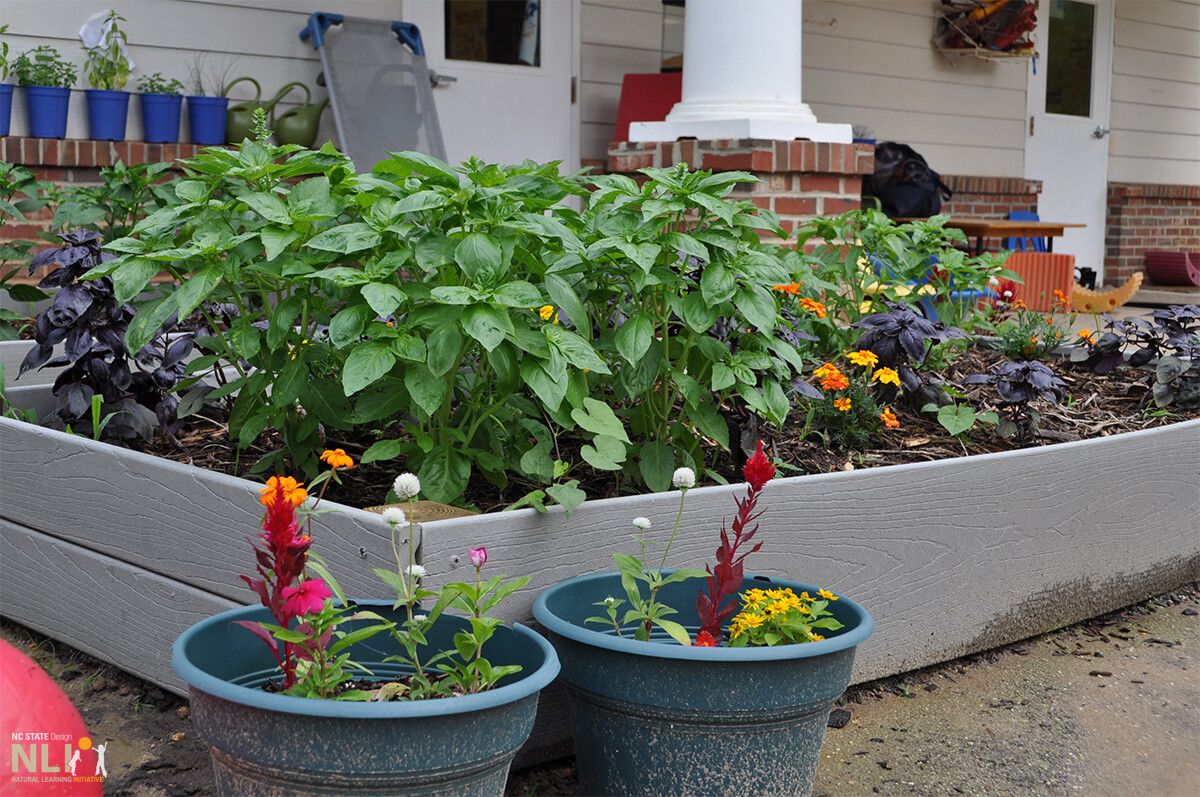
    Plants for play. Design or locate natural construction settings with adjacent plants that can be used and harvested by children to expand play and learning opportunities. By caring for and then harvesting plant materials, children learn about natural cycles of growth and decay. Suitable plants include hardy perennials and their flowers, perenial grasses along with trees or shrubs that shed branches, leaves, and seeds.

    Storage. should be designed to allow autonomous and independent play while minimizing clean-up for teachers and caregivers. Five-gallon buckets can be used to organize materials by type and size. Metal or wooden storage shelves provide ease of use and durability. Covered storage including sheds, shelves, and lean-to structures protect construction materials from the elements and increase longevity. Although covered storage may increase initial cost, materials will need replacement less frequently.

    Shade is important for extended periods of play in natural construction settings. For younger children playing with small components, large shrubs, shade settings such as shade sails, pergolas, and umbrellas may be used. For larger natural construction intended for older children, settings should be located in the shade of trees to provide adequate sun protection.

    Health and Safety

    • All natural construction play materials should be prepared for child-use by removing protrusions and sanding rough or splintered edges.
    • All components in the natural construction play areas should be regularly inspected and immediately replaced if showing signs of damage or decay.
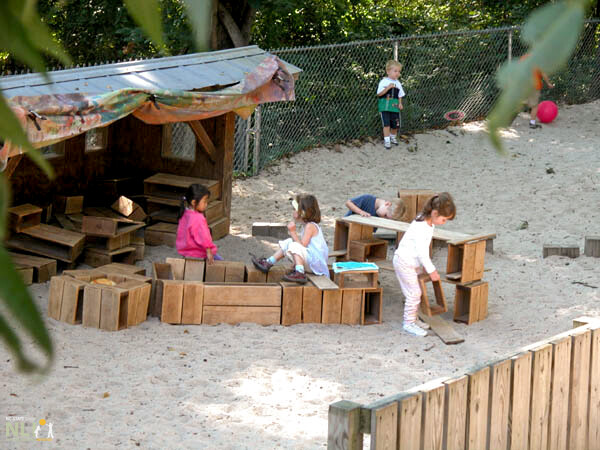
    children playing with stack-able wooden materials

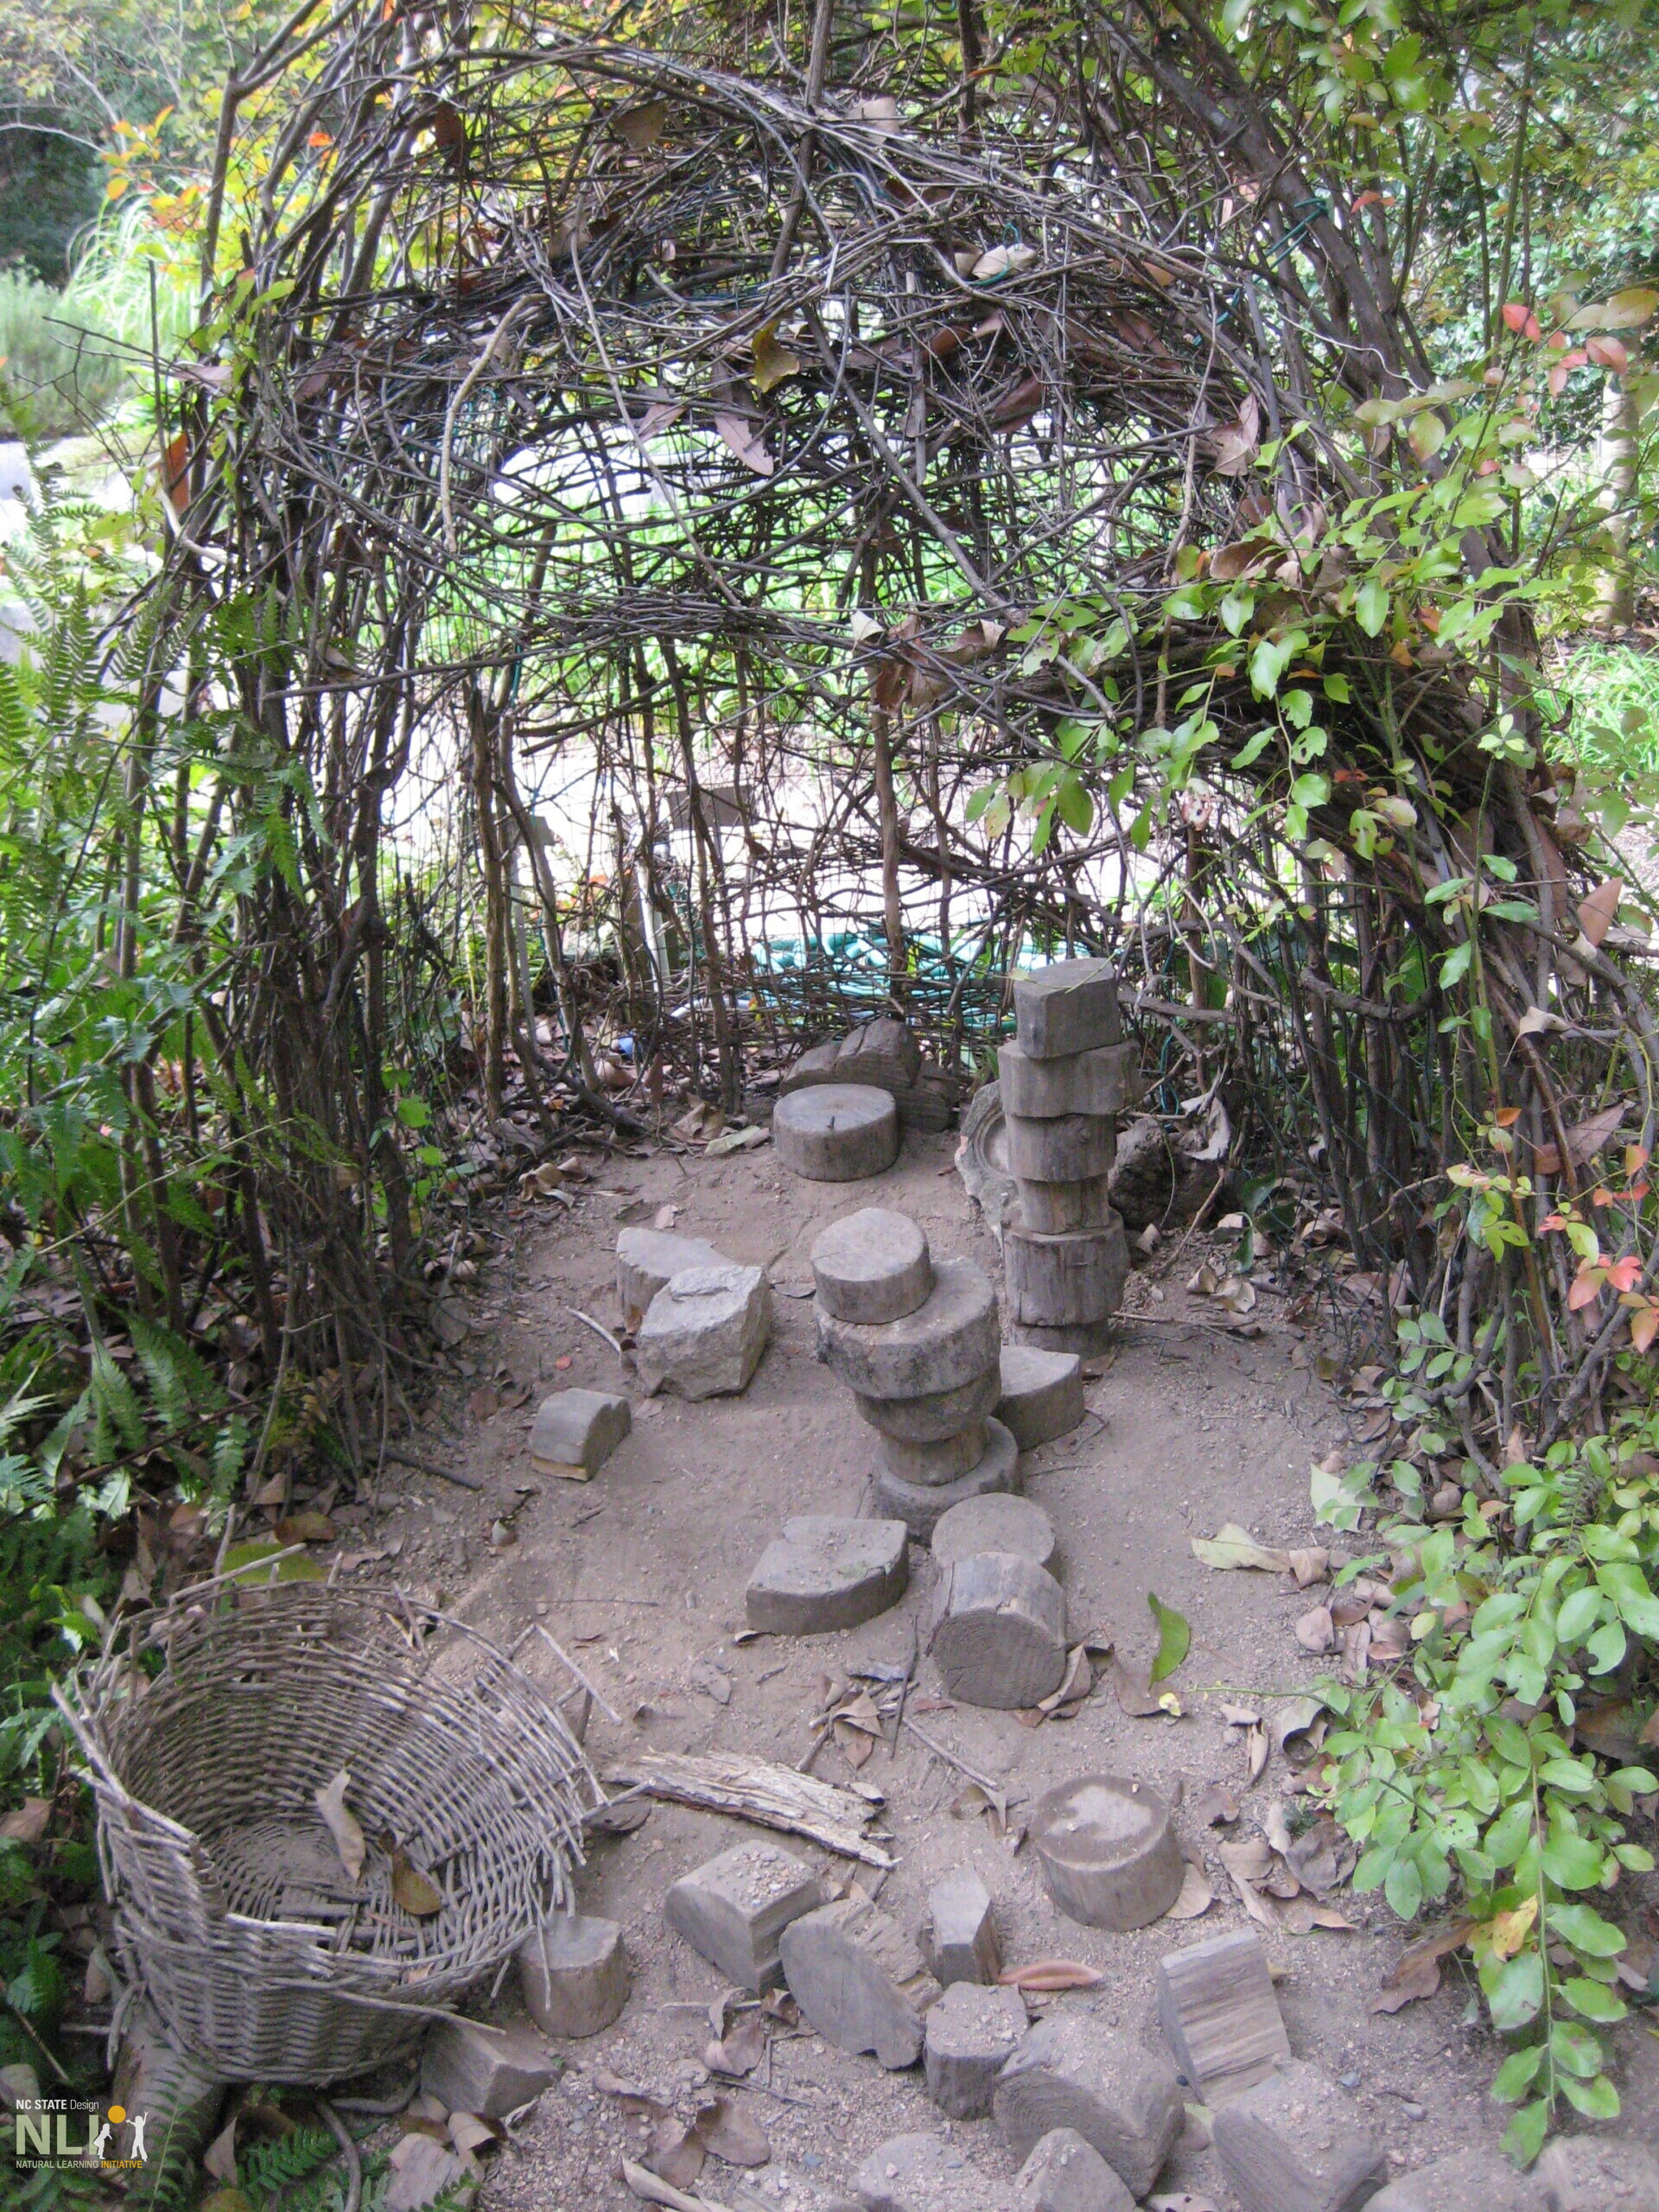
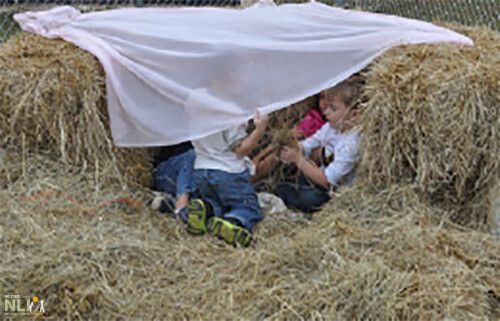
    Rudimentary “shelter” structure built by children from on-site, “found” natural objects.
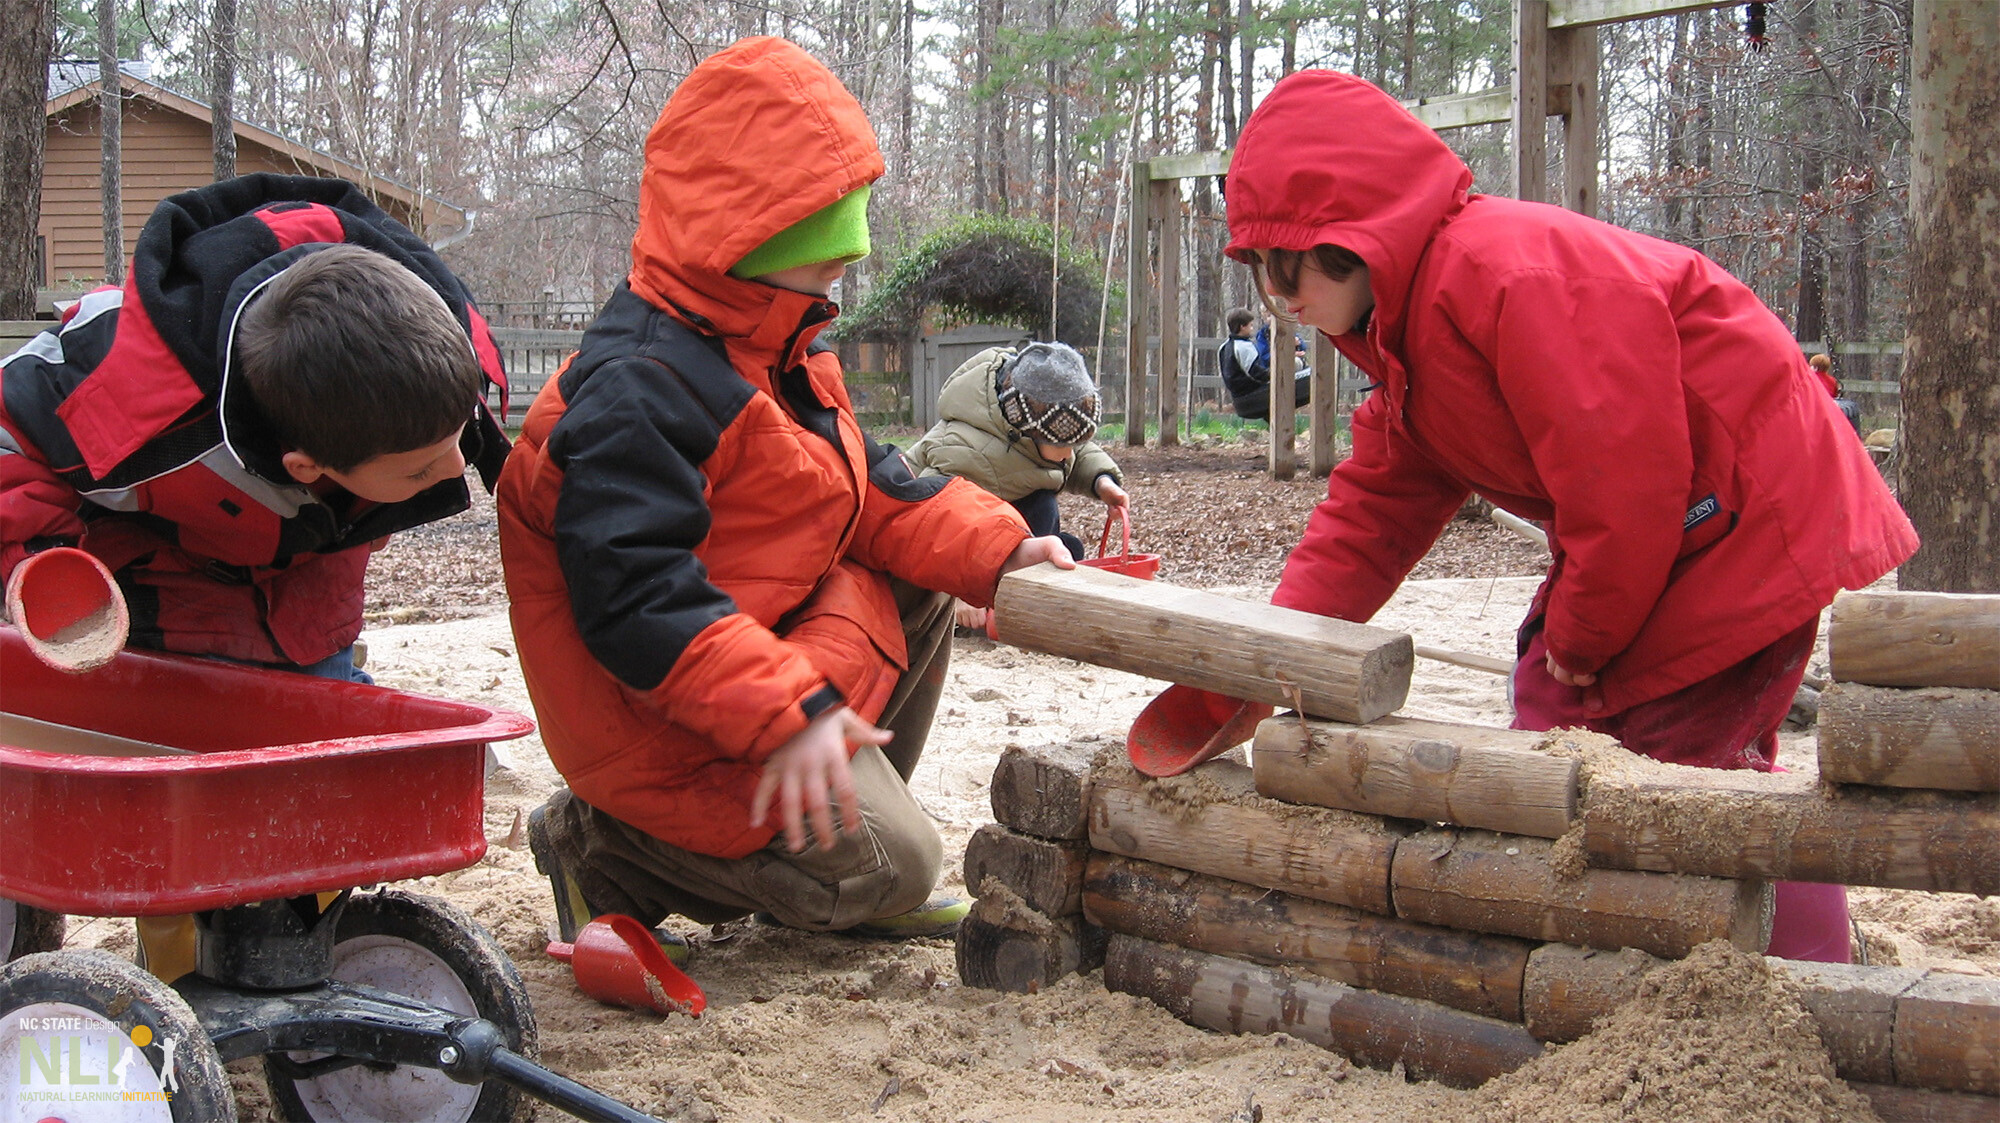
    children stacking wooden logs

    Prepared wooden logs can be used for stacking and building
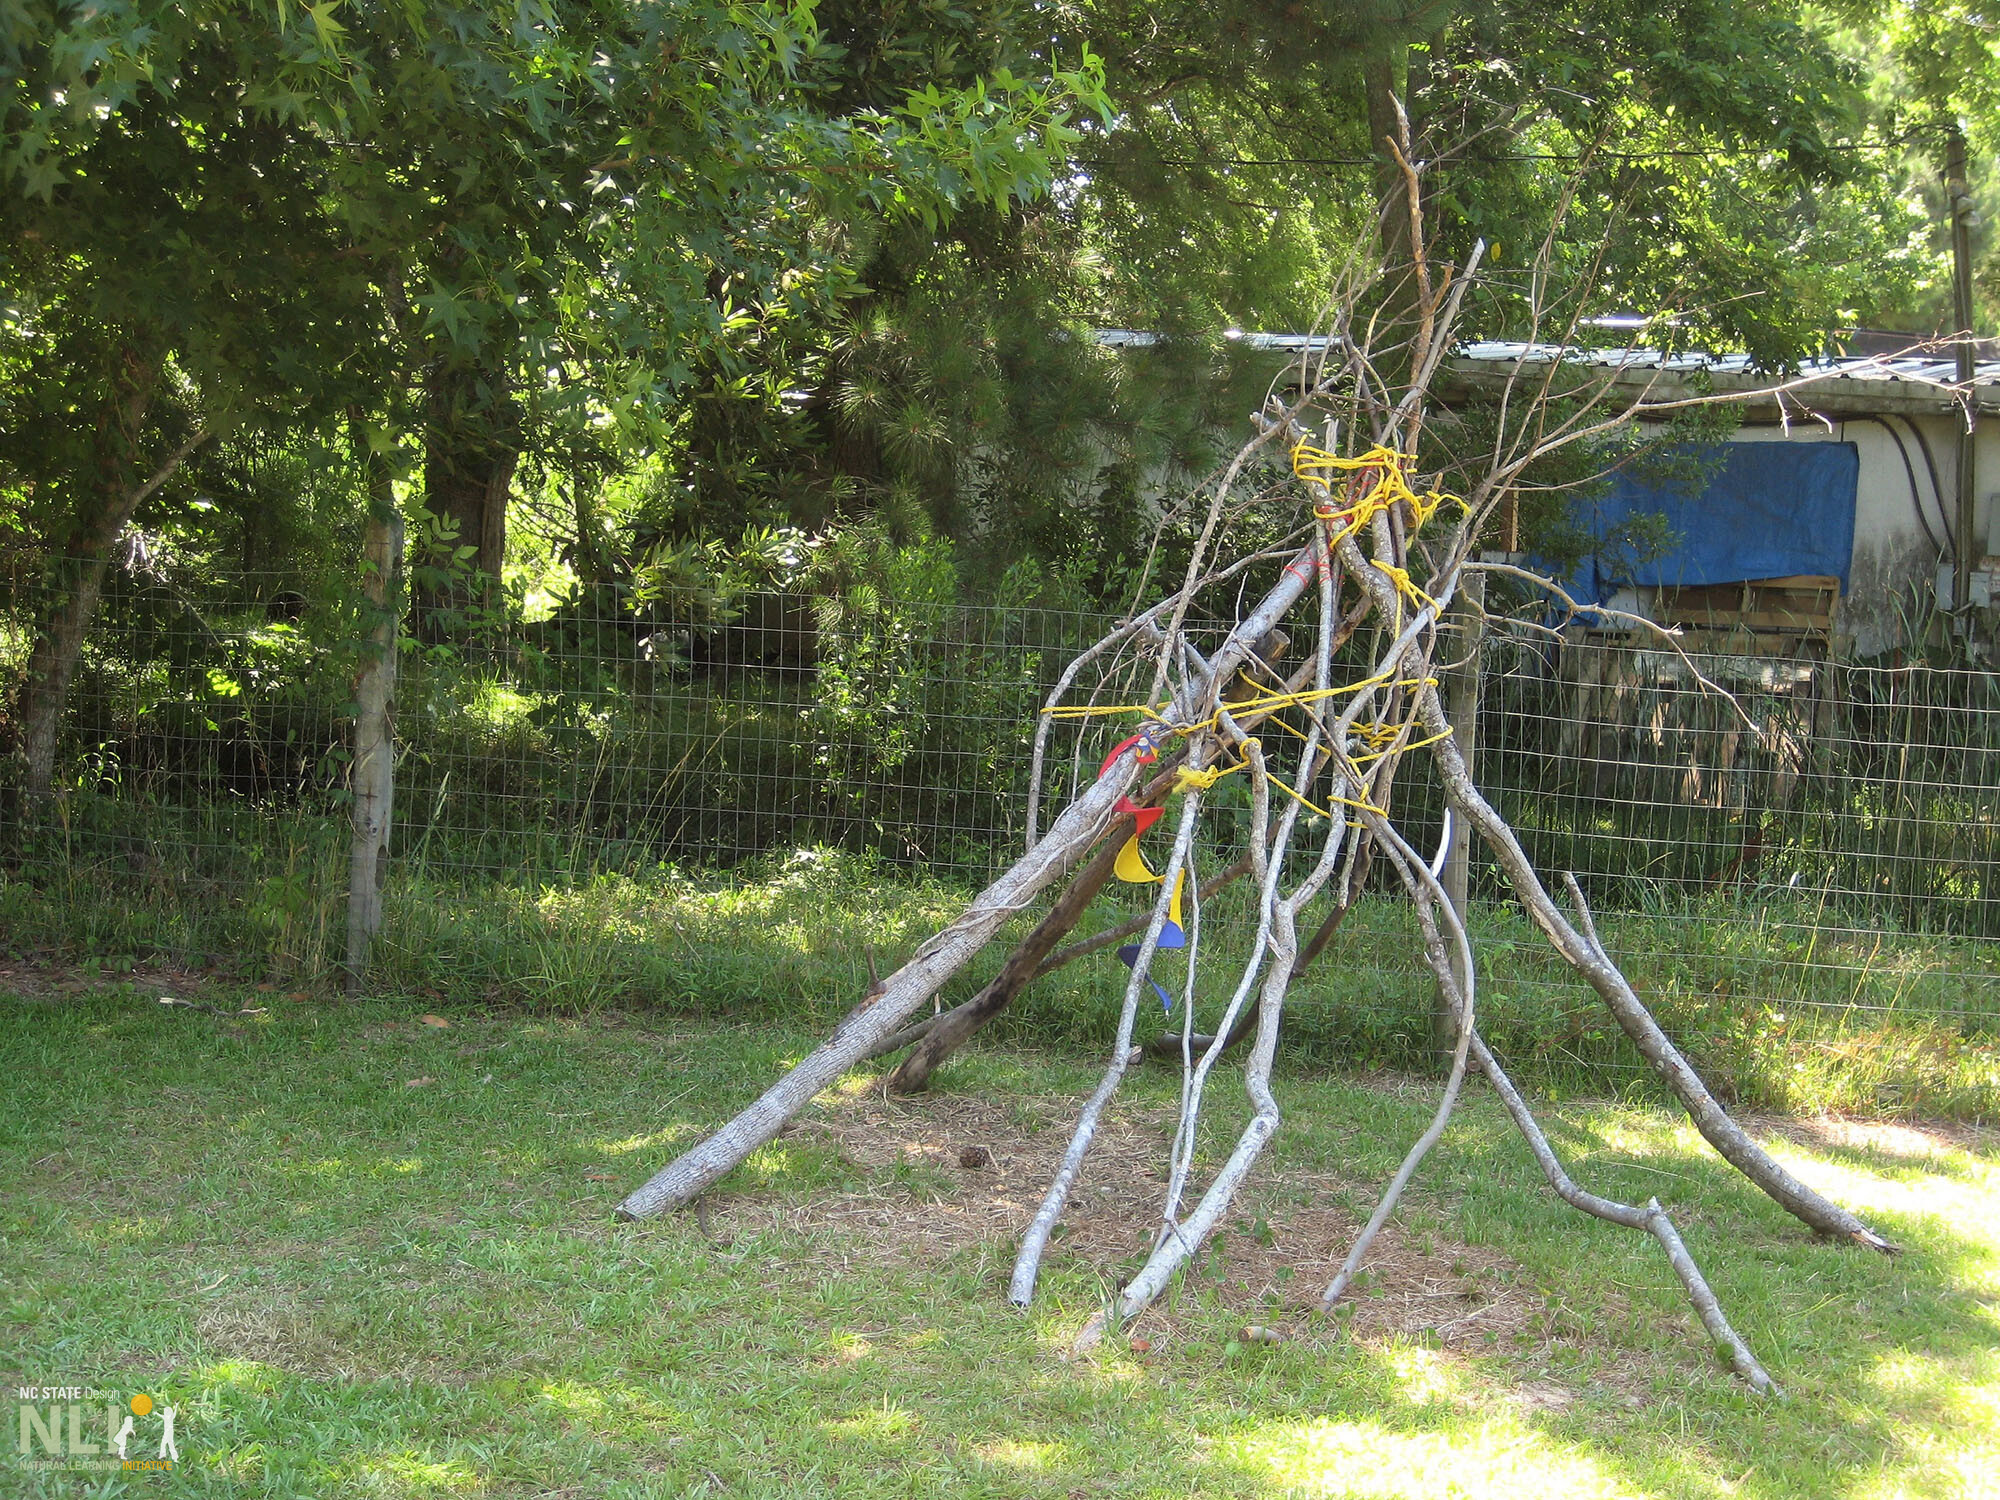
    child made conical structure
    sand play setting with natural and manufactures materials

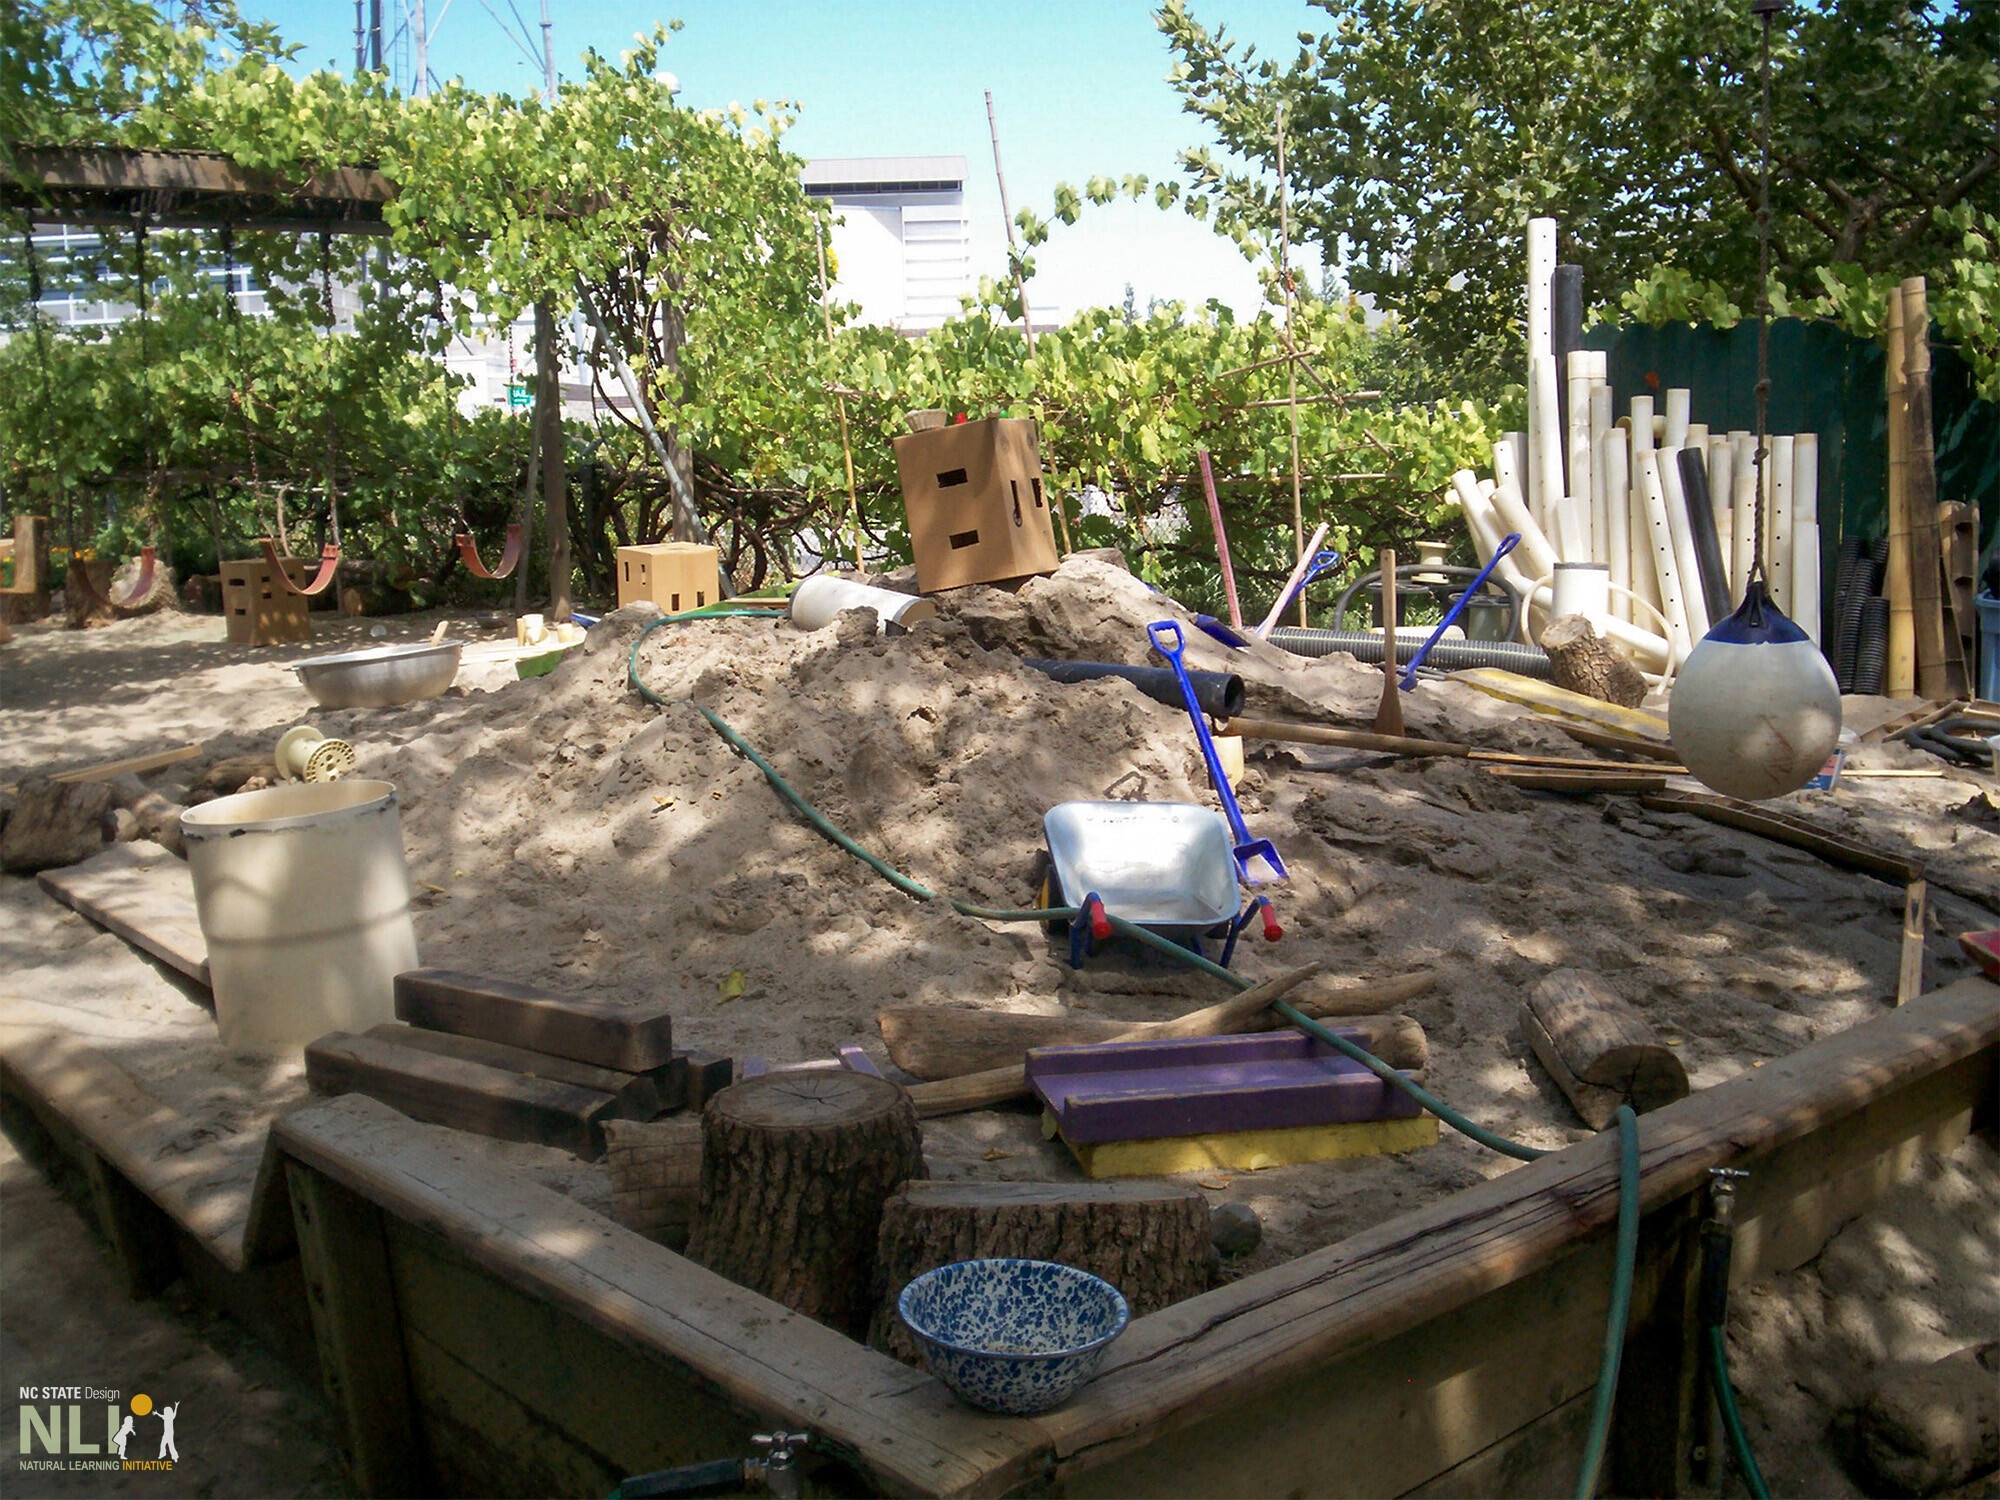
    A diverse natural construction area with a variety of natural and manufactured materials including PVC pipes and cardboard boxes.
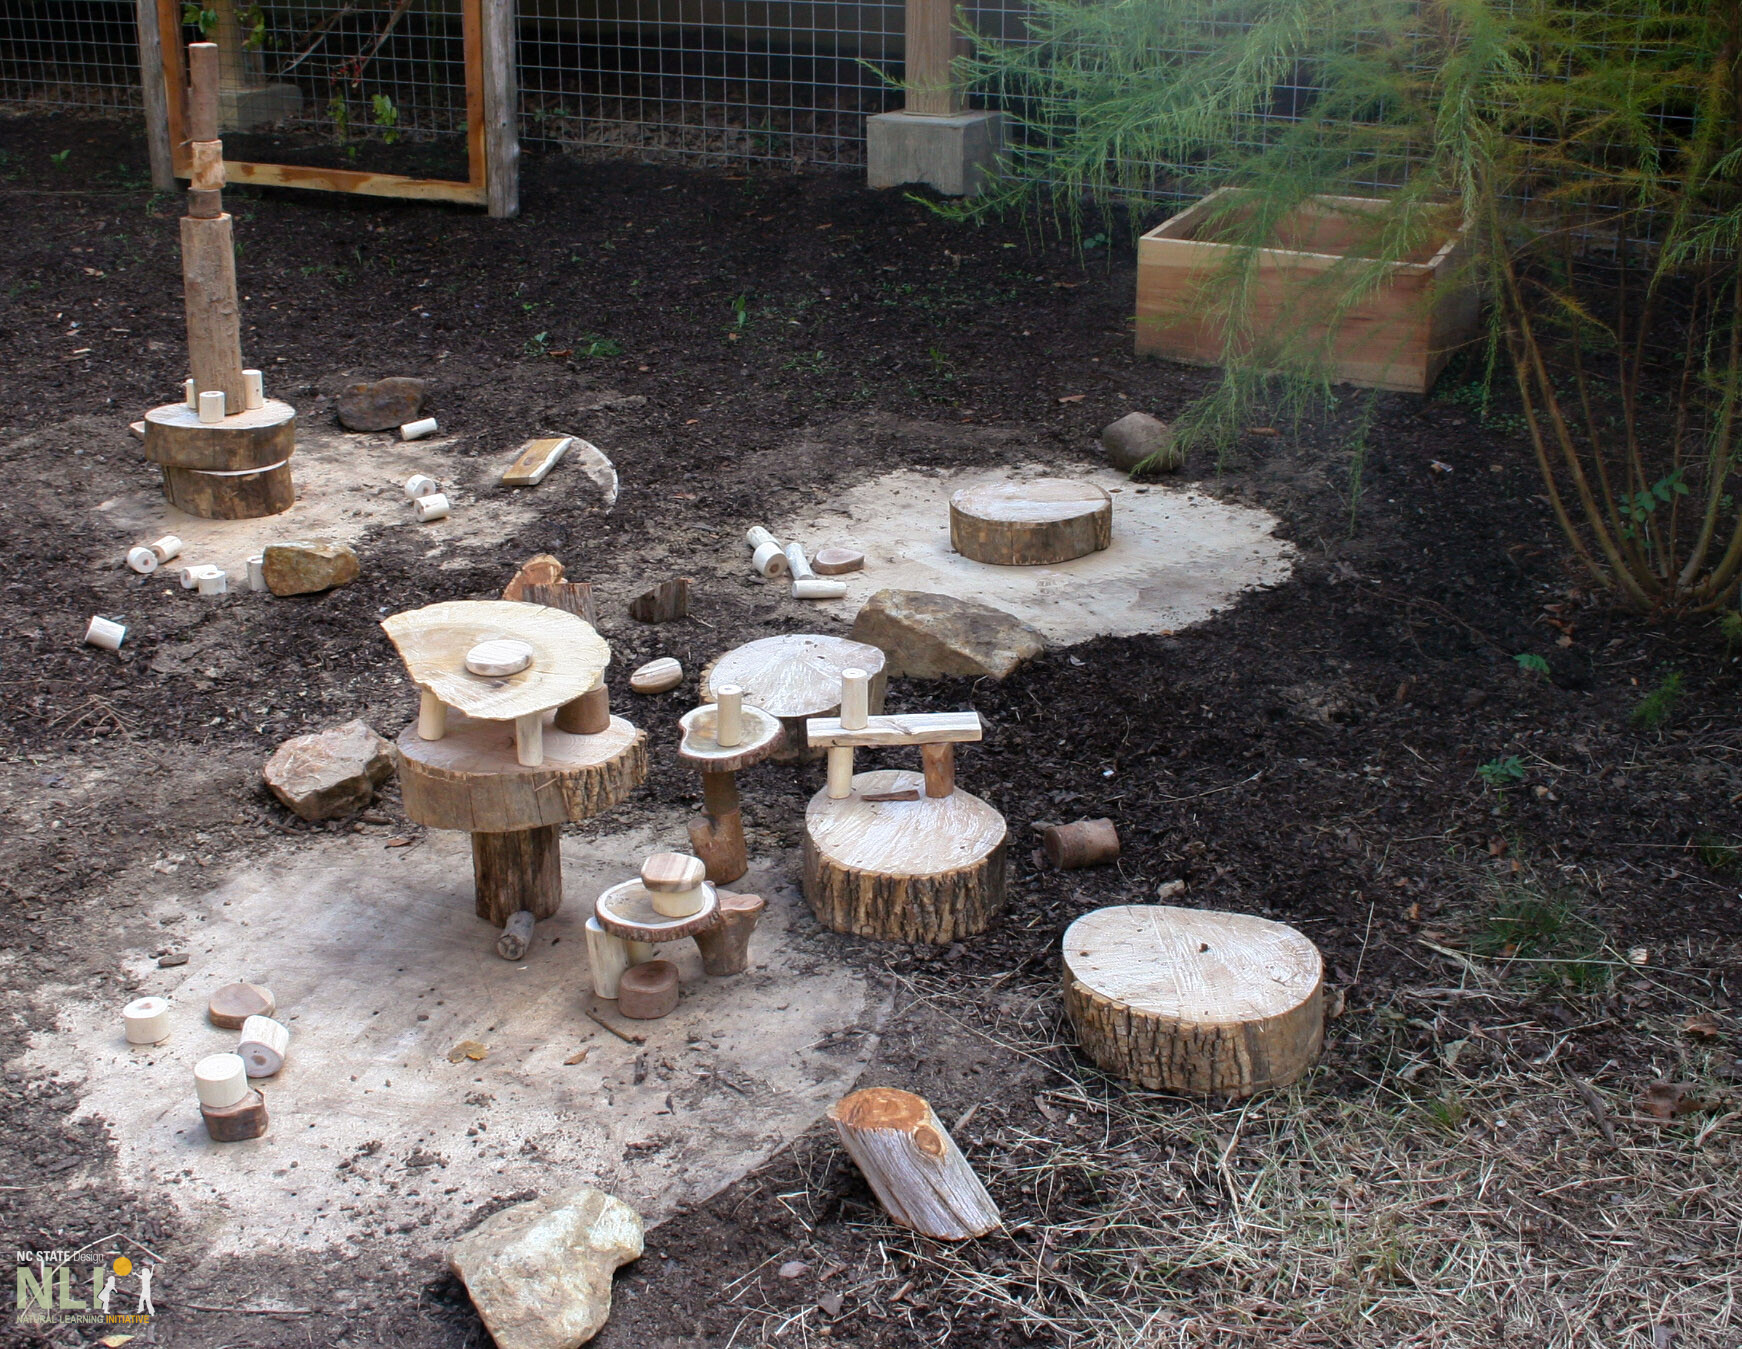
    tree cookies

    Stacked trees cookies of various shapes and sizes.
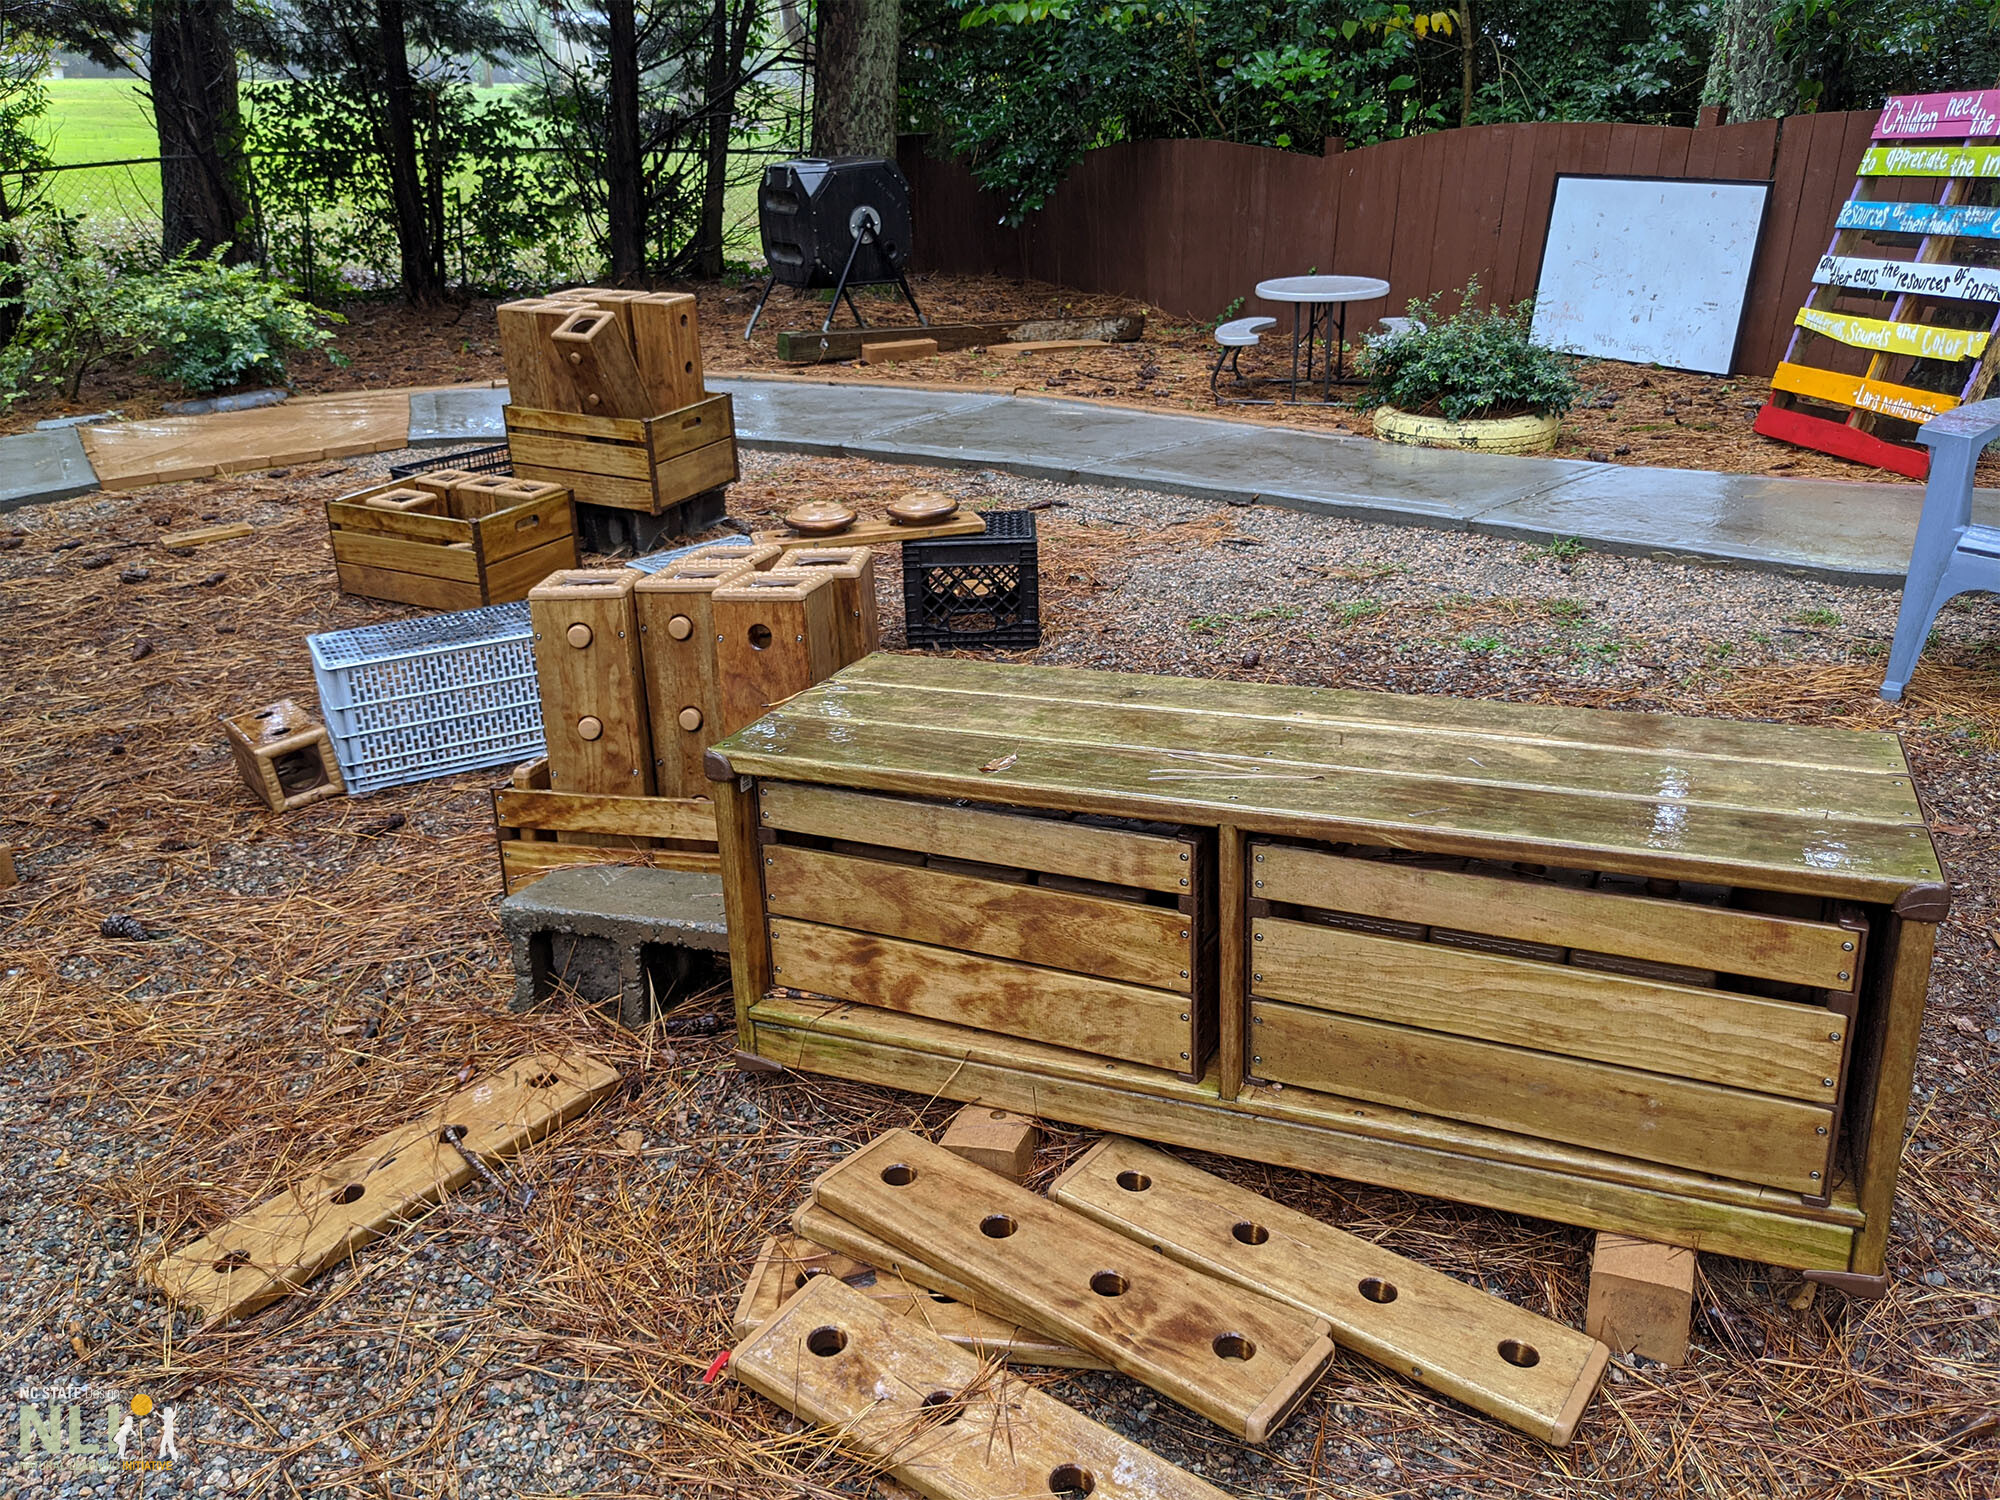
    stack-able wooden components

    Stackable components such as crates and wooden building blocks allow children to create unique structures in infinite combinations

  • 34. Mud Kitchens

    Infosheets

    34. Mud Kitchens

    Download the PDF – English

    materials

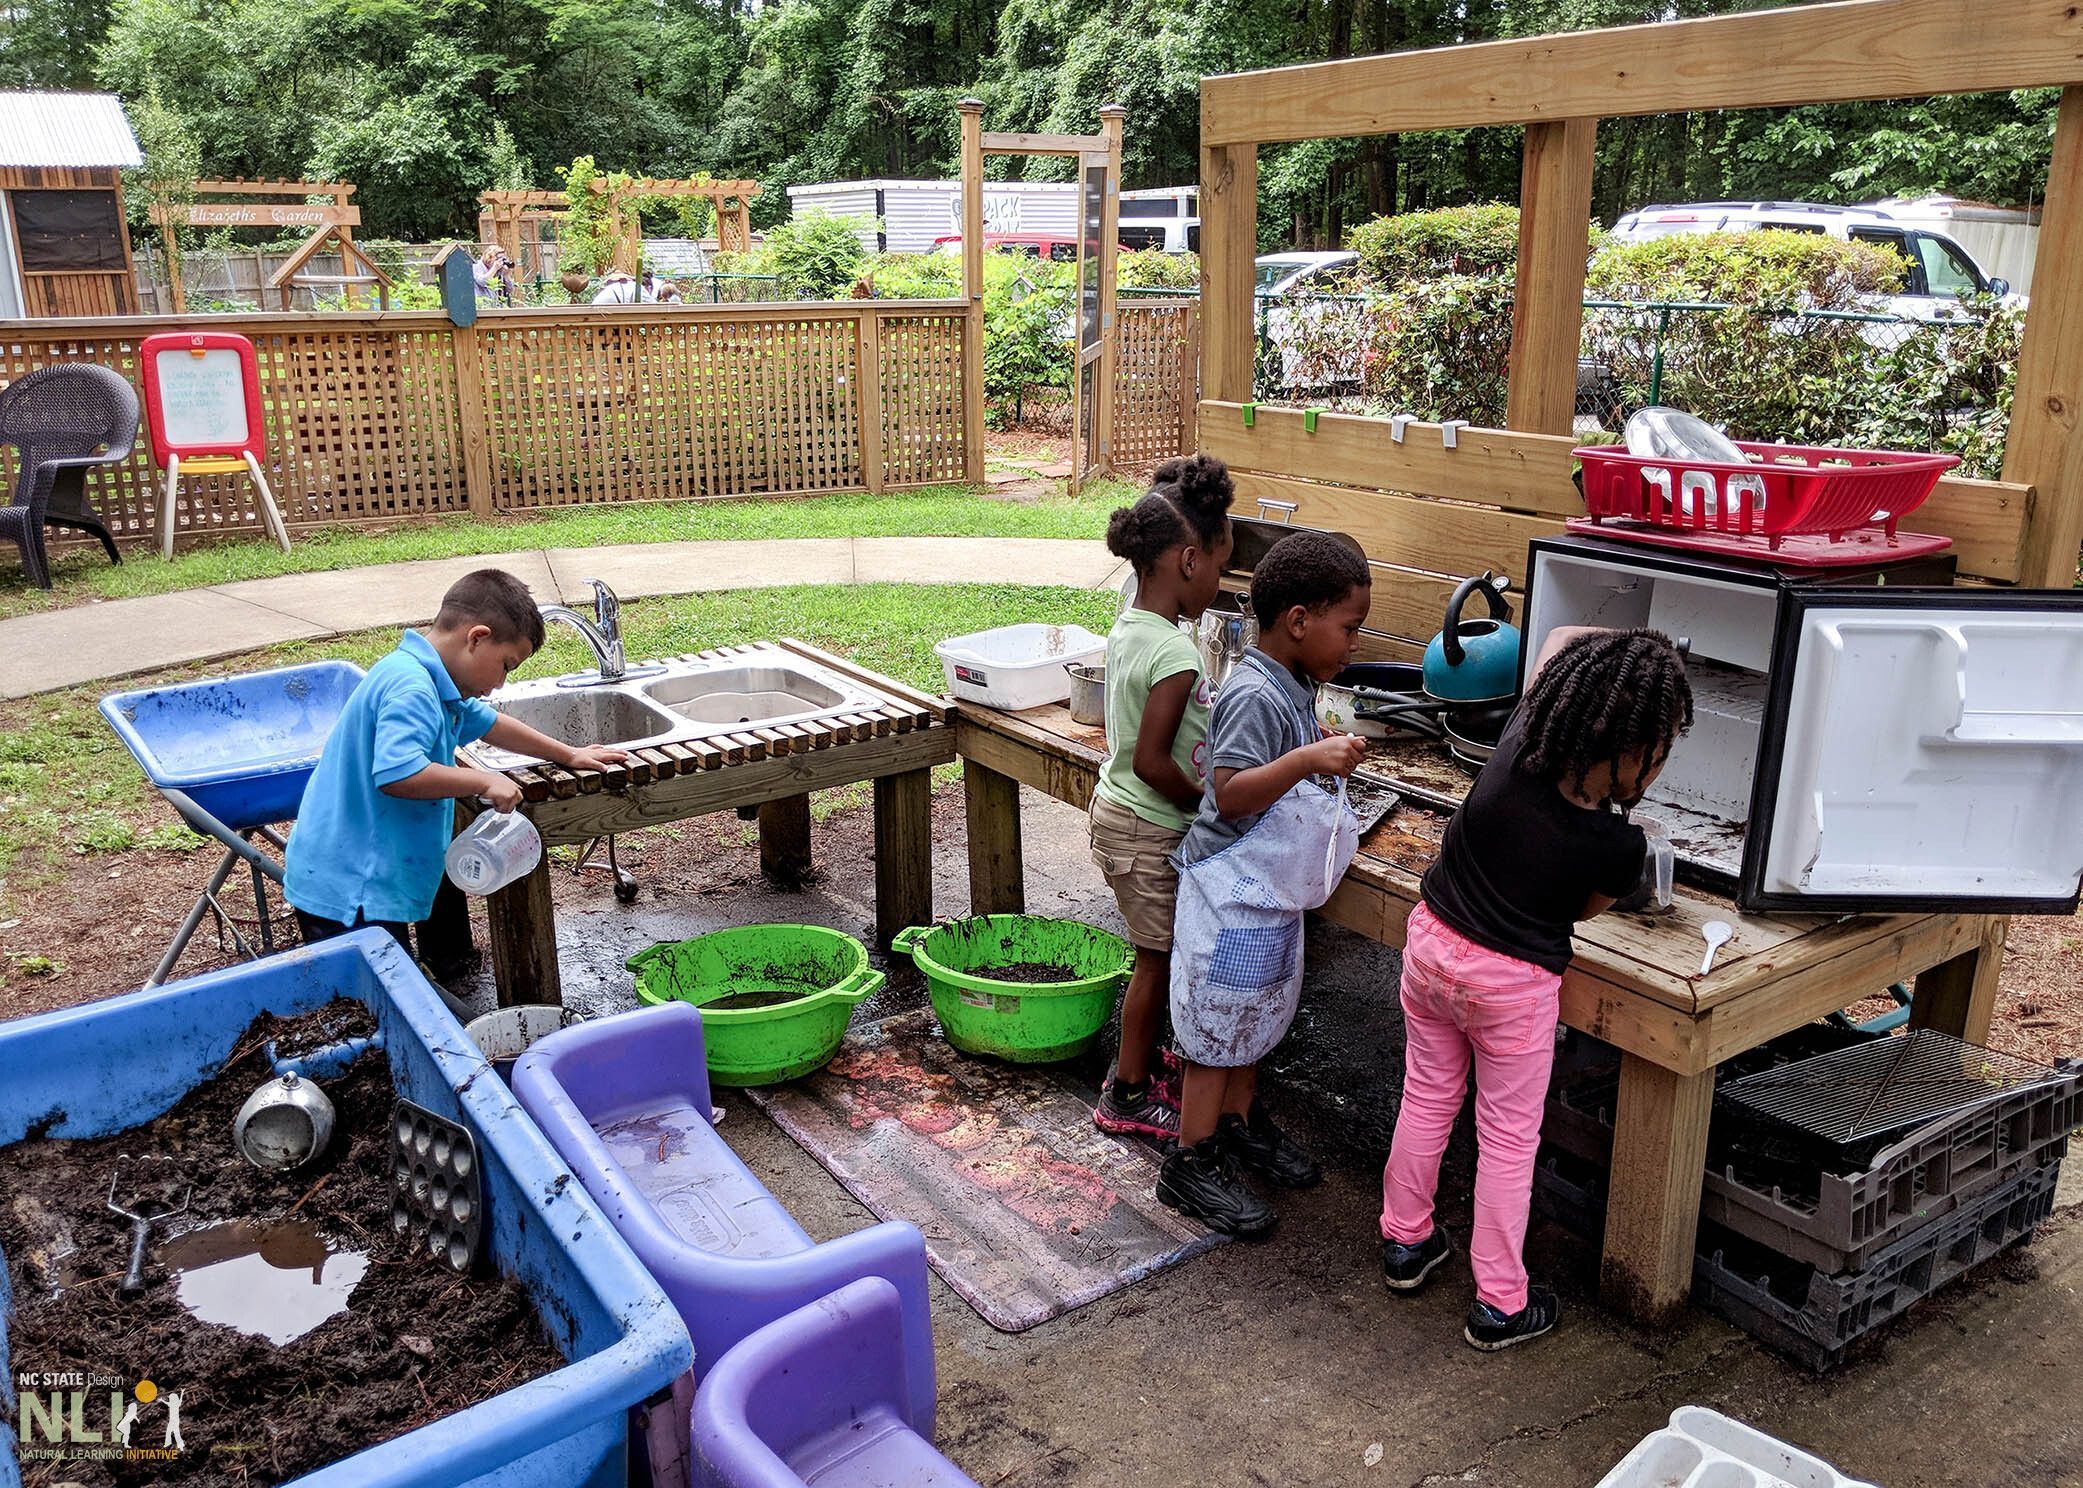
    A mud kitchen can be assembled using entirely recycled items. Engage parents by asking them to sort through kitchen cabinets to see what they can donate to the center. Visit material recycling yards for recycled equipment. Check thrift stores and yard sales. Key components include the following:

    Kitchen utensils. Pots, whisks, pans, baking trays, mixing bowls, spoons, cups, strainers, ice trays — a plethora of kitchen items can be repurposed as lab equipment to encourage mud play and learning. Maximize affordances for manipulating materials by pouring, mixing, scraping, sifting, and measuring. Consider support for imaginary play such as baking and serving.

    Recycled kitchen appliances. An old microwave, tea kettle, oven racks, or mini fridge help children read the mud kitchen as a place for “cooking” and experimentation (remove any cables and plugs beforehand).

    Natural loose parts. Plant parts become imaginary ingredients, including sticks, leaves, petals, seeds that enhance mud kitchen play. Go on a safari around the outdoor learning environment (OLE) and talk with children about “pickables” for decorating concoctions. Plant the children’s favorite “ingredients” in your OLE garden.

    Water is essential. Evaluate water sources in relation to possible mud kitchen locations. Water can be supplied in many ways, ranging from a portable reservoir to a permanent reservoir and handpump. A spring-loaded faucet or teacher-controlled trickling hose will let children be self-sufficient and simplify clean-up. Ensure that water is potable.

    Dirt/soil is essential. Purchase sterile, organic garden soil from a local supplier/hardware store. Store in a tub in the “kitchen.”

    Usability. All mud kitchen components/play props should be visible and reachable to encourage children’s diverse, independent play.

    layout

    Child-sized workspaces. Configure your child-sized workspace with countertops and recycled sinks, backs for hanging utensils, under-counter storage, elevated mixing tubs, “café” tables, sitting logs, and more!

    Enclosure. The mud play setting should create a feeling of free, messy “house-play.” Make the space large enough to accommodate multiple children playing simultaneously. Enclosure can be achieved by adding backs to counters or placing them against fences to separate from adjacent settings.

    Shade. Mud play is engaging and can last a long time, so protection from over-exposure to sunlight is crucial. Adequate sun protection can be achieved with shade trees, shade sails, pergolas, or roof structures.

    Compatible adjacency. To enhance mud play experiences, locate mud settings near complementary settings such as informal gathering spaces with child-sized tables and chairs for “serving” and nearby plants for foraging ingredients.

    Visibility. All components of the mud kitchen should be visible for adequate supervision.

    Combining water play and mud play. There are no strict requirements to implement a “mud kitchen.” Some centers create settings that are loosely defined, containing a mix of water, mud, and loose parts, with a pedagogical focus on STEM. Combinations can take on linear forms that work well along OLE edges.

    health and safety

    Purchase organic potting soil to ensure absence of toxic or unsafe materials and to prevent children from digging up other areas of the OLE. It is advisable that children wear smocks or rain ponchos to keep clothing dry and clean. Ensure that children wash their hands after mud play and before resuming indoor activity. Remind children that their concoctions are for playing, not eating!

    parent engagement

    What if parents think mud play is a bad idea? Try organizing a parent workshop, engaging parents in hands-on activities and sharing evidence-based research that outlines the benefits of nature play and learning, including mud play. Recognize that some parents may never have even touched soil and consider it unhealthy. Slowly introduce hands-on activities with natural materials, soil, and mud, allowing time to discuss and feel comfortable. Suggest that playing in dirt and mud not only stimulates the imagination and social skills, but helps to build children’s immune systems. Look at the growing list of recent literature resources by well-credentialed authors on the positive impact of “dirt.”

    Resources

    1. National Wildlife Federation. 2012. The Dirt on Dirt: How Getting Dirty Outdoors Benefits Kids.
    2. Asia Citro. 2015. A Little Bit of Dirt. Woodinville, WA: Innovation Press.
    3. Jack Gilbert & Rob Knight. 2017. Dirt is Good. New York, NY: St. Martin’s Griffin.
    4. Mary Ruebush. 2009. Why dirt is good: 5 ways to make germs your friends. New York, NY: Kaplan Pub.
    5. Maya Shetreat-Klein. 2016. The Dirt Cure. New York, NY: Atria Books.
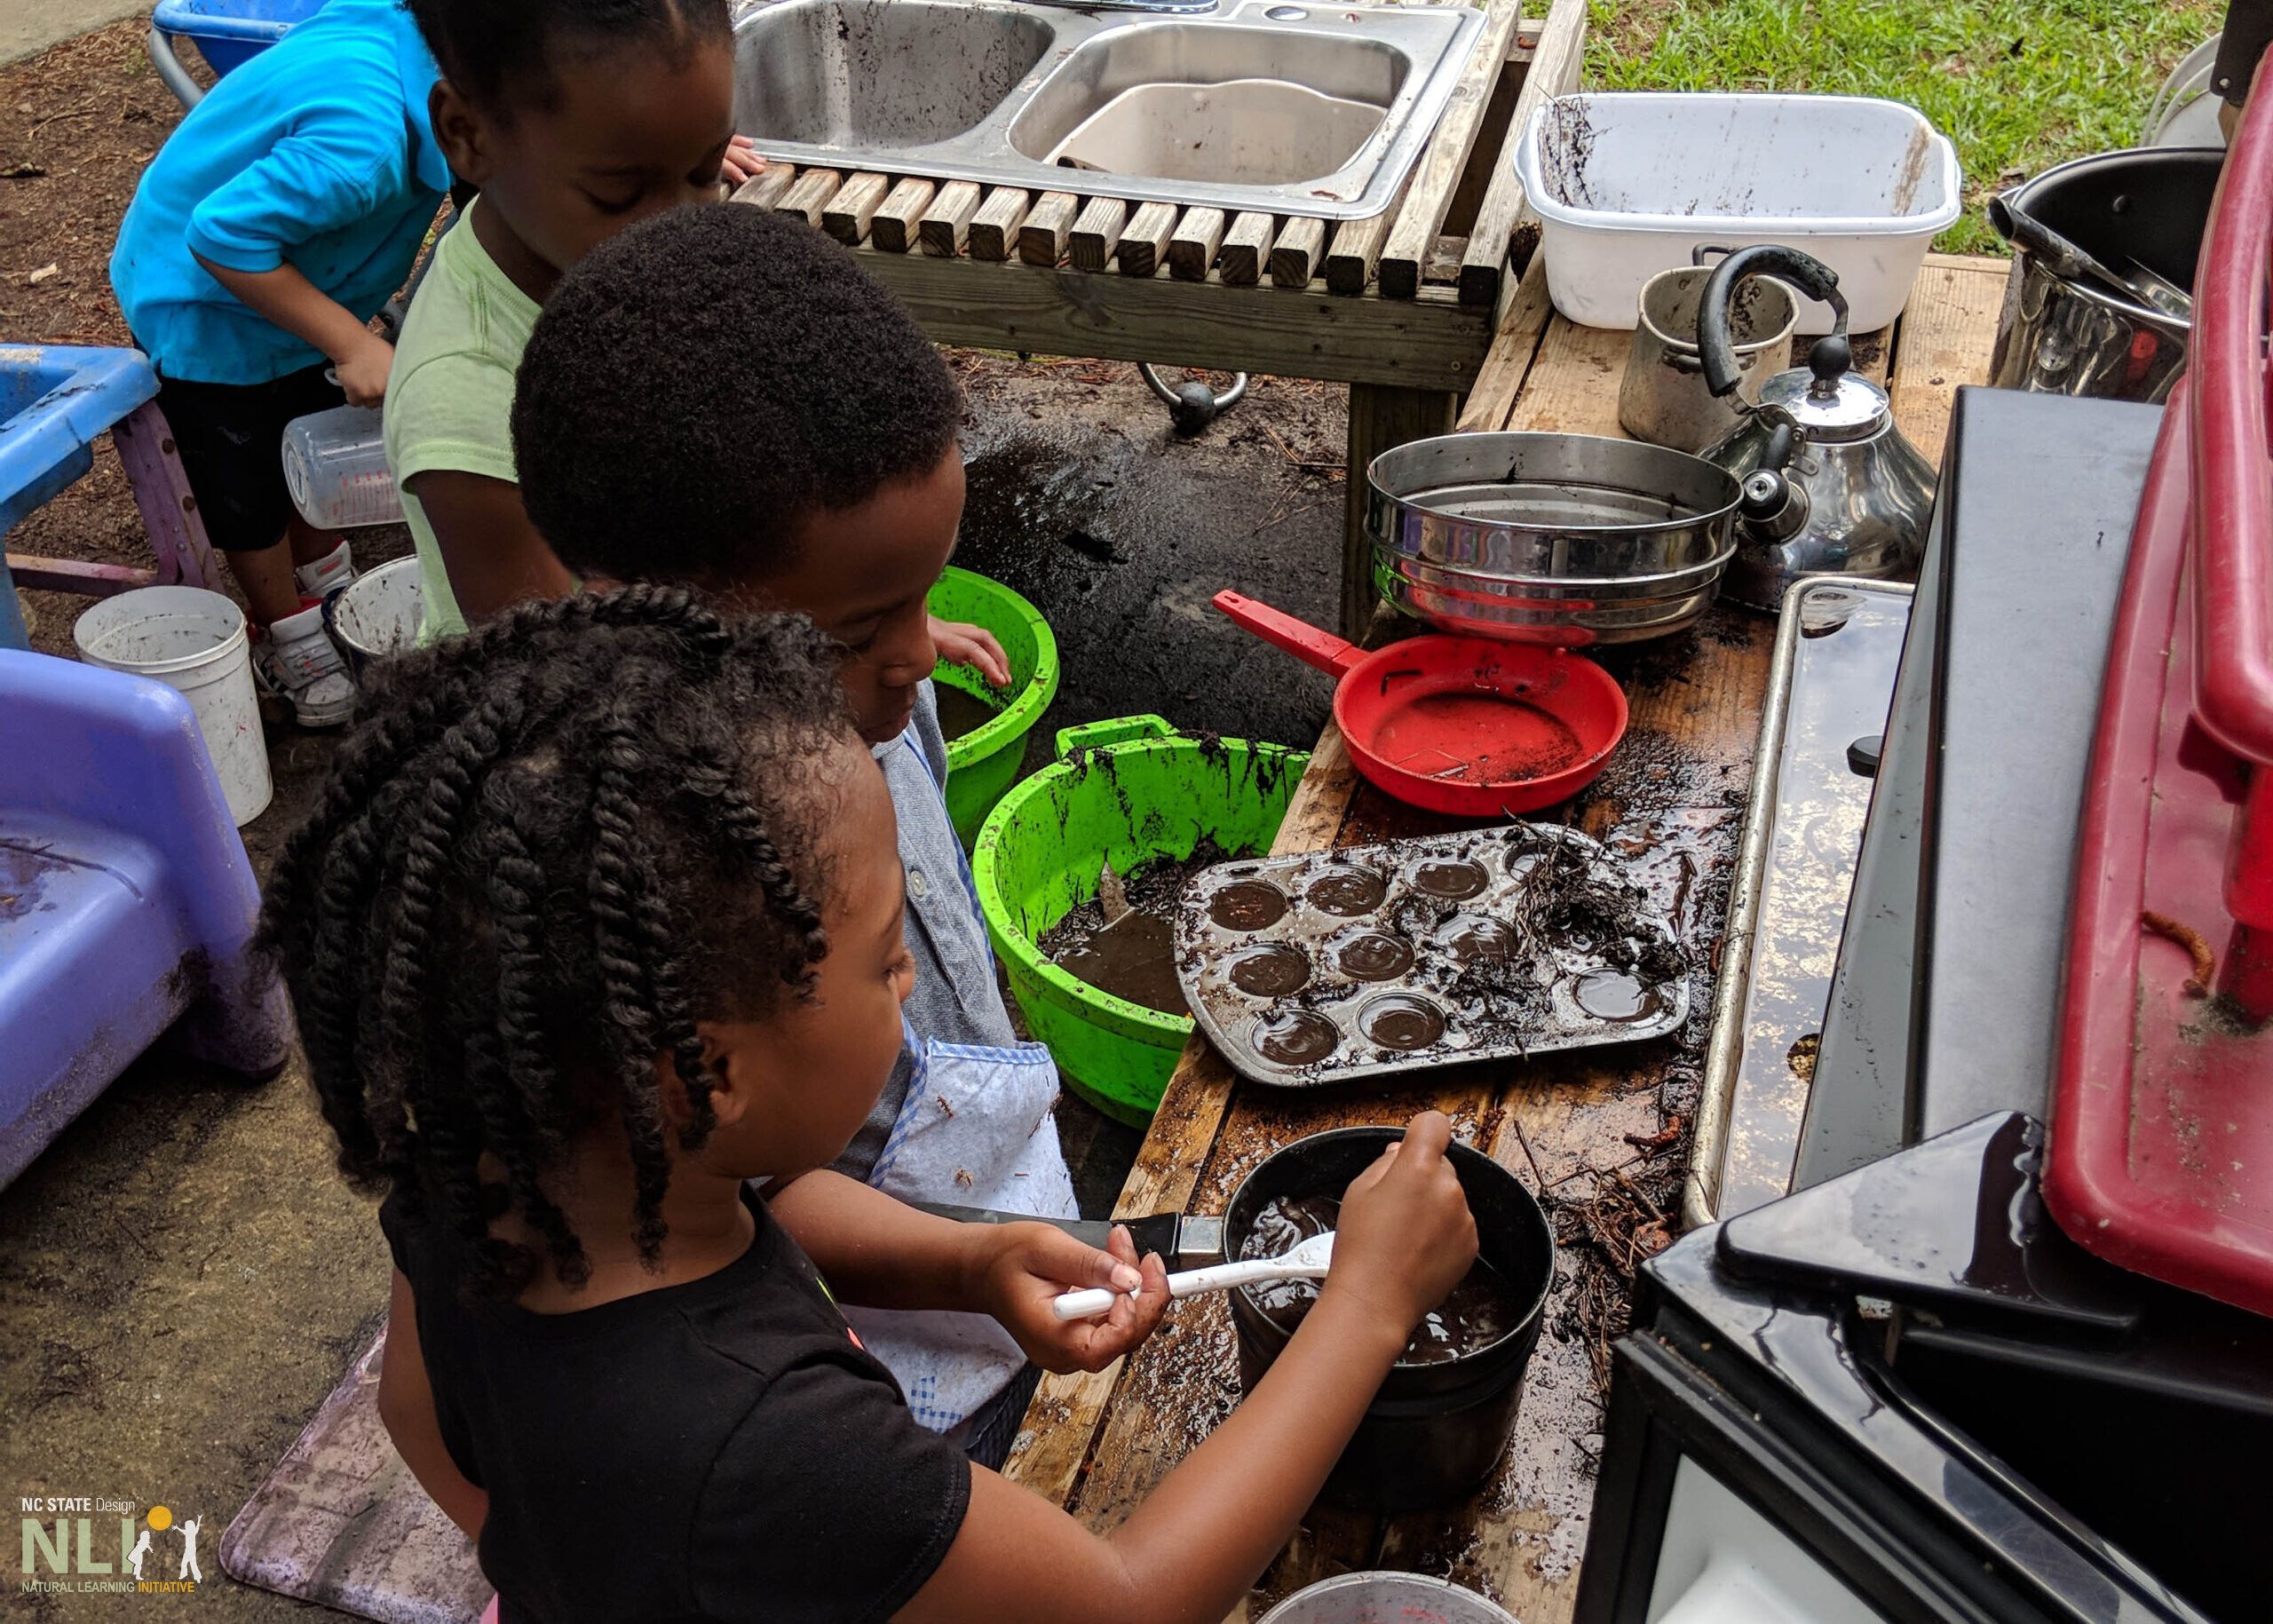
    children playing and pretending in a mud kitchen

    Basic mud kitchen easy setup!

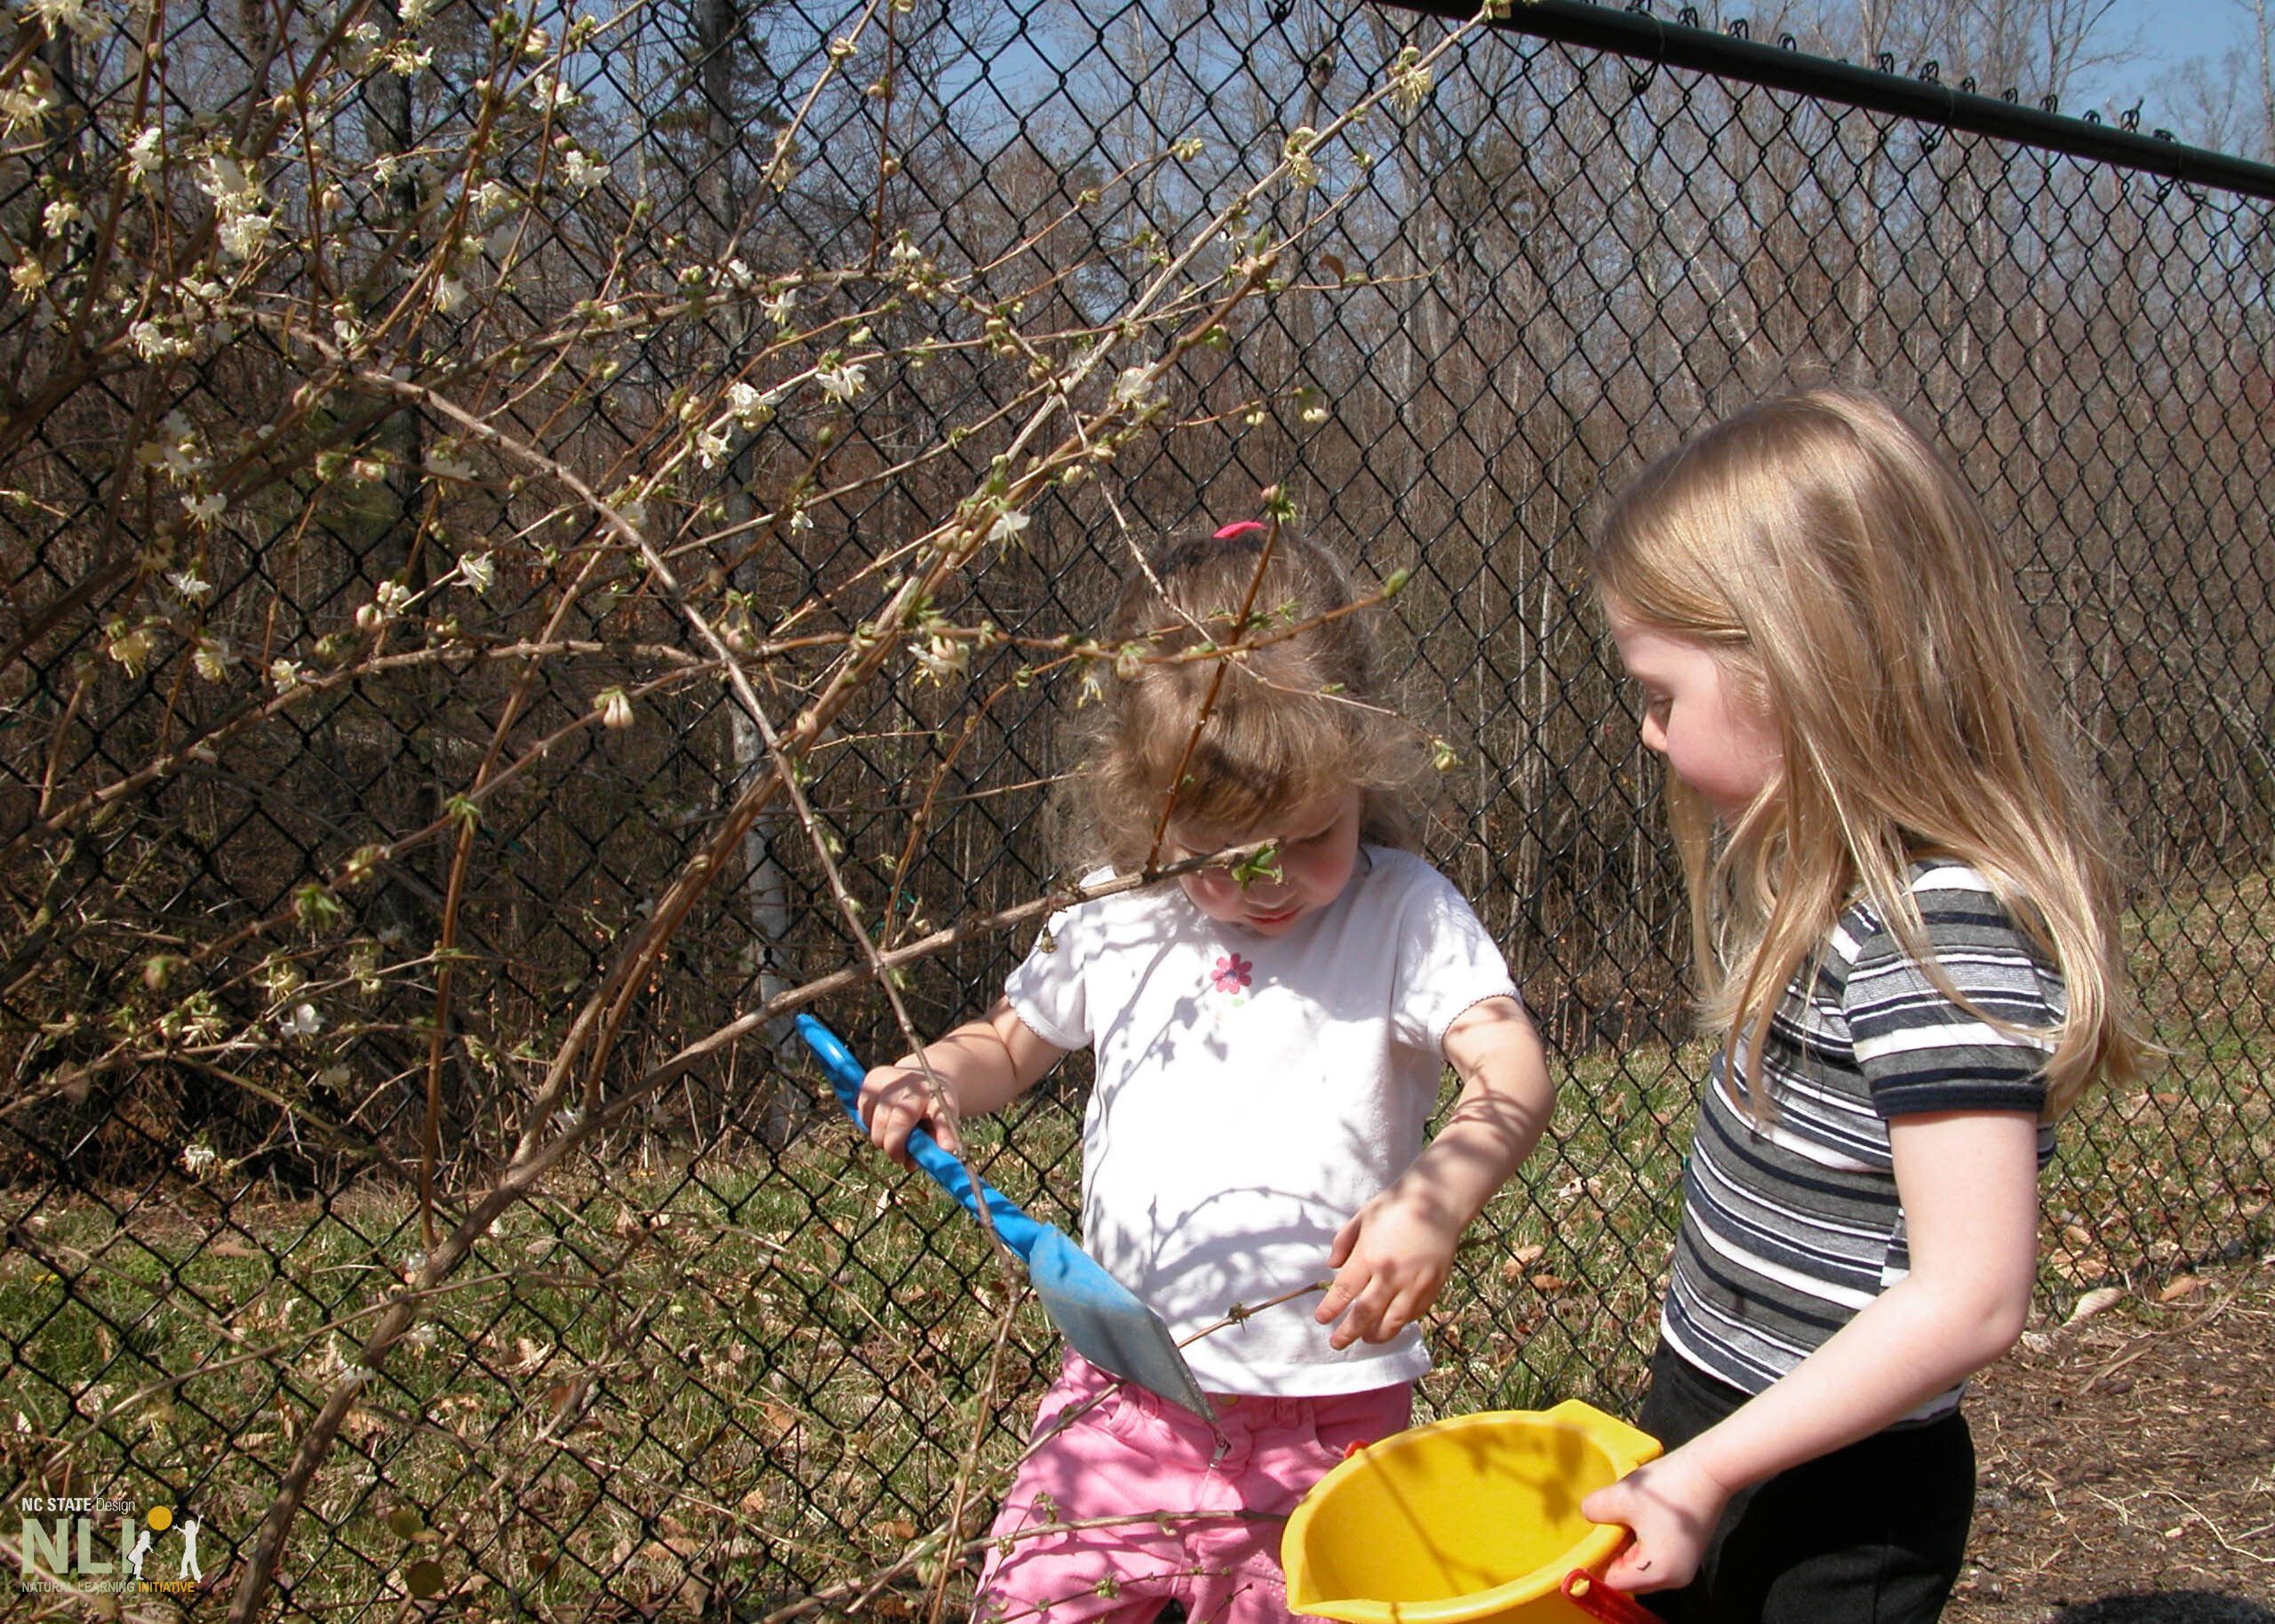
    children collecting plants

    A pair of “hunter-gatherers” collect blossoms as a colorful ingredient.

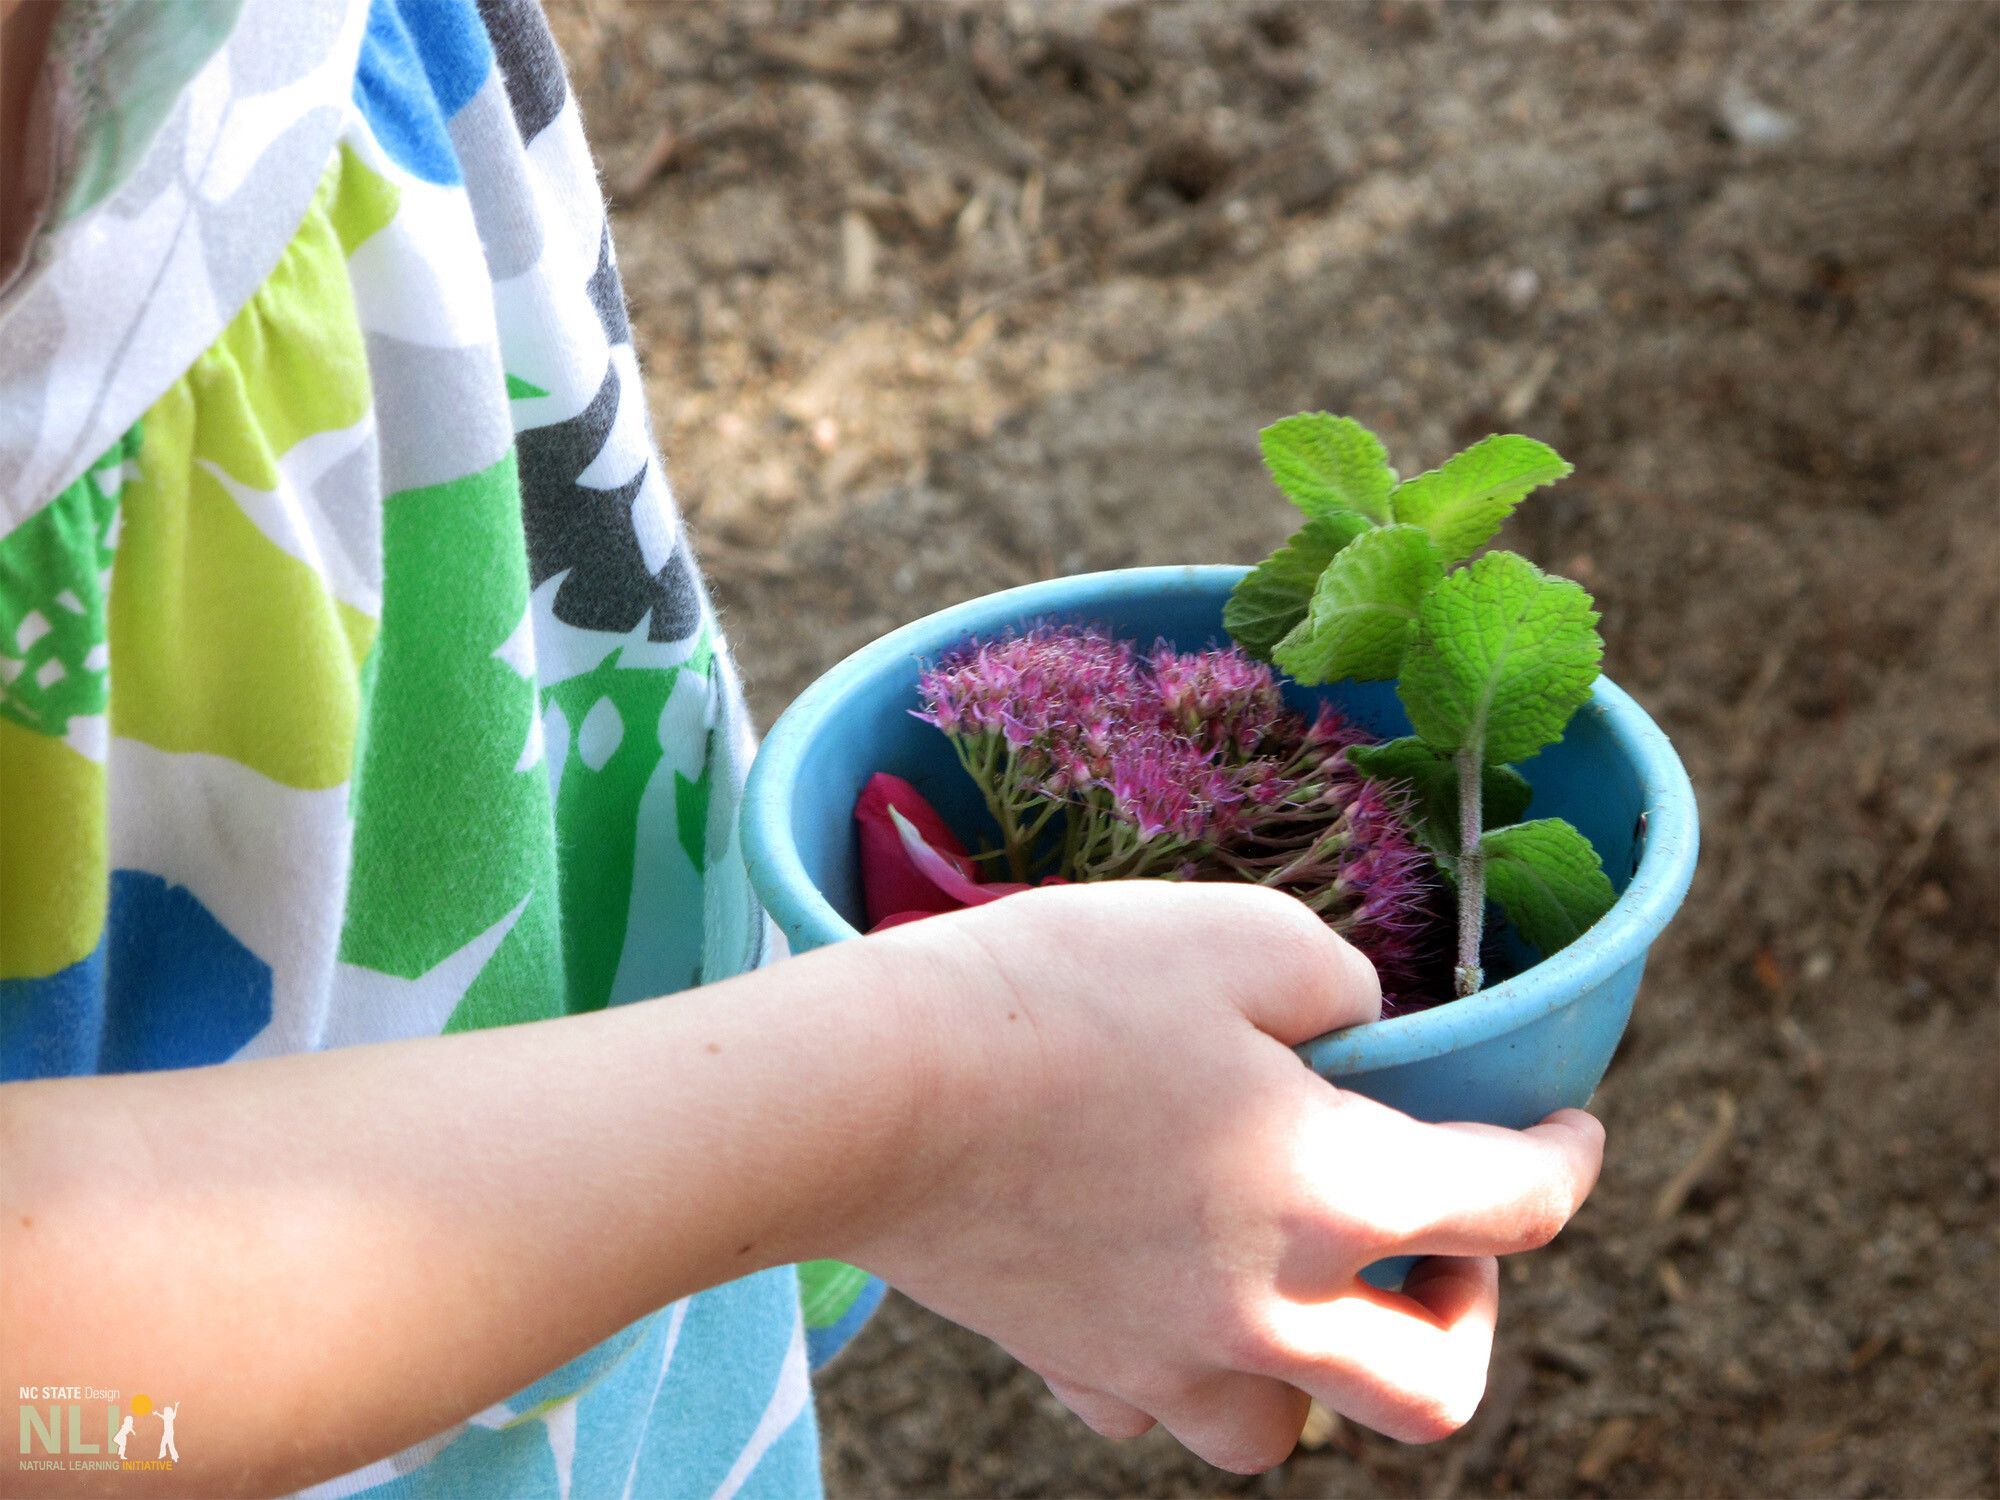
    child holding a collection of plants

    Collecting natural loose parts

    children playing in a mud kitchen

    Superb mud kitchen with features that can easily accommodate 6 to 7 children for long play and learning sessions. Beyond the pathway lies an edible garden.

    children making pretend soup

    Soup needs water!

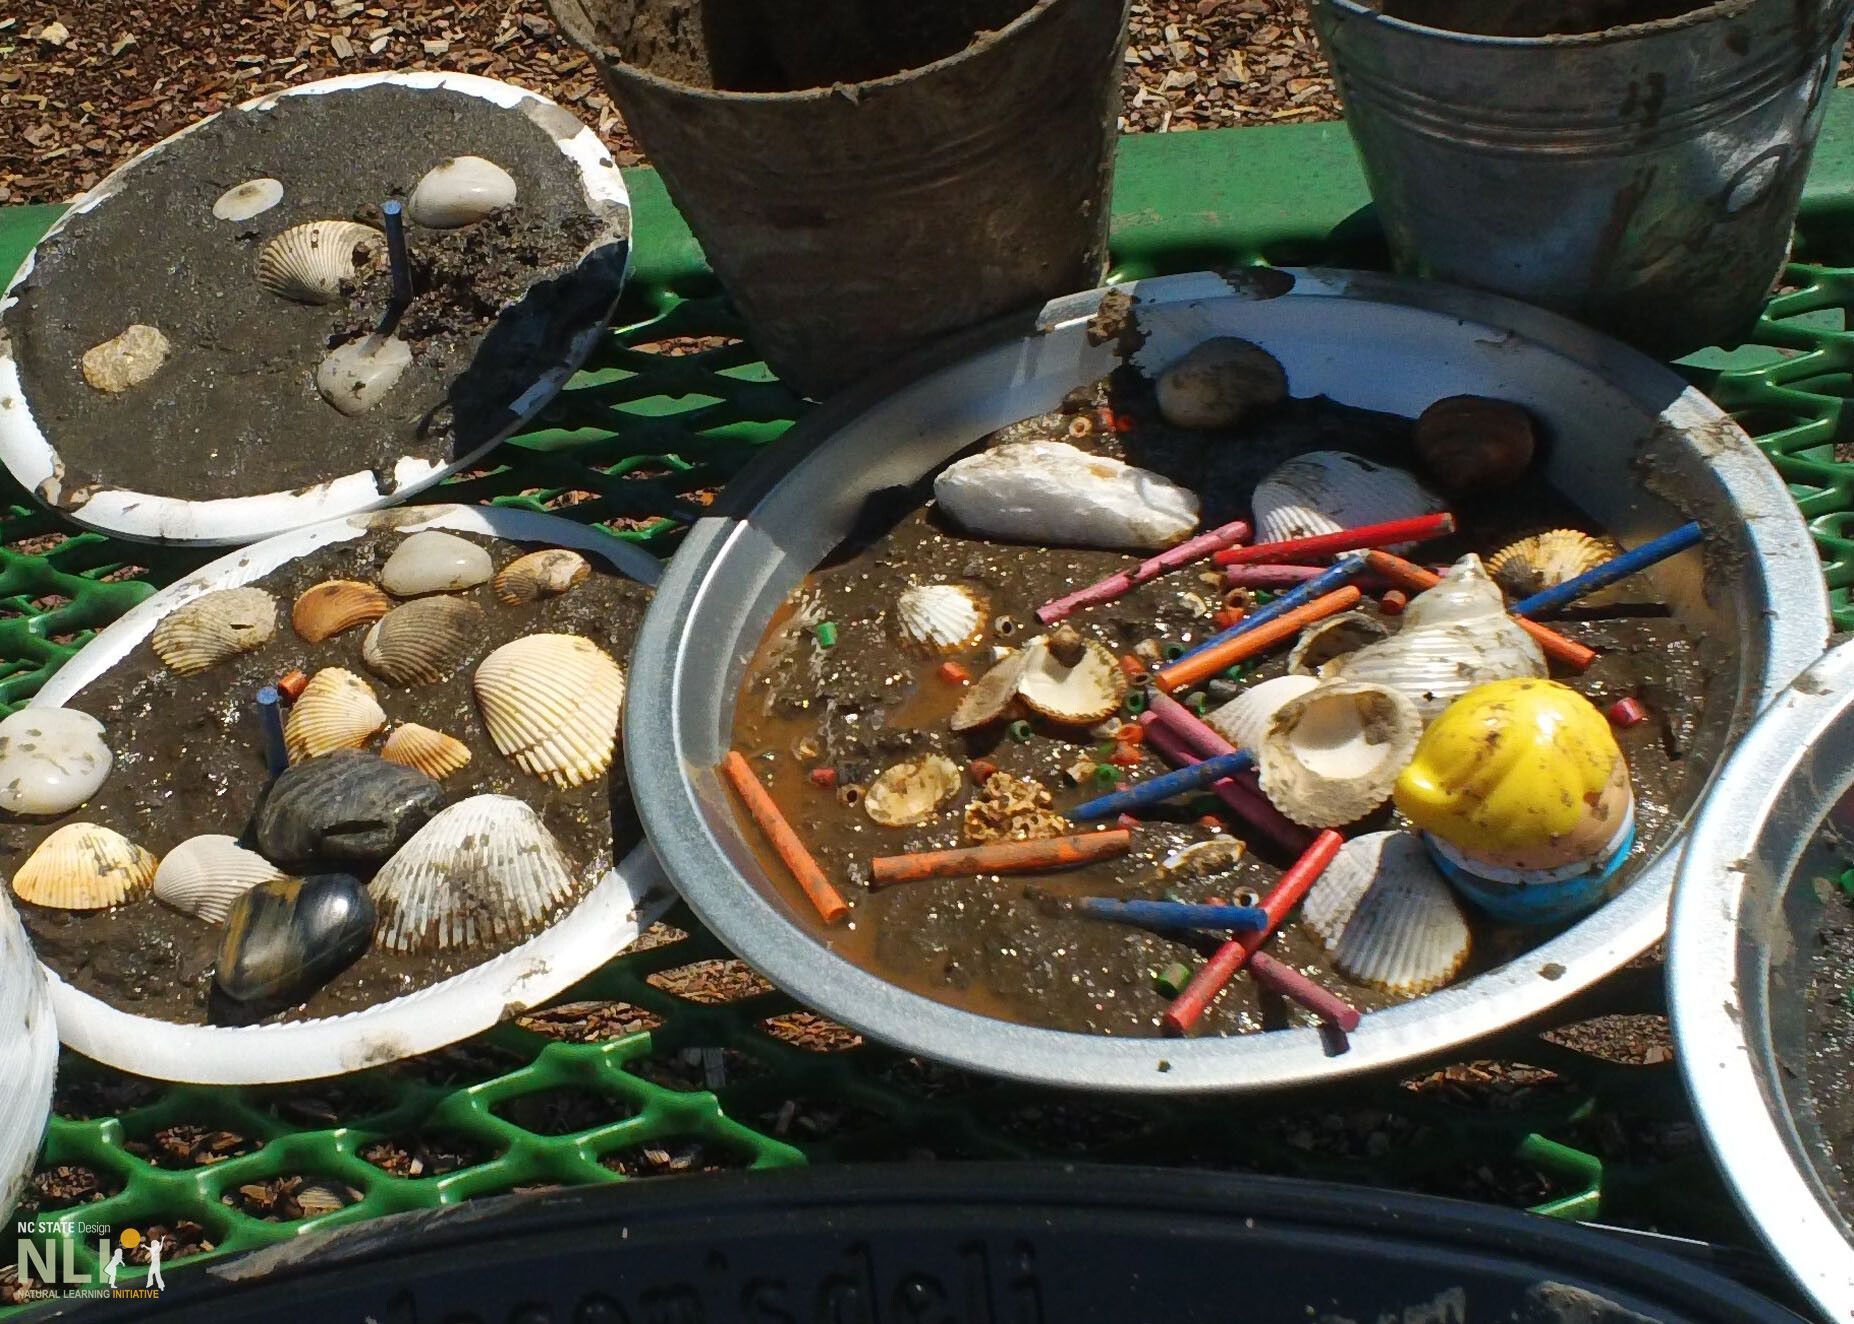
    "mud pies" made from various natural and manufactured materials

    Mud pies, anyone?

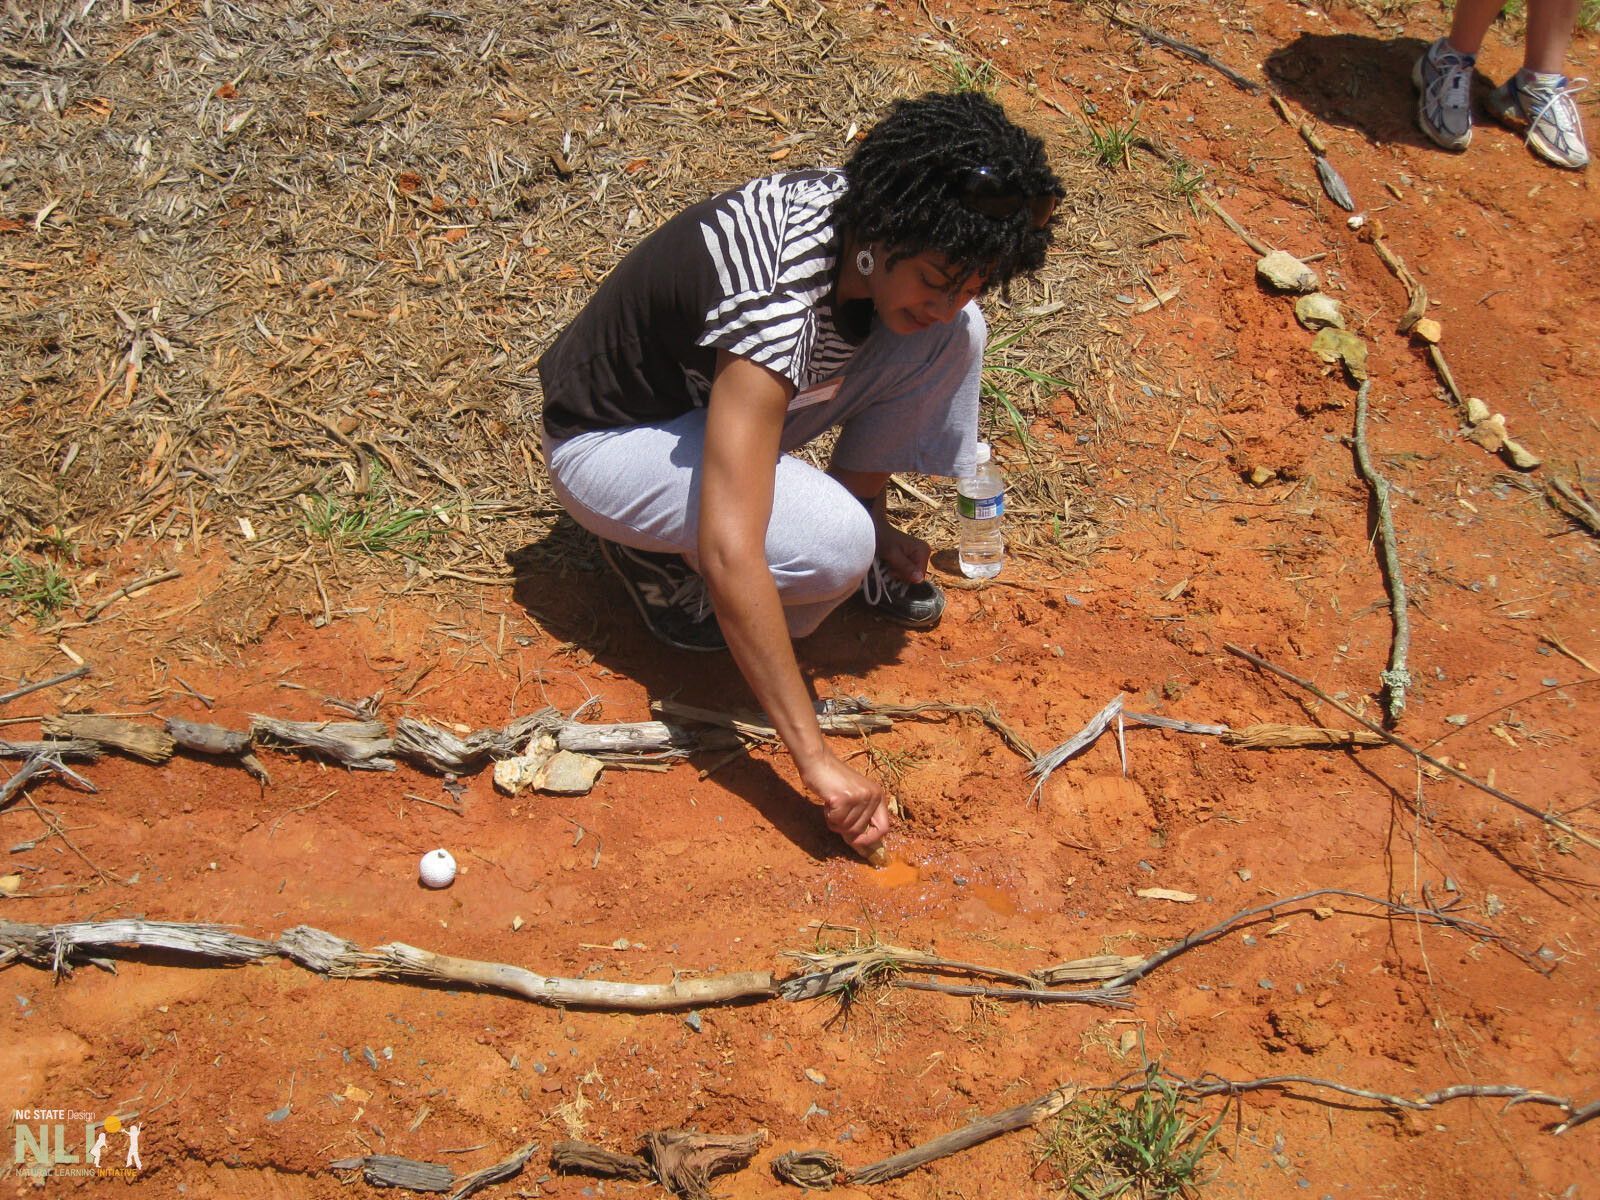
    adult playing in the dirt

    Adult nature play workshop with sticks, damp soil, and mud helps parents feel comfortable with dirt play.

  • 40. Water Play

    Infosheets

    40. Water Play

    Download the PDF – English

    Water offers endless, multi-sensory, interactive play and learning opportunities like floating leaves and other “floatables,” manipulating flow with movable stones, pouring from containers, splashing, “painting” with water, and more. The sound of running water with sunlight glinting off ever-moving water surfaces increases sensory impact. Misting creates mini-rainbows that playfully intrigue and connect children to the larger world.

    TYPES OF WATER PLAY & LEARNING SETTINGS

    Water play and learning settings can be categorized as either hands-in or full-body, each with particular characteristics and requirements. In either case, water must be potable.

    Hands-in settings connect children easily to water and endless, flexible possibilities provided by portable items and loose parts including tubs, trays, and small containers (purpose-made and re-purposed). Water is commonly delivered via a fillable reservoir or various types of hand pumps.

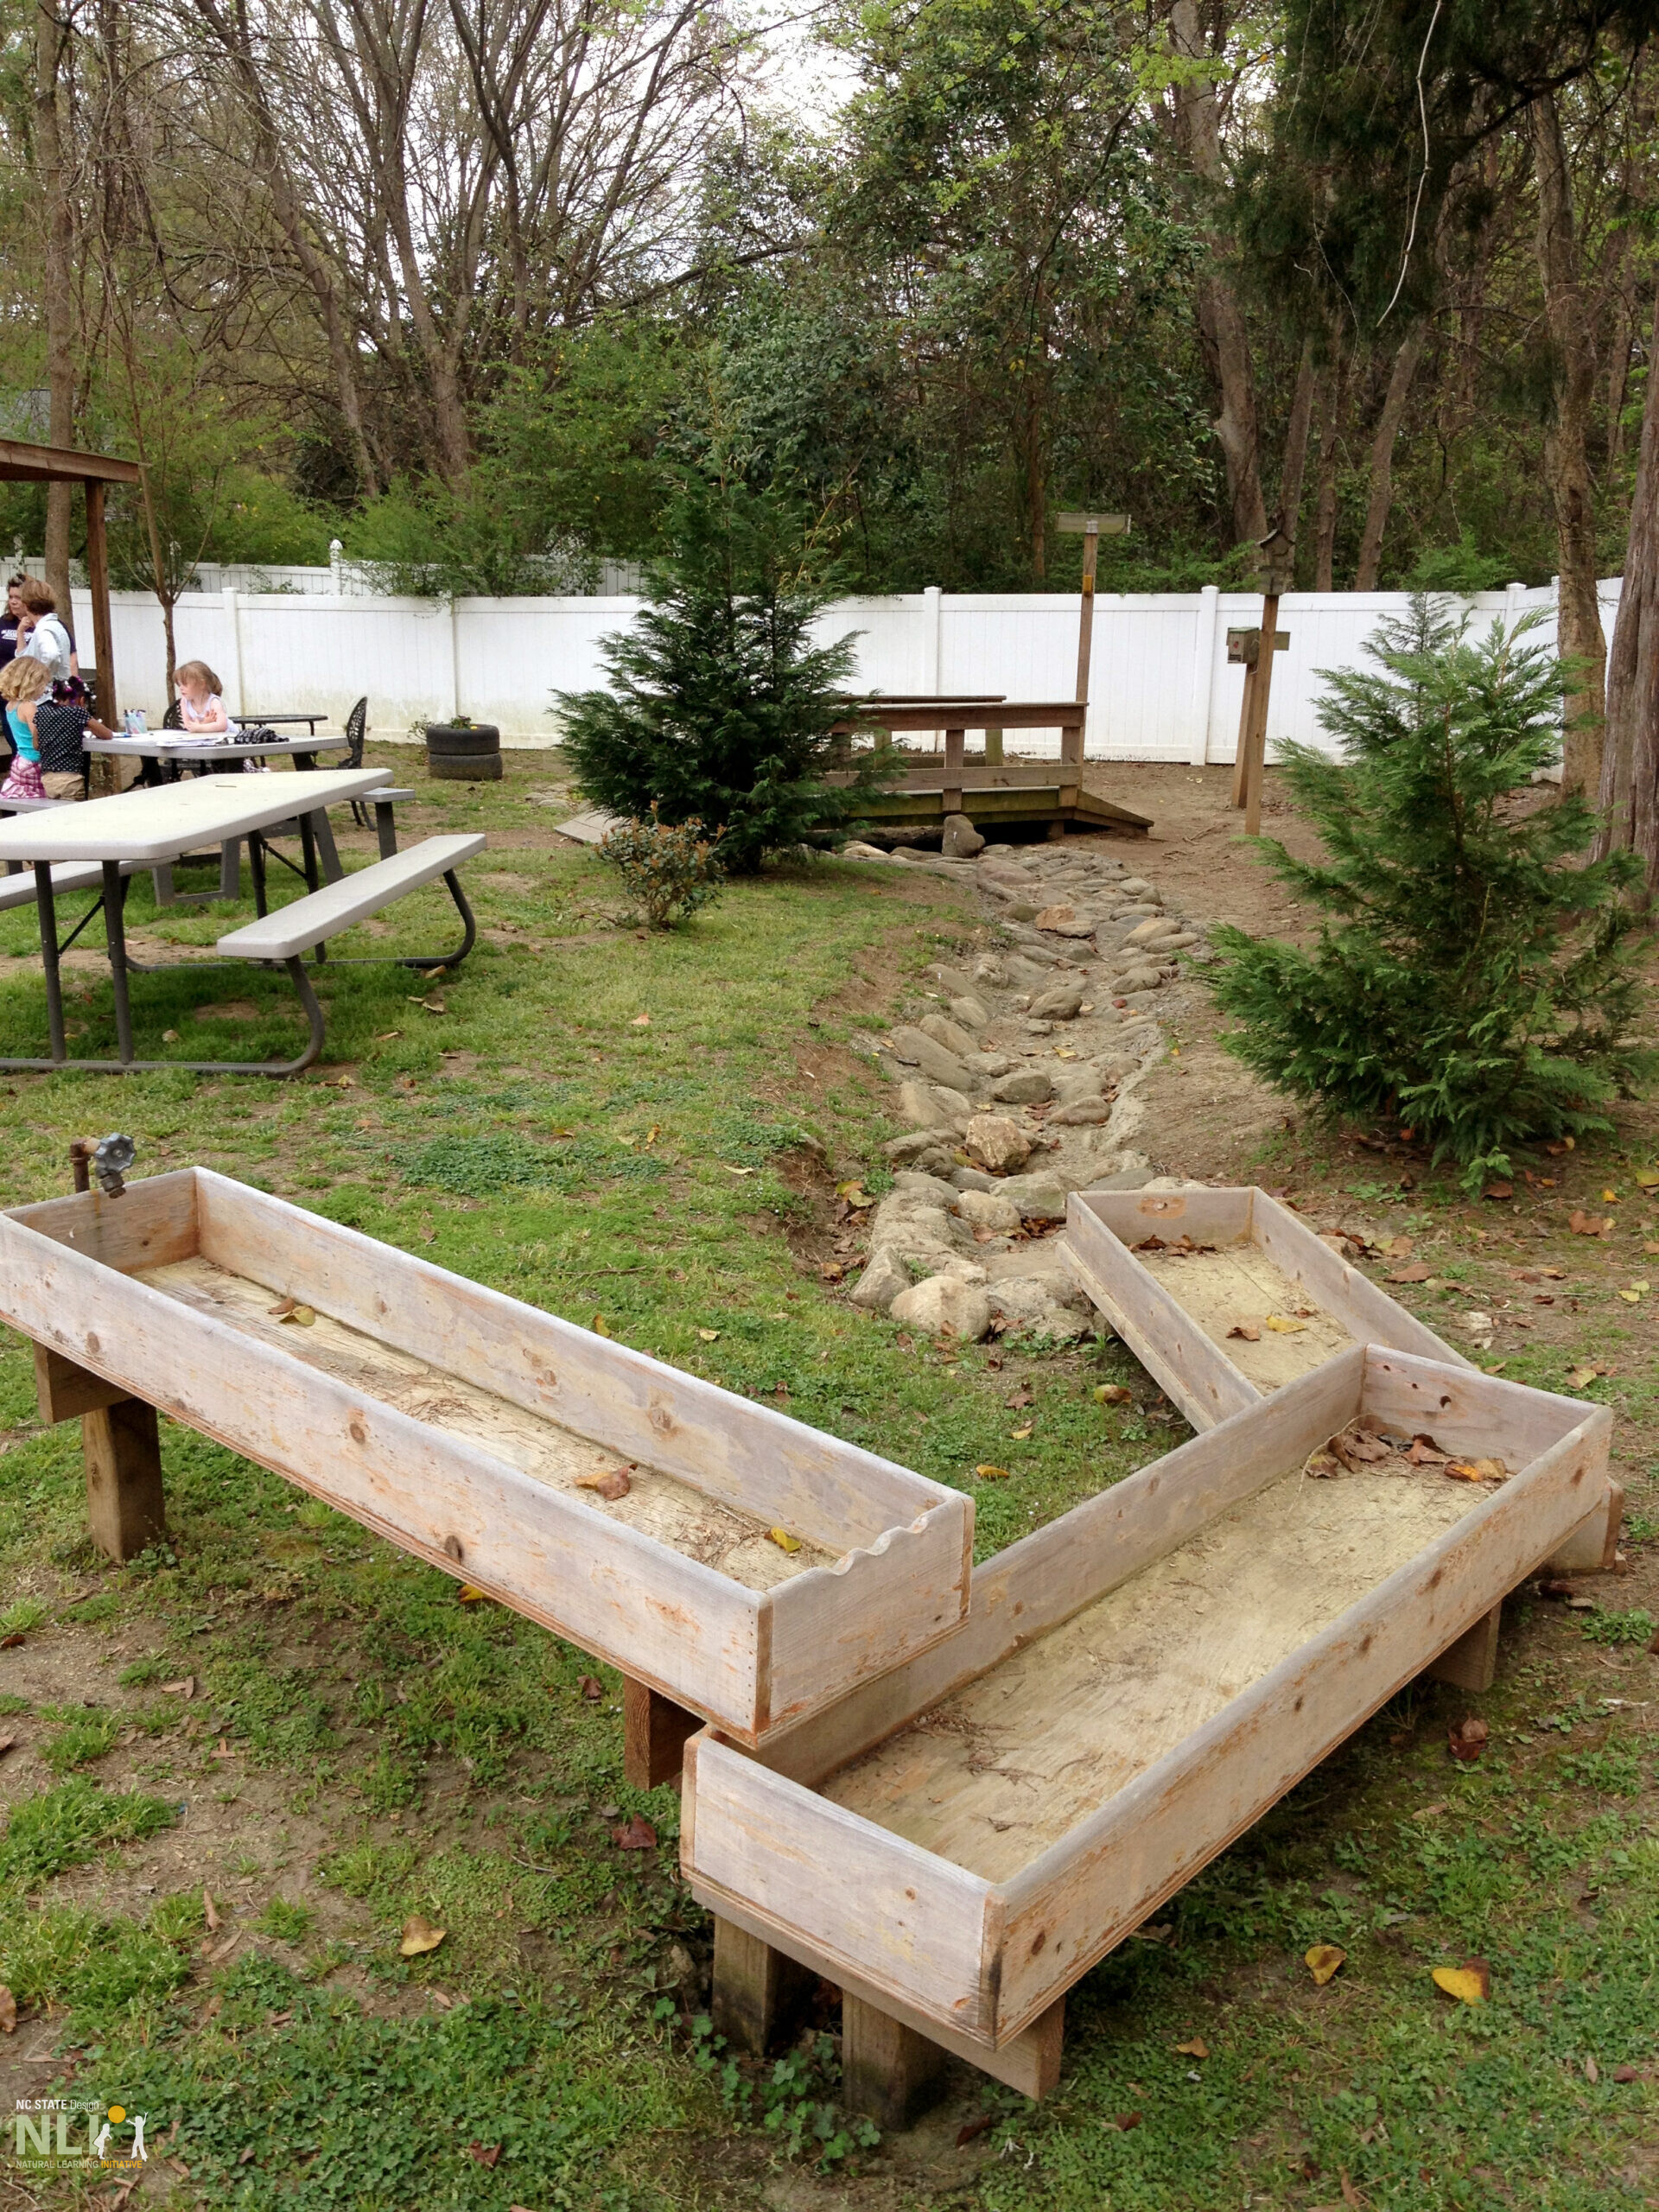
    Elevated, interconnected water tables offer a flexible, wheel-chair friendly, hands-in option that extends the water play season and is usable by diverse groups of children. Manufactured water tables can be purchased and are easily moved and stored when not in use. More elaborate, multi-tiered water tables can be designed as permanent best practice installations.

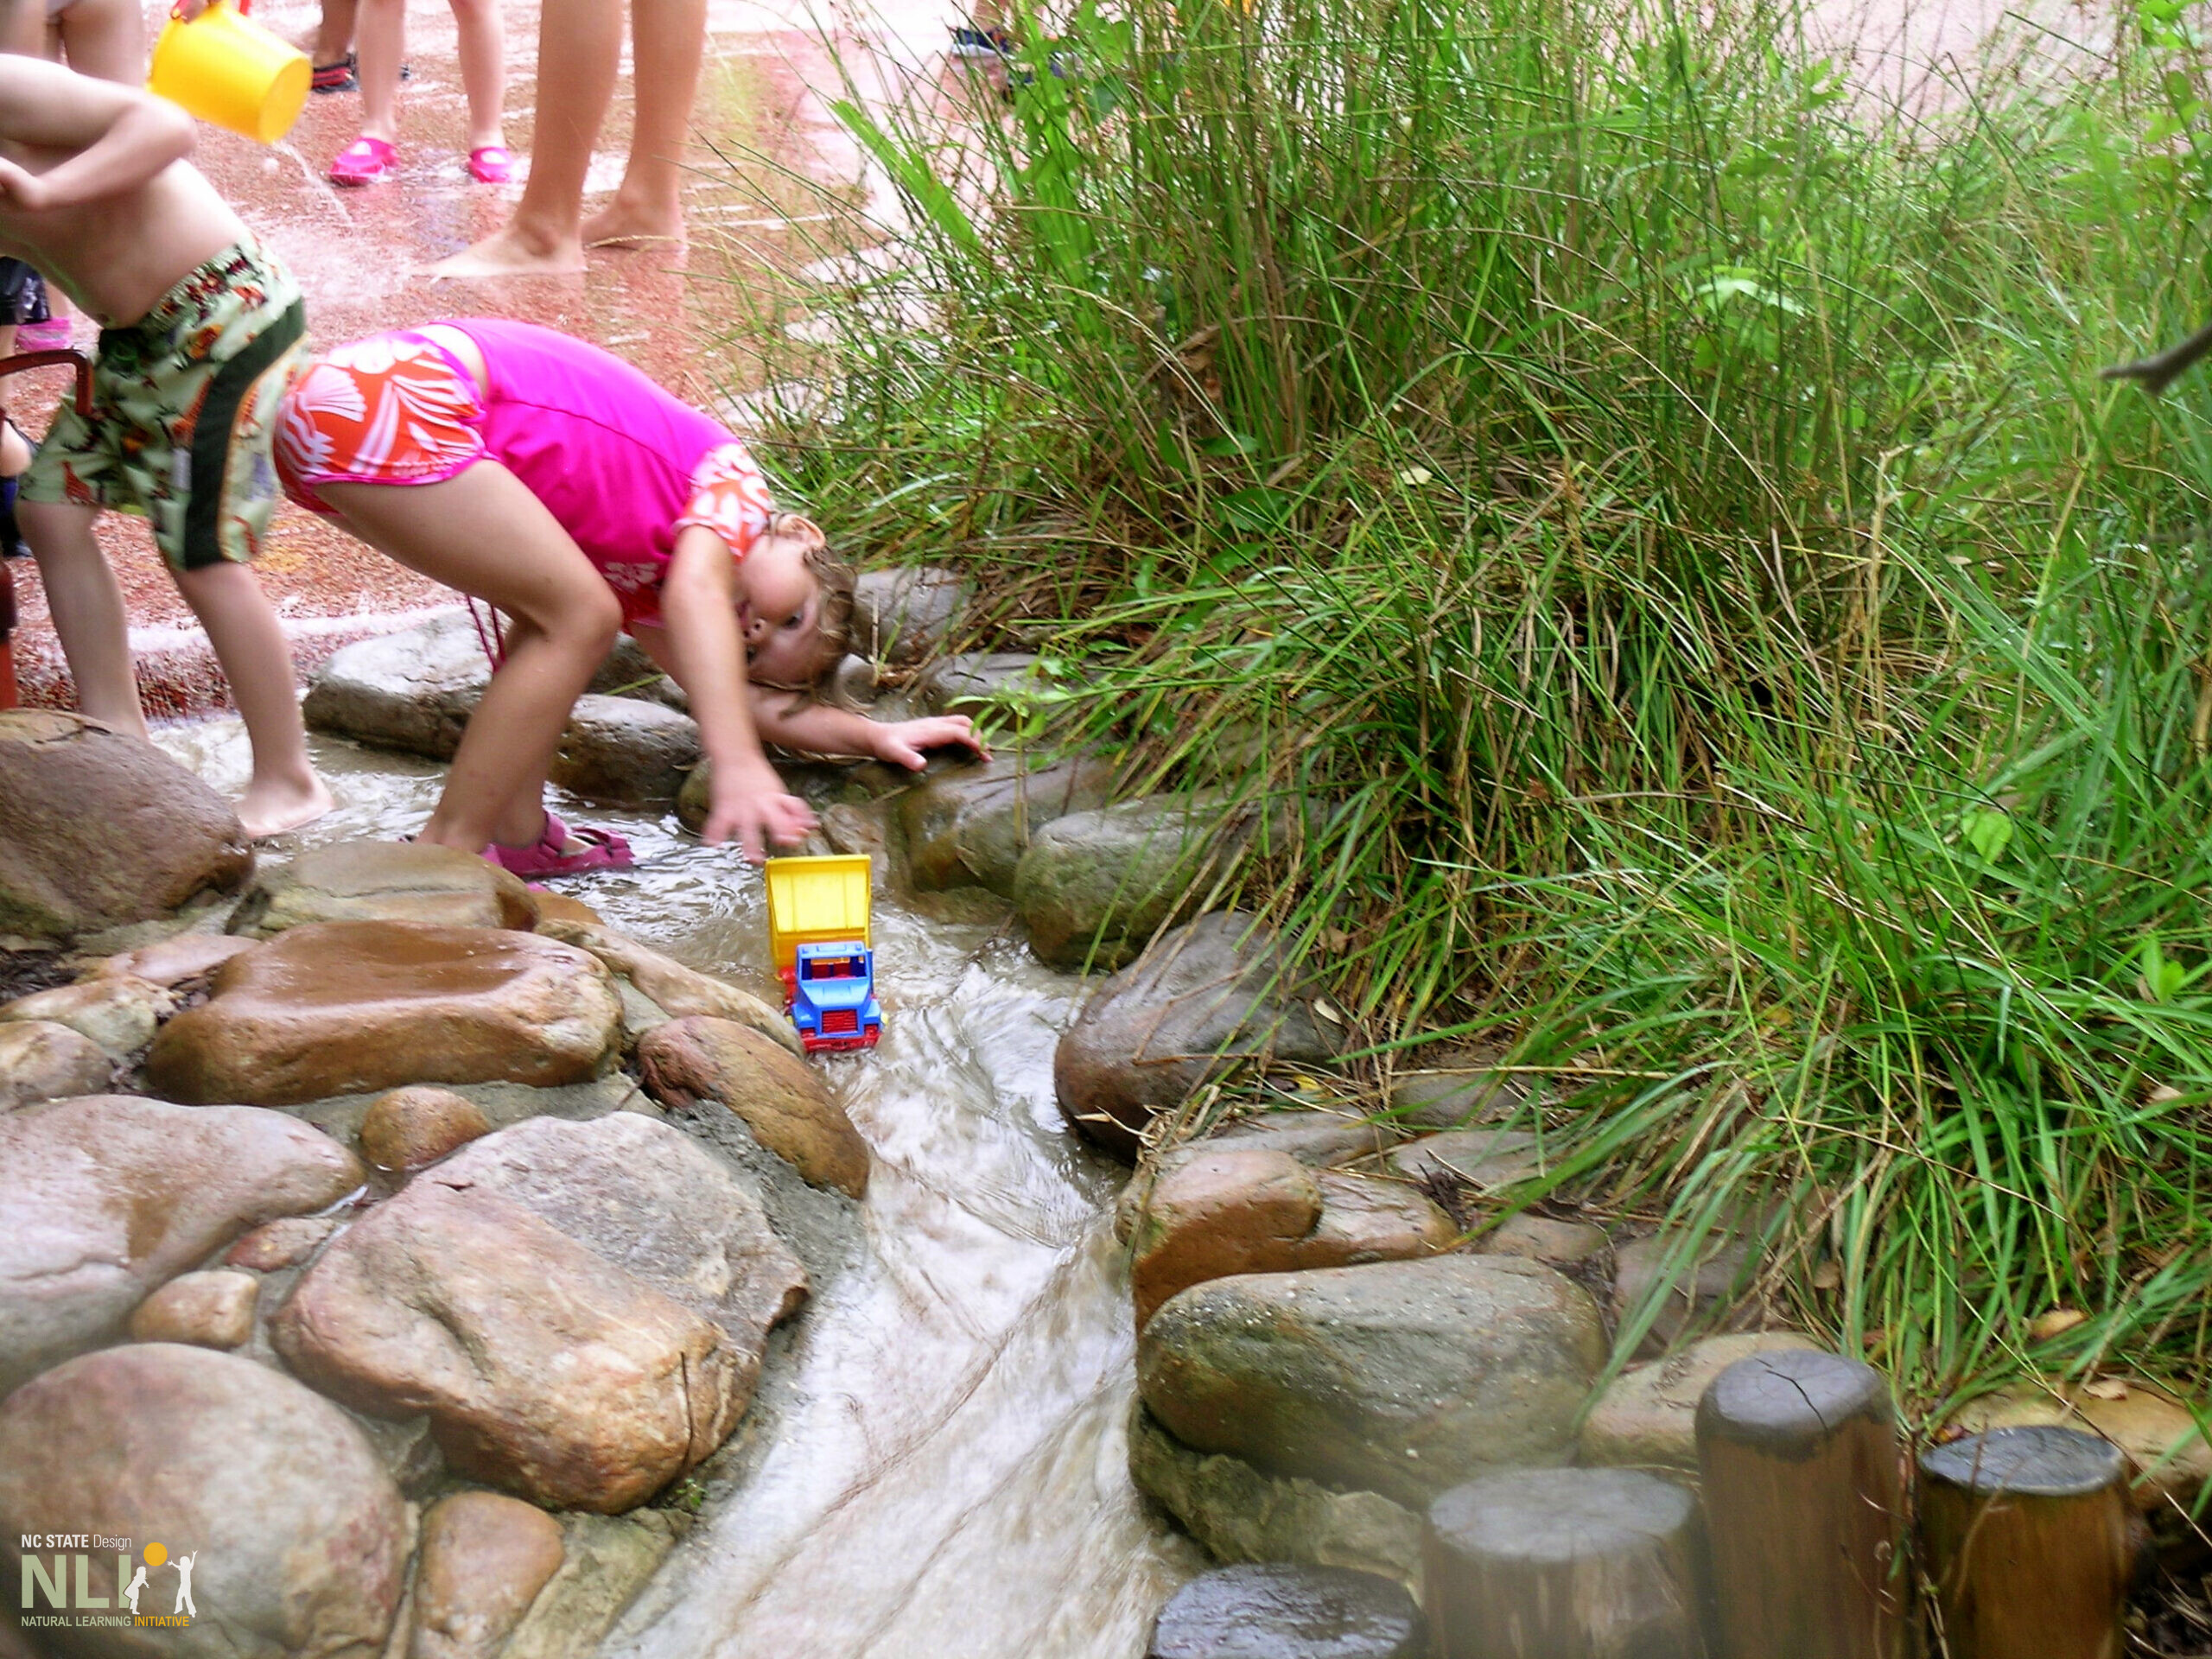
    In-ground, hard-surfaced streams (similar to dry stream beds), are another, more naturalistic hands-in option. Although the play value may be limited by season, they can be designed as drainage outlets, carrying water away from water tables or other components. Children can play and learn by manipulating water flows, creating dams with loose parts, and floating objects down the stream.

    A multitude of natural and manufactured loose parts can add play and learning value to water settings. They include natural objects such as sticks, acorns, pinecones, and leaves that can be scavenged from the vicinity. Manufactured items such as balls, boats, and rubber ducks provide unique color, texture, and buoyancy. Utensils such as bowls, cups, ladles, pitchers, water bottles, and funnels can be used to scoop, pour, stir, and spill water for endless fun!

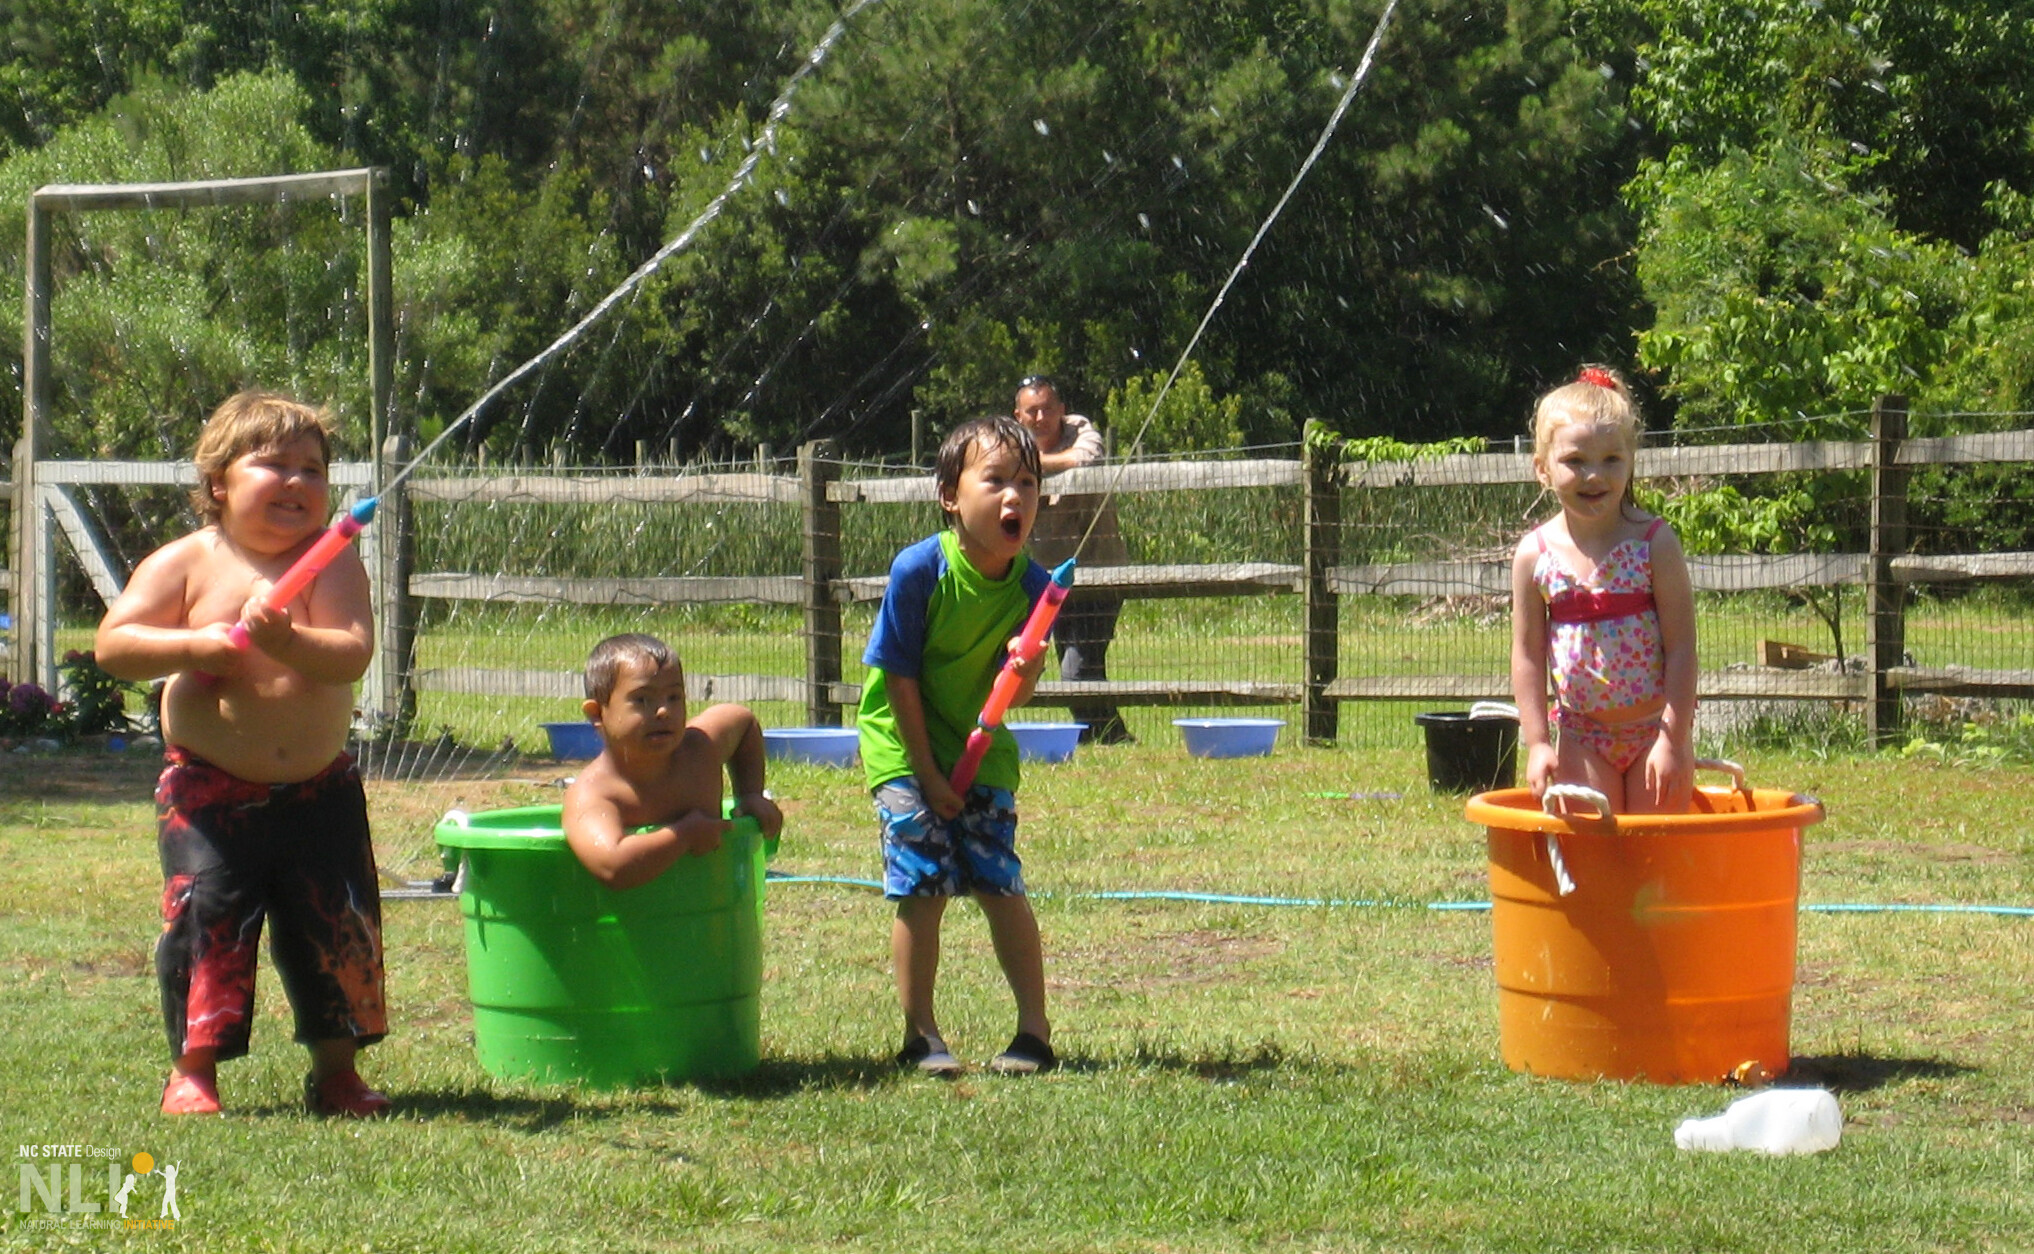
    Full-body settings are ideal for cooling off during the hot summer months while stimulating vigorous, active play. They include water delivered as spray or mist. For low-cost solutions, place a sprinkler in the center of a multi-purpose lawn or suspend a hose with a soft spray head from an arbor or pergola. Either will afford active, gross motor chase play as well as focused attention on the behavior of water. Misting is an alternative option using affordable components easily installed in an arbor, pergola, or other overhead structure. Full-body water play can include all kinds of colorful squirt toys suitable for preschoolers. A more expensive option includes permanent, valve-operated, ground-level spray heads mounted in a concrete slab with a poured-in-place safety surface.

    On designated “water play days” make sure children come prepared with a change of clothes and towel for drying off. Identify spots (fences, temporary clothes lines) where wet/damp clothes and towels can dry.

    DESIGN CONSIDERATIONS

    Water supply. Use potable water that drains into either a sewer system, rain garden, or flows into a dry stream bed. Harvested rainwater or standing outdoor water should not be used.

    Drainage. Water settings should drain at the end of each day to avoid standing water.

    Setting size. A sand play setting can range between 40–300 square feet, depending on the available space and age of children served.

    Regulations. Consult local regulations that may apply to childcare center water installations.

    Surfacing. Surfaces around water play settings should be non-skid and well-drained.

    Shade. Ensure that children are protected from harmful UV light by providing adequate shade for water play and learning settings, especially during the summer months. Temporary shade solutions such as shade sails and umbrellas can be used while permanent solutions, such as shade trees or pergolas, become available.

    Water-related play and learning settings that may benefit from functional adjacency and/or shared water hook-ups can be found in the following InfoSheets: 12: Arbors, Pergolas, & Trellises;15: Sand Play Settings;16: Multi-purpose Lawns;34: Mud Kitchens; and36: Dry Stream Beds.

    Health and Safety

    • Never use gray water or run-off for hands-in or full-body water play. This includes harvested rainwater, snowmelt, or standing water on site. Use potable running water from an outdoor faucet.
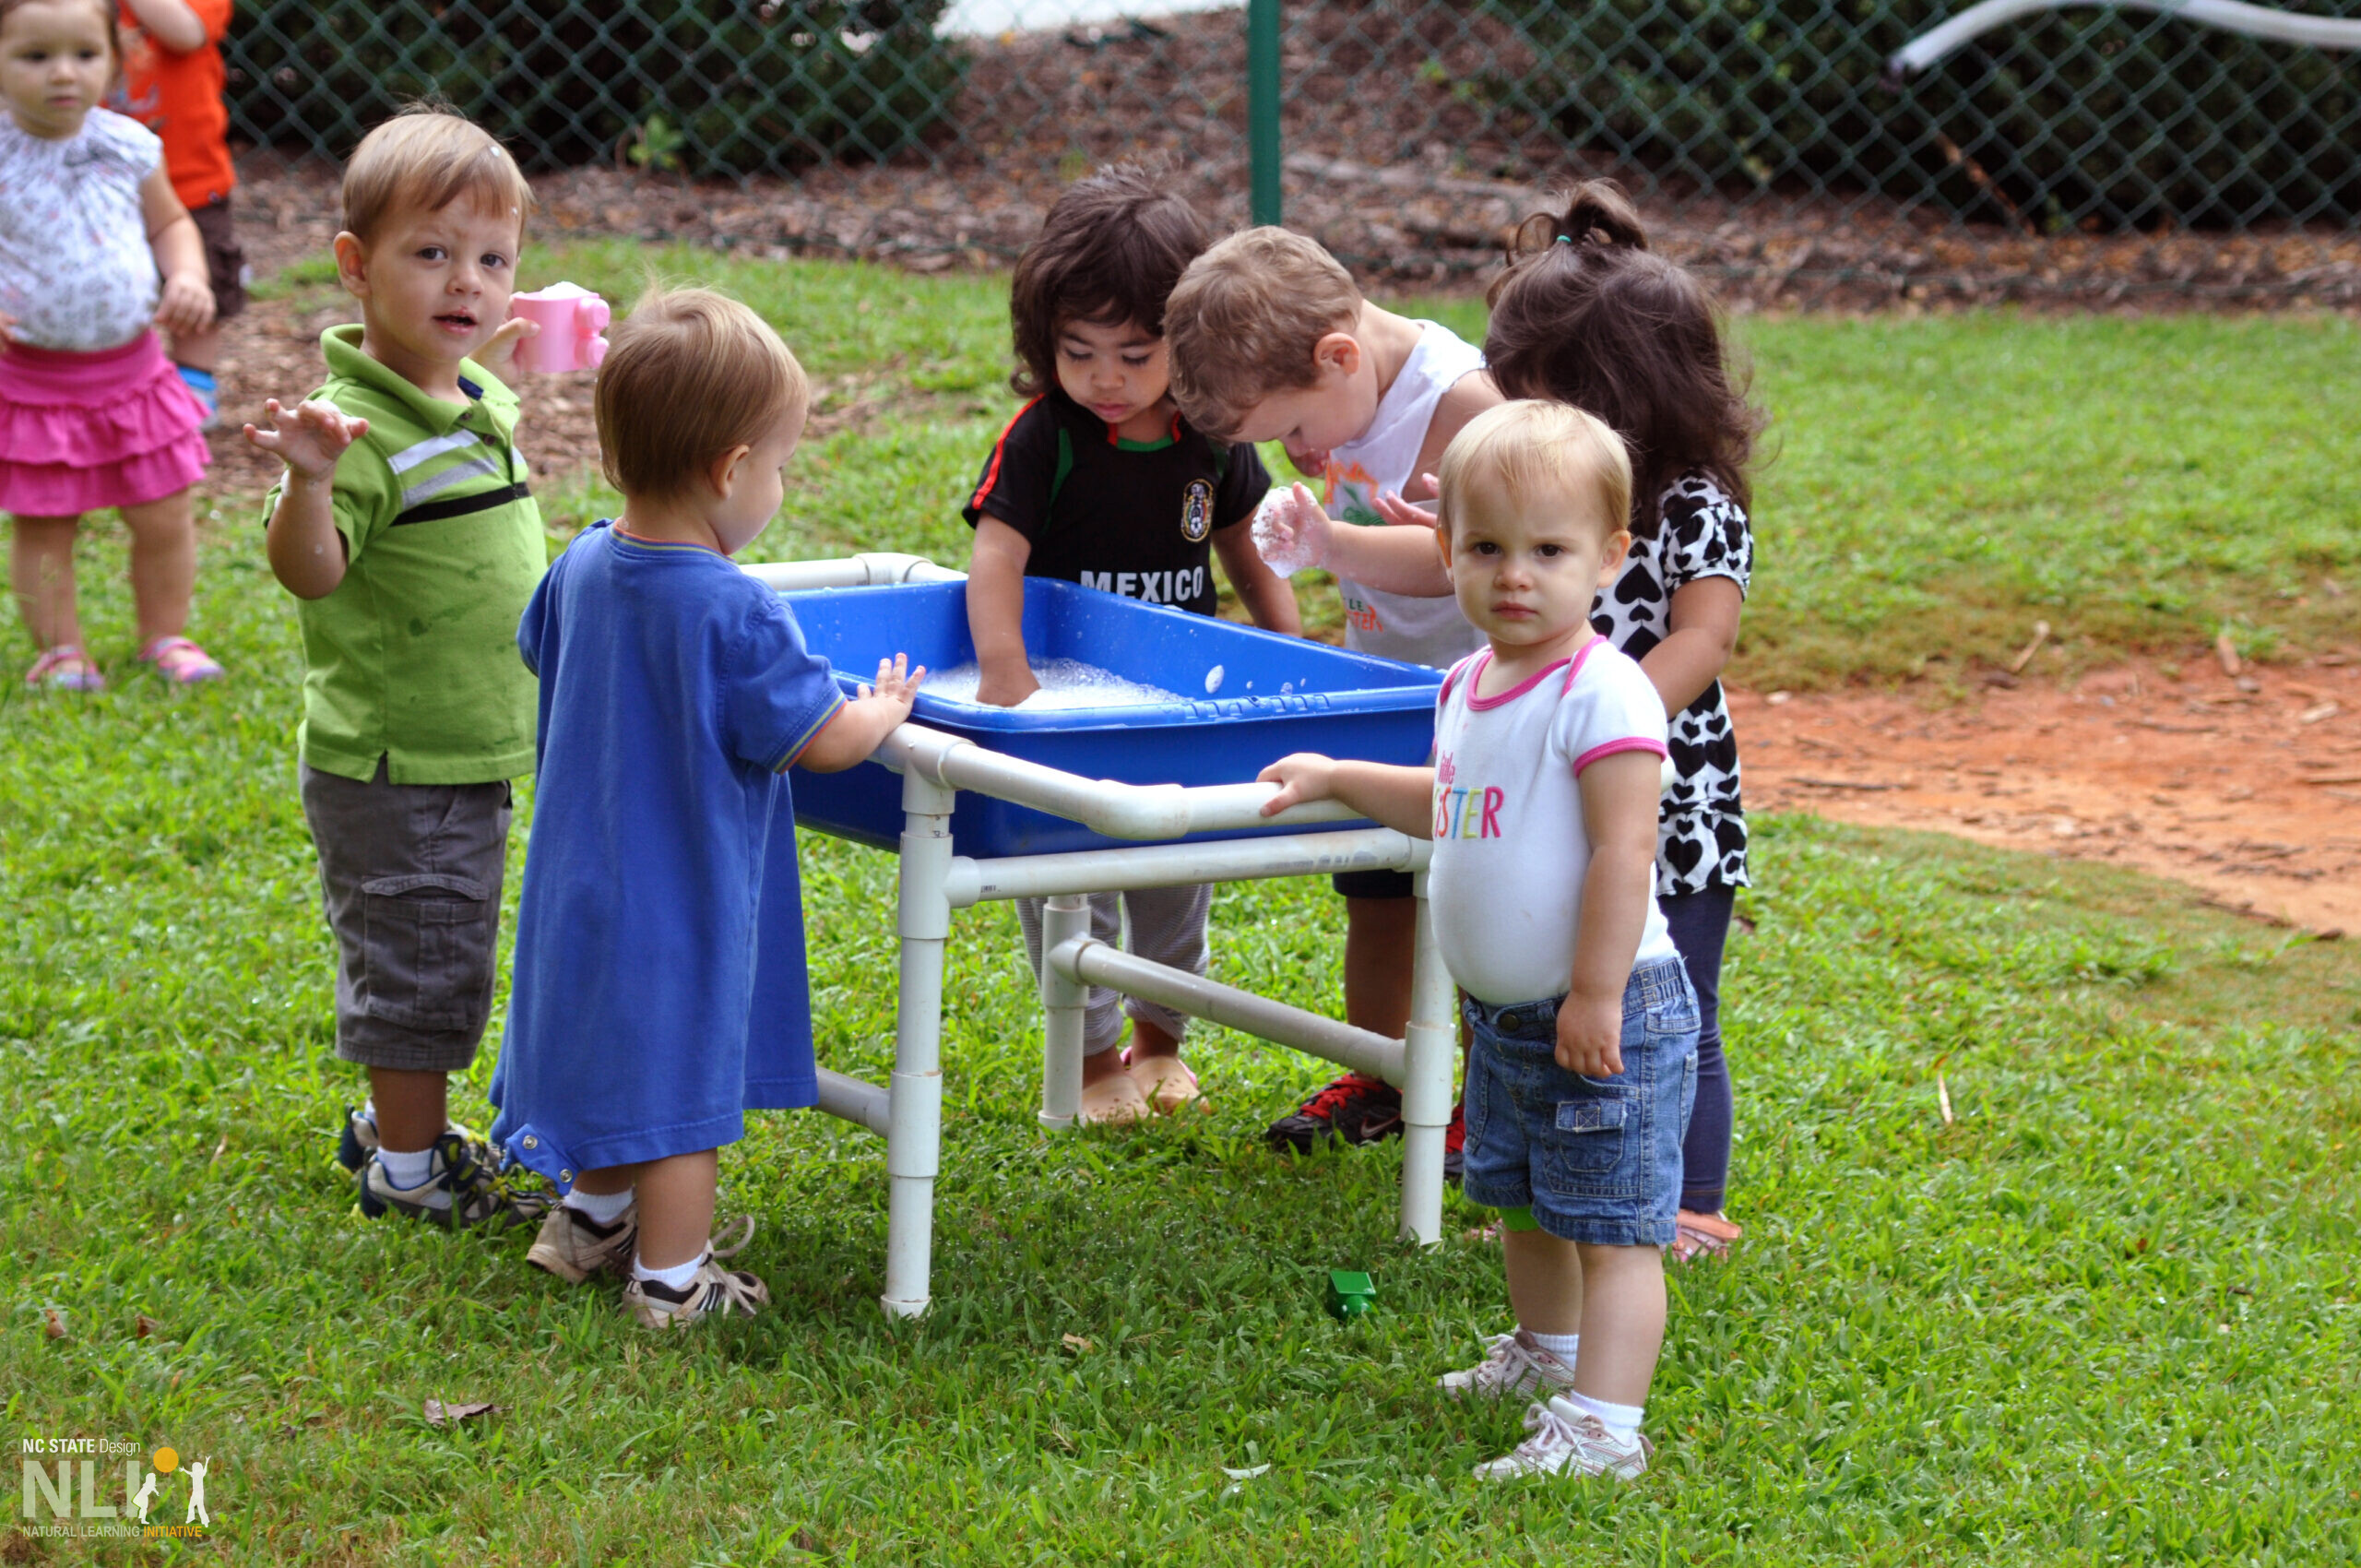
    children playing in a plastic water table
    A single tray, manufactured, moveable water table is inexpensive and serves a range of play and learning purposes such as soap play.

    A single tray, manufactured, moveable water table is inexpensive and serves a range of play and learning purposes such as soap play.

    interconnected water table
    Raised, multi-level, interconnected water table. Water is supplied by an adjustable valve and exits into a dry stream bed converted from an eroding ditch.

    Raised, multi-level, interconnected water table. Water is supplied by an adjustable valve and exits into a dry stream bed converted from an eroding ditch.

    child playing in a hard-surfaced stream
    Ground-level channel flowing from spray space motivates preschooler toy truck play. Note water-loving vegetation.

    Ground-level channel flowing from spray space motivates preschooler toy truck play. Note water-loving vegetation.

    children playing around an in-ground water fixture
    Ground surface spray head motivates active, gross motor play and social interaction.

    Ground surface spray head motivates active, gross motor play and social interaction.

    children engaging in water play
    Squirt toys on a multi-purpose lawn add a fun, playful, and exciting extension to water play.

    Squirt toys on a multi-purpose lawn add a fun, playful, and exciting extension to water play.

  • 42. Loose Parts Settings

    Infosheets

    42. Loose Parts Settings

    Download the PDF – English

    Loose parts settings support a broad range of open-ended play and learning activities in a defined space, prompted by items that are small enough to be easily manipulated by preschoolers. Potential items include both natural materials as well as repurposed manufactured objects. Playful interaction with loose parts activates children’s imaginations and creativity and helps them learn early STEAM skills through hands-on combining, counting, sorting, rearranging, stacking, and more. The fundamental value of loose parts is that they are, well, loose—an essential quality and best practice. Because loose parts can be manipulated autonomously to serves children’s purposes, they enable development of agency, critical to success in life. Defined loose parts settings keep manufactured items and selected natural objects together and organized for teachers, while still encouraging independent play for children.

    Types of Loose Parts

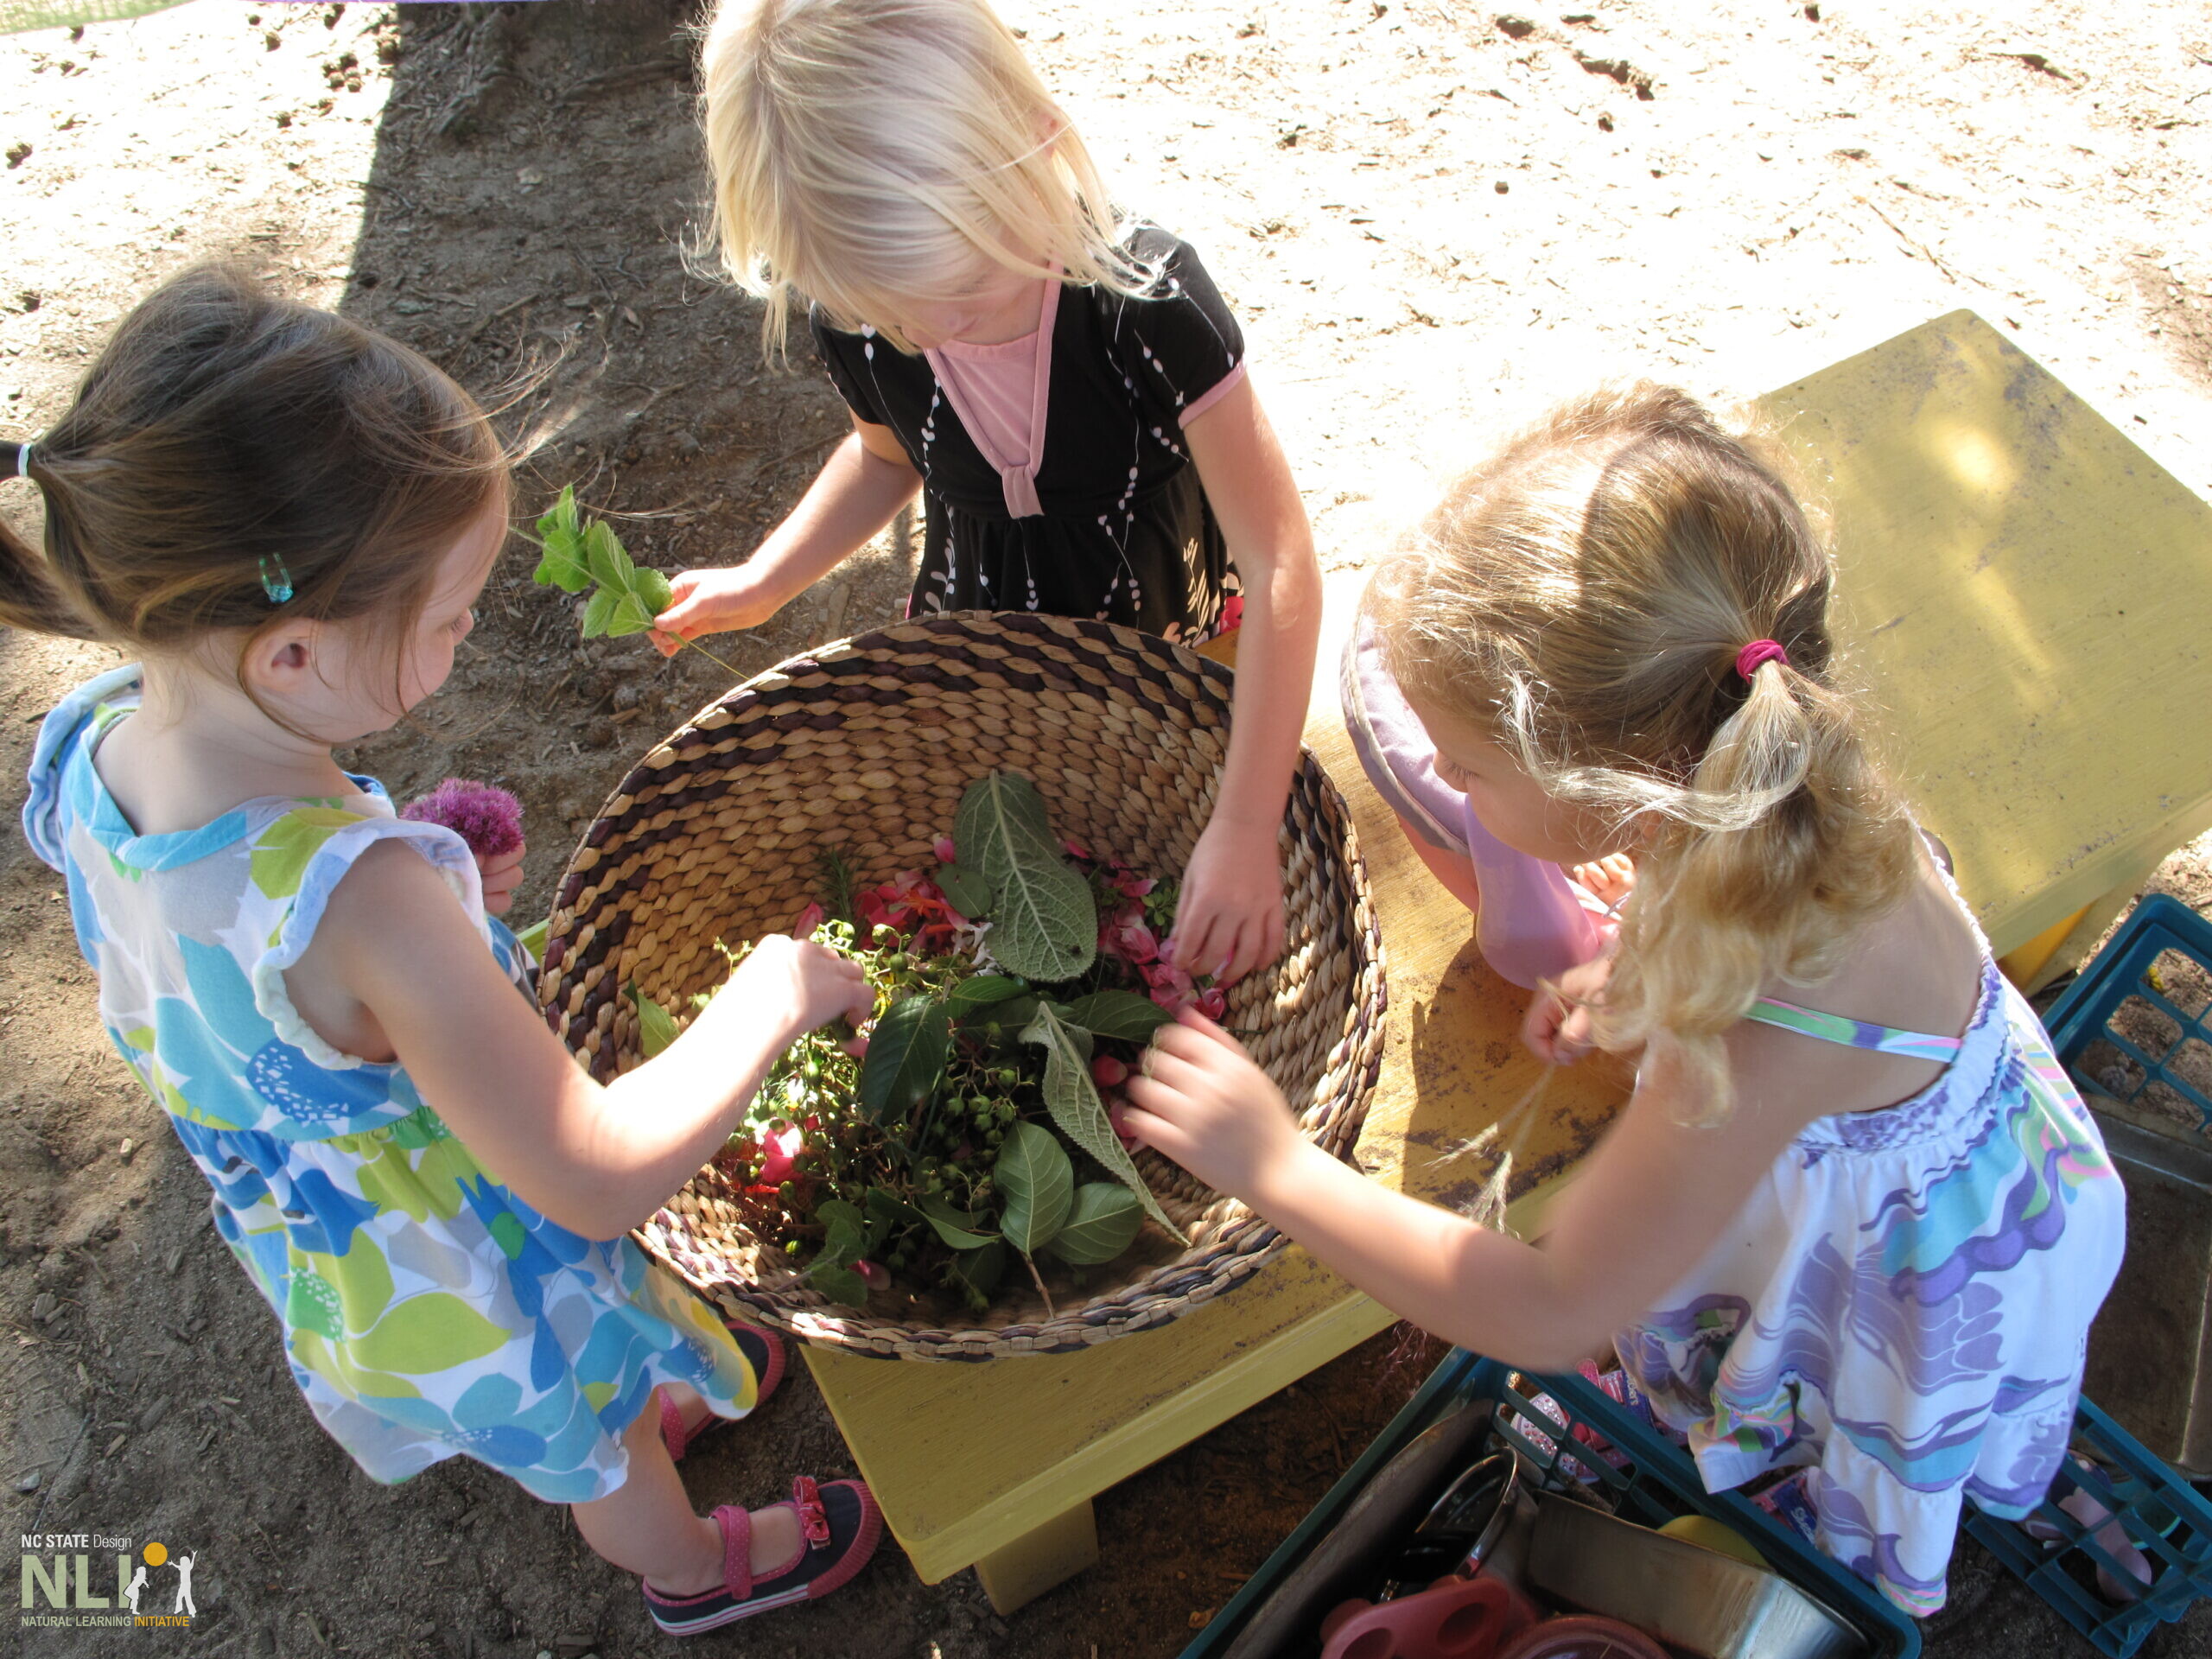
    Natural. Natural loose parts include a variety of natural objects such as sticks, stones, shells, mulch, pine cones, driftwood, “tree cookies,” fallen leaves, acorns, and similar seeds, and their seedpods. The availability of some natural loose parts, such as seeds and flowers, change with the seasons while others, such as sticks and stones, are available year-round. Naturalized play and learning spaces are by definition rich in natural loose parts, while others may require teachers and children to bring natural loose parts from home or other local sources. If baskets, buckets, and push toys are available, children will “forage” for natural loose parts, incorporate them into other activities, and increase their levels of physical activity.

    Manufactured. Manufactured loose parts can be created by re-purposing everyday items of all shapes and sizes. Large items include cardboard boxes and tubes, plastic pipes, crates and bins, pieces of textile and foam plastic, pieces of furniture, and items of clothing. Medium-sized items include all manner of plastic and metal containers, drink cans, plastic bottles, and cast-off kitchen utensils. Smaller items include bottle caps, beads, string, metal cans, soda tabs, and much more. Assemble a wide variety of objects with different colors, textures, and materials that maximize sensory play opportunities. Sources include kitchens, classrooms, households, and thrift stores.
    Location

    Locate loose activity settings near natural features that produce bountiful play and learning items, like trees, shrubs, tall grasses, and pickable flowers. Natural loose parts facilitate independent play and connect children to nature. Discuss with children what they can pick and gather outdoors. Ensure settings have sufficient shade to protect children during extended play sessions, either in the shade of trees or by installing shade components such as pergolas, umbrellas, or shade sails.

    Organization and Storage

    If a permanent loose parts activity setting is desired, provide adequate storage for ease of access. Storage in bins, baskets, buckets, and shelving units allows for self-guided play and facilitates easy clean-up. When possible, protect loose parts from the elements by storing them in bins with lids, in outdoor sheds, or under structures such as pergolas, lean-tos, or covered outdoor classrooms.

    Complementary Settings

    Both natural and manufactured loose parts complement each other and enrich outdoor play and learning in a variety of settings, including the following:

    Mud kitchens/cafés. Mud kitchens/cafés allow children to make concoctions from clean dirt and water, and whatever loose parts are available at the time. A wide range of natural materials and “pickables” bring color, texture, and added sensory stimulation to mud play settings. See InfoSheet 34: Creating a Mud Kitchen.

    Sand play. Sand is a classic open-ended play material that allows children to sculpt, mold, dig, and build. Adding natural and manufactured loose parts allows children to create mini-landscapes, to add texture and color to an infinite variety of sand sculptures. For more information on sand play settings, see InfoSheet 15: Sand Play Settings.

    Water play. Hands-in water play can be enriched and extended with a variety of loose parts, allowing children to float, pour, and splash, to appreciate the acoustic qualities of water and observe the behavior of this intriguing liquid as it flows around objects, with sunlight glinting off its surface. Games such as “sink or float” build STEAM skills by challenging children to guess the weight and properties of different materials. See InfoSheet 40: Water Play Settings.

    Outdoor classrooms. An outdoor classroom can serve as the base for more formal loose parts activities across the curriculum. Children may go on expeditions to gather diverse items, return to the “lab” outdoor classroom to count, sort, identify, name, classify, and describe different objects, or they can be used for art projects. An emphasis on natural loose parts can teach children about the seasons, how plants grow, and the cycles of nature. See InfoSheet 41: Outdoor Classrooms.

    Health and Safety

    • Loose parts in infant/toddler spaces should be carefully monitored to exclude potential choking hazards.
    • All loose parts settings should be inspected regularly and any damaged or hazardous items removed
    children collecting flowers and putting them a basket

    Collecting berries, leaves, and petals from around the OLE.

    wheelbarrows with loose parts

    Wheelbarrows filled with natural loose parts, including leaves and acorns.

    child playing with toy truck

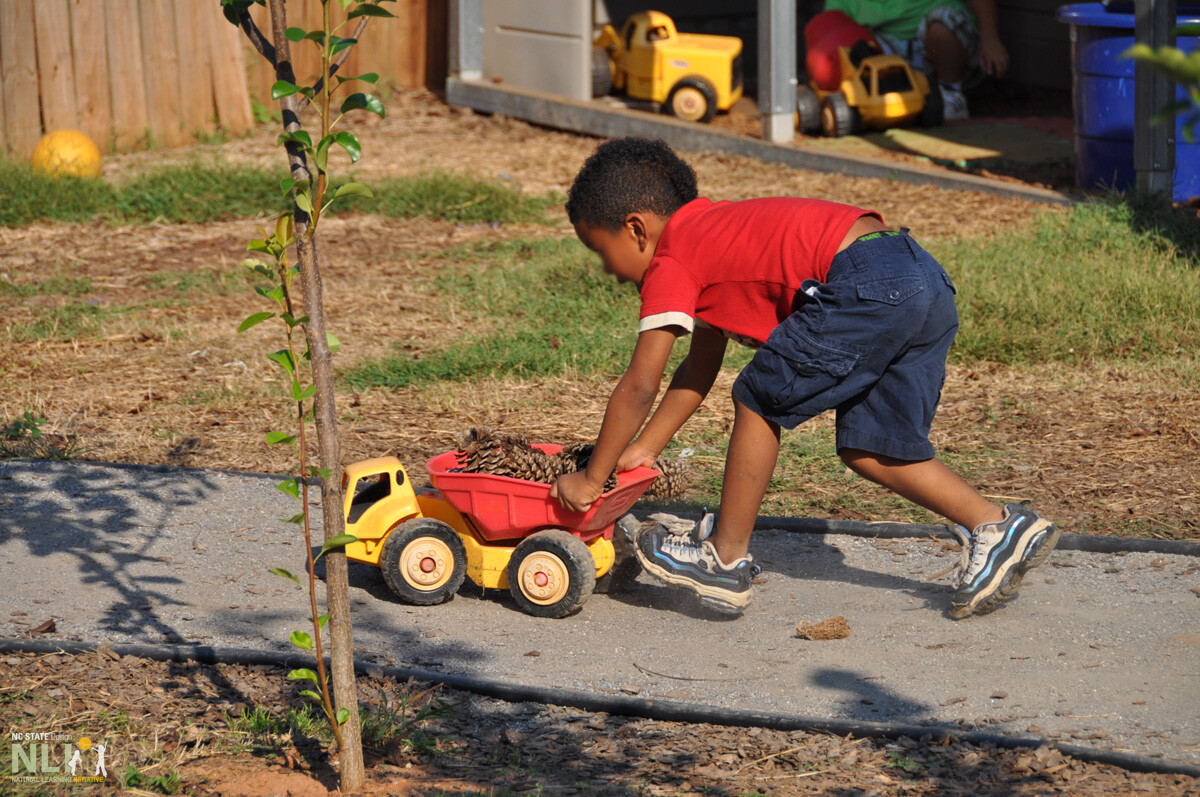
    Natural loose parts combined with a manufactured toy truck.

    natural loose parts in baskets

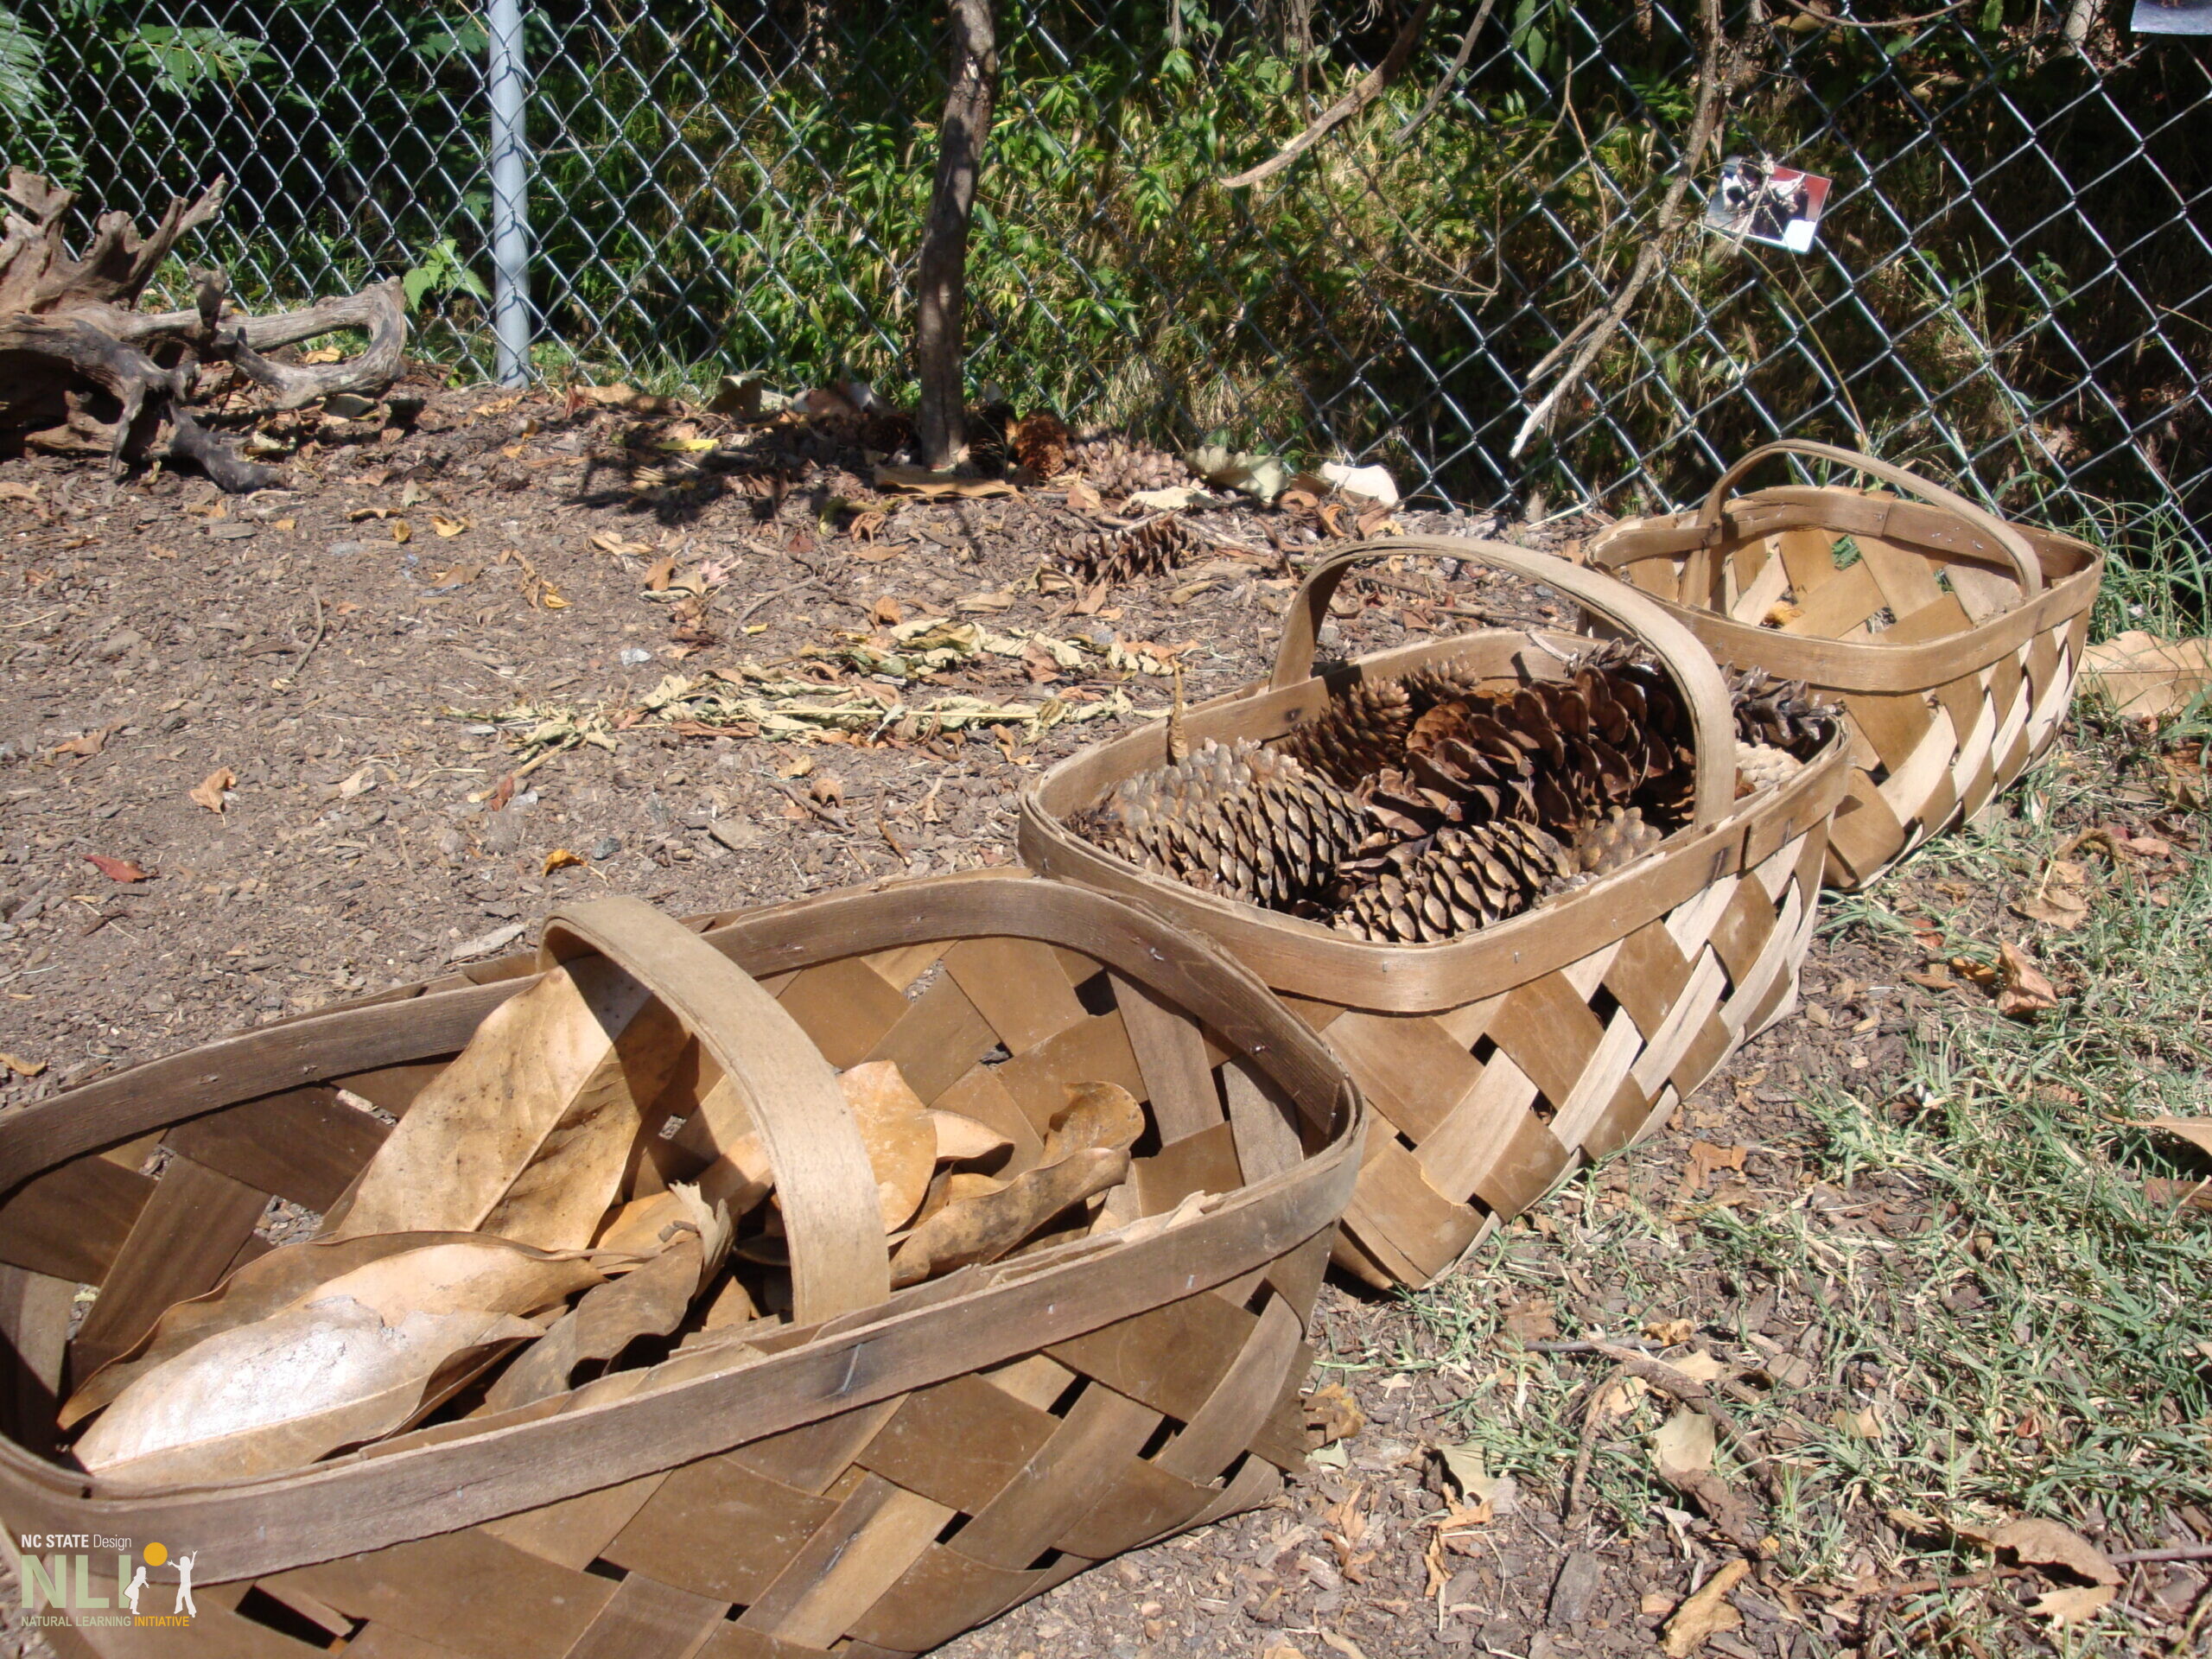
    Leaves and pine cones sorted into different baskets.

    child holding container with assorted flowers

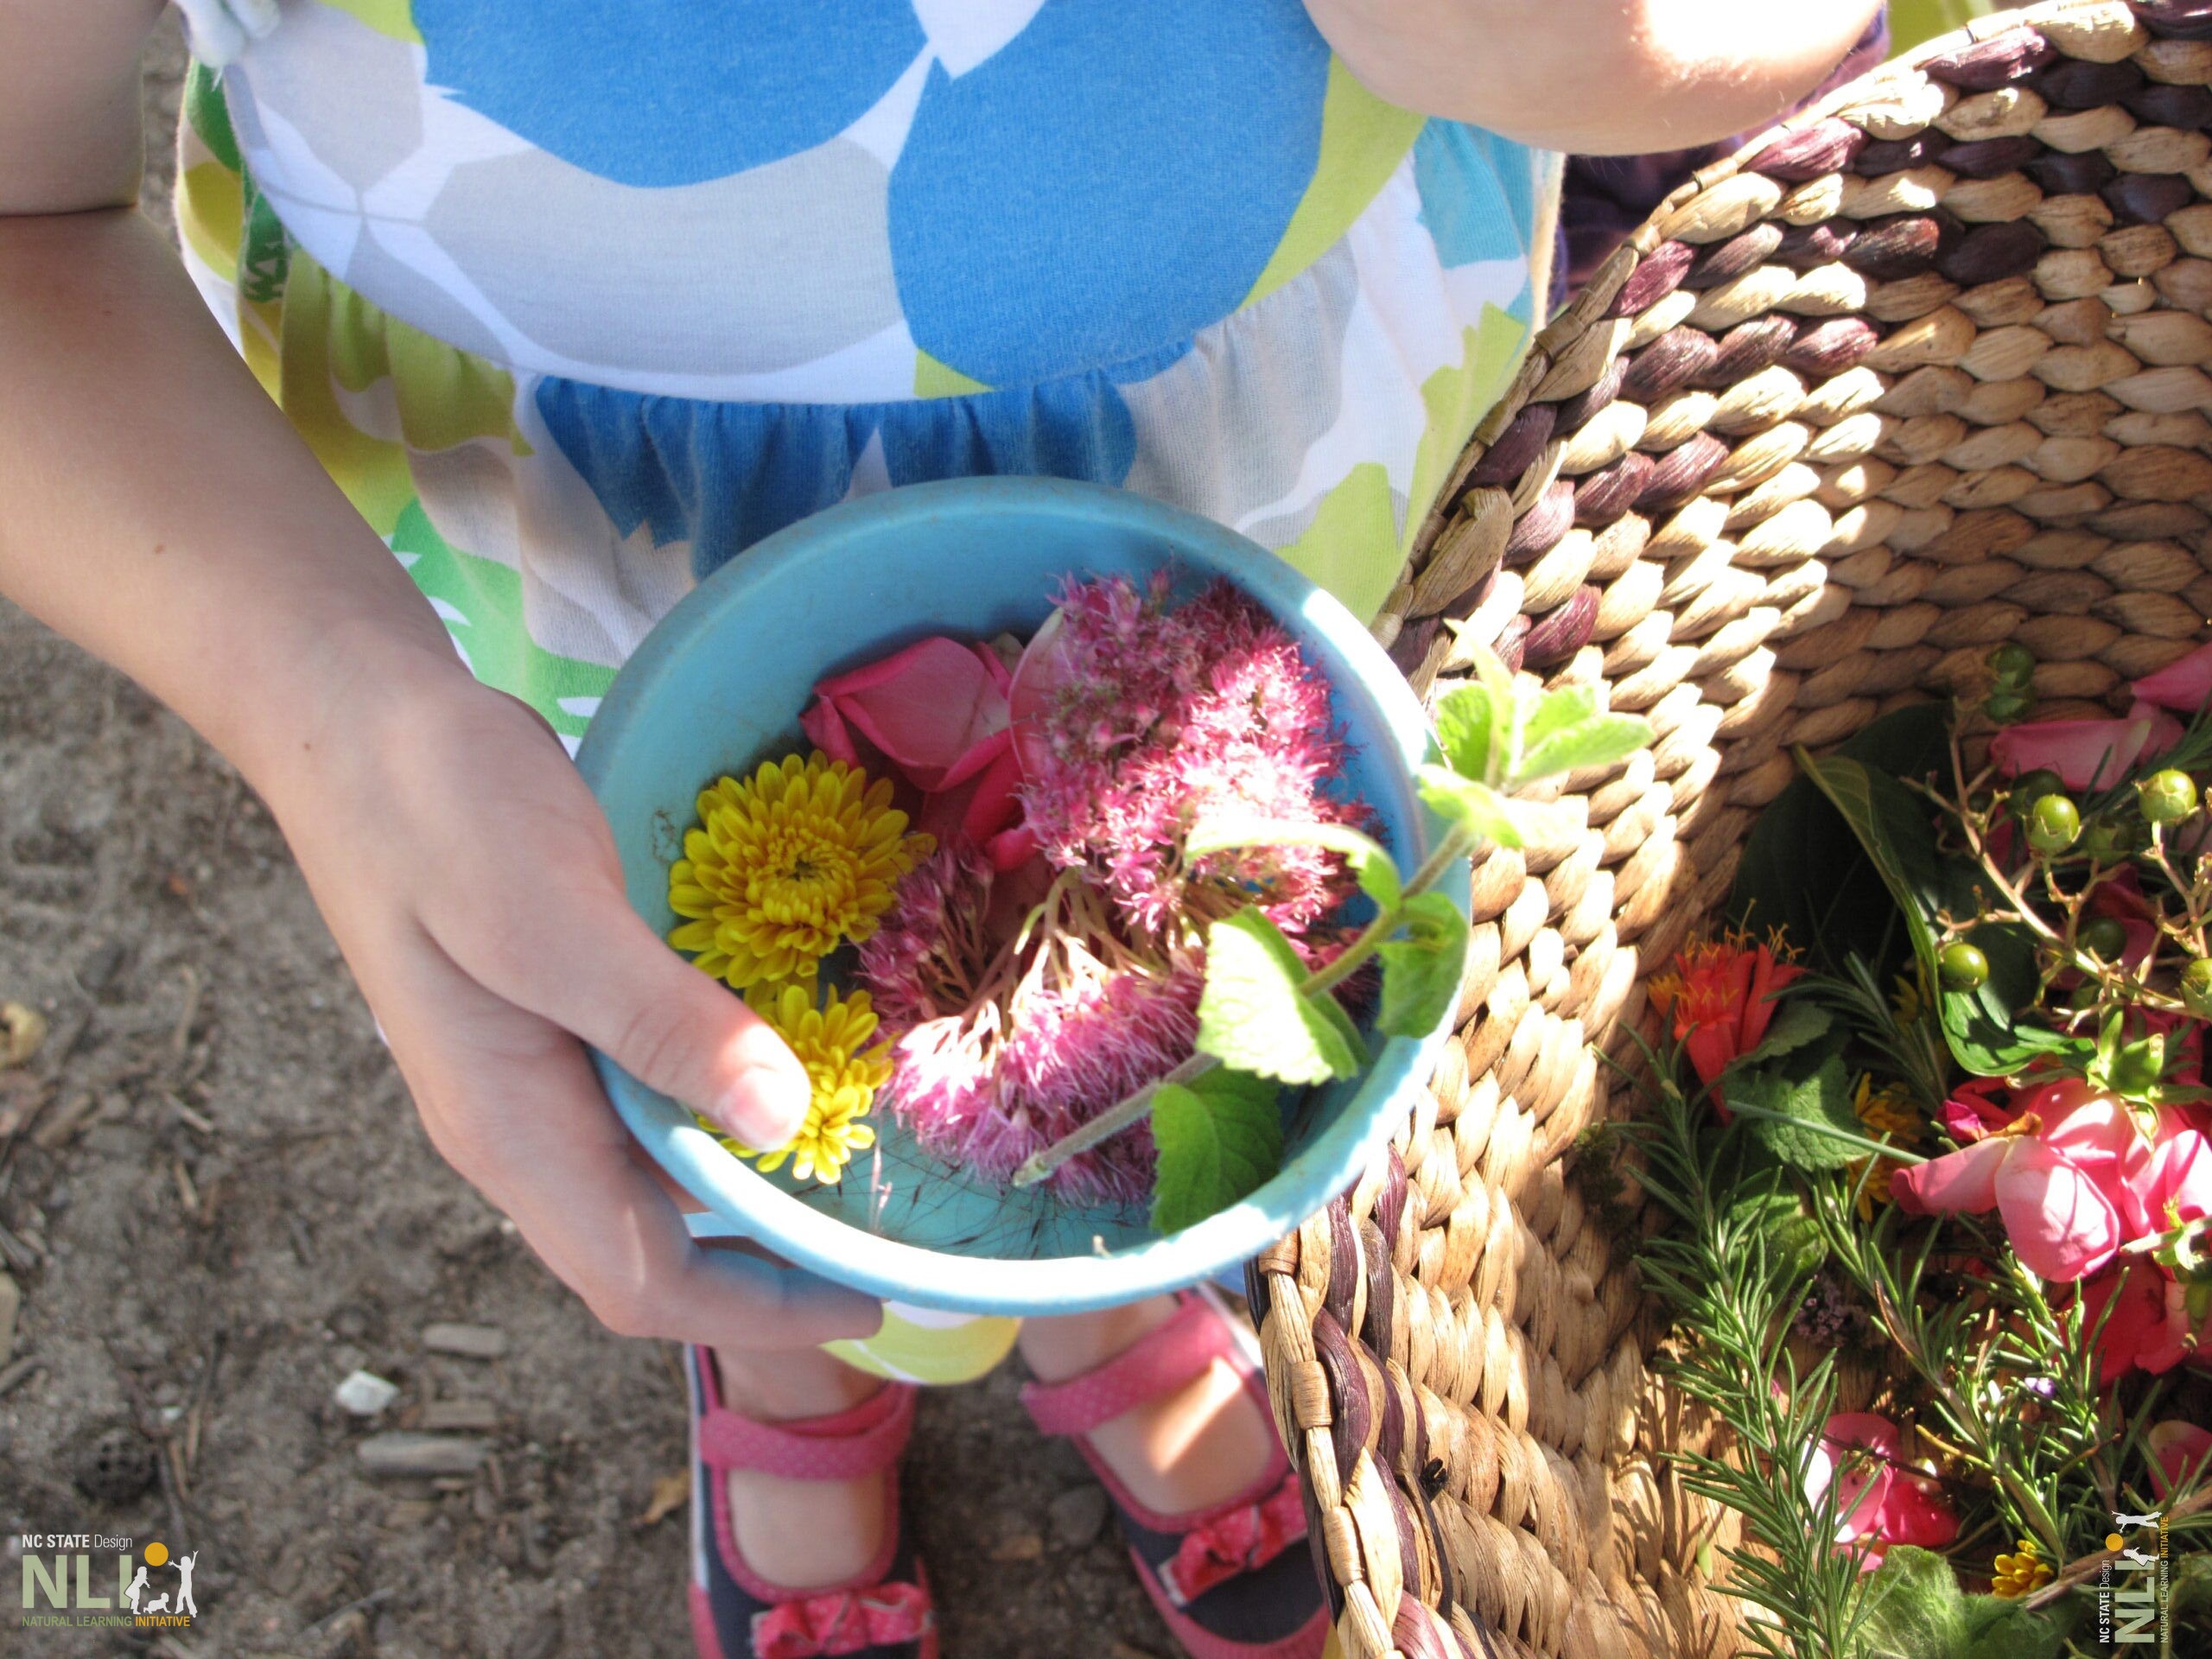
    Assorted petals and “pickables.” Tree

    tree cookies stacked

    Tree cookie stacking.

    crates with loose parts

    Crates used to sort and store different types of loose parts.

  • 45. Stormwater Management

    Infosheets

    45. Stormwater Management

    Download the PDF – English

    When soils are compacted, comprised of heavy clay, and/or drainage is insufficient, excessive water may gather in the outdoor learning environment (OLE) after a rain storm or during rapid snow-melt, making use impossible. This InfoSheet describes management approaches to reduce or eliminate such problems.

    Stormwater Management Solutions

    Consultation. Drainage issues are common. To solve them effectively often involves professional help. Consulting a landscape architect or engineer is an advisable first step.

    Amend soil. Clay soils easily compact, which causes poor drainage. If encountering a drainage problem in a small, specific area on site due to clay soils, amend soil to improve drainage. Aerate soil and add 2–3 inches of organic material, such as compost or mulch, working it in with a garden fork. Repeat this process twice a year to add structure to soil and improve drainage.

    Use a rain barrel. A rain barrel is a container that captures and stores rainwater drainage from a roof. Barrels usually range from 50–80 gallons and have a spigot for filling watering cans and a connection for a soaker hose. Installing a rain barrel at childcare centers will reduce water bills, minimize storm-water run-off, and model stewardship behaviors for the children that use it.

    Install drainage system. There are many different types of drainage systems that meet a wide spectrum of site-specific needs, including visibility, amount of water, and cost considerations. Three common and cost-effective drainage systems are outlined below.

    • A French drain is a sloped trench filled with gravel. A perforated pipe is placed at the bottom of the trench, which carries ground water away from the site and can empty into a designated drainage area. They are best used in soil that is prone to frequent saturation from rain or flooding. French drains are susceptible to frequent clogging, and roots from plants often displace and damage the perforated piping. French drains may need to be replaced every few years and require more maintenance than other drainage systems.
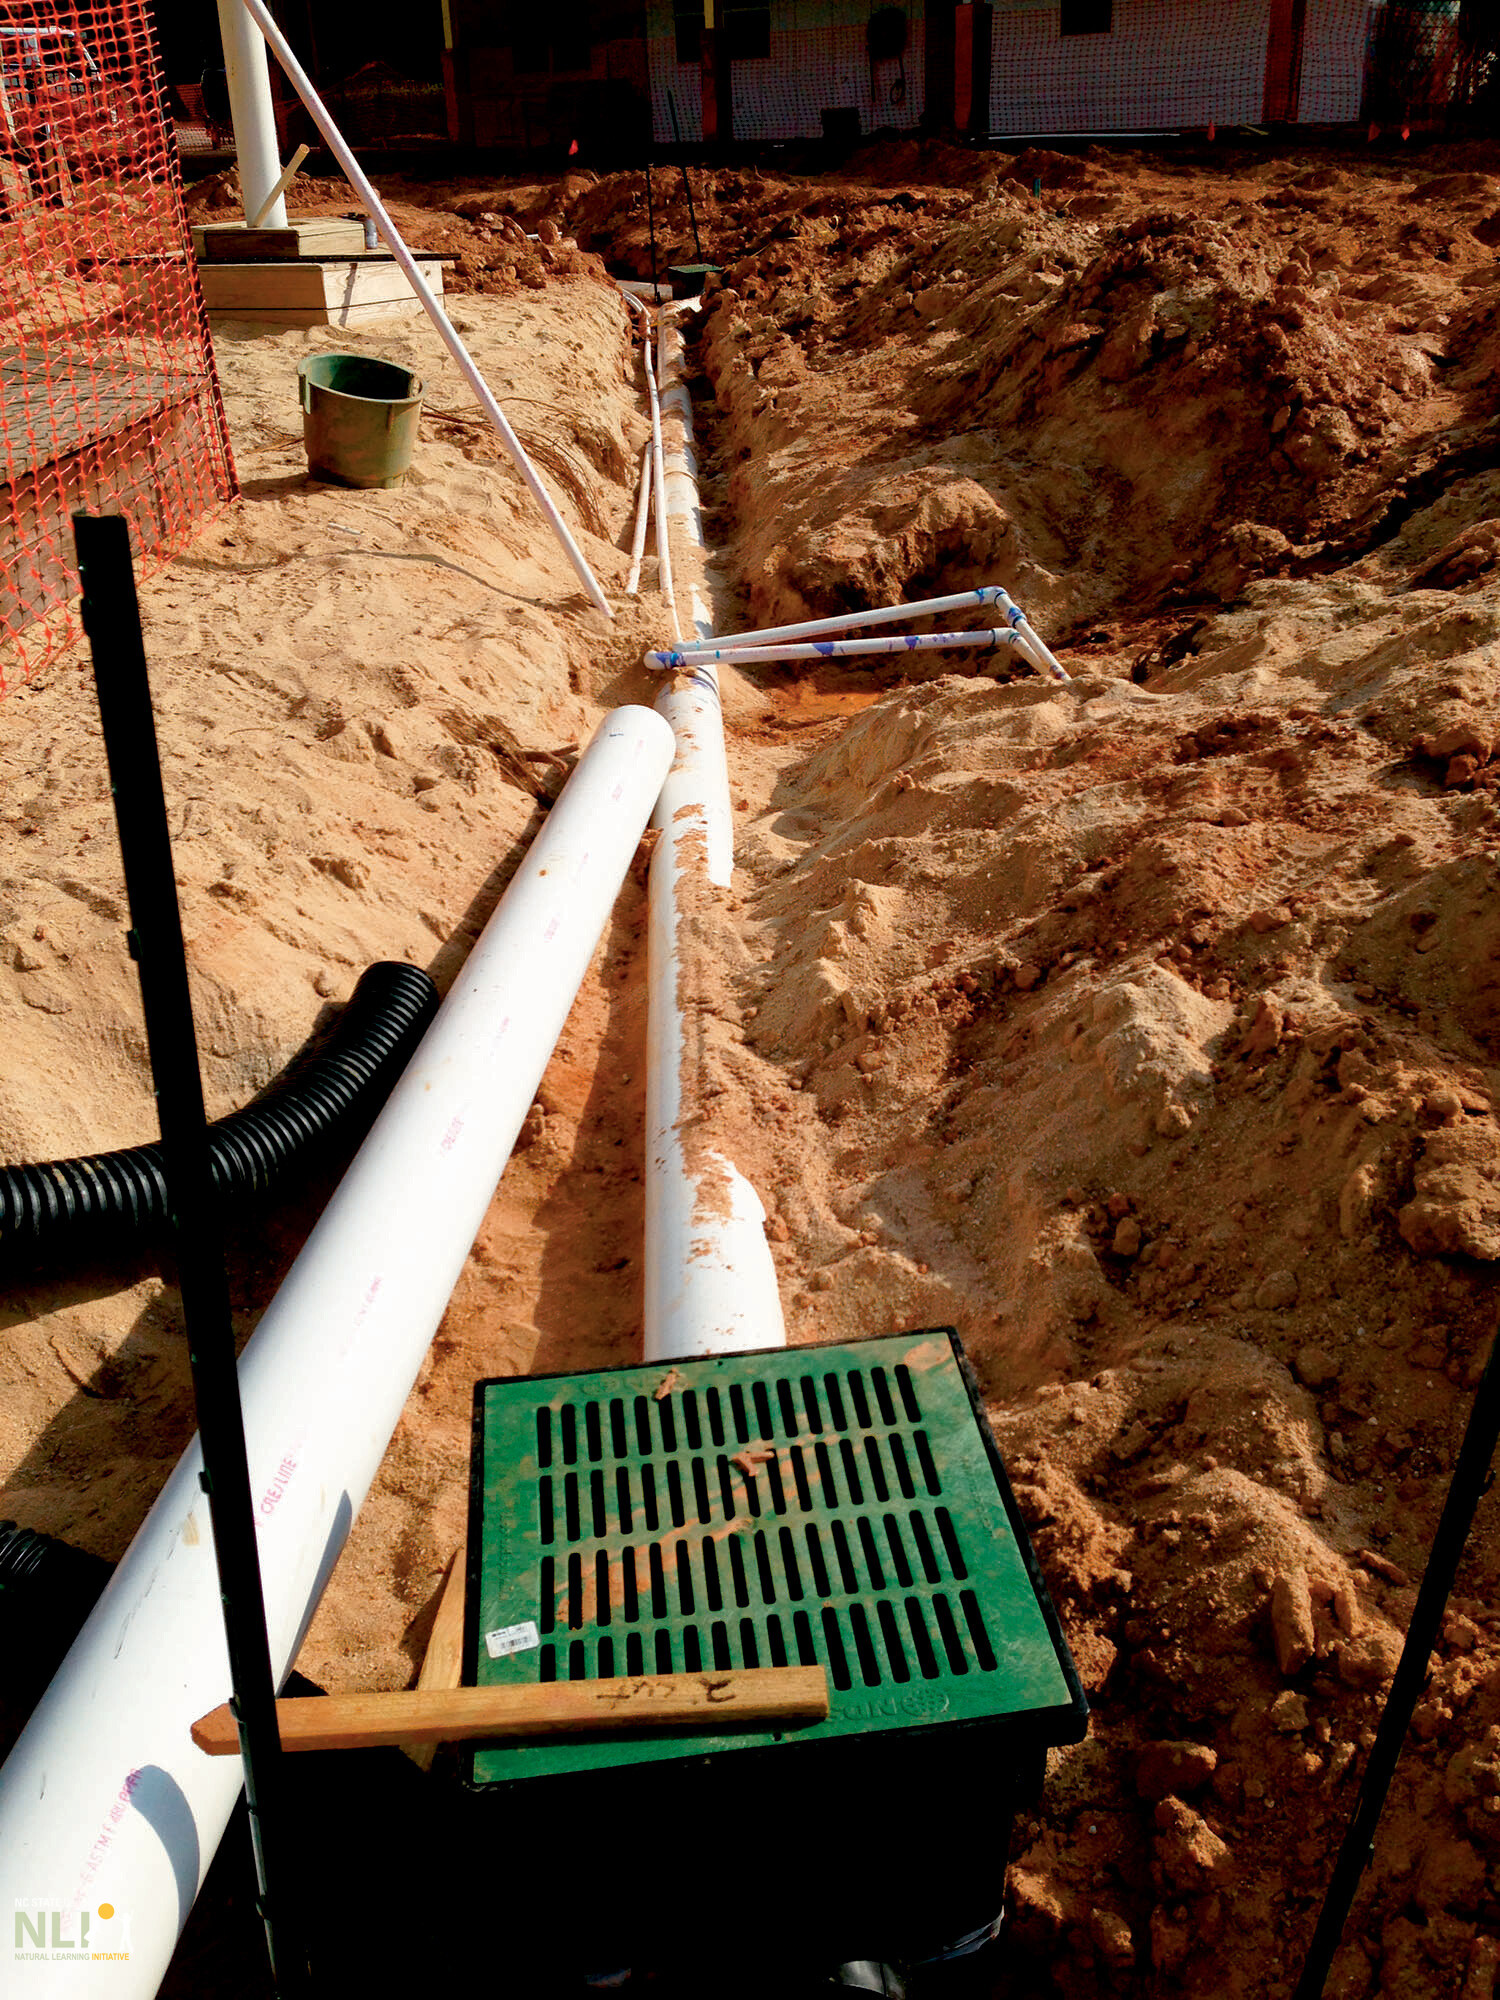
    • A surface drainage system typically includes 9-by-9-inch or 12-by-12 inch area drains and 4-inch flexible PVC pipe. The system is used to collect water at ground level and channel it away from poorly draining areas.
    • A channel drain is a type of surface drain that collects water in a trough and then directs it elsewhere. Channel drains are long, thin, and typically have a grated surface. They can be installed in a number of different environments, including turf grass, concrete, and gravel.

    Regrade landscape surfaces. Landscape regrading changes the ground plane to direct the flow of water across a given site. Landscape features called “berms” and “swales” are used to channel water toward or away from a desired area. While regrading is often an expensive process, a regraded site will divert unlimited amounts of water and requires no maintenance, except for erosion management.

    NATURALIZED DRAINAGE SOLUTIONS

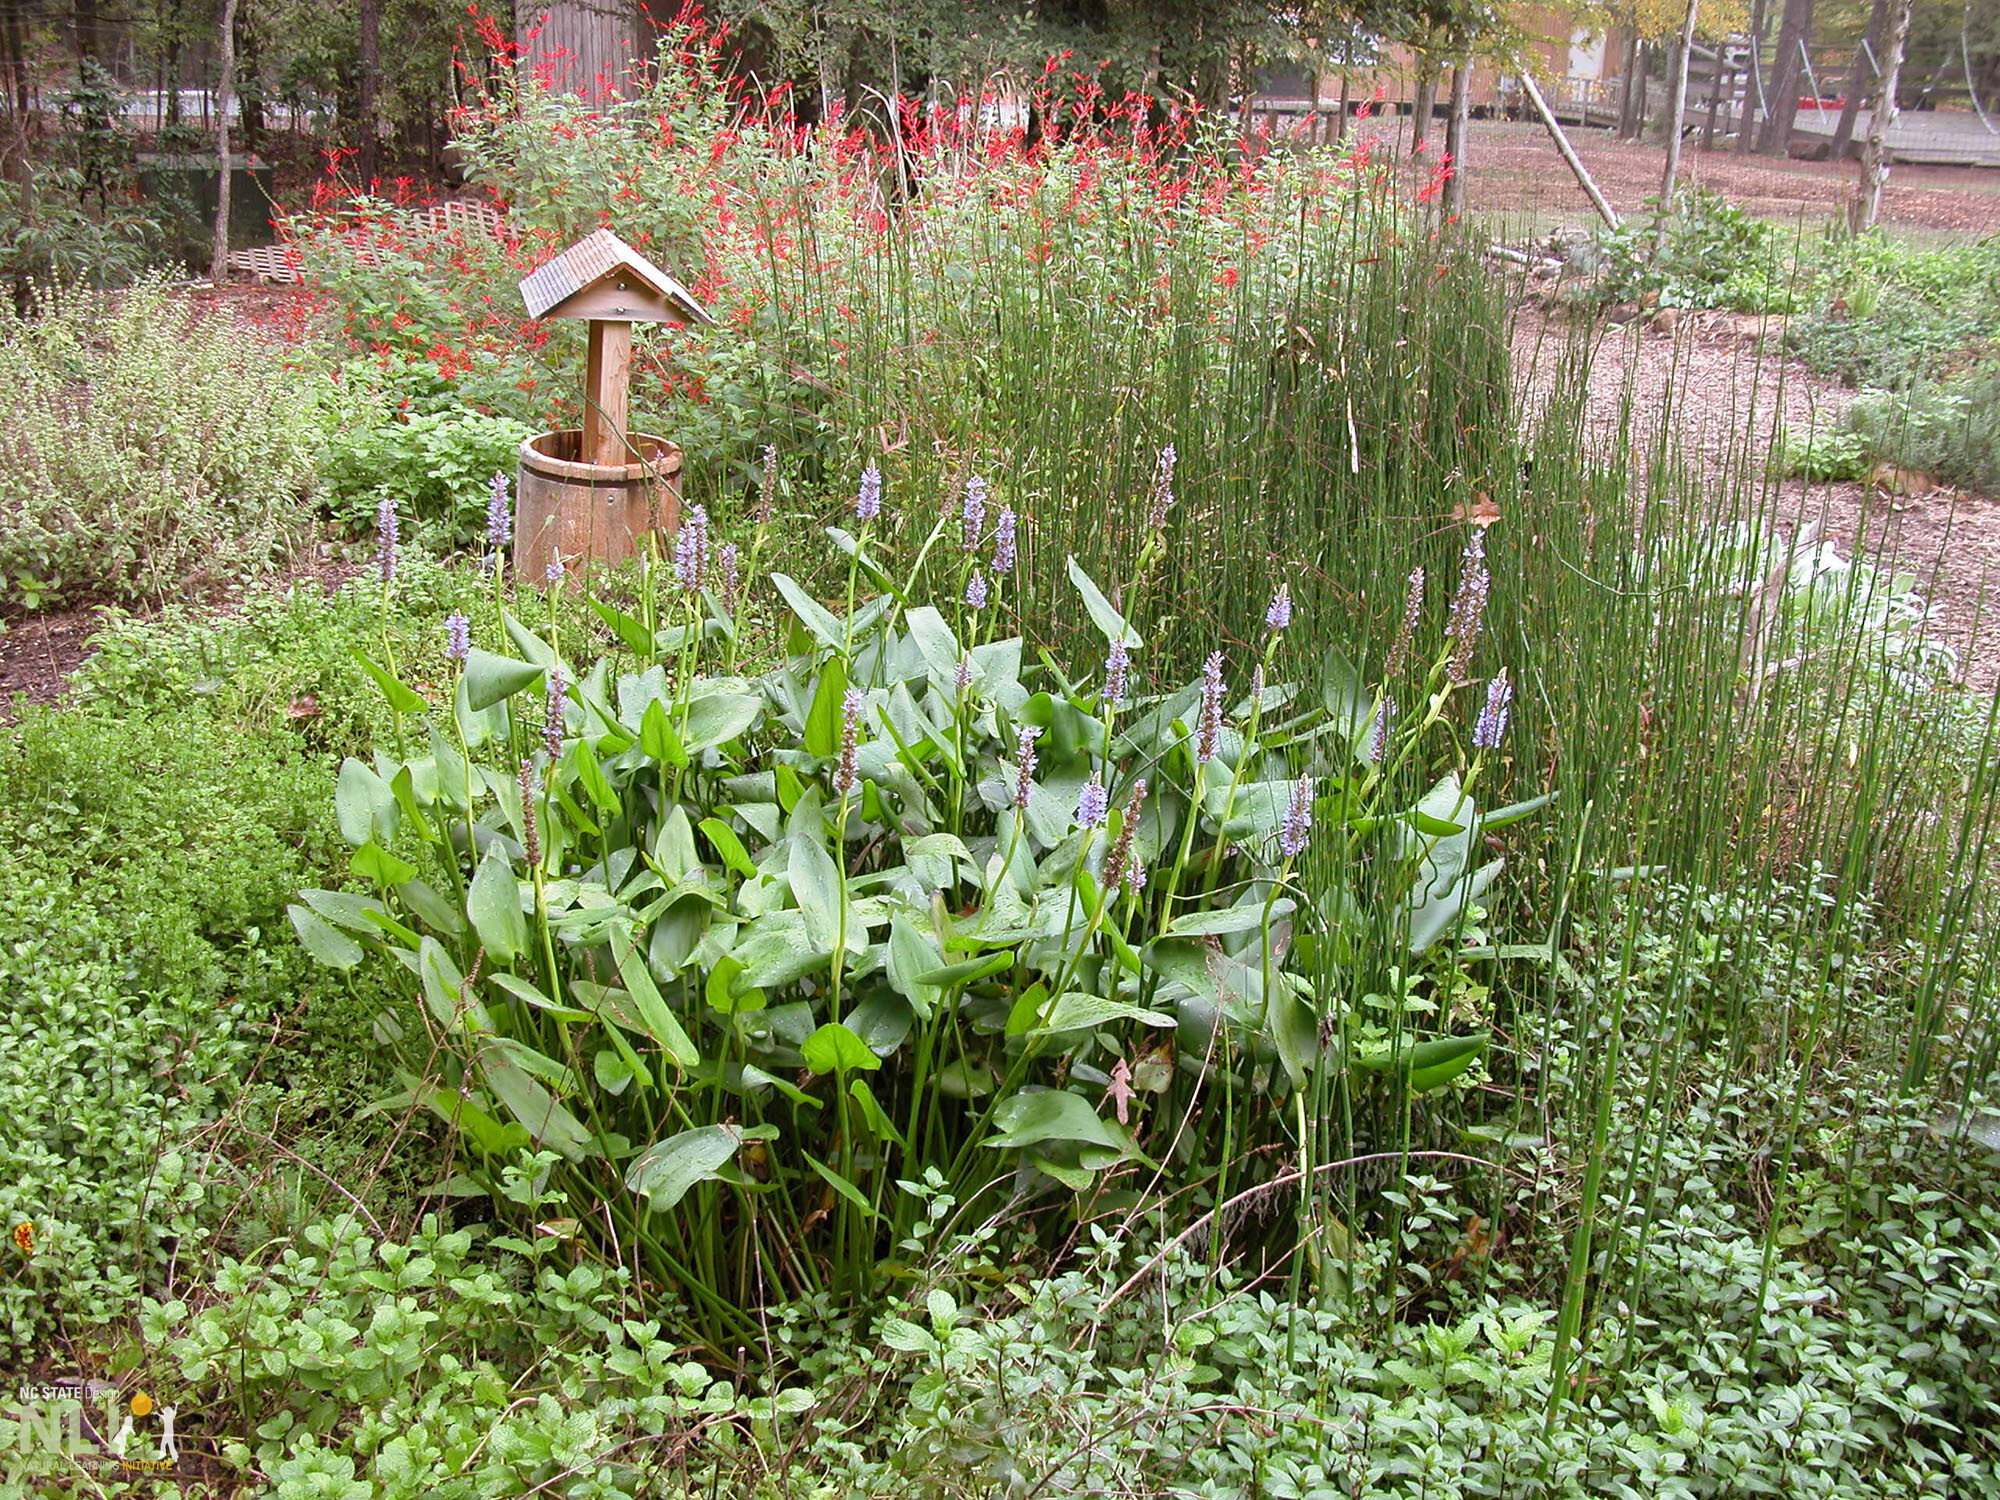
    Rain gardens. A rain garden is a designed low-point in the landscape that collects rain water from a drainage system and allows it to soak into the ground. Planted with wet-loving grasses and flowering perennials, rain gardens can be a cost effective and beautiful way to absorb excess water. Rain gardens can also help filter out pollutants in runoff and provide food and shelter for butterflies, song birds, and other wildlife.

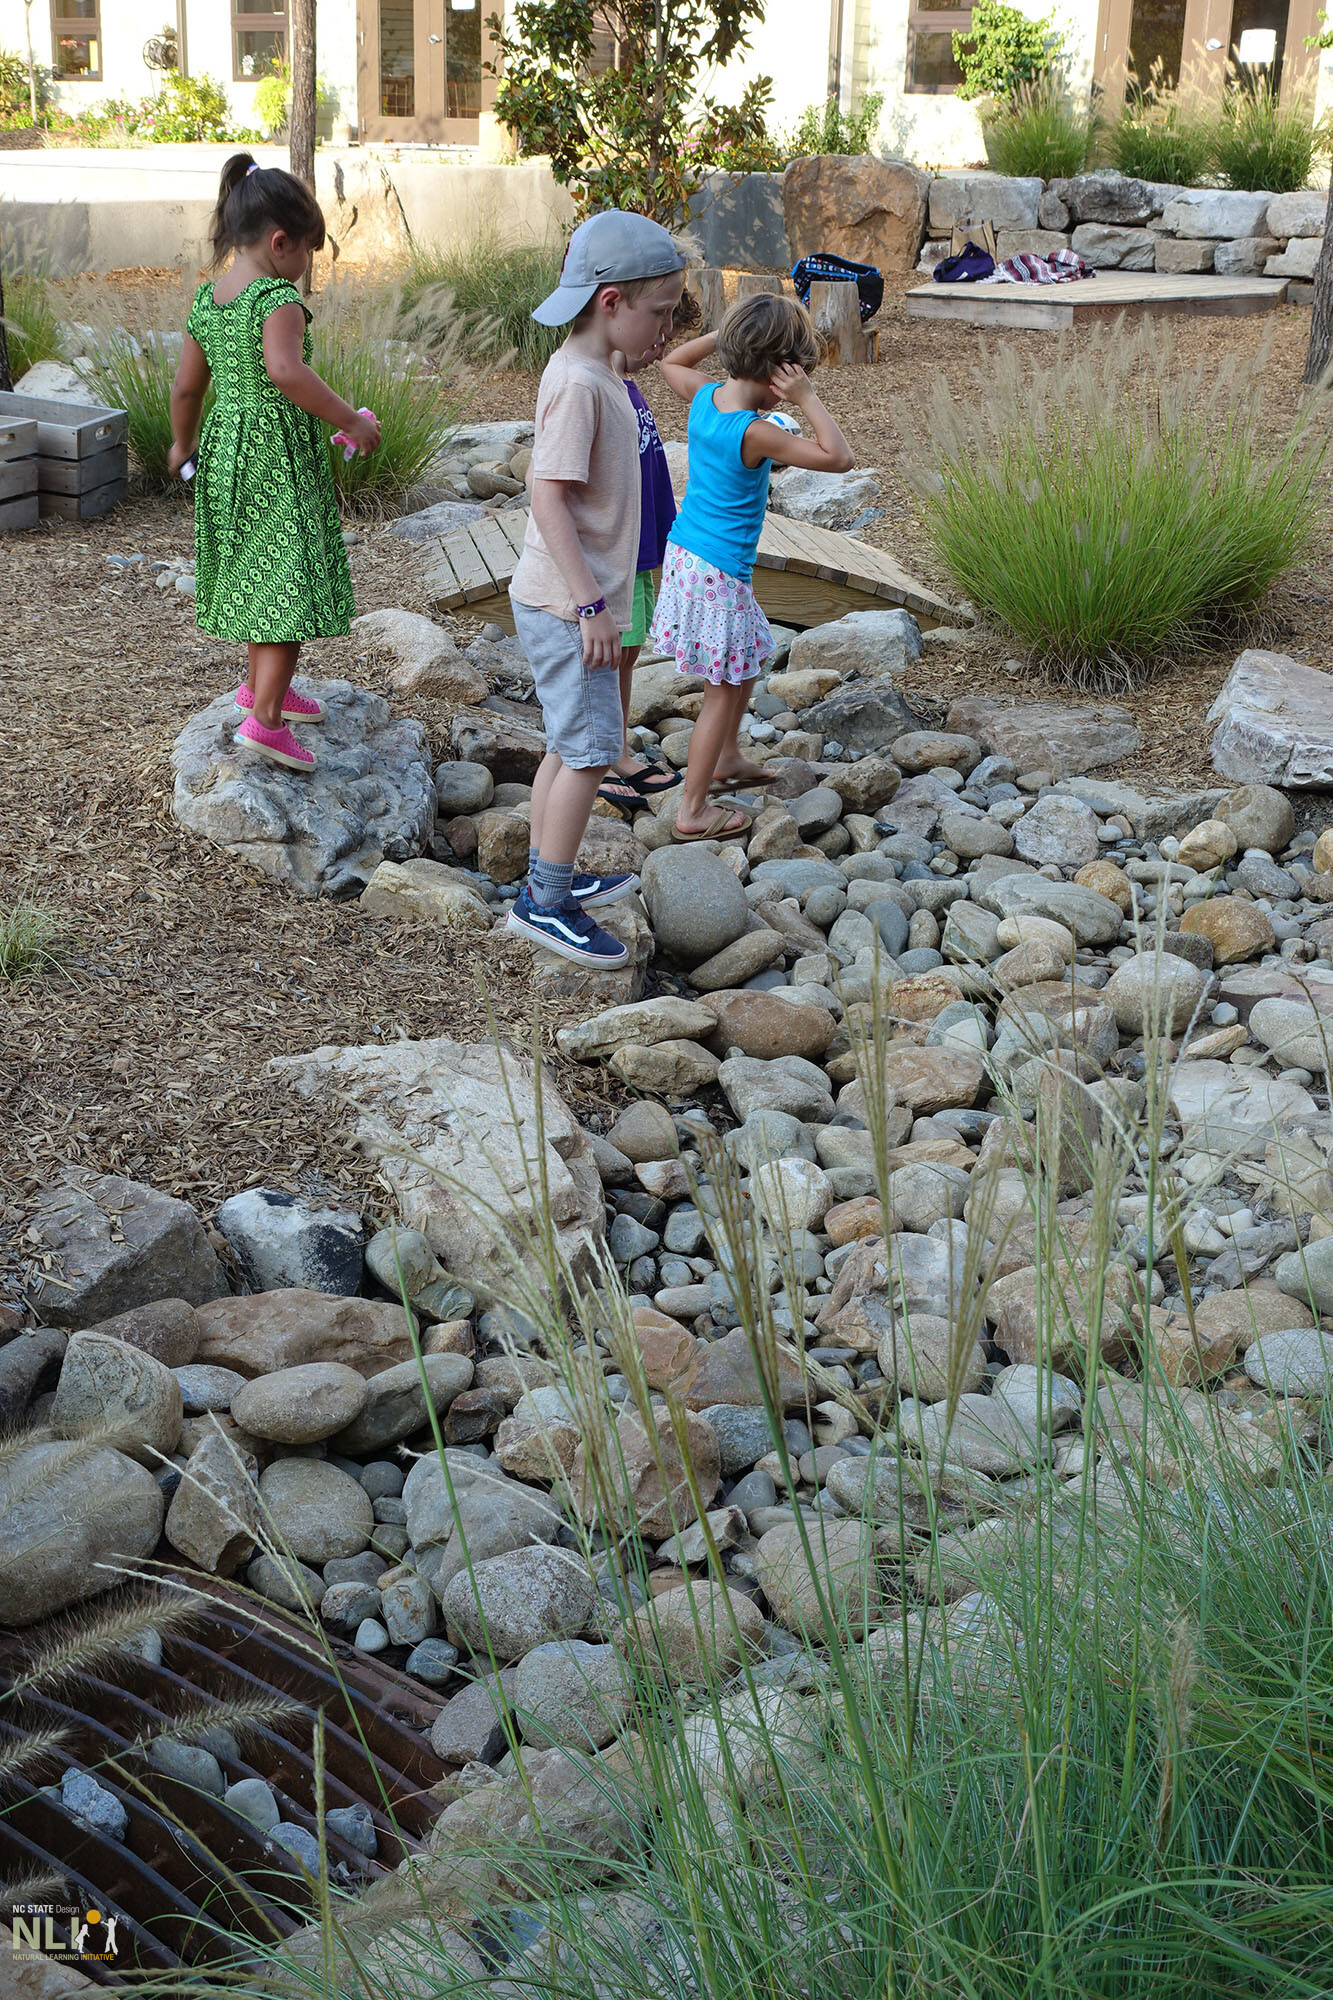
    Dry stream beds. Dry stream beds are swale-like depressions lined with smooth river stones. They convey runoff from water play activities, rain events, or snow melt. In addition to stormwater management, dry stream beds create excellent play settings. When combined with a bridge and hardy grasses, a dry stream bed will provide endless opportunities for play in an OLE.

    Resources:

    1. For more information on dry stream beds, see Infosheet: Dry Stream Beds

    RAIN GARDEN PLANTS

    Asclepias incarnata, Swamp milkweed
    Calamagrostis × acutiflora, ‘Karl Foerster’, Feather reed grass
    Callicarpa americana, American beautyberry
    Cephalanthus occidentalis, Buttonbush
    Chasmanthium latifolium, River oats
    Juncus effusus, Common rush
    Muhlenbergia capillaris, Muhly gras
    Rudbeckia fulgiida, Black-eyed SusanDry Stream Beds

    person holding soil

    Amending clay soils often may help solve drainage issues.

    rain barrel example

    Rain barrel connected to a hose intercepts run-off and conserves for later irrigation.

    drainage piping system being installed

    Example of a surface drainage system, which may be the only viable, long term solution.

    rain garden with a small well

    A rain garden planted with water-loving plants is an excellent management solution, attracting pollinators and adding beauty to an OLE!

    example of poor drainage system

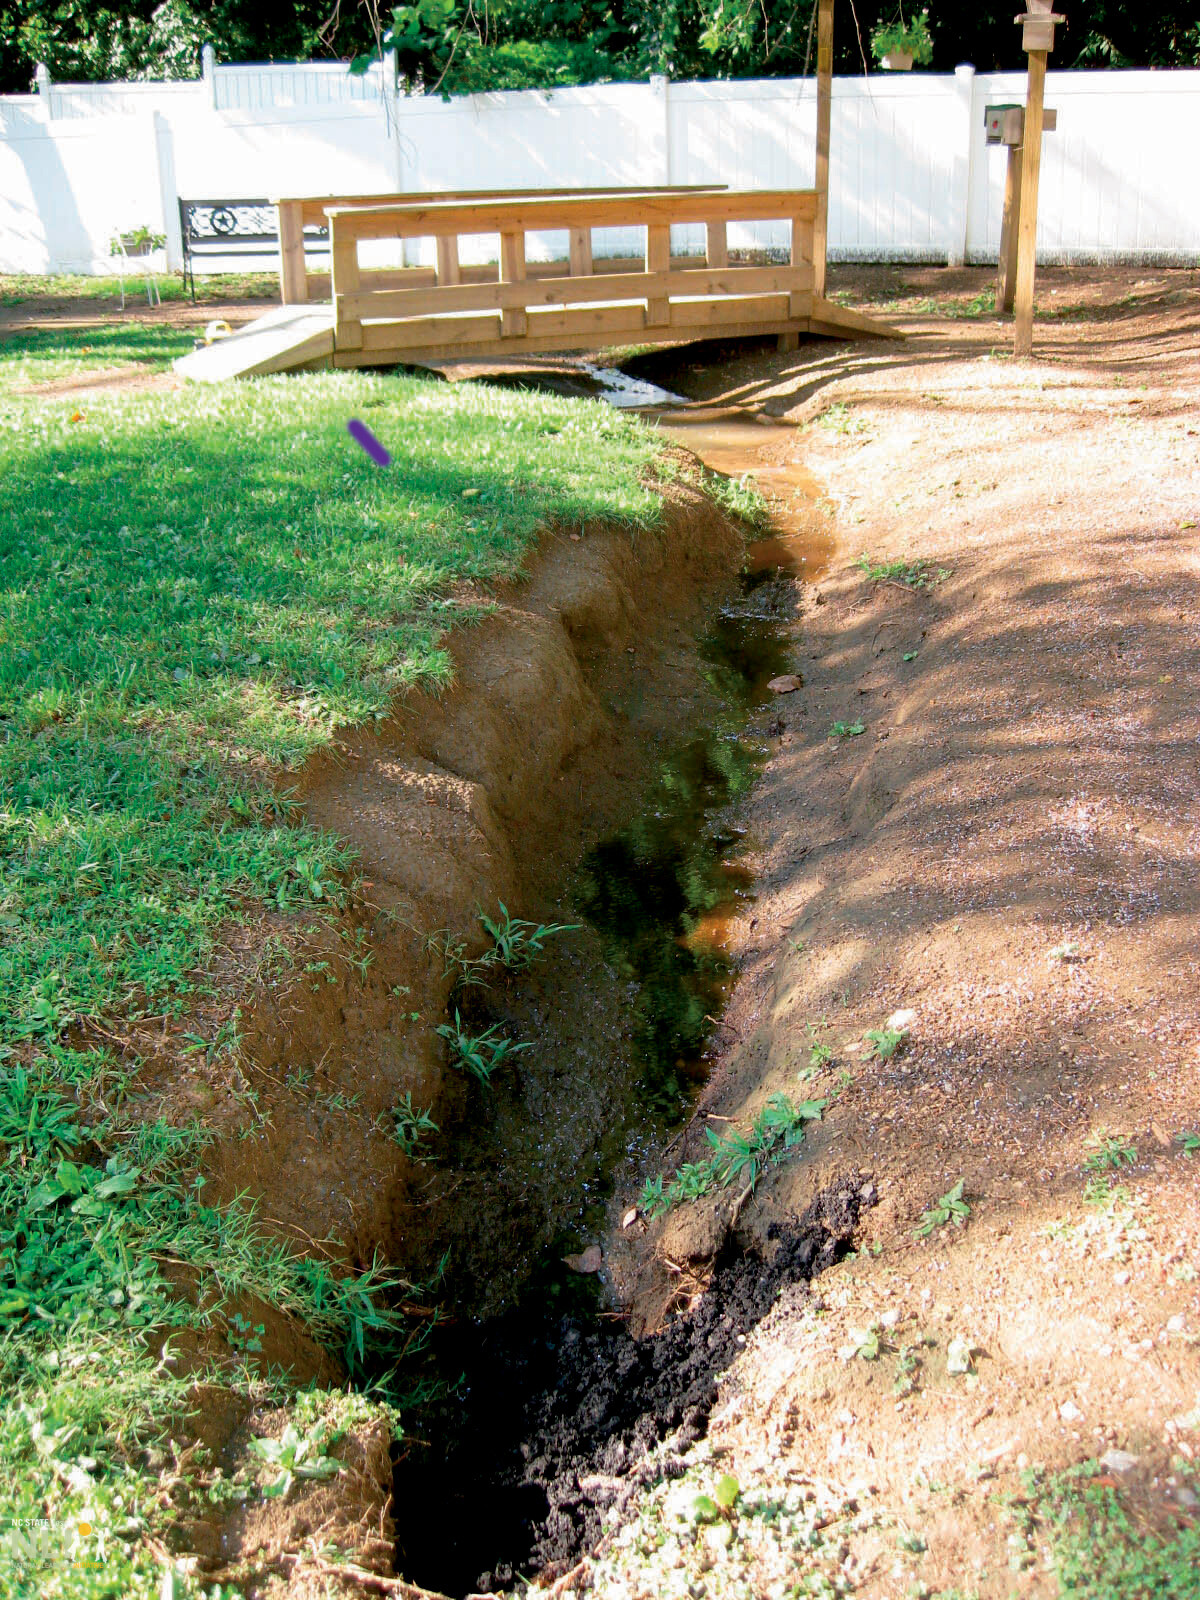
    Poor drainage at childcare centers can lead to erosion and unseemly gullies.

    children playing on a dry stream bed

    Dry stream beds offer a viable solution to erosion problems and provide attractive play settings.

  • Using Our Senses

    Leaflets

    Using Our Senses

    Download the PDF – English

    Herbs are stimulating natural elements used for children’s hands-on learning. Using herbs children have the opportunity to apply their senses to explore not only the properties of the plants, but to understand the richness of the natural and physical world around them. Herbs encompass a multitude of possibilities to the approaches to learning as it relates to science, mathematics, language, and sensory development.

    Setting:

    Classroom Setting

    Activity:

    Sensory Activity

    Focus of Activity:

    Activity focused on stimulating senses and cognitive development.

    Curricular Areas:

    • Creative Expression
    • Problem-Solving
    • Cognitive Development
    • Sensory Stimulation

    Suggestions:

    1. Using ice cube trays encourage children to fill each section with different herbs. Have children fill them with water until the herbs are completely submerged. Encourage children to count out how many herbs they put in each section of the ice trays and/or encourage them to create patterns to enhance their mathematics skills and development.
    2. Place tray(s) in freezer or outdoors if temperature permits, allowing tray(s) to freeze completely.
    3. Once frozen take ice cubes out of the freezer and place them in plastic bowls filled with water. Invite children to mix different herbs in one bowl or sort herbs together by their plant species.
    4. Encourage children to melt iced herbs by rubbing them between their hands.
    5. Within a group setting engage in open discussion. Focus questions that encourage math, science, cognitive and language skills.

    a. “How cold are the ice cubes?”
    b. “Do they have different smells”?
    c. “What do you smell?”

    Materials:

    • Ice cube trays
    • Variety of fragrant herbs
    • Bowls
    • Water
    • Cup or pitcher.
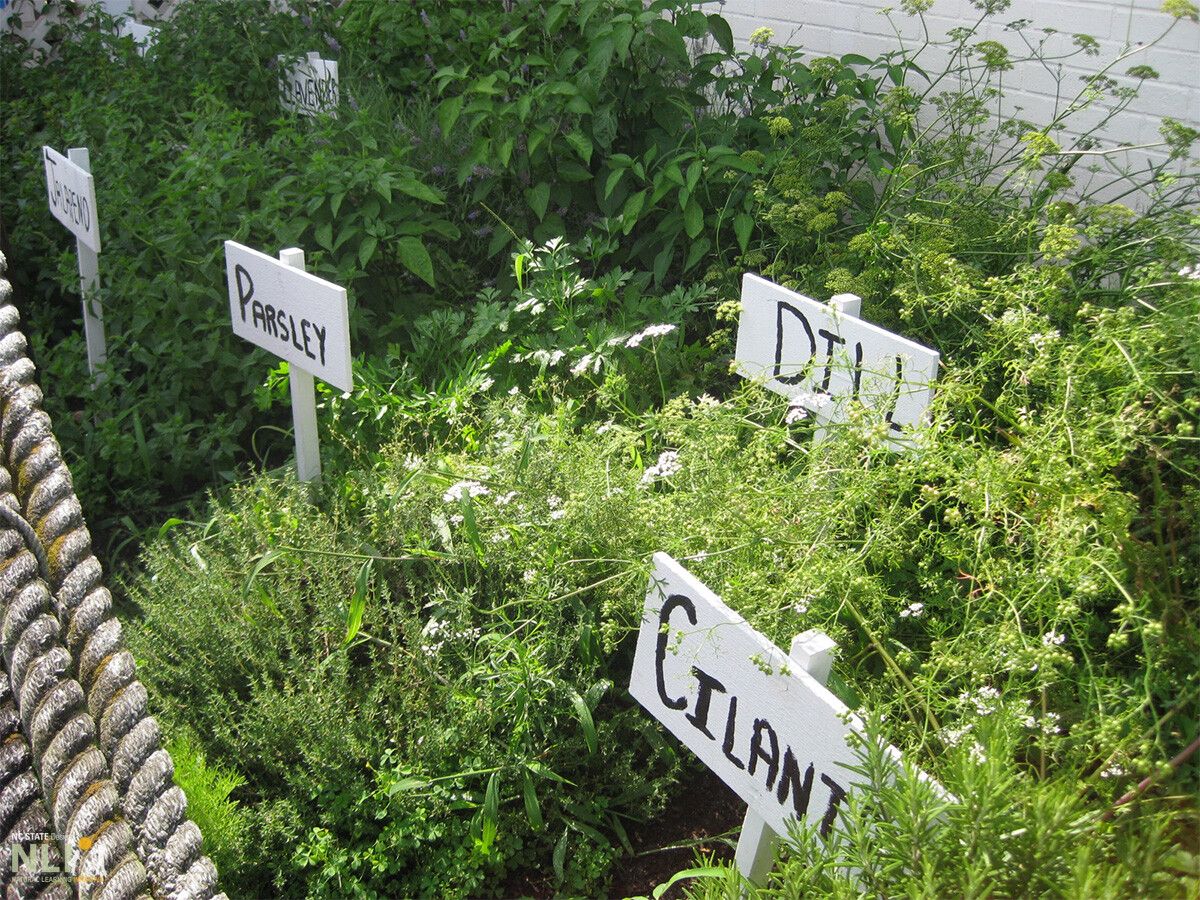
    herb garden
  • Trail Mix

    Leaflets

    Trail Mix

    Download the PDF – English

    As children make their own trail mix, they learn about different types of healthy foods. They also become more familiar with vocabulary relating to different types of food (nuts, dried fruit, seeds, grains) and with the origin of the term “trail mix.”

    Setting:

    Tasting station

    Focus:

    Healthy eating

    Curricular Areas:

    • Health and physical development
    • Language development and communication

    Trail Mix Directions:

    1. 1 scoop nuts (if there are nut allergies, substitute with a different type of cereal or seeds)
    2. 1 scoop seeds
    3. 1 scoop dried fruit
    4. 1 scoop cereal
    5. Mix together and eat

    Suggestions:

    1. Invite the children to make their own trail mix for snack.
    2. Provide the necessary ingredients and call attention to the printed directions.
    3. Mix together 1 scoop of nuts (if there are nut allergies, substitute with a different type of cereal or seeds), 1 scoop of seeds, 1 scoop of dried fruit, and 1 scoop of cereal
    4. Discuss with the children the different types of nuts, seeds, dried fruits, and grains in the cereal. Display the containers (packaging) for the ingredients (e.g., cereal boxes, bags, etc.) so that children can see the pictures and names of each food item.
    5. Discuss with the children the origin of trail mix – a snack developed by hikers as a type of food that is lightweight, easy to carry and store, nutritious, and delicious.
    6. Encourage children to eat their trail mix as they hike a trail marked out in advance with chalk, flour, or cairns (rock pyramids hikers make to show the way through an area).

    Engaging Parents:

    Give parents a copy of the directions for Trail Mix. Encourage them to make trail mix with their children at home.

    Materials:

    • Ingredients for trail mix (including a variety of nuts, seeds, dried fruit, and non-sweetened cereal) displayed in separate containers
    • Spoons
    • Scoops (1/4 or 1/8 cup size)
    • Small paper or plastic bowls
    • Printed directions (in plastic sleeve for protection)
    Trail Mix cup thumbnail
    Trail Mix cup
  • The Farm

    Leaflets

    The Farm

    Download the PDF – English

    Creative arts such as drama and pretend play allow for creative and imaginative expression. The creative arts engage children’s minds, bodies, and senses. Creative play activities invite children to listen, observe, discuss, move, solve problems, and imagine using multiple modes of thought and self-expression. Dramatic and artistic play provides ways for young children to learn and use skills in other domains such as language and cognitive development.

    Setting:

    Designated outdoor play space with sign/label “ THE FARM”

    Focus:

    Recognizing & Naming Farm Animals

    Curricular Areas:

    • Creative arts: drama and pretend play
    • Language development: receptive and expressive language
    • Cognitive development: conceptual knowledge of the natural and physical world
    • Fine and gross motor development
    • Beginning literacy

    Suggestions:

    1. Attach coat hooks along two interior sides of the barn placed at a height appropriate for children to hang costumes and face/head masks.
    2. On the back wall, provide several full-length mirrors either attached to the wall or free-standing mirrors similar to those used in the indoor classroom.
    3. Encourage children to use costumes or face/head masks to look at their new image in the mirror, and act out their animal.
    4. For twos and older children, call attention to the label name of the animal they select.
    5. Encourage children to use riding/rocking horses and other manufactured toys to engage in dramatic play.
    6. Place animal books on bookshelf each day. Encourage children to use animal books and find and match their animal to one of the books.
    7. Guide children in their play, providing just the right amount of support. For example, teachers can (Davidson 1996):
      • Model how to use a prop for pretend play
      • Model how to pretend through words and actions
      • Model the type of conversation that takes place in the (barnyard) setting
      • Make comments that help children notice what each other is doing
      • Assume a role and join in to show children that pretend play is important and to introduce new ideas they might want to use in their play
      • Intervene in disagreements when necessary to prevent physical harm, to encourage turn-taking, and to encourage sharing
    8. Increase children’s vocabulary by sharing the names of everything in the play space (path, barn, door, latch, animals, sounds of animals, hook, hang, mirror, costume, mask, hay, pretend, etc.).
    9. Take photos of children wearing their animal costumes and display in the indoor classroom.
    10. Encourage children to return costumes and masks to the appropriate hook when they have completed their play with their particular animal.
    11. Encourage recall indoors by asking children, “What animal were you today? What does that animal say?”

    Engaging Parents:

    1. Take pictures of the children playing on the farm. Post the pictures in a readily-accessible place and/or include them in a parent newsletter.
    2. Encourage parents to ask and listen to children talk about their farm experience.

    Potential Materials/Design Options:

    • A designated outdoor play space labeled THE FARM. The area can be designated as a specific play space by bordering the area with low shrubs, hay bales, landscape logs, or a low split rail fence
    • A small barn/shed similar to a playhouse in size, with a barn door fastened by a latch
    • A defined path from the primary wheel toy track to the barn door or farm area
    • Low trough attached to the outside of the barn
    • Coat hooks on wall inside the barn at height appropriate for children.
    • Full length mirrors
    • Costumes and face/head masks of animals
    • Labels with large sized letters over each hook with the names of different animals
    • Large pictures of animals over each hook
    • Several rocking horses outside barn (rocking horses can be stored inside barn overnight or bad weather days) or animal heads on a riding stick
    • Small bookshelf with books of animals (both can be stored inside the barn on shelf built over coat hooks and labels)
    • Two or three small low stumps for children to sit while using books
    • Small bench for teachers to read animal books to children
    • Child-sized wheel barrows, shovels, buckets for imaginative play
    the farm thumbnail
  • Sorting Our Seasons

    Leaflets

    Sorting Our Seasons

    Download the PDF – English

    Creating hands-on activities encourages learning and enhancement of children’s development. For this activity, children have the opportunity to categorize items associated with specific seasons, build their problem-solving skills, engage socially with each other, and most importantly, learn about natural cycles. In addition, children will have the chance to learn how seasons affect the lives of people, animals, and plants.

    Setting:

    Classroom setting or outdoor learning environment (OLE)

    Focus:

    The activity focuses on categorizing elements that are related to the four seasons

    Curricular Areas:

    • Decision-making
    • Approaches of learning: focus and engagement, imagination, and aesthetic sensibility
    • Social development
    • Cognitive development: creative expression
    • Hand-eye coordination• Color recognition
    • Physical development: fine motor skills
    • Conceptual knowledge of the natural and physical world
    • Language development

    Suggestions:

    1. Paint each wooden circle to represent a specific season (ex: for winter, use white and blue colors to create a winter scene). Engage children by having them help paint wooden circles. Use this time as a learning opportunity to expand children’s skills and knowledge related to their physical development, mathematics skills, language development and creative expression.
    2. Once paint has dried, cover it with a layer of Mod Podge as a paint protective.
    3. Invite children to add seasonal stickers to medium-sized stones. Have children find stickers to represent each season. Place one sticker on each stone. Have them seal each sticker with a layer of Mod Podge and allow it to dry. As an alternative, children can paint the stones with their own images, promoting their creative freedom and fine motor development.
    4. To start the activity, discuss the painted images on each wooden circle and which season they represent. Invite children to participate in the activity by sorting each sticker image to their corresponding season. Have children place the stone on top wooden circle that it matches with.
    5. Create an open dialogue about their decision for placing certain rocks onto the circles. Prompts could include, “Why did you put the flower in spring? Could the flower also be placed in another season? Why or why not?”
    6. Expand the activity to include learning components that are relevant to the current season.

    Engaging Parents:

    1. Take a picture of the children sorting. Post the picture in a readily-accessible place and/or include it in a parent newsletter.
    2. Share children’s progress and skill development with parents. If necessary, provide resources and tools to help continue skill development while at home.

    Materials:

    • Four circular wooden slices or “tree cookies”
    • Acrylic paint, paintbrushes
    • Mod Podge (or Elmer’s glue)
    • Medium stones (flat faced is recommended)
    • Seasonally themed stickers

    Book Recommendations:

    1. “The Snowy Day” by Ezra Jack Keats
    2. “Snow” by Cynthia Rylant
    3. “Goodbye Autumn, Hello Winter” by Kenard Pak
    4. “Our Seasons” by Grace Lin and Ranida T. McKneally
    5. “Old Bear” by Kevin Henkes
    6. “Calendar” by Myra Cohn Livingston and Will Hillenbrand
    7. “Goodnight Songs: A Celebration of Seasons” by Margaret Wise Brown
    8. “Bunny’s First Spring” by Sally Lloyd-Jones and David McPhail
    9. “Summer Days and Nights” by Wong Herbert Yee
    seasonal plants
  • Pumpkin Seeds

    Leaflets

    Pumpkin Seeds

    Download the PDF – English

    When roasted and lightly salted, pumpkin seeds have a nutty flavor. They are also nutritious, providing a rich source of protein and vitamins. Roast pumpkin seeds in the fall to celebrate the season–pumpkins can be carved or painted and kept in the outdoor learning environment as part of this activity.

    Setting:

    Worktable in the outdoor learning area (with additional access to a stove)

    Focus:

    Healthy Eating

    Curricular Areas:

    • Health and physical development: healthy eating, motor skills
    • Language development and communication: new vocabulary, describing
    • Cognitive development
    • Scientific thinking: observation, inquiry

    Suggestions:

    1. Remove the top of the pumpkin with the knife and scoop out the pulp with large spoons. Encourage children to describe how the pulp and seeds feel.
    2. Separate the seeds from the pulp. This works best immediately after you’ve removed the seeds from the pumpkin, before the pulp has a chance to dry. Rinse the seeds in a bowl of cold water and remove most of the strings.
    3. Coat the bottom of a baking sheet with olive oil and spread the seeds out over the pan in a single layer. Sprinkle lightly with salt.
    4. Bake on the top rack of an oven at 325 degrees until the seeds begin to brown (5-25 minutes, depending on the size of the seeds).
    5. When the seeds are nicely browned, remove the pan from the oven and allow seeds to cool. Let the pumpkin seeds cool entirely before eating.
    6. Enjoy a pumpkin seed snack–either by themselves or mixed with other seeds and nuts.
    7. Store any remaining seeds in an air-tight container for future snack time.

    Engaging Parents:

    Send the pumpkin seed recipe home with parents and encourage them to roast seeds with their children at home.

    Materials:

    • One or more medium-size pumpkins
    • Knife (for teacher’s use)
    • Large spoon, large bowl or bin
    • Baking sheet
    • Salt, olive oil, cold water
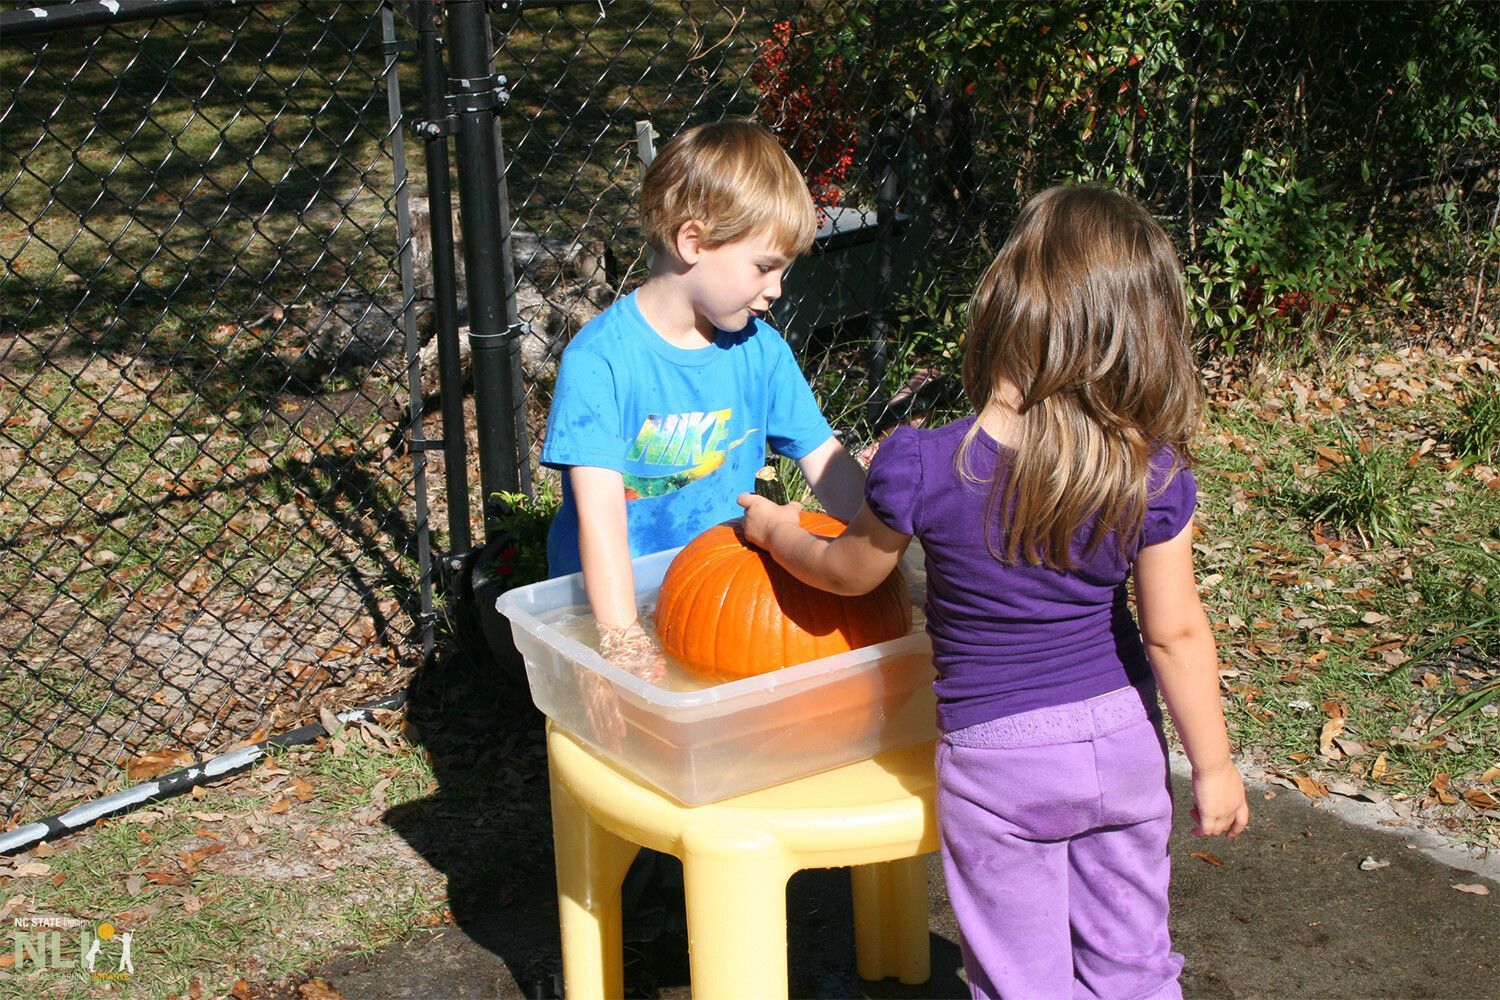
    children washing a pumpkin