Blog

  • Puddle Play

    Leaflets

    Puddle Play

    Download the PDF – English

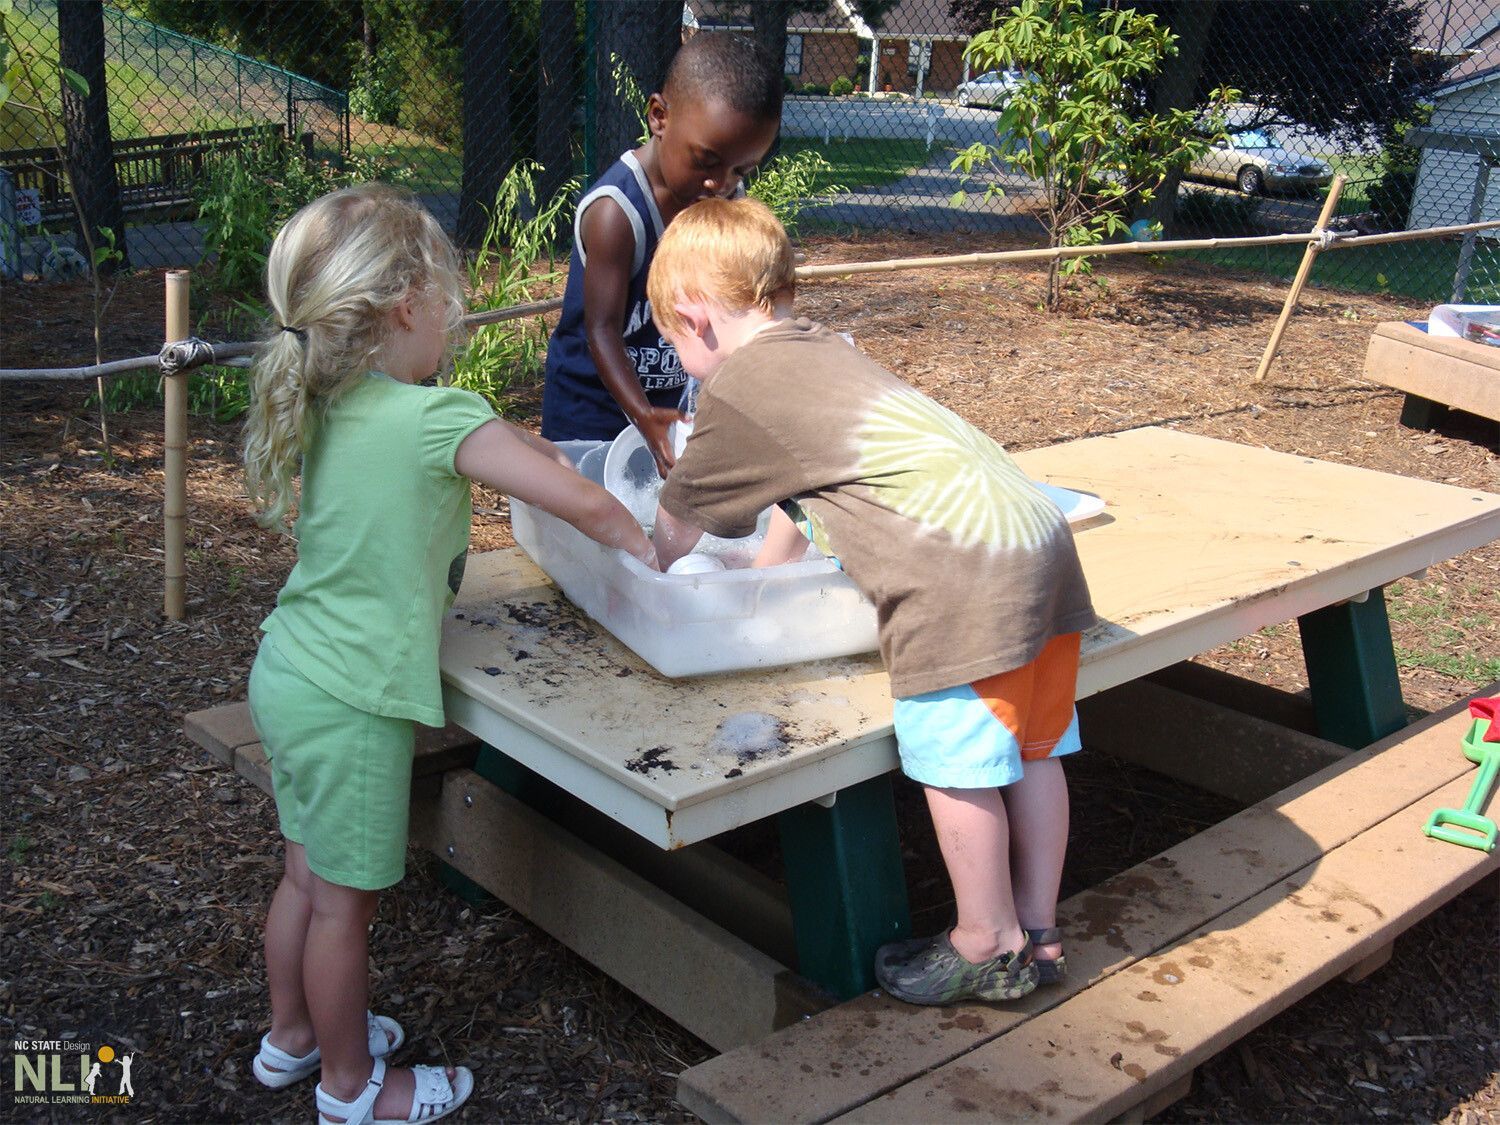
    Parents and teachers know that few experiences delight children more than water play. It is important for even very young children to experience water play and begin to understand the characteristics of water. This simple puddle play activity supports children’s development in several domains, including those listed in the curricular areas above. For older children, loose parts such as measuring spoons and cups, small pebbles, popsicle sticks, and other items that sink or float will add interest to puddle play activities.

    Setting:

    Outdoor play area with water access

    Focus:

    Characteristics of water

    Curricular Areas:

    • Conceptual knowledge of the natural and physical world
    • Physical development: gross and fine motor skills
    • Language development: receptive and expressive language
    • Sensory stimulation• Mathematics knowledge and skills: measuring
    • Cognitive development: colors, sink or float concepts

    Suggestions (for younger children):

    1. Place containers on the ground, or on a low stump or work table.
    2. Fill containers with water.
    3. Encourage non-mobile children to sit or lie on their stomachs on a mat and splash hands in water.
    4. Invite mobile children to step in containers on the ground to wet their feet, and splash and play with containers on work table.
    5. Encourage toddlers to keep the containers filled by providing a water pail, water pitcher, or other container to transport water from faucet/hose to pans and containers.
    6. Encourage the use of related language (pans, water, containers, splash, pitcher, etc.)
    7. Take photos of children’s water play and post in classroom for recall.

    Suggestions (for older children):

    1. All of the above.
    2. Model for children how to use measuring spoons and cups.
    3. Model and allow children to use food coloring to change the color of the water.
    4. Model and allow children to use a safe soap liquid to “squirt” into water. Show them how to stir and make soap suds.
    5. Provide sink and float loose parts for children’s experimentation.
    6. Encourage additional language use (more/less, full/empty, food coloring, names of colors, sink, float, etc.)
    7. Take photos of children’s water play and post in classroom to encourage recall.
    8. Give attention to children’s progress and skill development week to week.

    Engaging Parents:

    1. Post photos in an a place parents will see them, such as drop off/pick up points, or share in a parent newsletter.
    2. Send copies of this activity leaflet to parents and encourage them to provide water play experiences with children outside at home.
    3. Report children’s progress and skill development to parents.

    Materials (for infants and toddlers):

    • Water source: faucet or hose
    • Very shallow cake or pie pans and small plastic containers filled with water
    • Small water pail and/or water pitcher
    • Mat or quilt

    Materials (for twos and older children):

    • Items listed above for younger children
    • Measuring spoons and cups
    • Food coloring
    • Safe liquid soap
    • Loose parts that float or sink
    • Small pebbles
    children engaging in water play in a plastic container
  • Pebble Play

    Leaflets

    Pebble Play

    Download the PDF – English

    Mathematics and language skills are fundamental to children’s readiness for school. Practice, progress, and success in acquiring these early skills are highly predictive of later academic achievement in multiple subject areas. Opportunities to acquire beginning math and language skills during the early years help children connect ideas; develop logical and abstract thinking; and question, analyze, and understand the world around them.

    Setting:

    Flat area in the outdoor learning environment (OLE)

    Focus:

    Using outdoor pebble play to reinforce basic math and language concepts

    Curricular Areas:

    • Physical development: gross and fine motor skills
    • Mathematics knowledge and skills: counting, matching, sorting, comparing, serializing, recognition of patterns and shapes, one-to-one correspondence, measuring
    • Language and conceptual development
    • Spatial awareness and development

    Preparing the Pebble Garden:

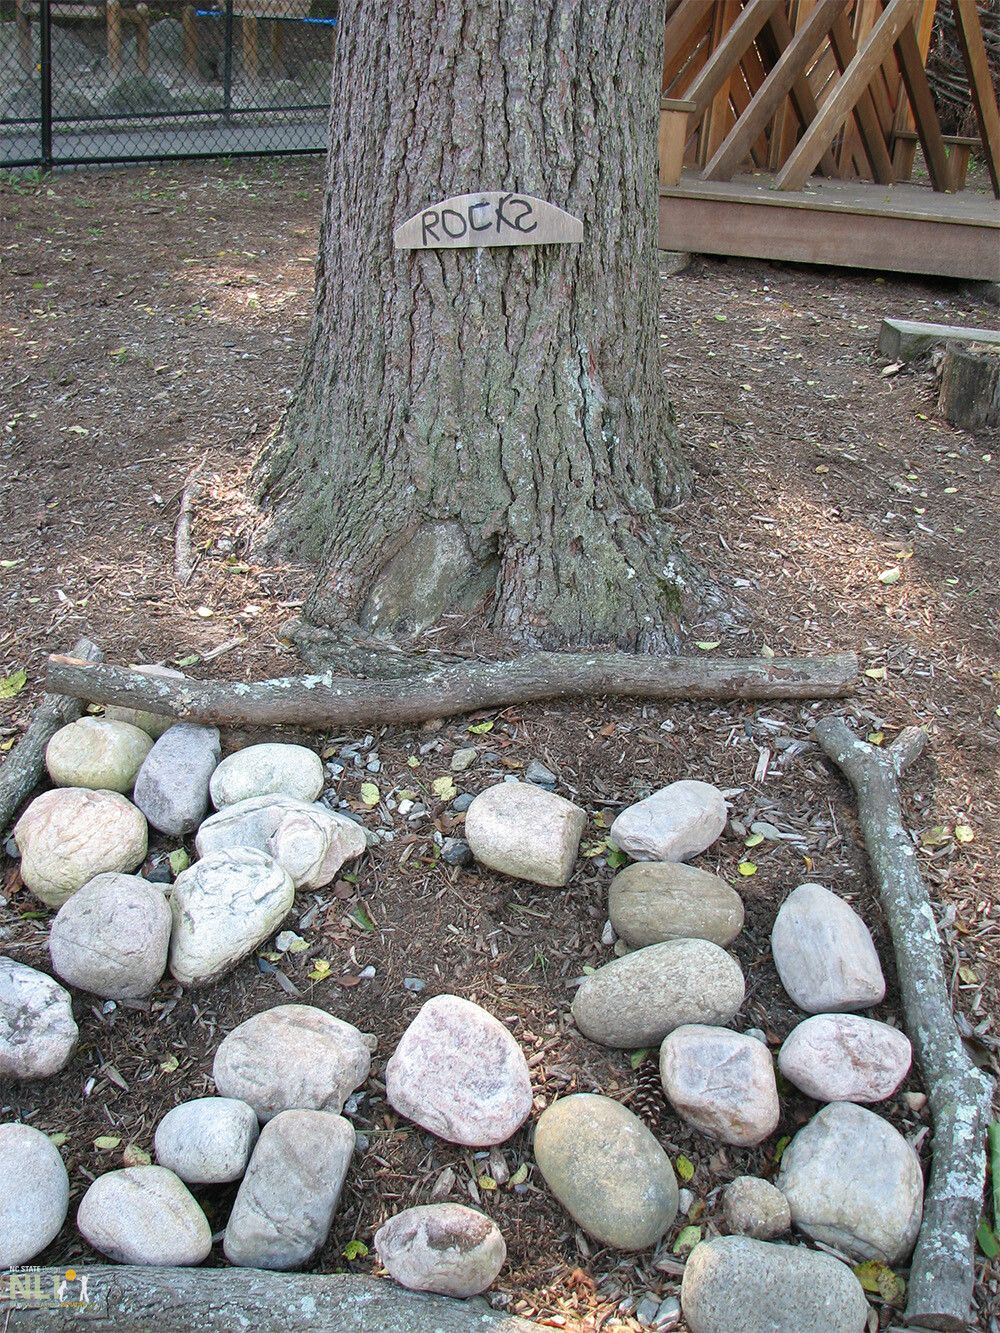
    1. In a designated outdoor play space, create several small “sand-box type” structures with differing shapes (square, triangle, round, rectangle, etc.).
    2. A border material such as landscape logs may make the best borders to hold pebbles and rocks and create safe “pebble gardens.”
    3. Fill each frame with pebbles of different sizes, colors, shapes, and weights.
    4. Provide near-by work tables (e.g. stumps, a solid piece of wood on the ground, or a workspace made from tiles).

    Suggestions:

    1. Model interactions with the stones and pebbles for children that support their development in the curricular areas above and give them opportunities to practice those skills at their own pace. Encourage them to sort pebbles and stones by shape, color, or size. Include prompts that encourage counting and sorting, such as “Lets try placing all the gray pebbles in the triangle garden!”
    2. Add containers of different sizes for children to transport pebbles from the “garden” to the workspace.
    3. Add a matching game with shapes made from wood or other material that will hold in outdoor conditions. Shapes should be the same size as each pebble garden.
    4. Add additional pebble gardens (diamond, hexagon, pentagon, and polygon) for older children.
    5. Remember, for these early experiences, it is not important for children to get the “right” answer or produce the perfect product, but rather that they be allowed to interact with the “loose parts” (pebbles and stones) and learn at their own pace.

    Engaging Parents:

    1. Show parents the pebble play space and let them know their children will be building foundations for later math and language by playing in this space.
    2. Share with parents the curricular areas above to help them understand how interaction with loose parts builds math and language skills, and therefore prepares children for school.
    3. Encourage parents to make their own pebble/rock gardens at home.

    Materials:

    • Smooth stones and pebbles of different shape, size, and color

    • A “border” material for pebble gardens, such as landscape logs, large tree branches, or bamboo poles

    • A variety of containers for children to carry stones

    stones surrounded by sticks making a sand-box of sorts
  • Leaf Necklaces

    Leaflets

    Leaf Necklaces

    Download the PDF – English

    Learning Objective: As a stimulating exercise, threading leaf necklaces strengthens children’s fine motor skills and builds their hand-eye coordination. This activity encourages children to practice their problem-solving and decision-making skills as they design their necklace and choose different leaf patterns. Furthermore, leaf necklaces help children become more independent and self-assured in decision-making.

    Setting:

    Outdoor learning environment

    Focus:

    This activity develops children’s fine motor skills and helps them connect to the natural and physical world.

    Curricular Areas:

    • Problem-solving
    • Decision-making
    • Cognitive development
    • Creative expression
    • Sensory stimulation
    • Hand-eye coordination
    • Mathematics knowledge and skills: counting, sorting, matching, patterns, comparing
    • Physical development: fine motor skills
    • Scientific knowledge and skills

    Suggestions:

    1. Select an area for children to make leaf necklaces in the OLE.
    2. Explain to children they will be creating leaf necklaces. As children are collecting leaves outside, highlight trees within the OLE: place emphasis on the shape, size, and color of each leaf they choose.
    3. Encourage children to sort leaves based on their shape, size, and color.
    4. Using hole punchers, invite children to punch holes through each leaf. This exercise helps to strengthen their fine motor skills, with focus on hand muscle development. During this portion of the activity, adult assistance may be needed.
    5. Have children thread twine or yarn through leaf holes. Encourage them to create patterns or decorate leaves using acrylic paint.
    6. With teacher assistance, tie ends together to form the shape of the necklace. Have children showcase their necklace to others.
    7. Expand activity to include additional learning outcomes for children.

    Engaging Parents:

    1. Have children draw a picture and share stories of their leaf necklace with their family.
    2. Encourage parents to recreate this inexpensive activity at home with their children.

    *Caution children from wearing their necklace during outdoor play and/or physical activities as it may cause a choking or entanglement hazard.

    Materials:

    • Leaves of different shape, size, and color
    • Hole puncher, twine or yarn, acrylic paint and brushes (optional)

    Book Recommendations:

    1. “All About Leaves” by Claire Throp
    2. “A Leaf Can Be…” by Laura Purdie Salas and Violeta Dabija
    3. “Tap the Magic Tree” by Christie Matheson
    4. “The Leaf That Wouldn’t Leave” by Trish Trinco and Bryan Langdo
    5. “We’re Going On A Leaf Hunt” by Steve Metzger and Miki Sakamoto
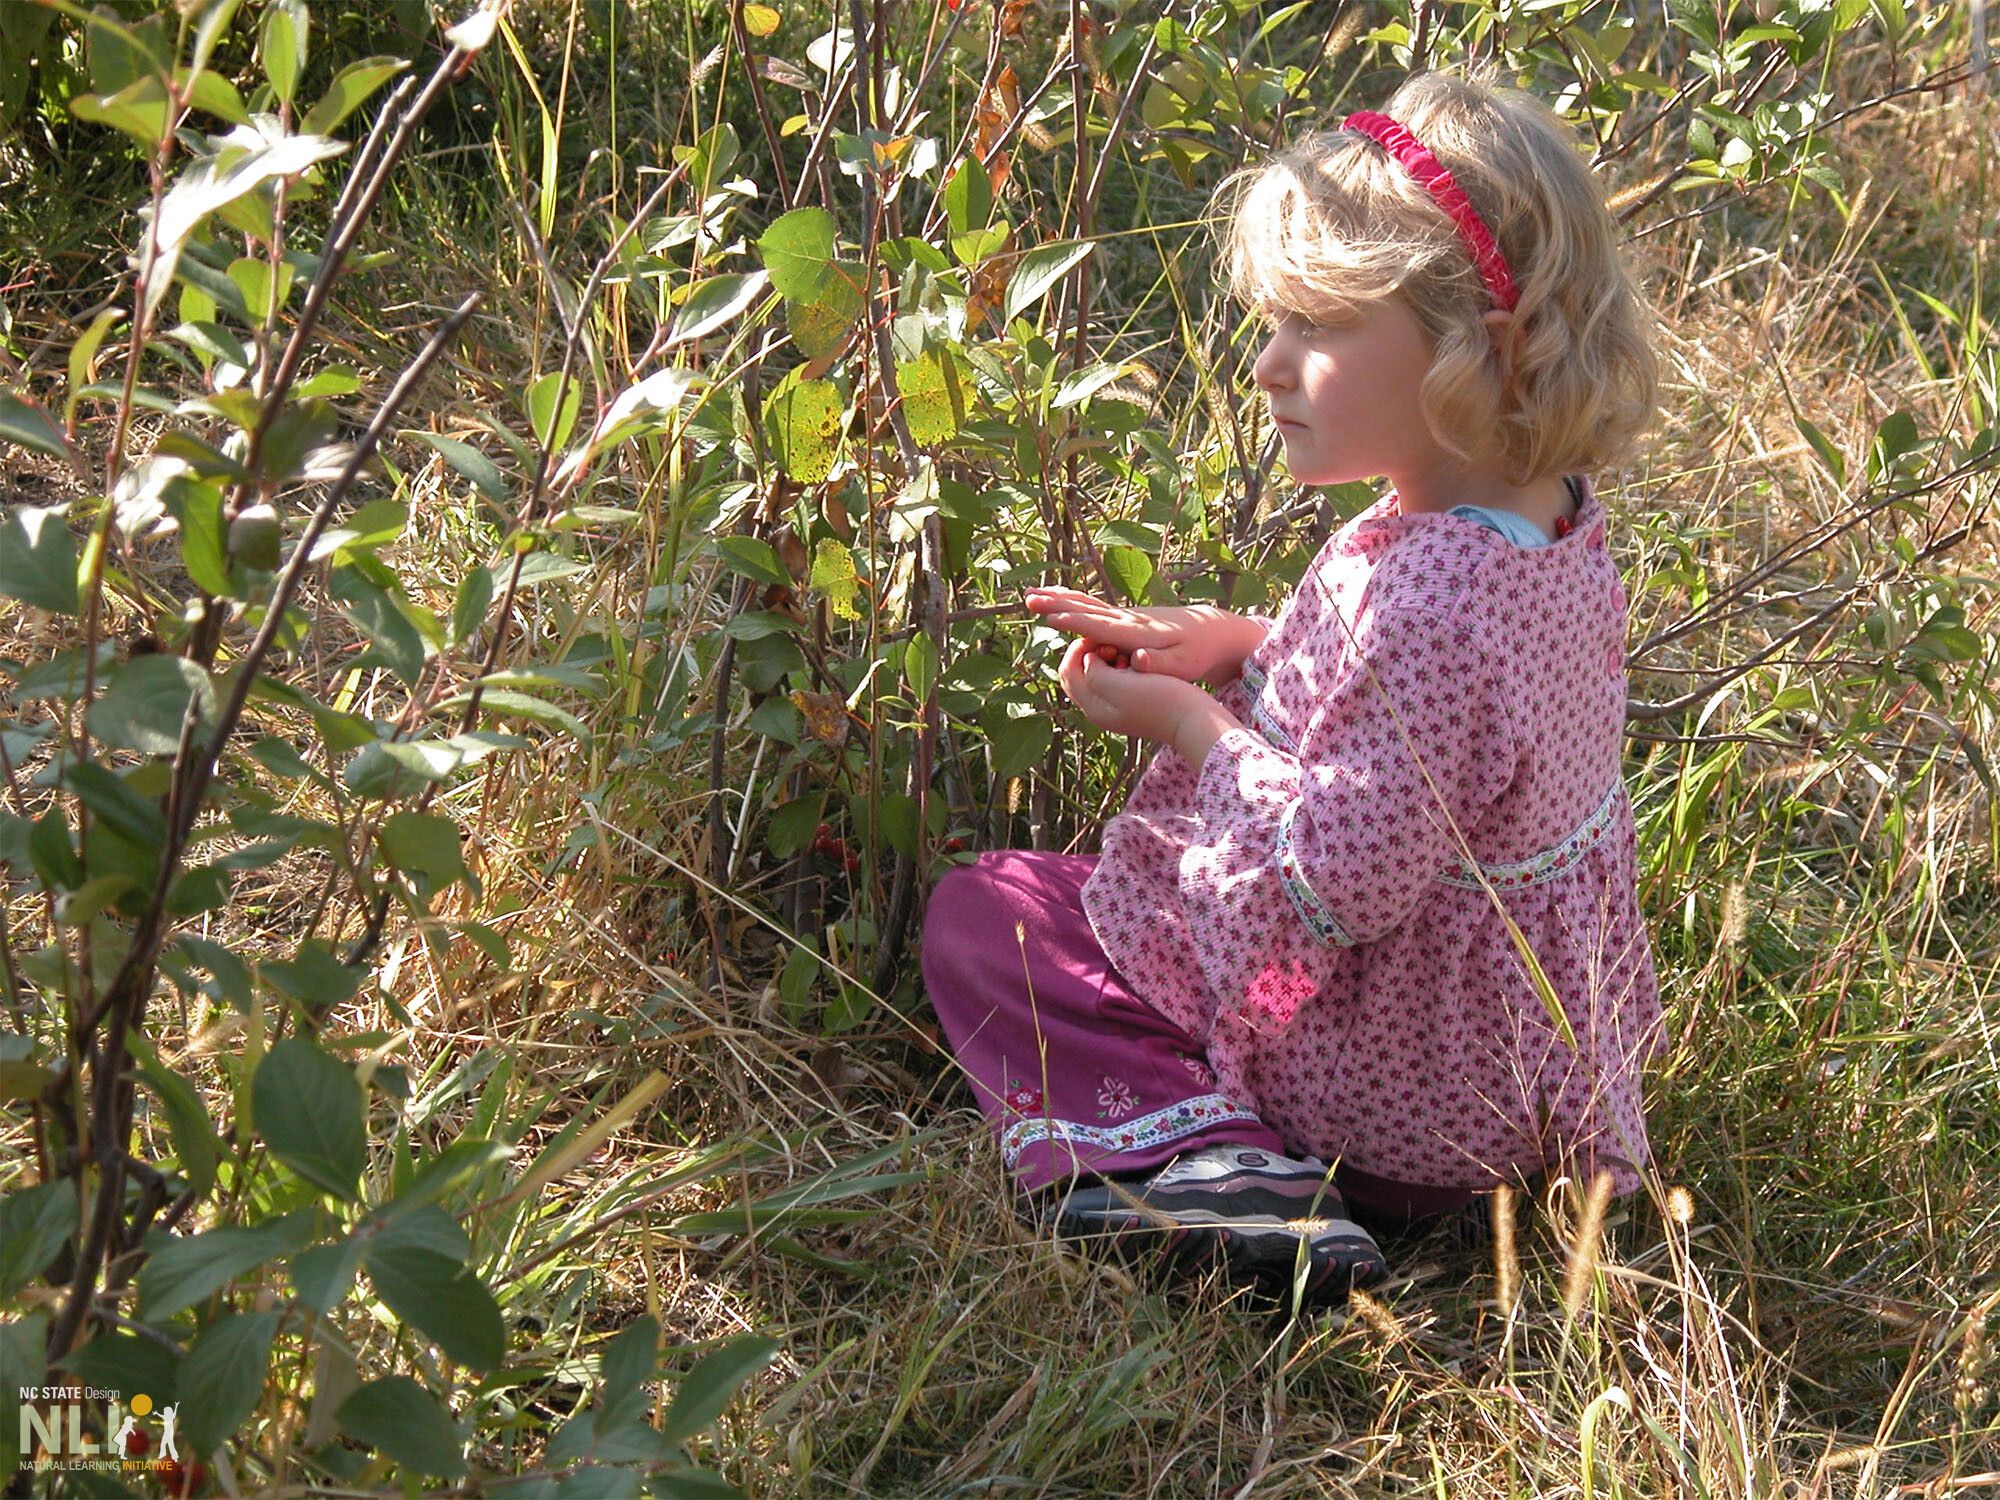
    child observing plants
  • Ice Painting

    Leaflets

    Ice Painting

    Download the PDF – English

    Learning about water and ice is age-appropriate activity that stimulates children’s senses and enhances their fine motor skills through creative design. Making artwork encourages young children to practice hand-eye coordination and introduces STEAM concepts at an early age.

    Setting:

    Outdoor learning environment (OLE)

    Focus:

    Outdoor craft focused on stimulating senses and building physical development (fine motor skills)

    Curricular Areas:

    • Creative expression• Problem-solving
    • Cognitive development• Sensory stimulation
    • Physical development (fine motor skills)

    Suggestions:

    1. Fill freezable containers with water.
    2. Mix in food coloring.
    3. Place a craft stick or small plastic spoon in each container and place in freezer.
    4. Allow a couple hours for water to thoroughly freeze.
    5. Once frozen, take ice paint out of the container and allow children to paint on construction paper or outdoor surfaces (sidewalk, pathways, play structures, etc.) using the cubes as paintbrushes.
    6. FOR OLDER CHILDREN: Invite children to create a painting of their outdoor learning environment. Encourage them to incorporate animals/natural elements they may see during their outdoor time. During circle time, create an atmosphere for open dialogue. Ask the children to discuss their outdoor scene. To expand this activity, have them identify the shapes, colors, and number of items they included in their picture.
    7. Expand the activity to include more curricular and development areas.

    Engaging Parents:

    1. Take a picture of children’s ice paintings. Post the pictures in a readily-accessible place and/or include it in a parent newsletter.
    2. Encourage children to show their ice painting to their parents and talk about the outdoor scene they created.

    Materials:

    • Food coloring, craft sticks or plastic spoons
    • White construction paper, water, and small, plastic, freezable containers (ex. empty yogurt containers or ice trays)

    Book Recommendations:

    1. “Mouse Paint” by Ellen Stoll Walsh
    2. “Beautiful Oops!” by Barney Saltzberg
    3. “Do You Know Colors?” by Katherine Howard and J.P. Miller
    4. “Brown Bear, Brown Bear, What Do You See?” by Bill Martin Jr.
    5. “Pantone: Colors” by Pantone and Helen Dardik
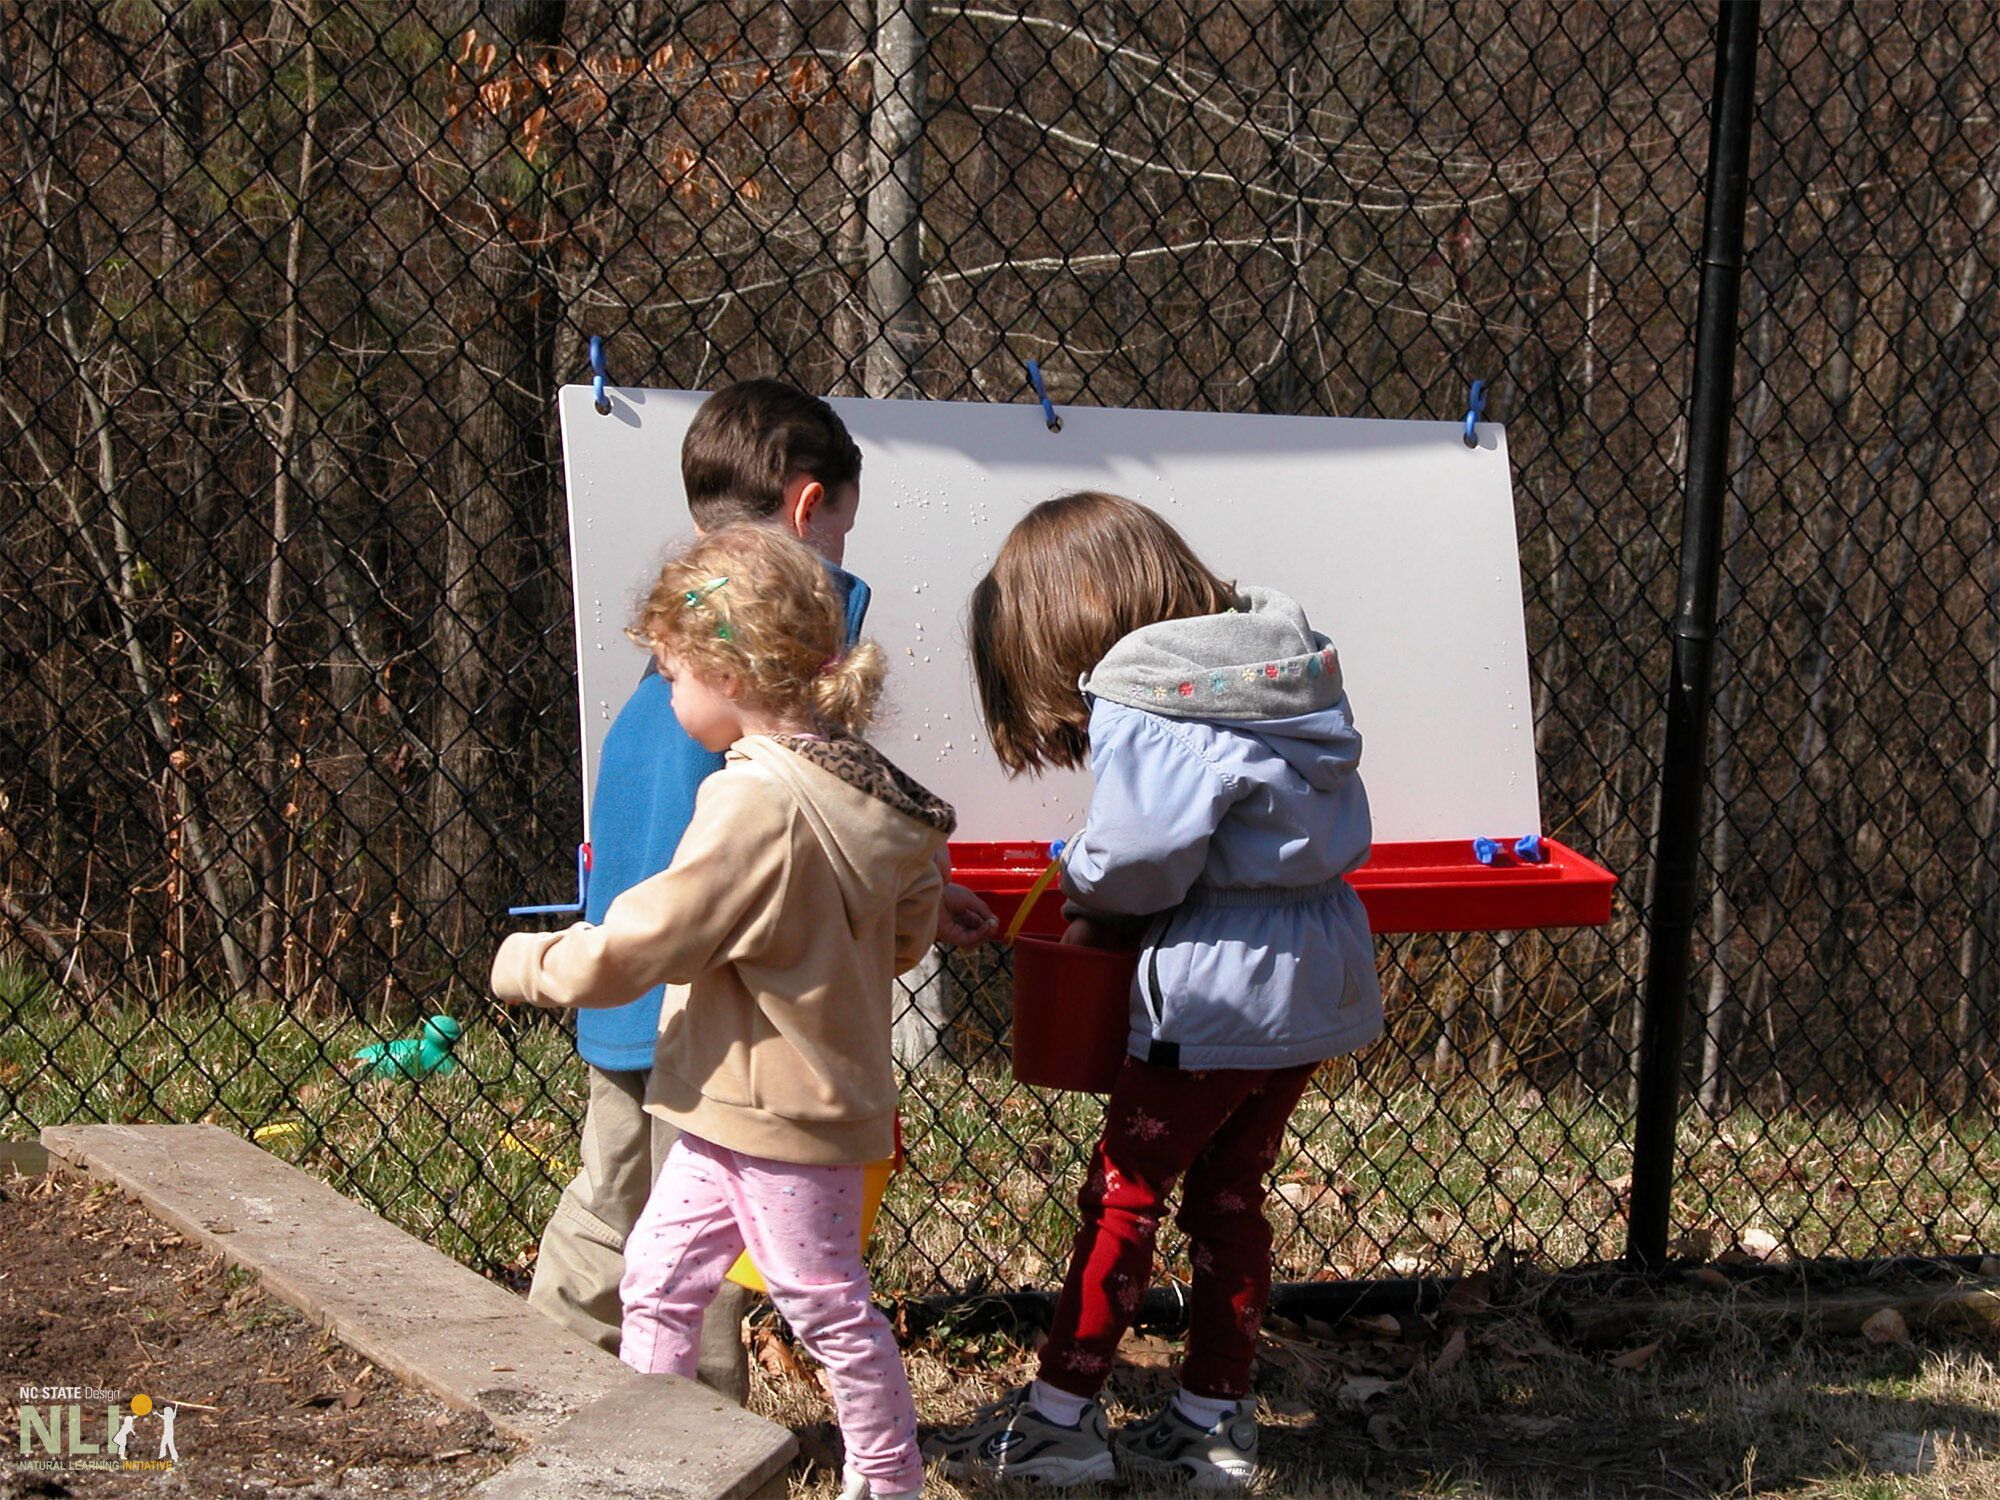
    children engaging in ice play with a canvas ouside
  • Harvest Time

    Leaflets

    Harvest Time

    Download the PDF – English

    Gardening with young children is one of the best ways to get them interested in healthy eating and where food comes from. Gardening activities also foster STEAM skills and language development as children observe, question, and describe changes in the garden over time. A conservation attitude can also be promoted as children learn how to care for living things.

    Setting:

    Garden in the outdoor learning environment (OLE)

    Focus:

    Gardening and healthy eating

    Curricular Areas:

    • Health and physical development: healthy eating, motor development
    • Language development and communication: new vocabulary, listening, describing
    • Cognitive development: scientific thinking with observation and sensory exploration, conservation/empathy, familiarity with living things, interest in living things

    Suggestions:

    1. Call attention to the difference between vegetables in the garden that are ripe and ones that are not. Use descriptive words. For example: describe ripe pea pods as fat and those that are not ripe as flat. Describe ripe tomatoes as red and soft; those that are not ripe as green and hard.
    2. Encourage children to taste the ripe vegetables and to describe what they taste like.
    3. Give each child a container for collecting ripe vegetables.
    4. Involve the children in cleaning the harvested vegetables and preparing a plate of vegetables and dip for snack.

    Engaging Parents:

    1. Encourage children to take their parents to the garden and talk about the different vegetables that are growing there and how to tell if they are ripe.
    2. After enough vegetables have been harvested, invite parents to an “Open House” or “Art Show” where children’s artwork is displayed and the harvested vegetables are included as refreshments.

    Materials:

    • Small containers
    • Healthy vegetable dip such as hummus
    teacher explaining to children about plants
  • Garden Yoga

    Leaflets

    Garden Yoga

    Download the PDF – English

    Physical exercise is a great way to promote growth and development. By engaging in whole-body movement, children can express themselves and develop crucial motor control skills. This simple but captivating activity nurtures children’s physical capabilities and increases their awareness of the natural world around them.

    Setting:

    Designated play area or outdoor learning environment (OLE)

    Focus:

    Promote physical development

    Curricular Areas:

    • Health and physical development: climbing, balancing, motor control, muscle developmen
    • Problem-solving
    • Cognitive development
    • Language development
    • Conceptual development of the natural and physical world
    • Imitating

    Suggestions:

    1. Explain to the children they are going on a garden yoga walk.
    2. Read the story Rachel’s Day in the Garden: A Kids Yoga Spring Colors Book by Giselle Shardlow and Hazel Quintanilla, or show a book with yoga poses. Invite the children to role-play the story and/or try yoga poses to make sure they understand basic yoga movements.
    3. During outside time, demonstrate different yoga poses while walking around the garden and OLE, encouraging children to follow the lead. Utilize different outdoor elements such as boulders, tree logs, stepping stones, straw bales, and tree stumps for different poses.
    4. During the garden walk, encourage children to smell and touch various garden plants and nature-related materials. During yoga poses, encourage them to listen to nature and identify the different sounds they hear.
    5. Expand this activity by having children pose/walk like animals or elements they see outside ( “walk like a squirrel” or “pose like a pine tree”).
    6. Create additional activities to expand children’s learning process.
    7. FOR INFANT & TODDLERS: Modify activity to best fit children’s developmental and physical level. For infants, try simple stretching exercises to stimulate physical development. For toddlers, try simple poses before nap-time to help muscle development and encourage restful sleep. Incoroporate open dialogue to stimulate language and social/emotional development for both infants and toddlers.

    Engaging Parents:

    1. Take a picture of the children during their yoga walk. Post the picture in a readily-accessible place and/or include it in a parent newsletter.
    2. Have children draw a picture of their garden yoga experience. Have them share their picture and story with parents.
    3. Invite parents to do this activity at home with their child(ren) and share photographs.

    Materials:

    • A childrens book about yoga (see recommended list)
    • Fixed outdoor elements for poses such as stumps, boulders, hay bales, etc.

    Book Recommendations:

    1. “Jenny’s Winter Walk” by Giselle Shardlow and Vicky Bowes
    2. “You Are a Lion!: And Other Fun Yoga Poses” by Taeeun Yoo
    3. “Little Yoga: A Toddler’s First Book of Yoga” by Rebecca Whitford and Martina Selway
    4. “Yoga Bunny” by Brian Russo
    5. “ABC Yoga” by Christiane Engel
    6. “Yoga Bugs: Simple Poses for Little Ones” by Sarah Jane Hinder
  • Fence Weaving

    Leaflets

    Fence Weaving

    Download the PDF – English

    Almost all childcare centers have a chain-link fence around the outdoor play area. Most often, it is used for little other than defining the boundaries for outdoor play. As a standalone component, it is dull, colorless, non-stimulating, and not very attractive. It has little aesthetic or utilitarian value. Let’s dress up our fence!

    Setting:

    Areas near a chain-link fence in the outdoor learning environment (OLE)

    Focus:

    Creative expression

    Curricular Areas:

    • Fine motor skills
    • Imitating
    • Hand-eye coordination
    • Learning colors, patterns, and sizes
    • Decision-making
    • Following directions
    • Vocabulary (long, short, soft, hard, smooth, hole, fence, insert, push, pull)

    Suggestions:

    1. Place containers of fabric strips near the fence. A small stump for each container or one large table-height stump for all containers works well and identifies the area as a designated “play space,”
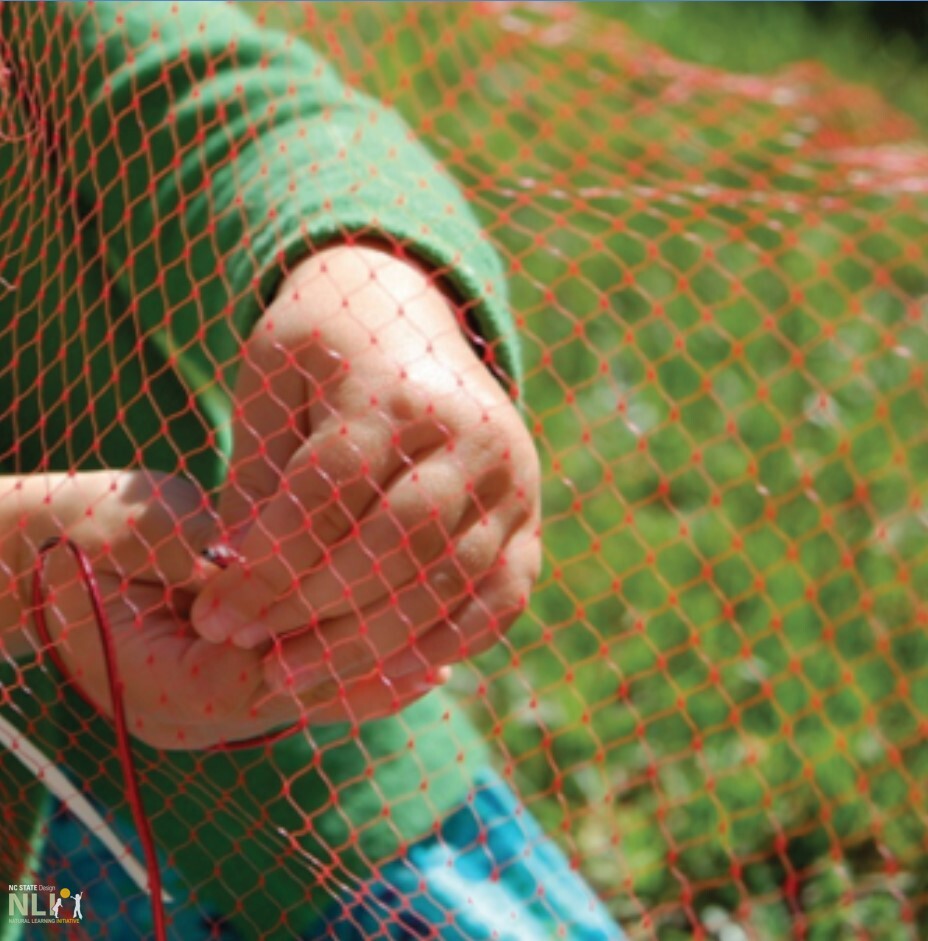
    2. With walking infants (12-18 months), simply model the behavior of weaving by lacing a fabric piece through a hole in the fence.
    3. With older infants (18-30 months) you may want to introduce directions: “Let’s dress up the fence with red strips today”; “Let’s add 3 strips of fabric on the fence today”; “Let’s make a pretty pattern.”
    4. As you model fence weaving for the children, be aware of all of the opportunities for growth and development in the curricular areas listed above. Expand on this activity for further play and learning opportunities for children.
    5. Take photos of even small pieces of “completed work.” Use photos to help children remember their work on the fence weaving project (important for later reading recall and comprehension)

    Variations:

    • Add even more variation in color, length of fabric strips, patterns, etc. as the year progresses.
    • For older children who have developed motor skills, allow them to cut strips of fabric (with child-safe scissors). Use a ruler and have them measure the fabric before cutting.
    • Add holiday cheer and seasonal recognition by providing selected colors such as orange, red, yellow, and brown in the Fall, or pink, blue, and green in the Spring. Reflect specific topic areas by providing fabric with different animals, with trees and flowers, or fabric with popular characters such as Sponge Bob. Fabric stores will readily provide end-of-bolt fabrics at no cost.

    Engaging Parents:

    1. Send photos home to parents and encourage them to do a similar project at home with their children. They do not necessarily need a chain-link fence: a large square of chicken wire from Home Depot or Lowe’s works well.
    2. Ask parents to bring additional 2 inch strips from home to add to the fence.

    Materials:

    • Containers (baskets, boxes, cans, zippered plastic bags) with 2 inch strips of fabric (different lengths, colors, patterns, thickness, texture)
    • Use oil cloth or weather proof fabric to make this activity semi-permanent over an extended period of time: this gives children a sense of working on a project.
    • The project might be referred to as “our beautiful fence,” or “dressing up the fence.”
    child engaging in fence weaving
  • Extending Seasons

    Leaflets

    Extending Seasons

    Download the PDF – English

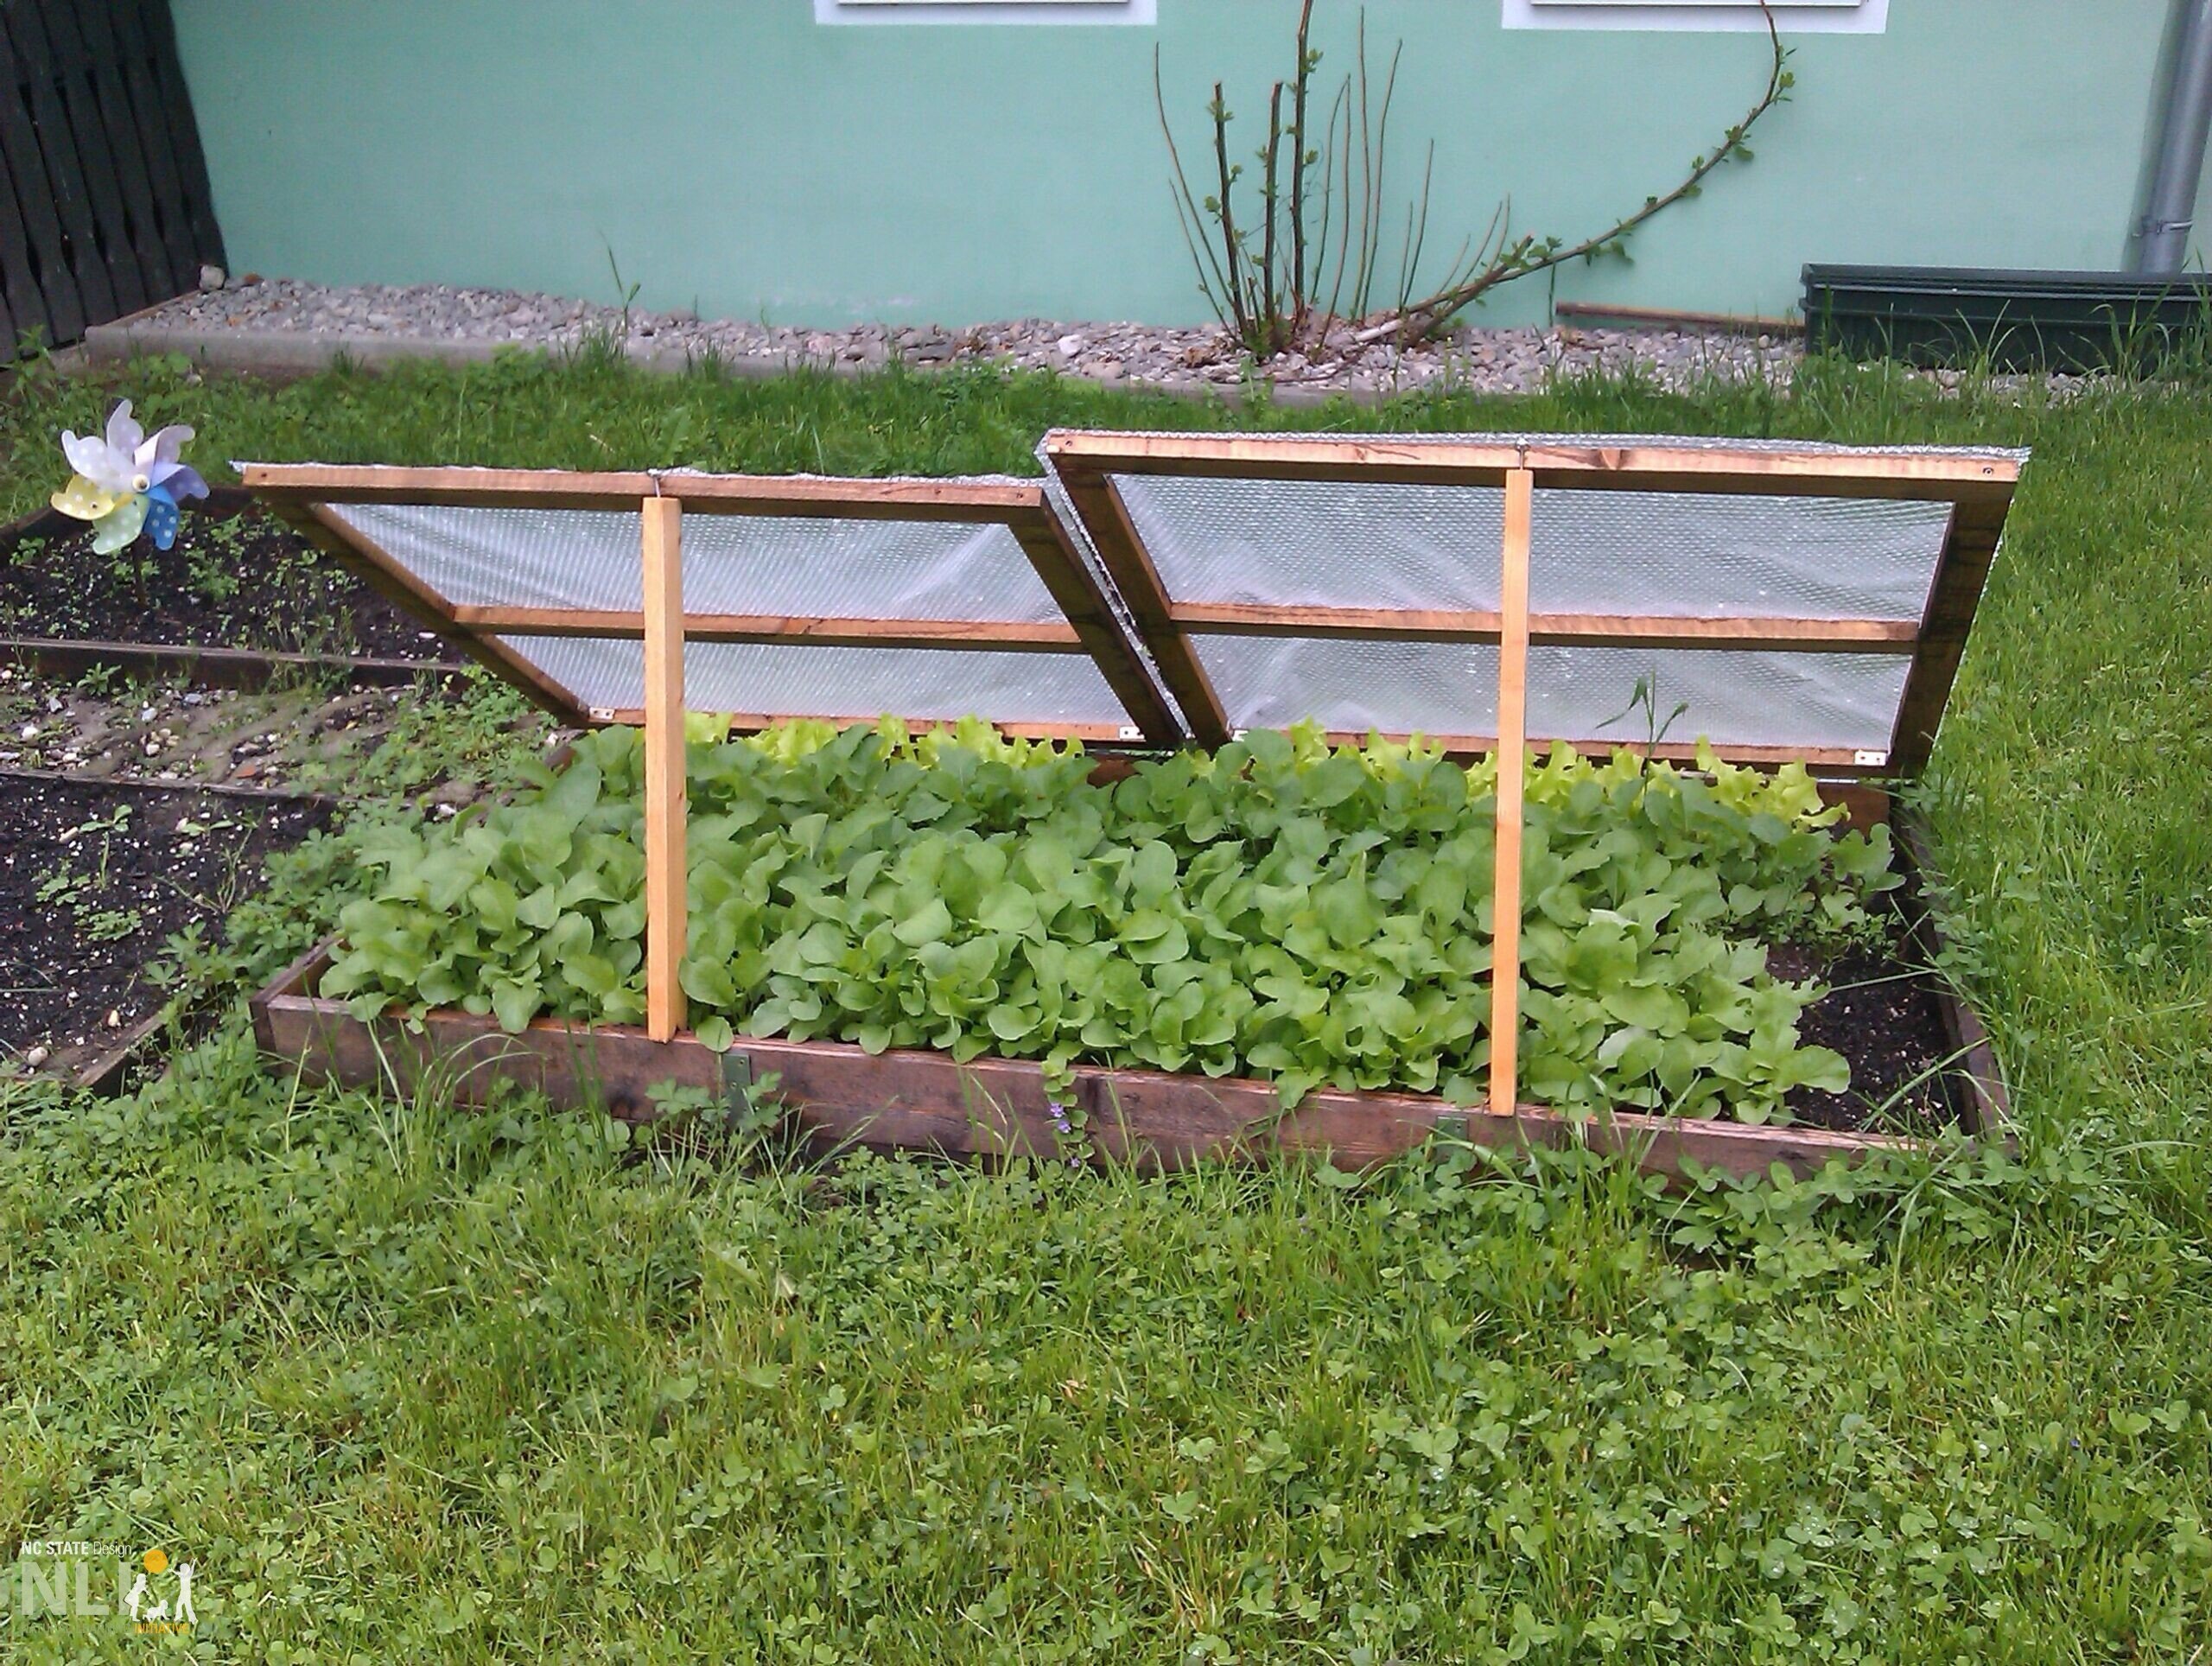
    A cold frame is simply a box set on the ground, topped with framed polycarbonate plastic sheeting, greenhouse film, or sometimes glass, usually hinged on the north-facing edge (in the northern hemisphere). Building a cold frame is a great way to extend the growing season, allowing earlier seed germination and protection of plants from early frost well into fall and winter. In southern latitudes, some edibles – such as greens and herbs – may continue growing throughout the winter with the benefit of cold frame protection.​

    Setting:

    Garden or outdoor area along a building or fence where plants can be grown

    Focus:

    Gardening

    Curricular Areas:

    • Health and physical development: motor skills, healthy eating
    • Approaches to learning: pondering, processing
    • Cognitive development: scientific thinking (observation, inquiry)

    Suggestions:

    1. Decide with the children the best location for a cold frame. Ideally, the location will be south-facing to collect the warmth of the sun. Consider water and soil requirements: select an area with adequate drainage and some protection from the wind. Locating a frame near a wall or building adds additional insulation and protection from the elements.
    2. Work with the children to prepare the soil. The area of prepared soil should be the size of the cold frame. Remove any grass or other type of ground cover. Loosen the soil and remove any rocks or debris. Add some compost and mix into the soil.
    3. Construct a frame around the prepared soil, using bricks, wood, and/or bales of straw. If possible, make the back of the frame about twice as high as the front so the lid slopes to a favorable angle for capturing sunlight. The entire growing area should be tall enough to accommodate growing plants.
    4. Make a cover or lid for your cold frame by stretching and securing clear plastic sheeting across the frame of an old window screen.
    5. Plant seeds or seedlings in the cold frame. Lettuce, spinach, arugula, broccoli, and herbs work well. Water the seeds or seedlings, and place the lid over the frame.
    6. Keep the soil moist and observe the plants over time.

    Engaging Parents:

    1. Encourage children to show the cold frame to their parents and talk about how it helps the plants to grow.
    2. Once the plants are ready to harvest, send them home with children. Encourage children to share the healthy foods they helped to grow.

    Extension Gardener Handbook

    Materials:

    • Rake or digging tool to prepare the soil
    • Compost
    • Materials for constructing a frame (bricks, wood, and/or bales of straw)
    • Large piece of clear greenhouse film (woven or solid) for a hoop design or solid sheets of clear polycarbonate for a box design
    • Frame of an old window screen
    • Seeds or seedlings
    Cold frame with hinged covers

    Cold frame with hinged covers, propped open to let the sun in when necessary.

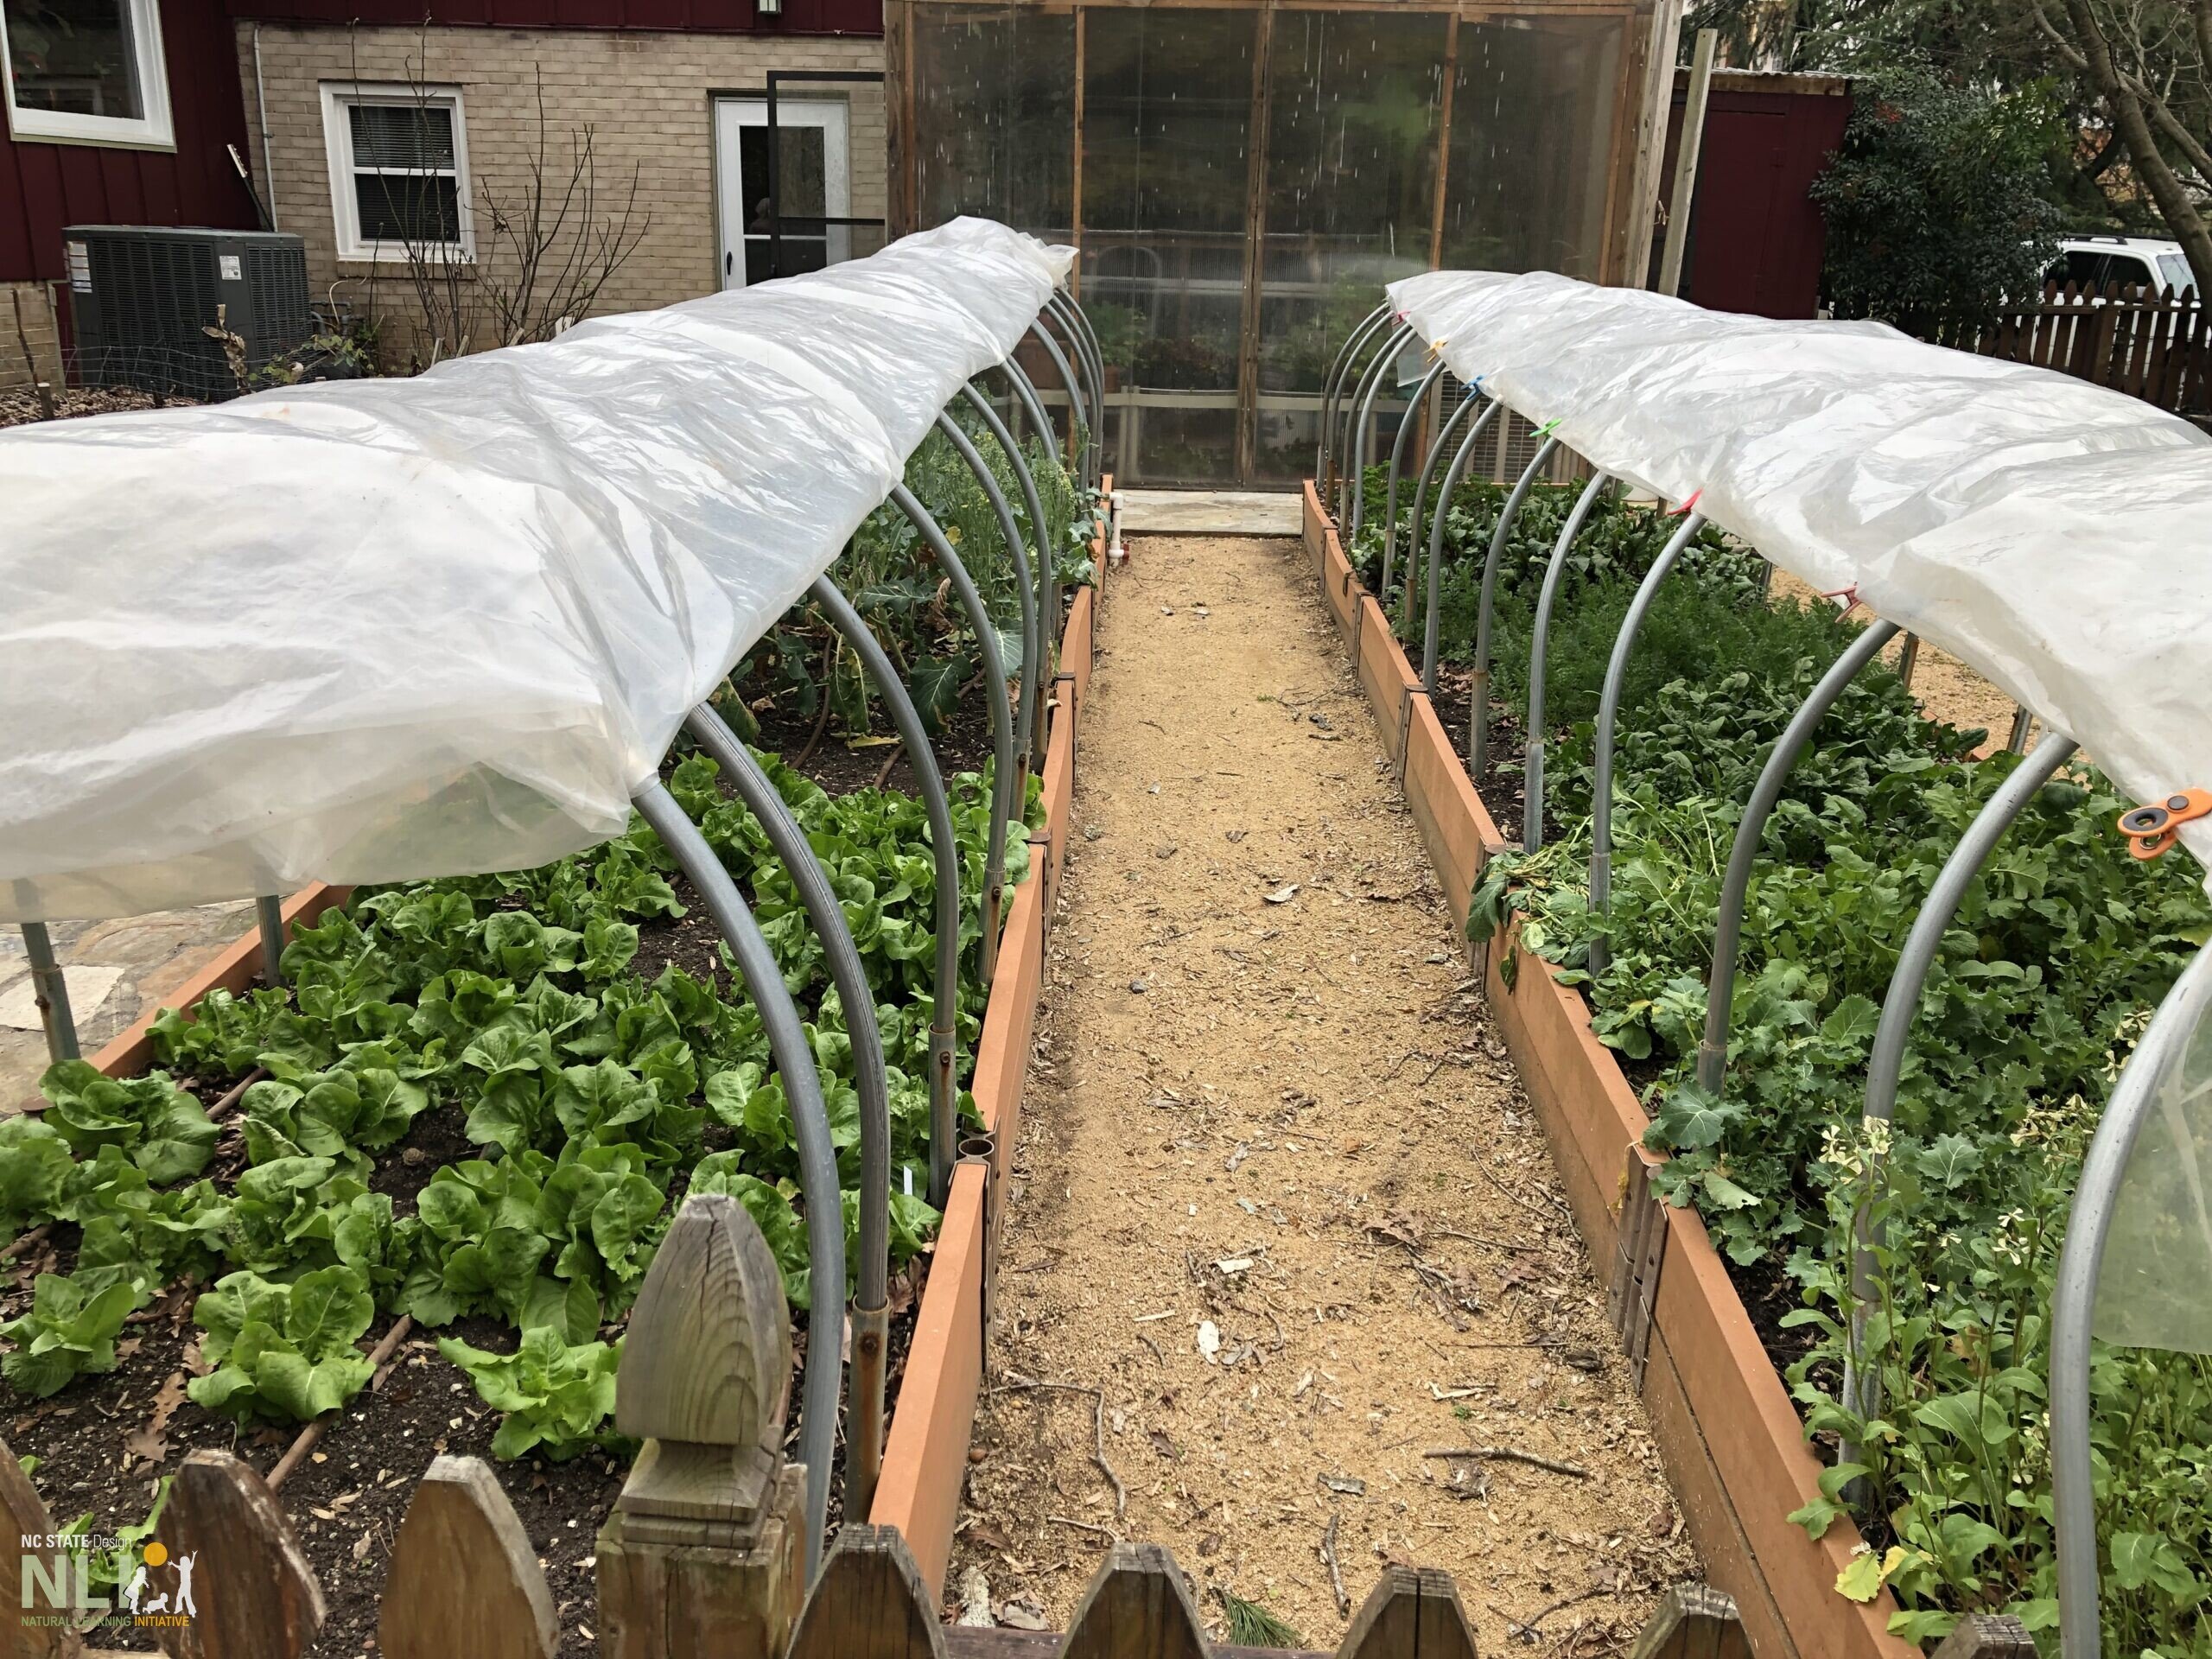
    planting beds with hooped protection

    Hooped protection of planting beds allows for extensive plant growth. The example shown here employs large metal hoops and greenhouse film. A more modest version could be constructed using curved PVC pipe secured at each end by inserting into a rebar rod driven into the ground.

  • Grow It, Smell It, Eat It

    Leaflets

    Grow It, Smell It, Eat It

    Download the PDF – English

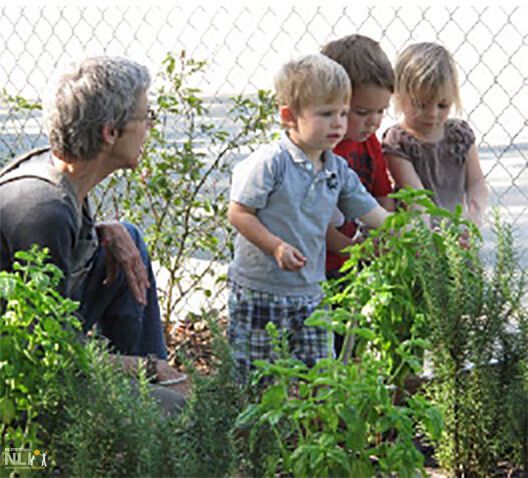
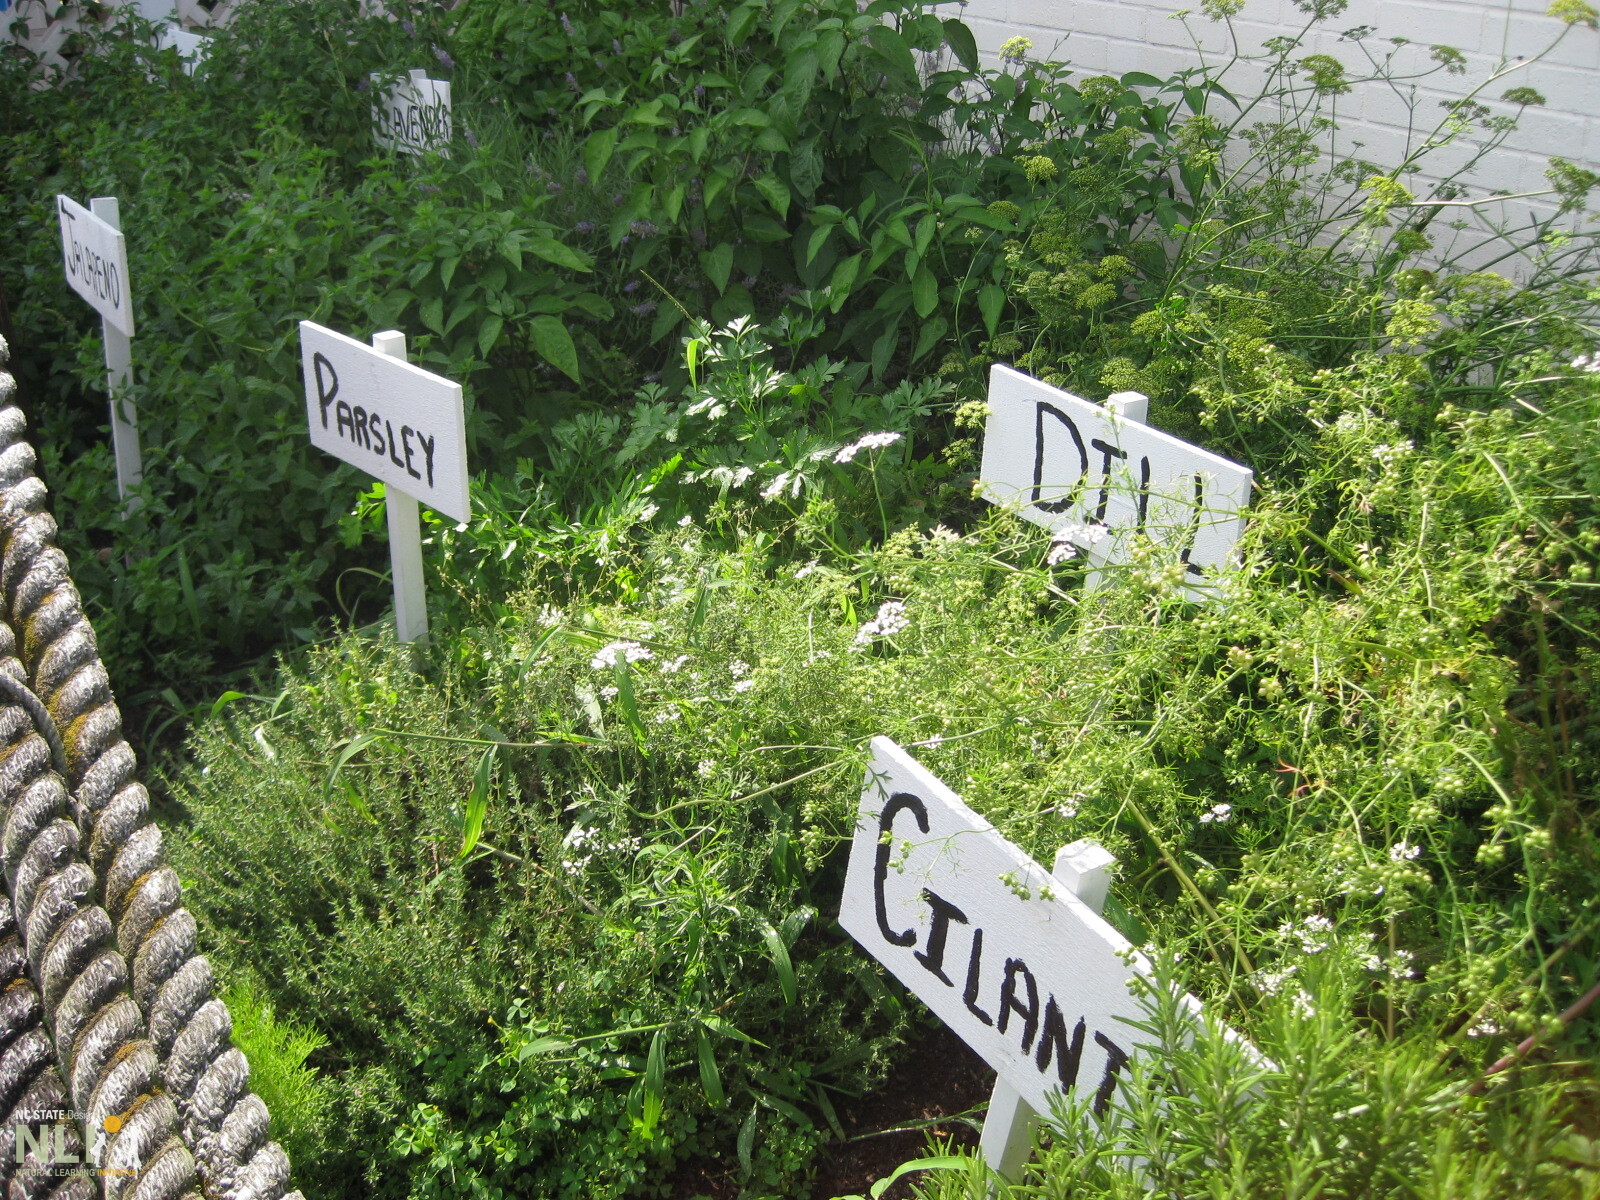
    Herbs are special edible plants that can be used to introduce children to new scents and tastes in the garden. Planting herbs and watching them grow can also help children develop an appreciation for growing plants and gardening. Many herbs are easy to grow and have interesting scents and tastes.

    Setting:

    Work Table/Potting Table

    Focus:

    Gardening

    Curricular Areas:

    • Health and Physical Development: physical health and growth (eating healthy food)
    • Language Development: Receptive language (new vocabulary, listening skills), expressive language (explaining, describing), foundations for reading (using labels)
    • Conservation/Empathy: familiarity with living things

    Suggestions:

    1. Call attention to the materials on the potting table, with special emphasis on related vocabulary including herbs, seedlings, and soil.
    2. Have children smell the dried herbs and explain how people use herbs to add flavor to food.
    3. Tell the children that they can grow their own herbs instead of buying them in a jar. Call attention to the seedlings and the names of each.
    4. Help children plant the seedlings in pots. Label each pot. Carefully water the plants.
    5. Keep the soil moist, and at least once a week, check the growth of the seedlings.
    6. Wait for the plants to mature, and then pinch leaves off the plants. Sprinkle the herbs on salads and other dishes prepared with the children.

    Engaging Parents:

    Send a few snippets of herbs home with the children. Encourage the children to explain to their parents how they grew the herbs and how they might be used in cooking.

    Materials & Tools

    • Variety of pots for planting (make sure the pots have drainage holes)
    • Potting soil
    • Several varieties of herbs (e.g. seedlings of thyme, rosemary, basil, and chives)
    • Labels for herbs
    • One or two jars of dried herbs
    • Spray bottles with water
    mixed herb garden
  • Garden Path

    Leaflets

    Garden Path

    Download the PDF – English

    As children work to create a path through a garden area, they manipulate both heavy and light materials, thus practicing a variety of motor skills. Working around a garden also fosters interest in growing healthy food.

    Setting:

    Garden Area

    Focus:

    Gardening

    Curricular Areas:

    • Health and Physical Development (motor skills, physical health & growth)

    Suggestions:

    1. Place a pile of wood chips and a pile of stones close to the garden area. Also have some buckets and child-sized garden rakes available.
    2. Invite children to help create a path through the garden by spreading wood chips and lining the path with rocks.
    3. Provide materials and a place for creating a mini garden. This can be done on a table or sand table with small furniture, figurines, etc. where children can install and modify pathways and other settings.

    Engaging Parents:

    1. Take a picture of the completed garden path. Post the picture in a readily-accessible place and/or include it in a parent newsletter.
    2. Invite children to draw a picture of the garden path and then share the picture with their parents.

    Materials & Tools

    • Wood chips
    • Stones
    • Buckets
    • Child-sized garden rakes
    • Materials for creating a mini garden (small furniture, figurines, etc.)
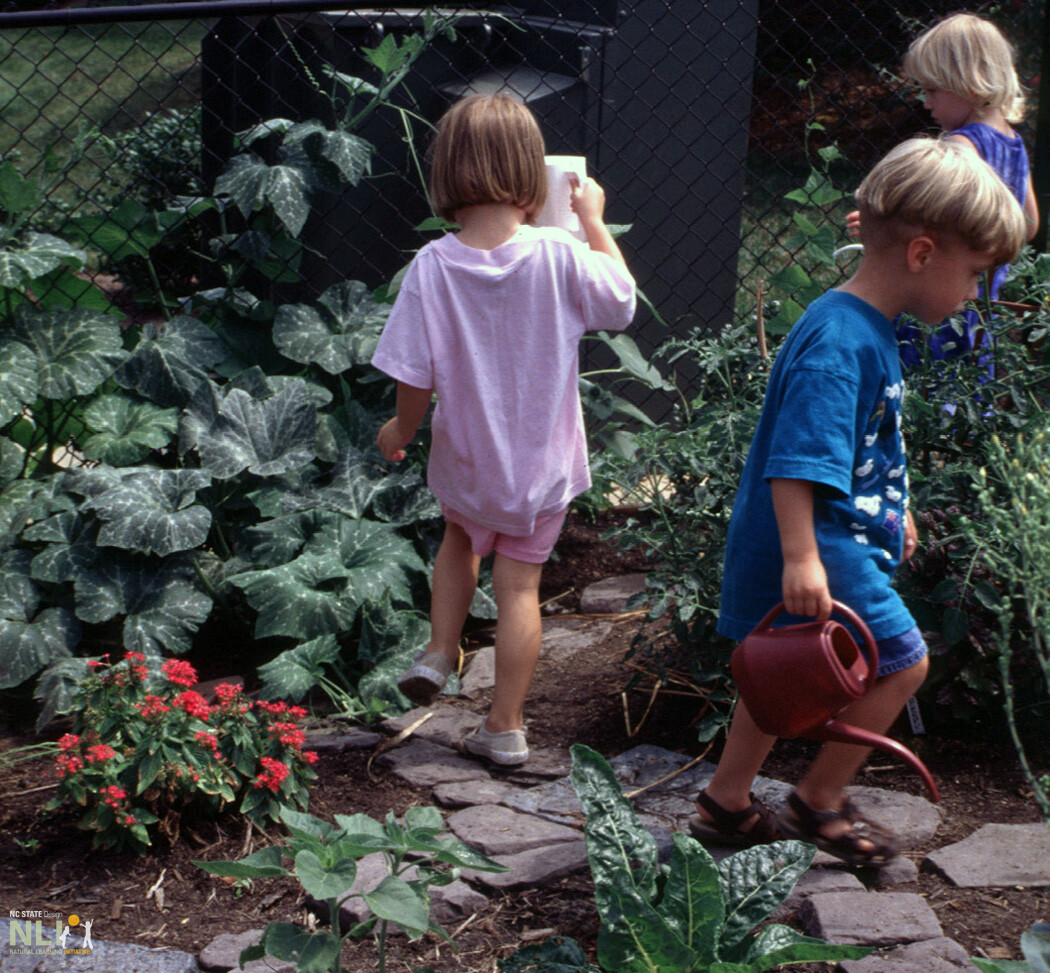
    children in a garden watering plants