Blog

  • Trail Mix Activity Leaflet

    The Green Desk

    Trail Mix Activity Leaflet

    Activity:Making Trail Mix

    Focus of Activity:Healthy Eating

    Activity Setting:Tasting Station

    Curricular Area:

    • Health and Physical Development
    • Language Development and Communication

    As children make their own trail mix, they learn about different types of healthy foods.  They also become more familiar with vocabulary relating to different types of food (nuts, dried fruit, seeds, grains) and with the origin of the term “trail mix.”

    Materials: Ingredients for trail mix (including a variety of nuts, seeds, dried fruit, and non-sweetened cereal) displayed in separate containers, spoons, scoops (1/4 or 1/8 cup size), small paper or plastic bowls, printed directions* (in plastic sleeve for protection)

    Suggestions:

    1. Invite the children to make their own trail mix for snack.
    2. Provide the necessary ingredients and call attention to the printed directions.
    3. Discuss with the children the different types of nuts, seeds, dried fruits, and grains in the cereal.  Display the containers (packaging) for the ingredients (e.g., cereal boxes, bags, etc.) so that children can see the pictures and names of each food item.
    4. Discuss with the children the origin of trail mix – a snack developed by hikers as a type of food that is lightweight, easy to carry and store, nutritious, and good.
    5. Encourage children to eat their trail mix as they hike a trail marked out in advance with chalk, flour, or cairns (rock pyramids hikers make to show the way through an area).

    Engaging Parents: Give parents a copy of the directions for Trail Mix.  Encourage them to make trail mix with their children at home.

    Trail Mix Directions:

    1 scoop nuts (if there are nut allergies, subsitute with a different type of cereal or seeds).

    1 scoop seeds

    1 scoop fruit

    1 scoop cereal

    Mix together and eat.

    Trail Mix Activity Leaflet
    Trail Mix cup
  • Plant of the Month: March – Winter Jasmine

    The Green Desk

    Plant of the Month: March – Winter Jasmine

    Winter Jasmine(Jasminum nudiflorum)

    • Native range: Northern China
    • Hardiness Zone: US 6-10
    • Sun: Full Sun to Part Shade
    • Plant Habit: Vine
    • Water requirement: Medium

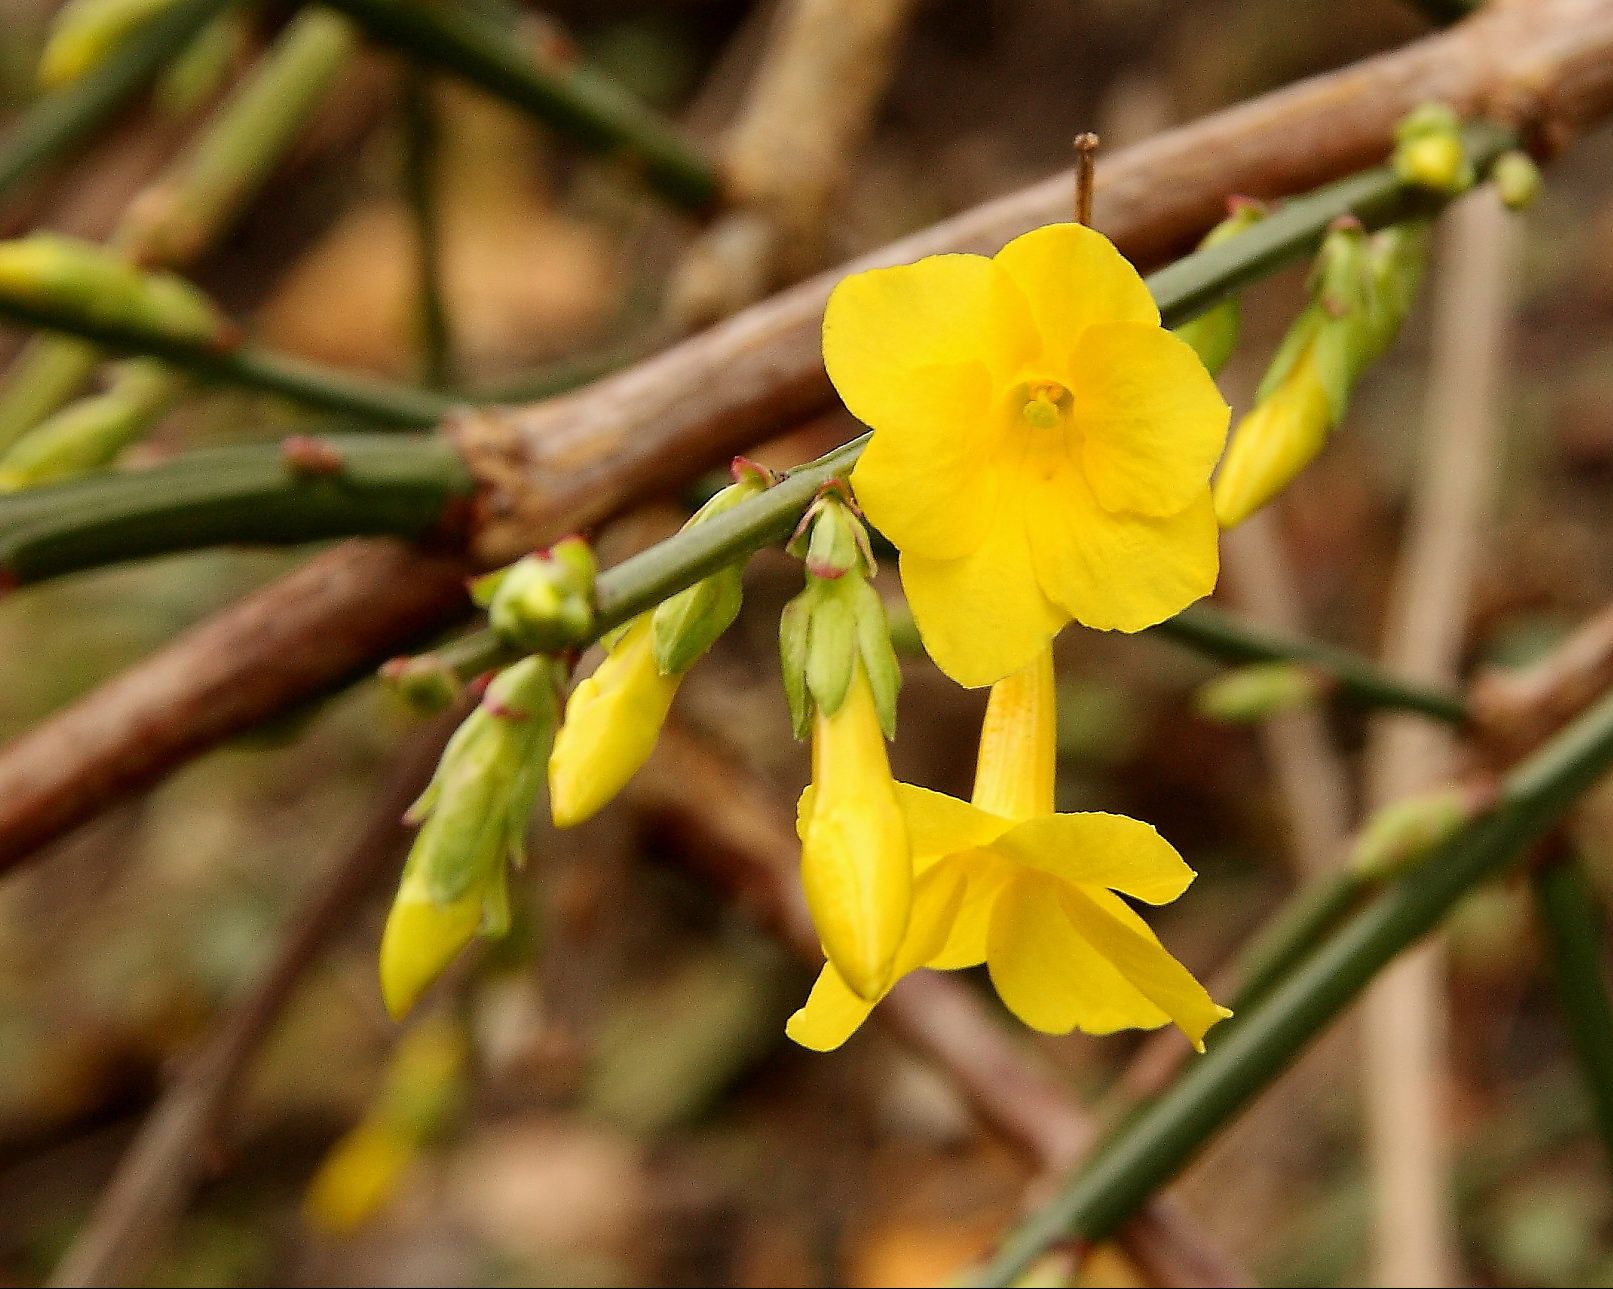
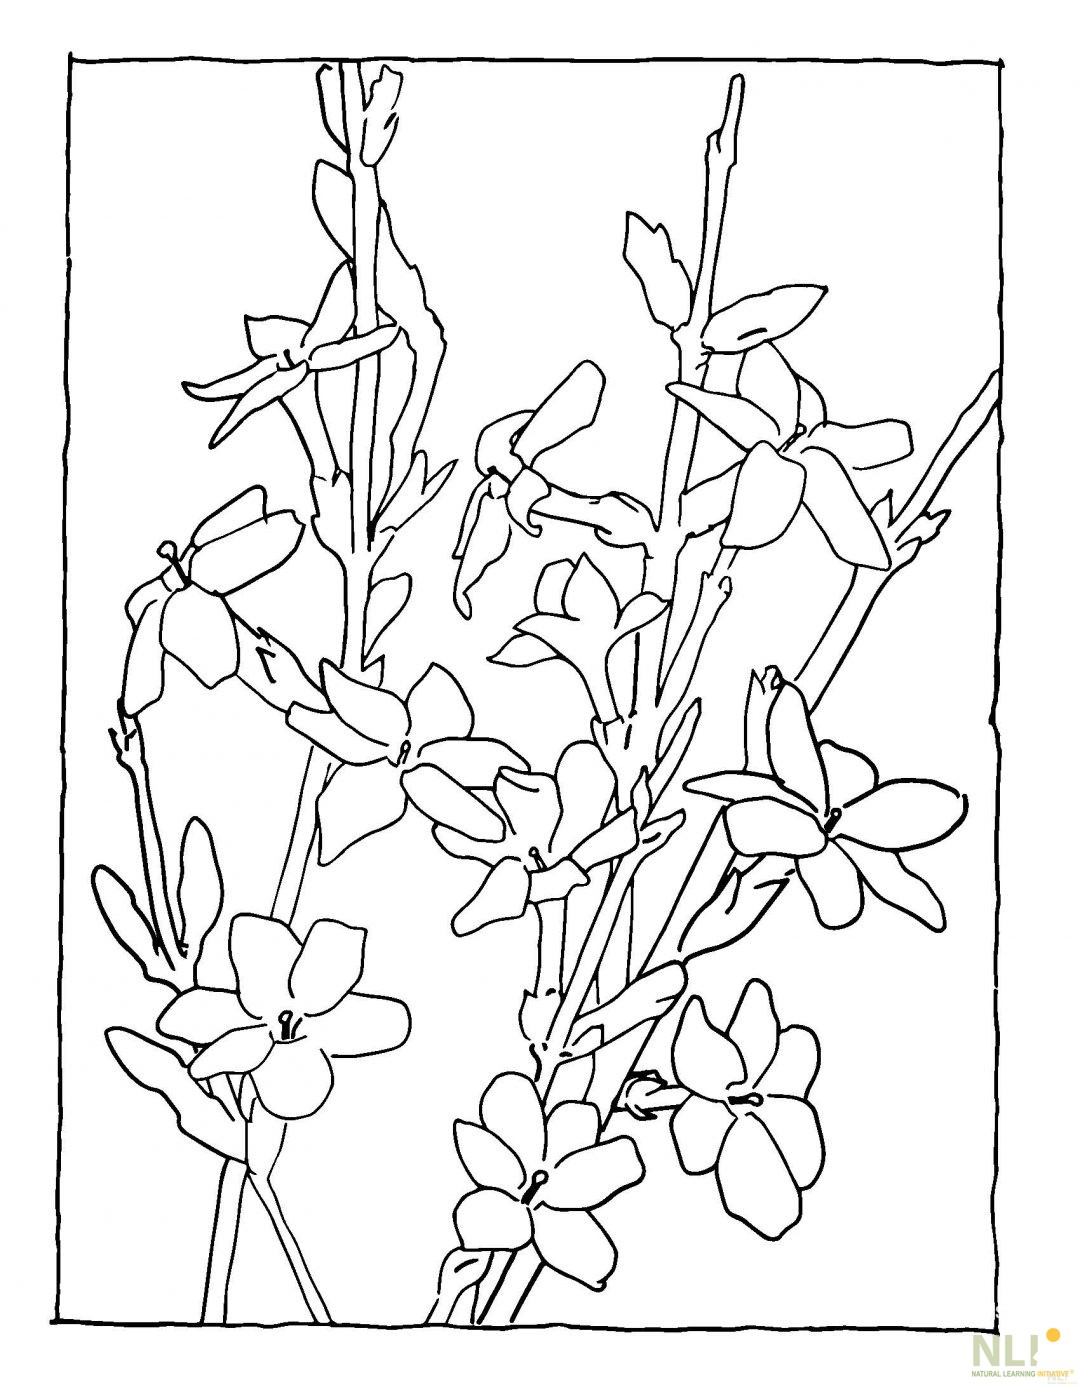
    Bursting from winter’s stillness comes this joyful yellow flower, blooming as early as January and as late as April.  Winter jasmine is a shrubby vine with arching branch-like vines that originate from one central crown. This plant prefers well-drained soils and partial to full sun. With the winter sun low on the horizon, consider planting winter jasmine on the south side of buildings in order to take advantage of the sun on the short days.

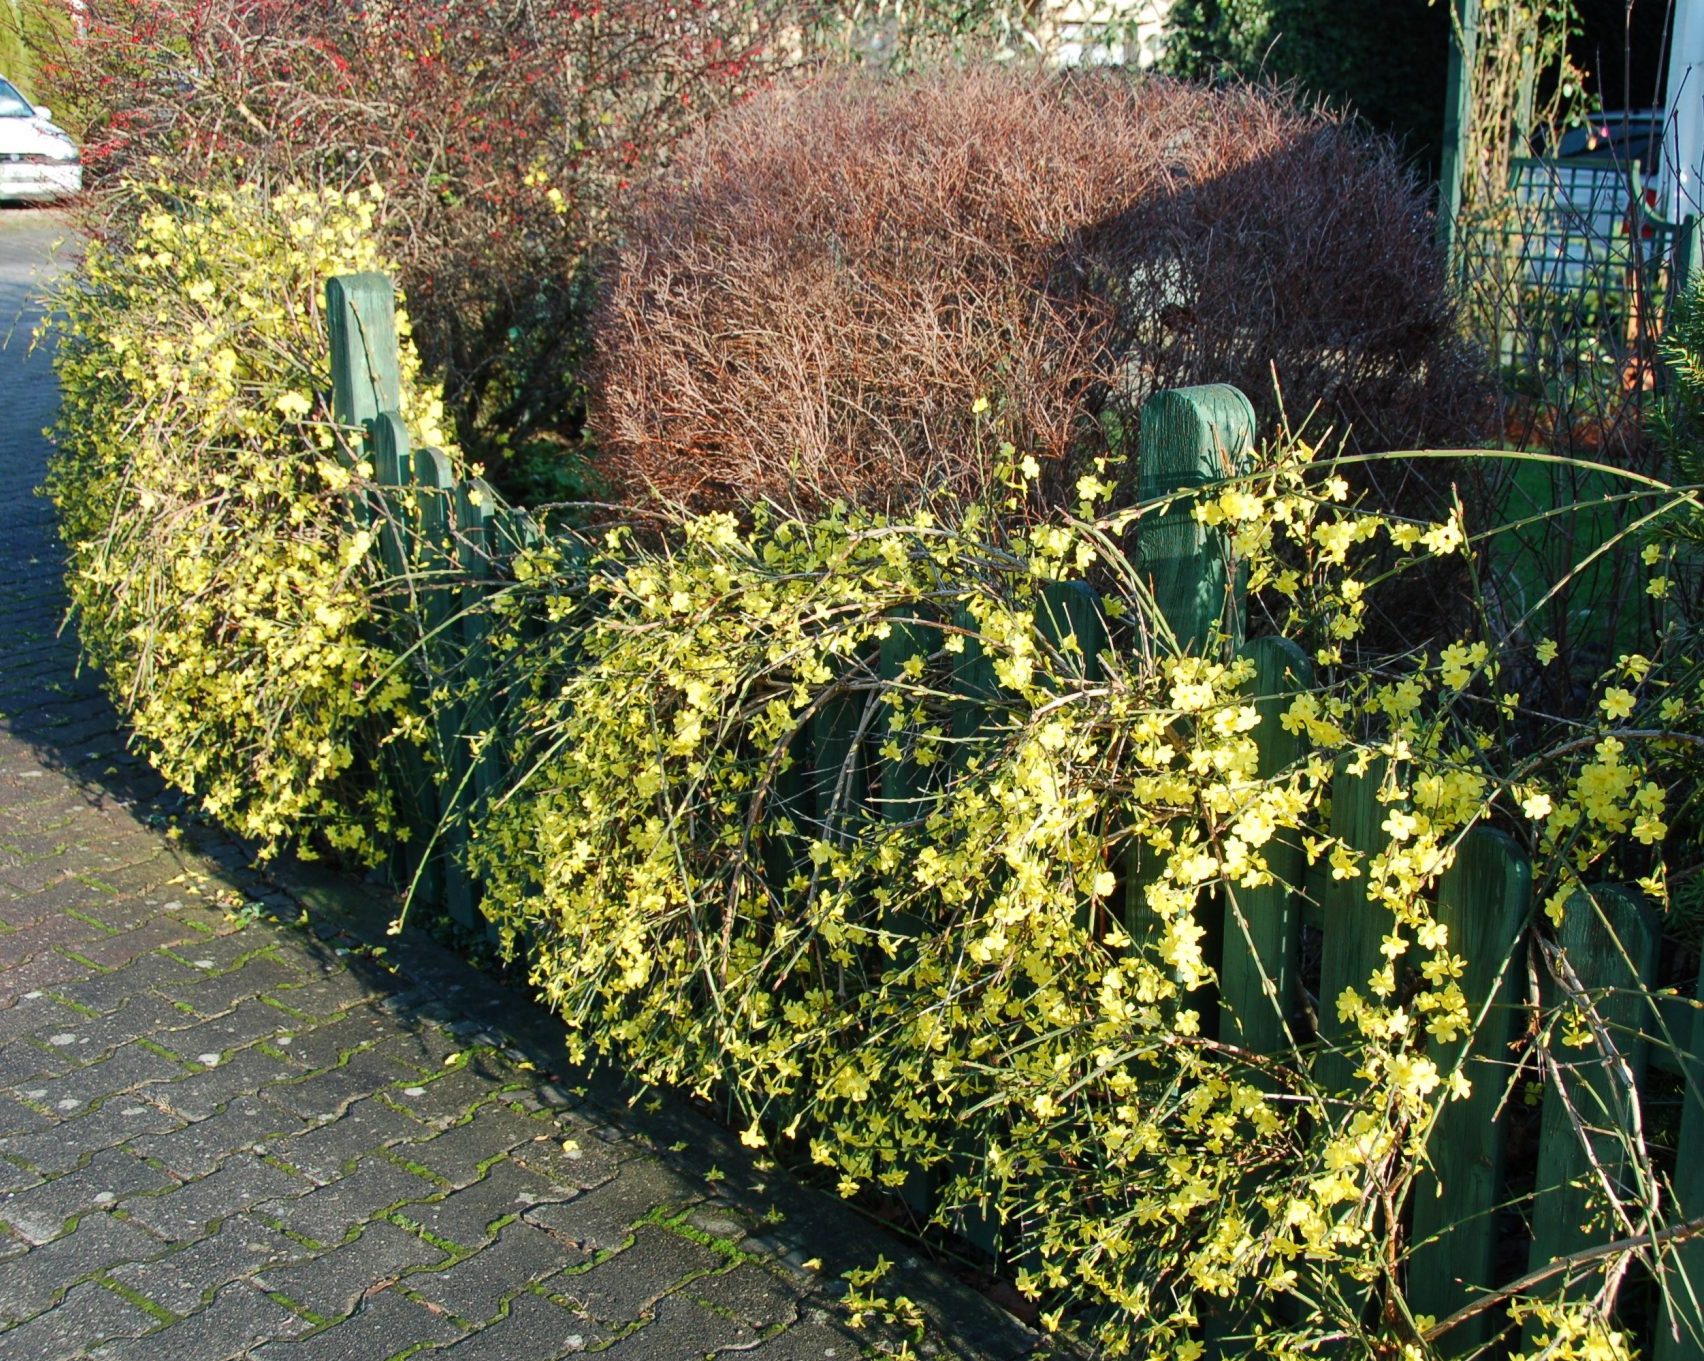
    Erosion is a common side effect of children at play and there are many plants that can help to remedy this issue. Winter jasmine is particularly effective at securing the soil on hillsides and allows water to slowly percolate the soils rather than quickly run off taking layers of soil with it. Winter jasmine also does well draping down the sides of outdoor walls and with some direction, can be trained to climb a support structure.

    When bright colors are hard to find in the outdoors, a color scavenger hunt can bring an exciting challenge to winter play, winter jasmine providing both yellow and green. Once established, winter jasmine is not easily damaged, making it a great addition to the Outdoor Learning Environment. Picking the willowy branches for fairy crowns or adding the flowers to a collection of loose parts, are excellent ways for children to interact with the plant. Children can even help in training the plant to climb by weaving the branches through the support structure or fence.

    Don’t confuse with Carolina jasmine, that’s not recommended for OLEs because of its potential toxicity for young children.

    Fun Fact:Jasmine and Olives are in the same plant family; Oleaceae

    winter jasmine flower
    winter jasmine on a fence
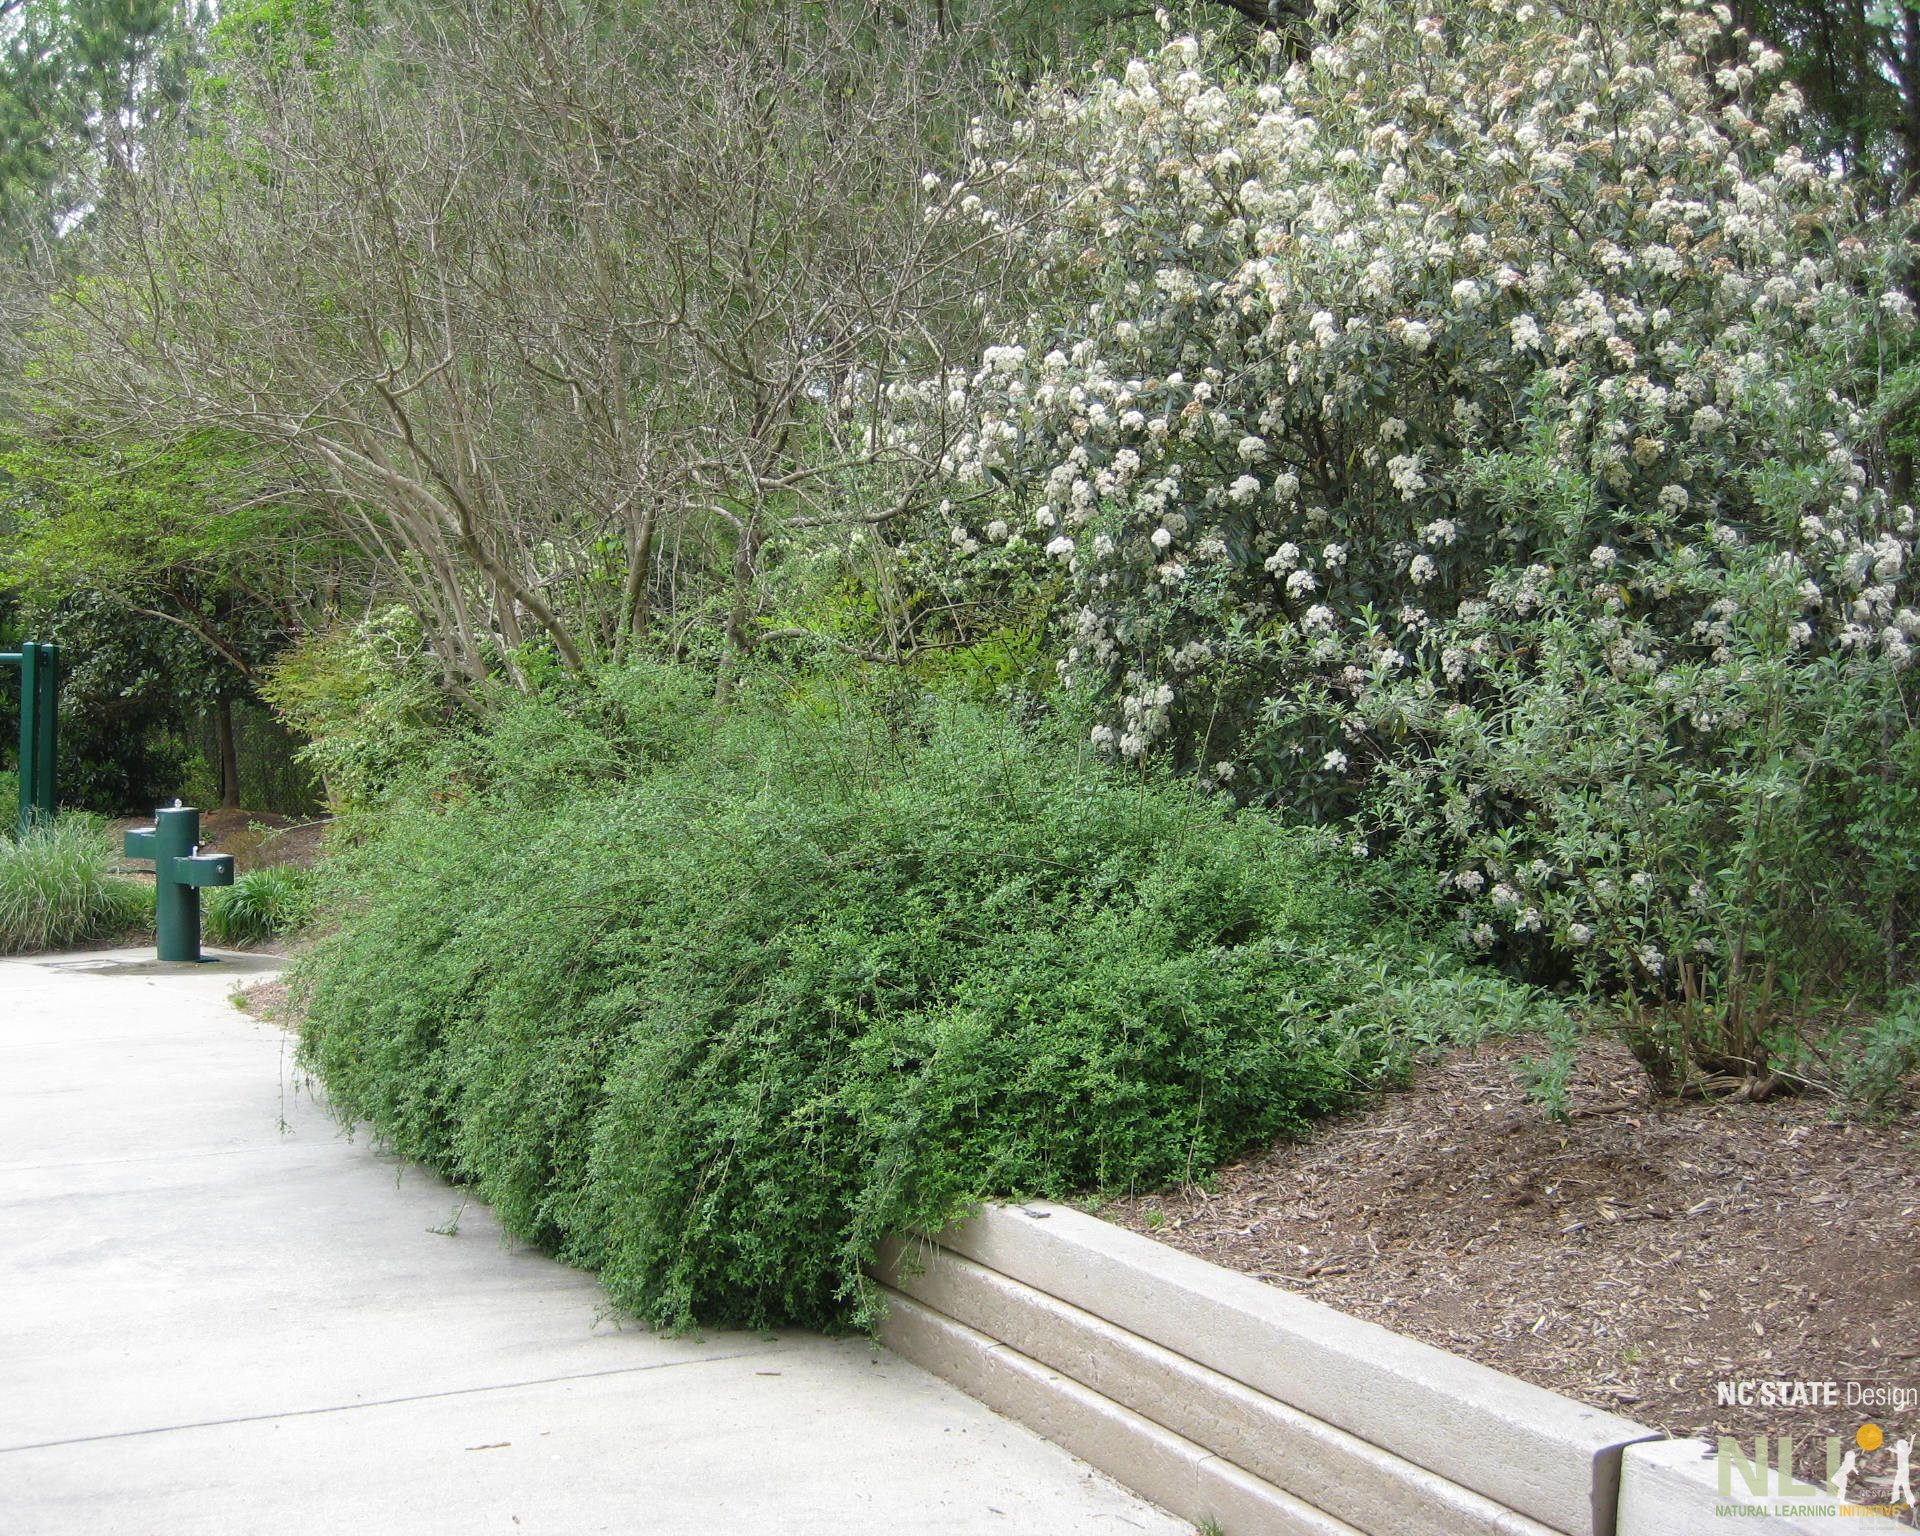
    plants growing over the wall

    Download Coloring Page

  • Harvesting and Eating Sunflower Seeds

    The Green Desk

    Harvesting and Eating Sunflower Seeds

    I’ve noticed the birds are eating the seeds from our sunflowers growing in our child care center.  Can the children eat them too?

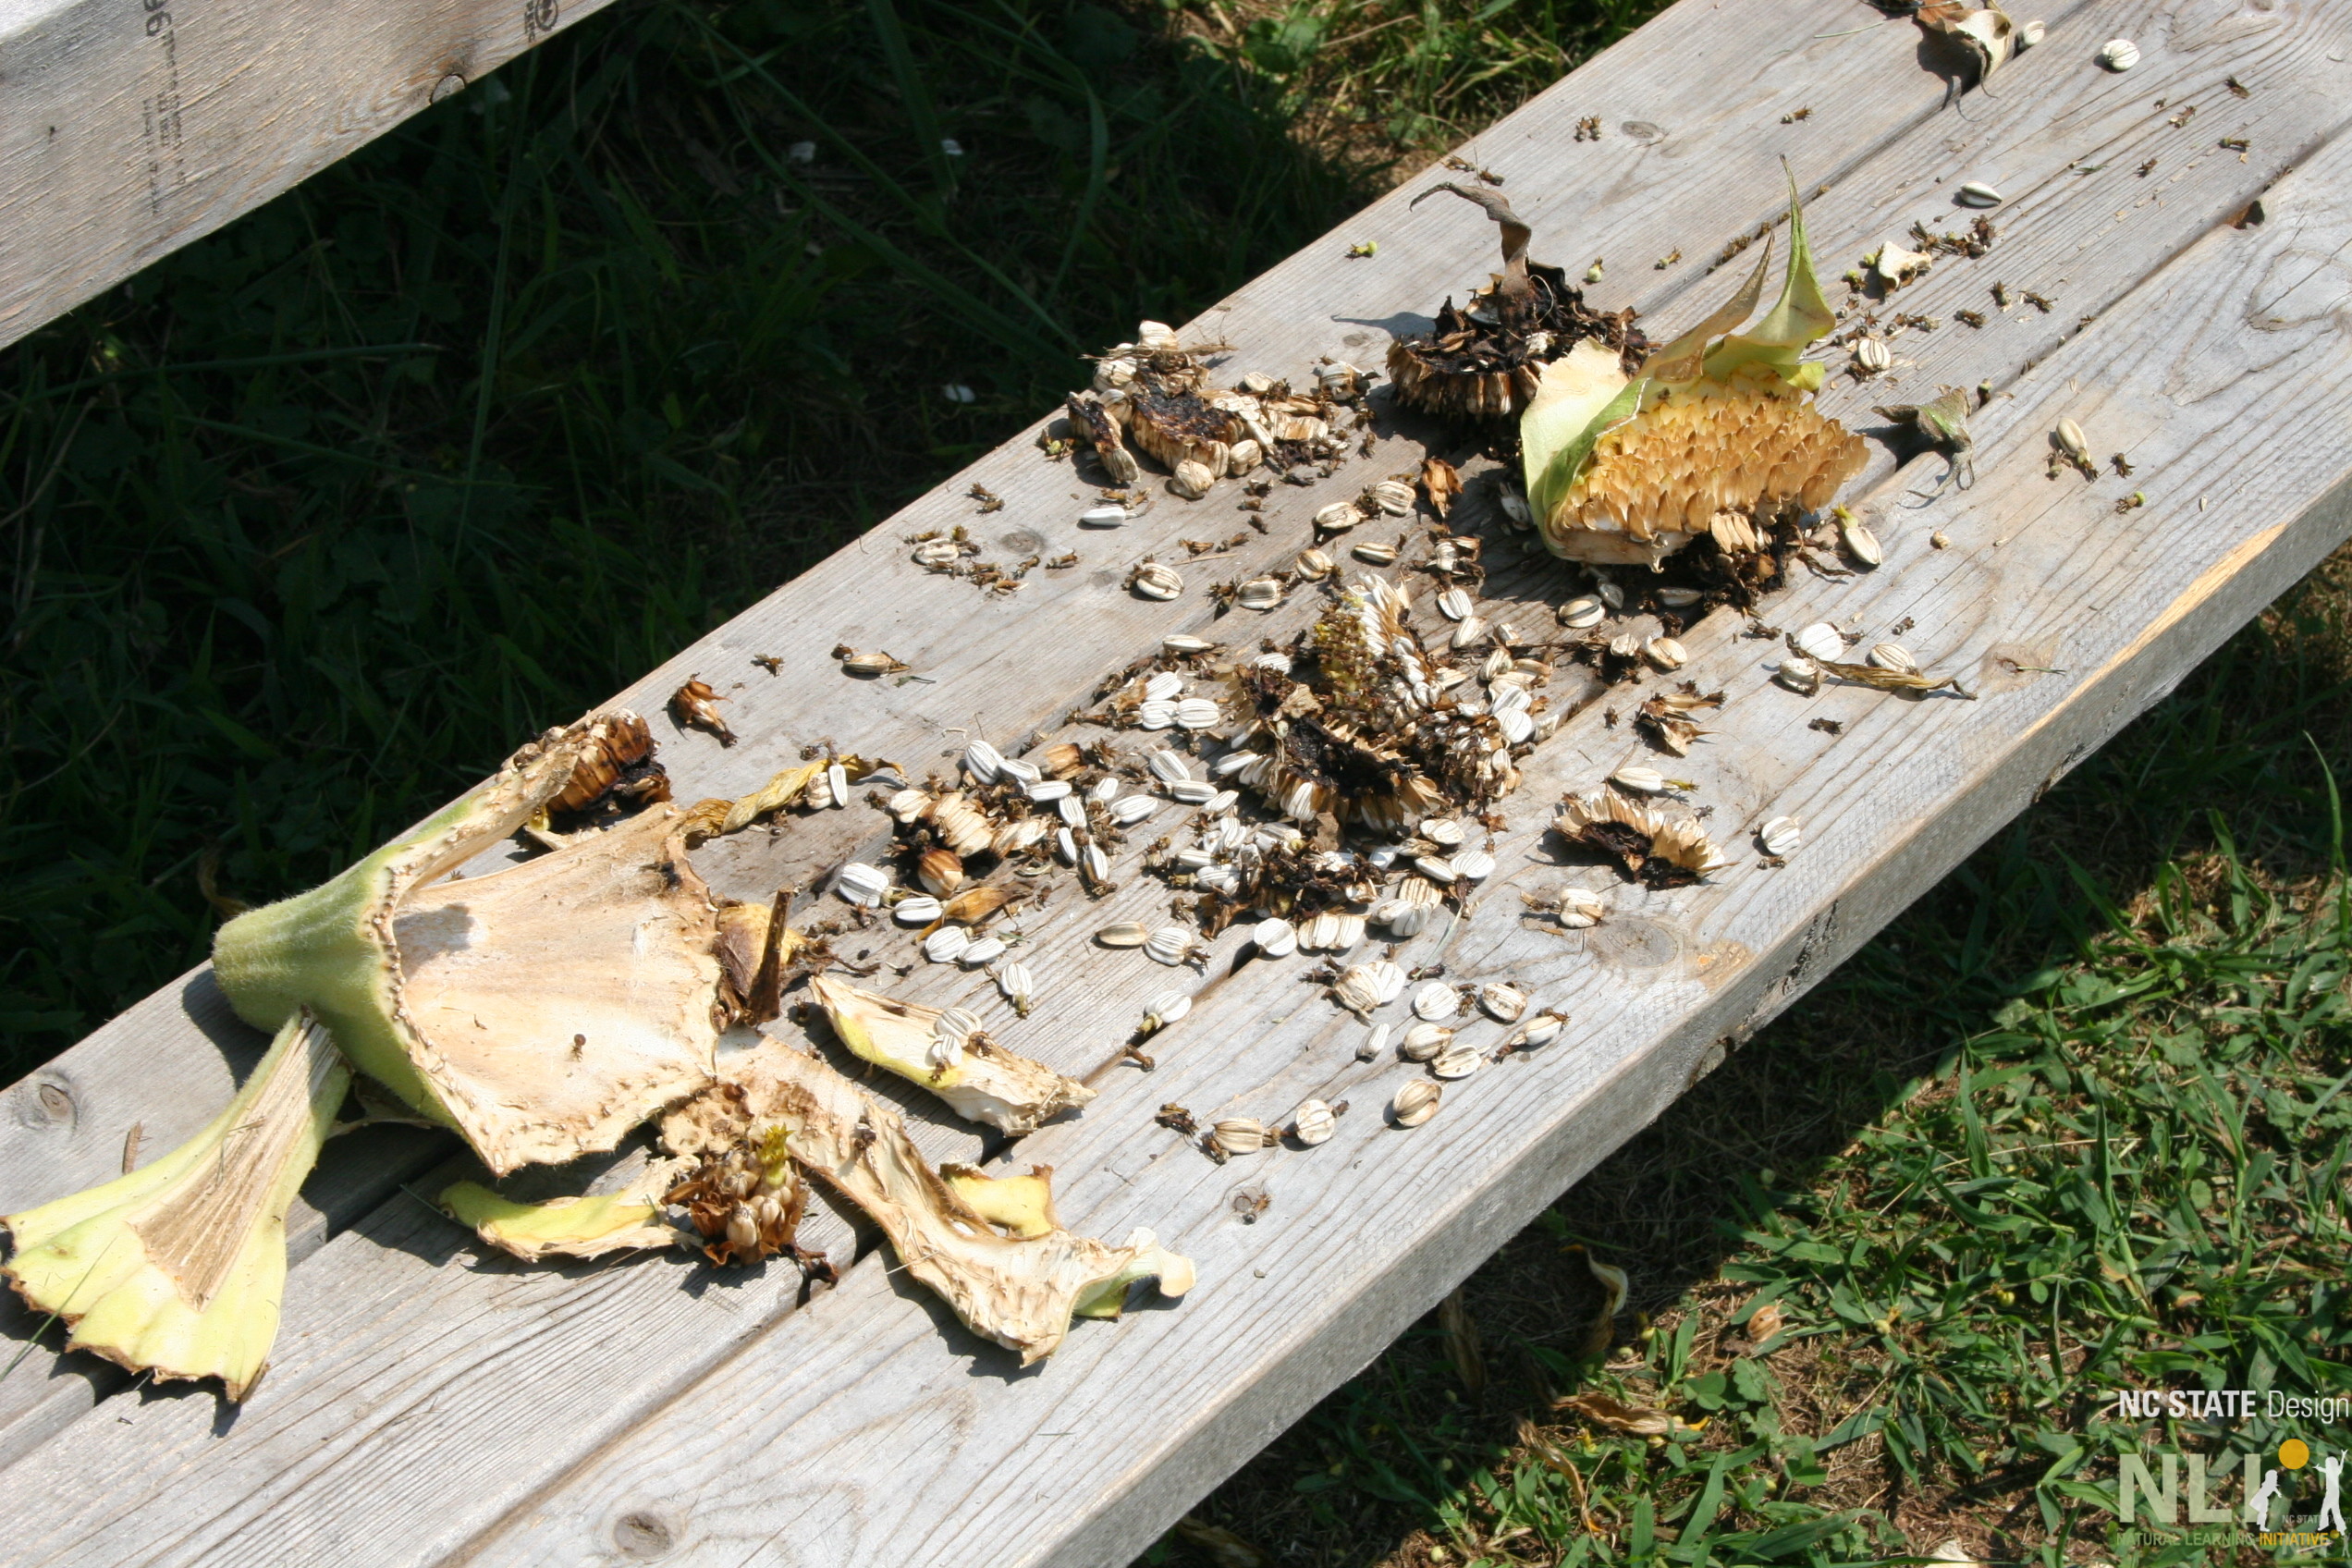
    The birds are attracted to sunflowers in your garden because they benefit from the high nutritional value sunflower seeds provide. They are also preparing for the winter months when there will be less food for them to eat.  Sunflower seeds are an excellent source of minerals like potassium, calcium, magnesium, and iron as well as vitamin B complex, and a valuable source for protein, fiber and polyunsaturated fat.
    Sunflower seeds are a healthy snack for children as well.  Harvesting and eating the seeds is a great way to celebrate the season and bring the harvest to the table as a snack or as part of an ingredient in a meal for the children. Research shows that harvesting and cooking from the garden is a successful strategy for enhancing children’s healthy eating habits.

    Preparing sunflowers seeds for eating is simple. According to Kids Gardening of the National Gardening Association, sunflowers that are ready for harvest will look like they are dying: the flower head will start to turn from green to yellow and flop over from the weight of the seeds.

    To prevent birds and squirrels from harvesting the maturing seeds, cover the heads of your sunflowers with cheesecloth, or with a brown paper bag.  You can also cut the seed head with at least 12 inches of the stock and bring it indoors to dry.

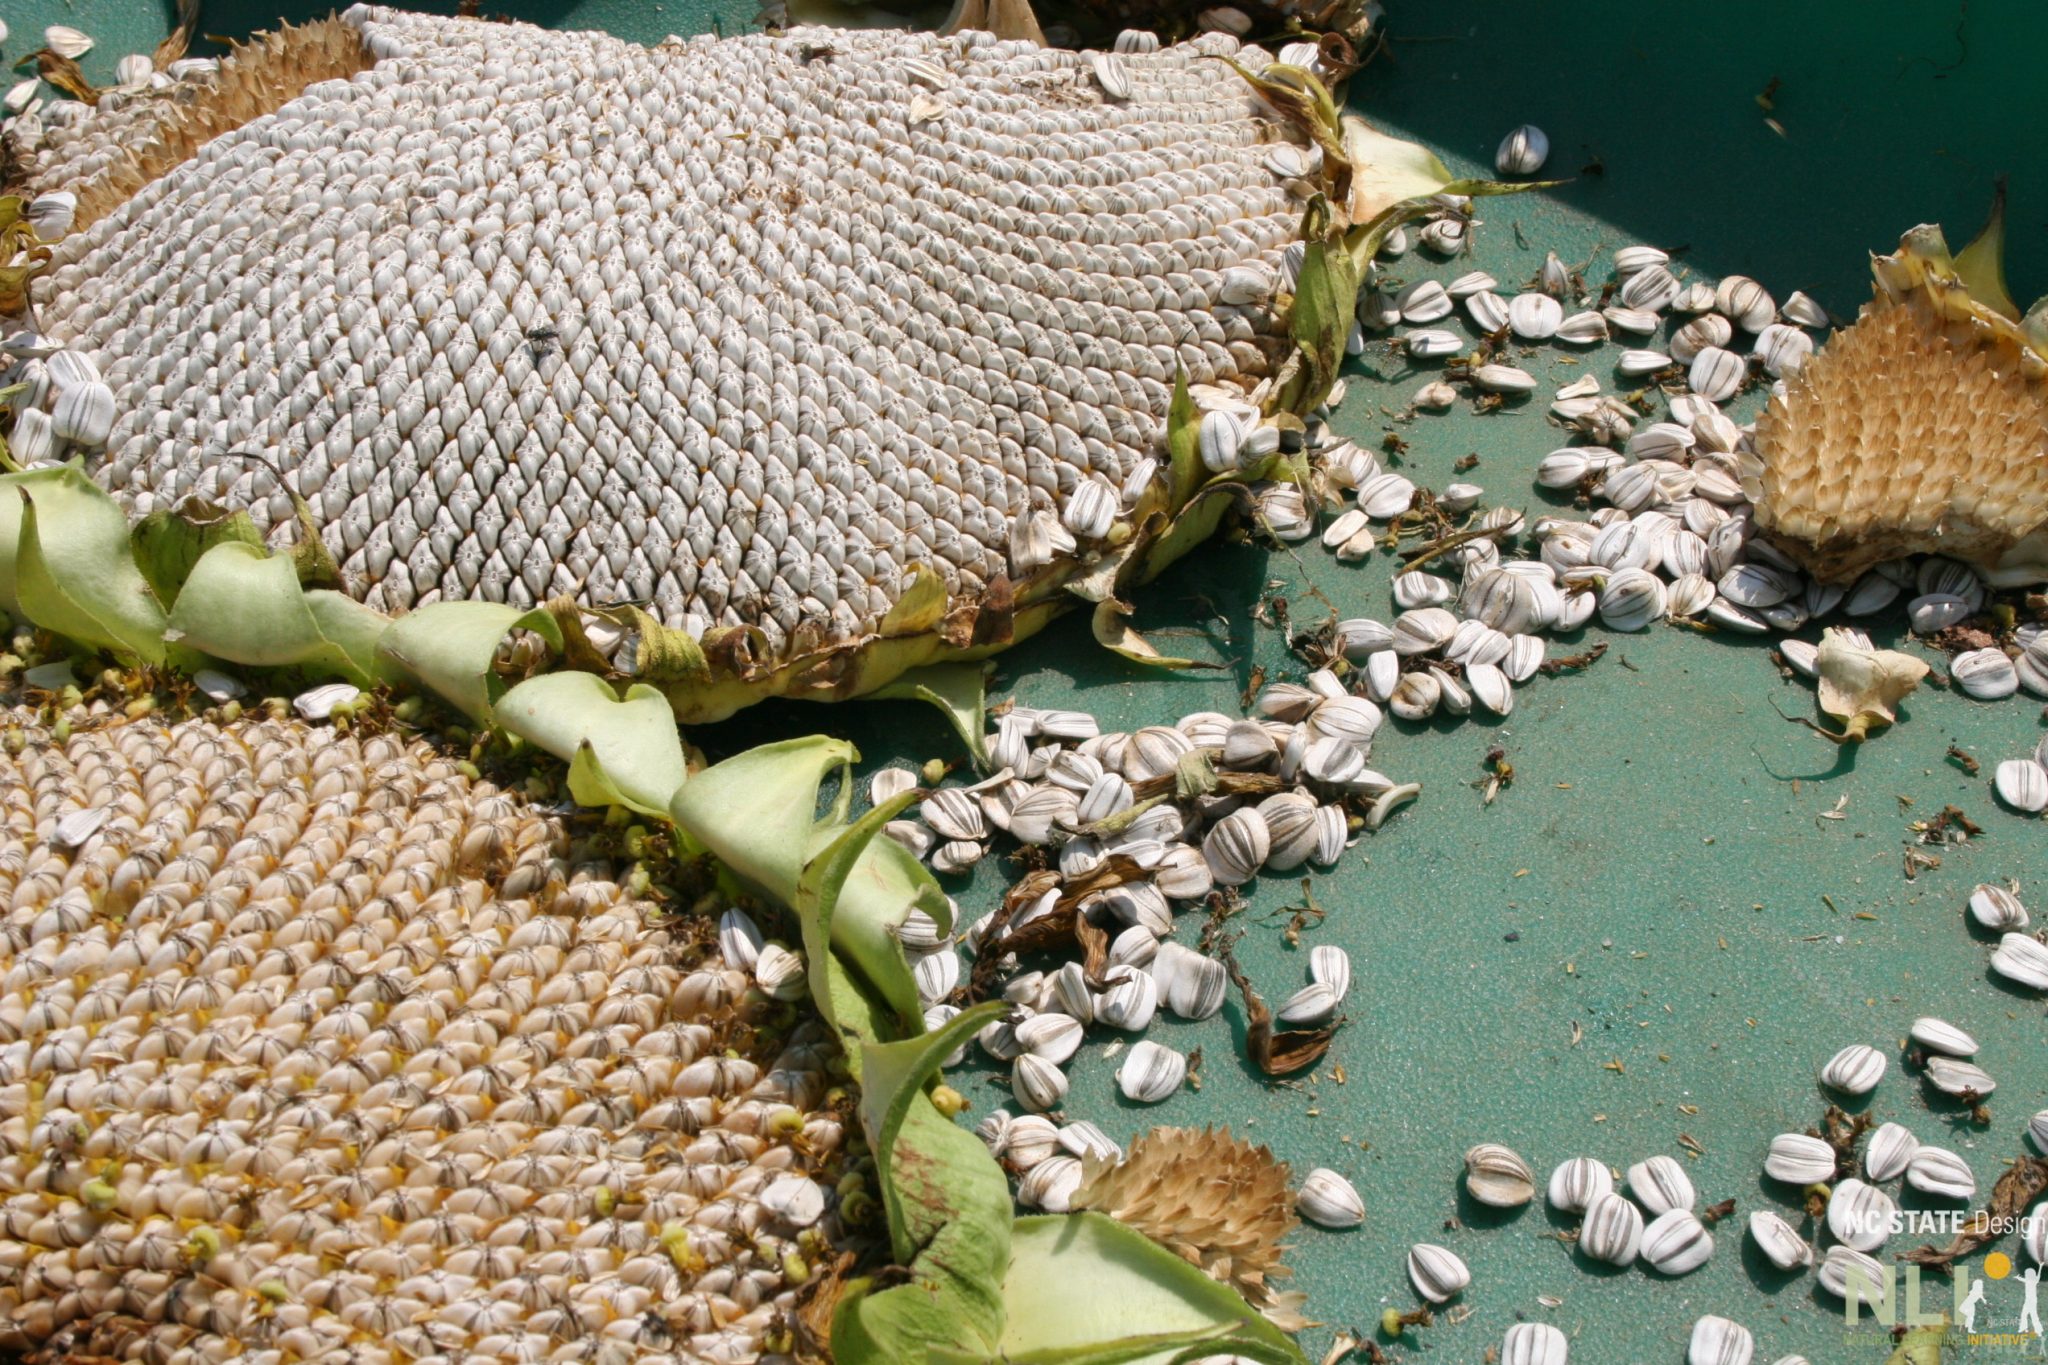
    When completely dried, which will take from one to four days, the seeds will easily fall from the seed head.  The sunflower seeds can then be washed and eaten as is, or lightly toasted in the oven.

    dried sunflower and sunflower seeds
    opening a sunflower to reveal seeds

    Resources

  • Engaging Community Resources

    The Green Desk

    Engaging Community Resources

    How do we recruit local resources to help renovate our outdoor learning environment?

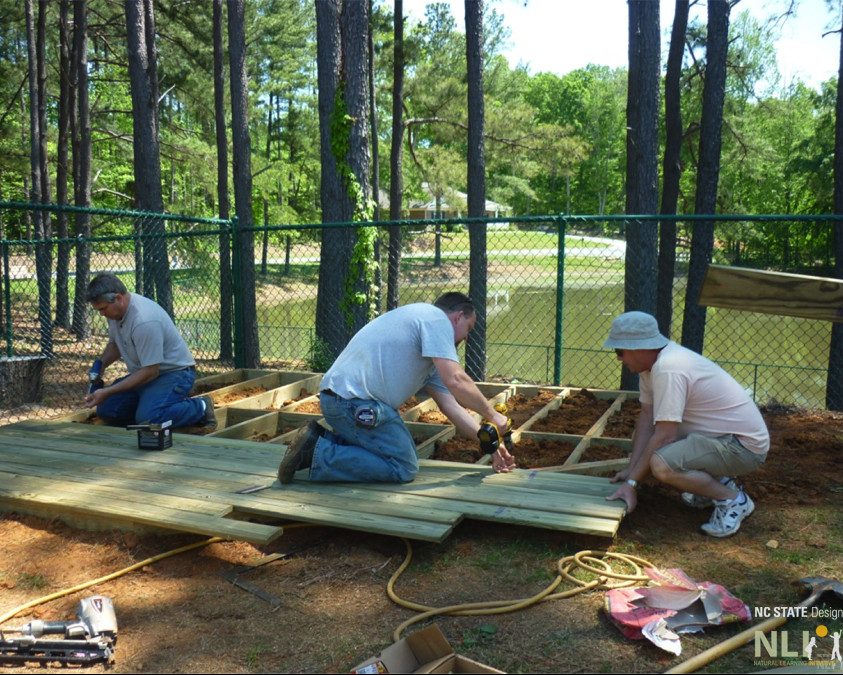
    Engaging the community is key to successfully renovating an outdoor learning environment (OLE). Communities can provide resources such as volunteers to help with installation, donations of plants to naturalize OLEs, consultations for creating and maintaining edible gardens or carpentry skills to build structures like decks and arbors. Recruiting local resources can help stretch budgets and bring community support for long-term development and sustainability.

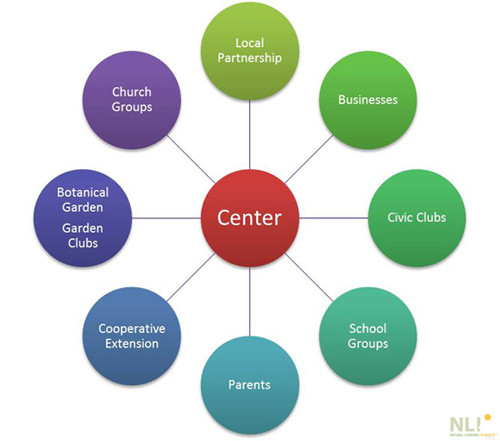
    Think about unique aspects of the community—its heritage, culture, history, and geographic location, which could connect the center’s efforts to the larger community. Create a ‘wish list’ of desired new elements and ask staff and center parents to help expand the circle of center friends and supporters by contacting local organizations, civic clubs, and businesses that might support the renovation (See Figure).

    The local chamber of commerce may help to identify links to potential resources. Hosting a center event such as an open house, yard sale or garden party is an effective way to build community awareness and excitement about the OLE improvement.

    Concentrate efforts on engaging support for substantial improvements most critical to success that to implement require local builders, landscape contractors or gardening experts.

    people planting trees
    people installing a deck
    people working on garden construction
    community engagement diagram
  • Bright Horizons Child Development Center at Research Triangle Park

    Project

    Bright Horizons Child Development Center at Research Triangle Park

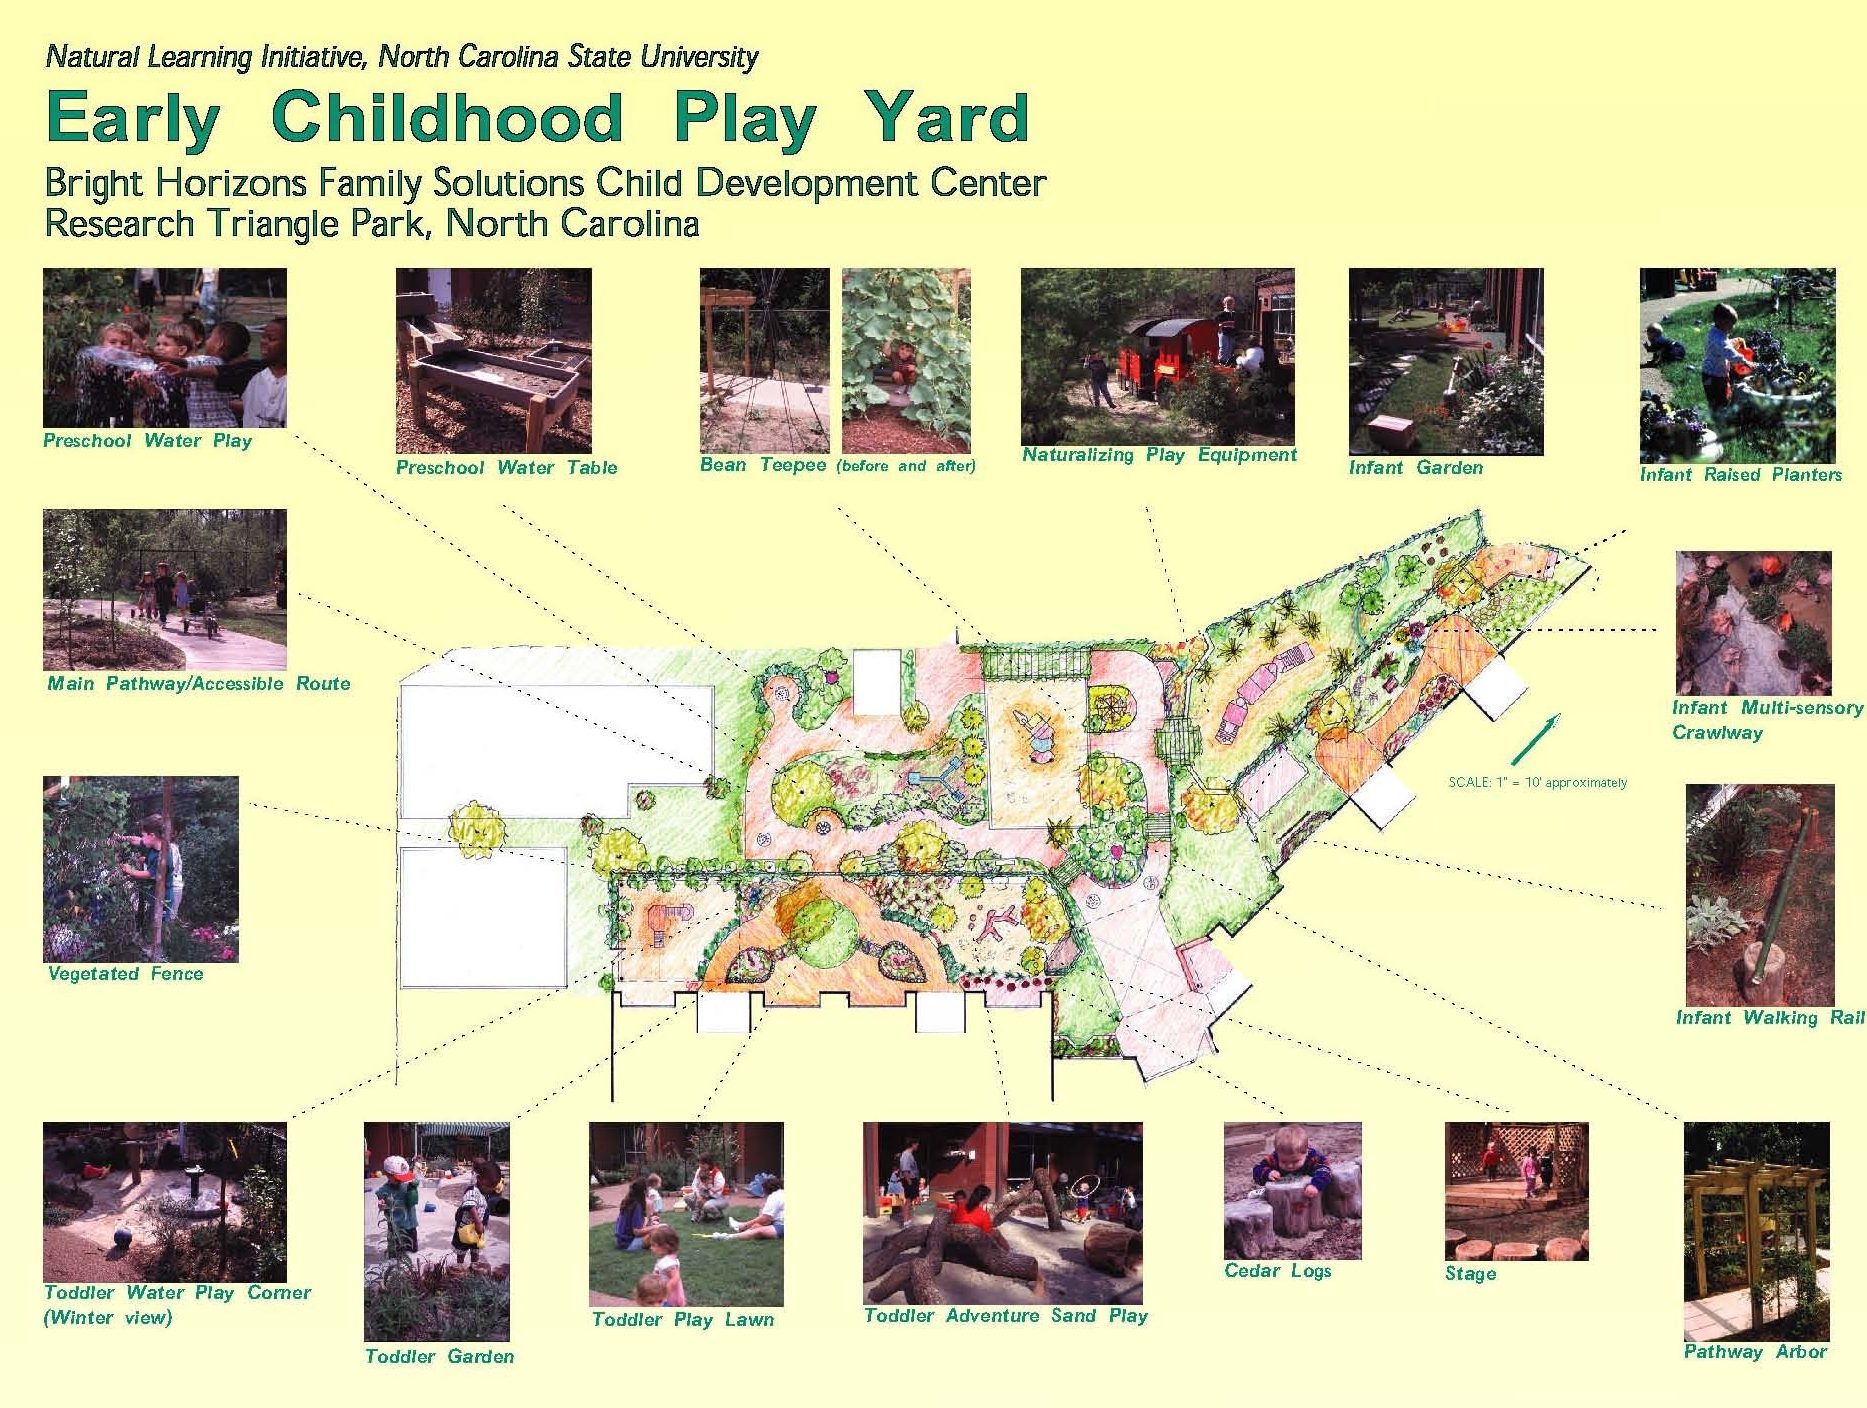
    The Bright Horizons Family Solutions (BHFS) Child Development Center at Research Triangle Park serves families working on the adjacent GlaxoSmithKline campus, Research Triangle Park, between Raleigh and Durham, NC. In 1997, Robin Moore was invited to assist with the renovation of the disfunctional site. He worked with then NC State design and horticulture students (Leslie Booker and Kemper Covington) and led the design-build project with GSK in-house contractors. The three play and learning areas, which serve infants, toddlers, and preschoolers, continue to serve as a key NLI research site. Each area or garden contains a broad curving pathway connecting play and learning settings that encourage children’s daily safaris of exploration, discovery, and learning.

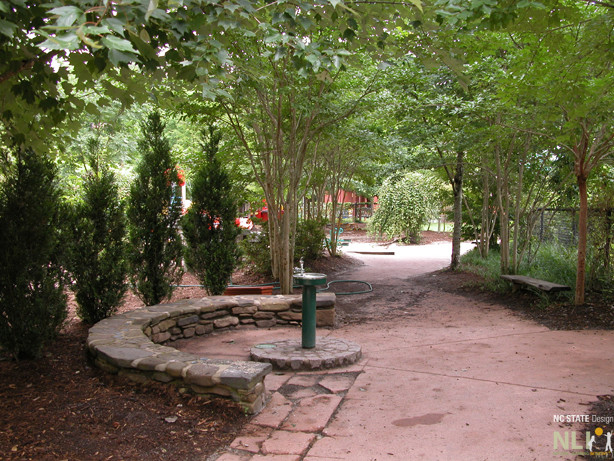
    Stone drinking fountain surrounded by trees and shrubs in a serene outdoor setting, promoting nature-based play and learning.
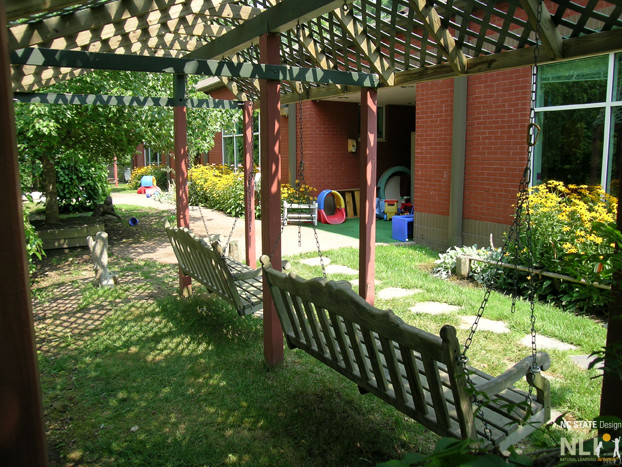
    Outdoor play area with swings, grass, and colorful play structures, promoting nature-based learning.
    Children play with toy trucks in a wooden sandbox surrounded by nature, promoting outdoor learning and accessibility.
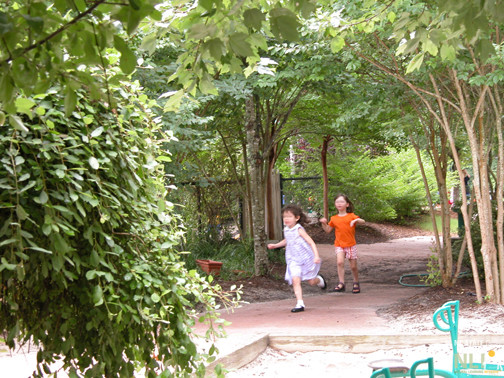
    Two children run on a pathway surrounded by lush greenery, promoting outdoor play and nature-based learning.
    RTP Early Childhood Play Yard: Natural Learning Initiative, NC State U. Features accessible pathways, water play, sand areas, and sensory gardens for inclusive play.
  • Creating a Supportive Network and Training Resources

    Project

    Creating a Supportive Network and Training Resources

    The goal of the project is to facilitate the implementation and use of naturalized outdoor learning environments in North Carolina childcare centers by creating a specialized professional network covering all North Carolina Division of Child Development(DCD) Licensing Consultants and Environmental Rating Assessors (hereafter called consultants and assessors).

    The project will increase access and understanding of the knowledge base related to naturalized outdoor learning environments so that the professional and regulatory judgements of consultants and assessors are appropriate and consistent with implementing and managing high quality naturalized outdoor environments for young children.

    Project Need

    The White House Task Force on Childhood Obesity Report to the President (White House, 2010), reports that approximately one-in-five children are overweight or obese by the time they reach their 6th. birthday. Responding to this issue, the report recommends “reducing the risk of obesity in the early years of a child’s life by improving the quality of our nation’s child care settings so they can consistently support our children’s healthy development.”

    North Carolina is currently the 11th. most obese state in the Union. In 2009 North Carolina placed 12th. (Trust for America’s Health, 2010). Of North Carolina children 2-4 years of age, 15.7% were obese in 2008 (CDC, 2009). With more than 40% of children under age five with employed mothers spending at least 35 hours a week in childcare (or more waking hours in childcare than in their own home) (Capizzano and Main, 2005), preventing childhood obesity through interventions in childcare environments is a potential strategy to reach large numbers of children across all income levels.

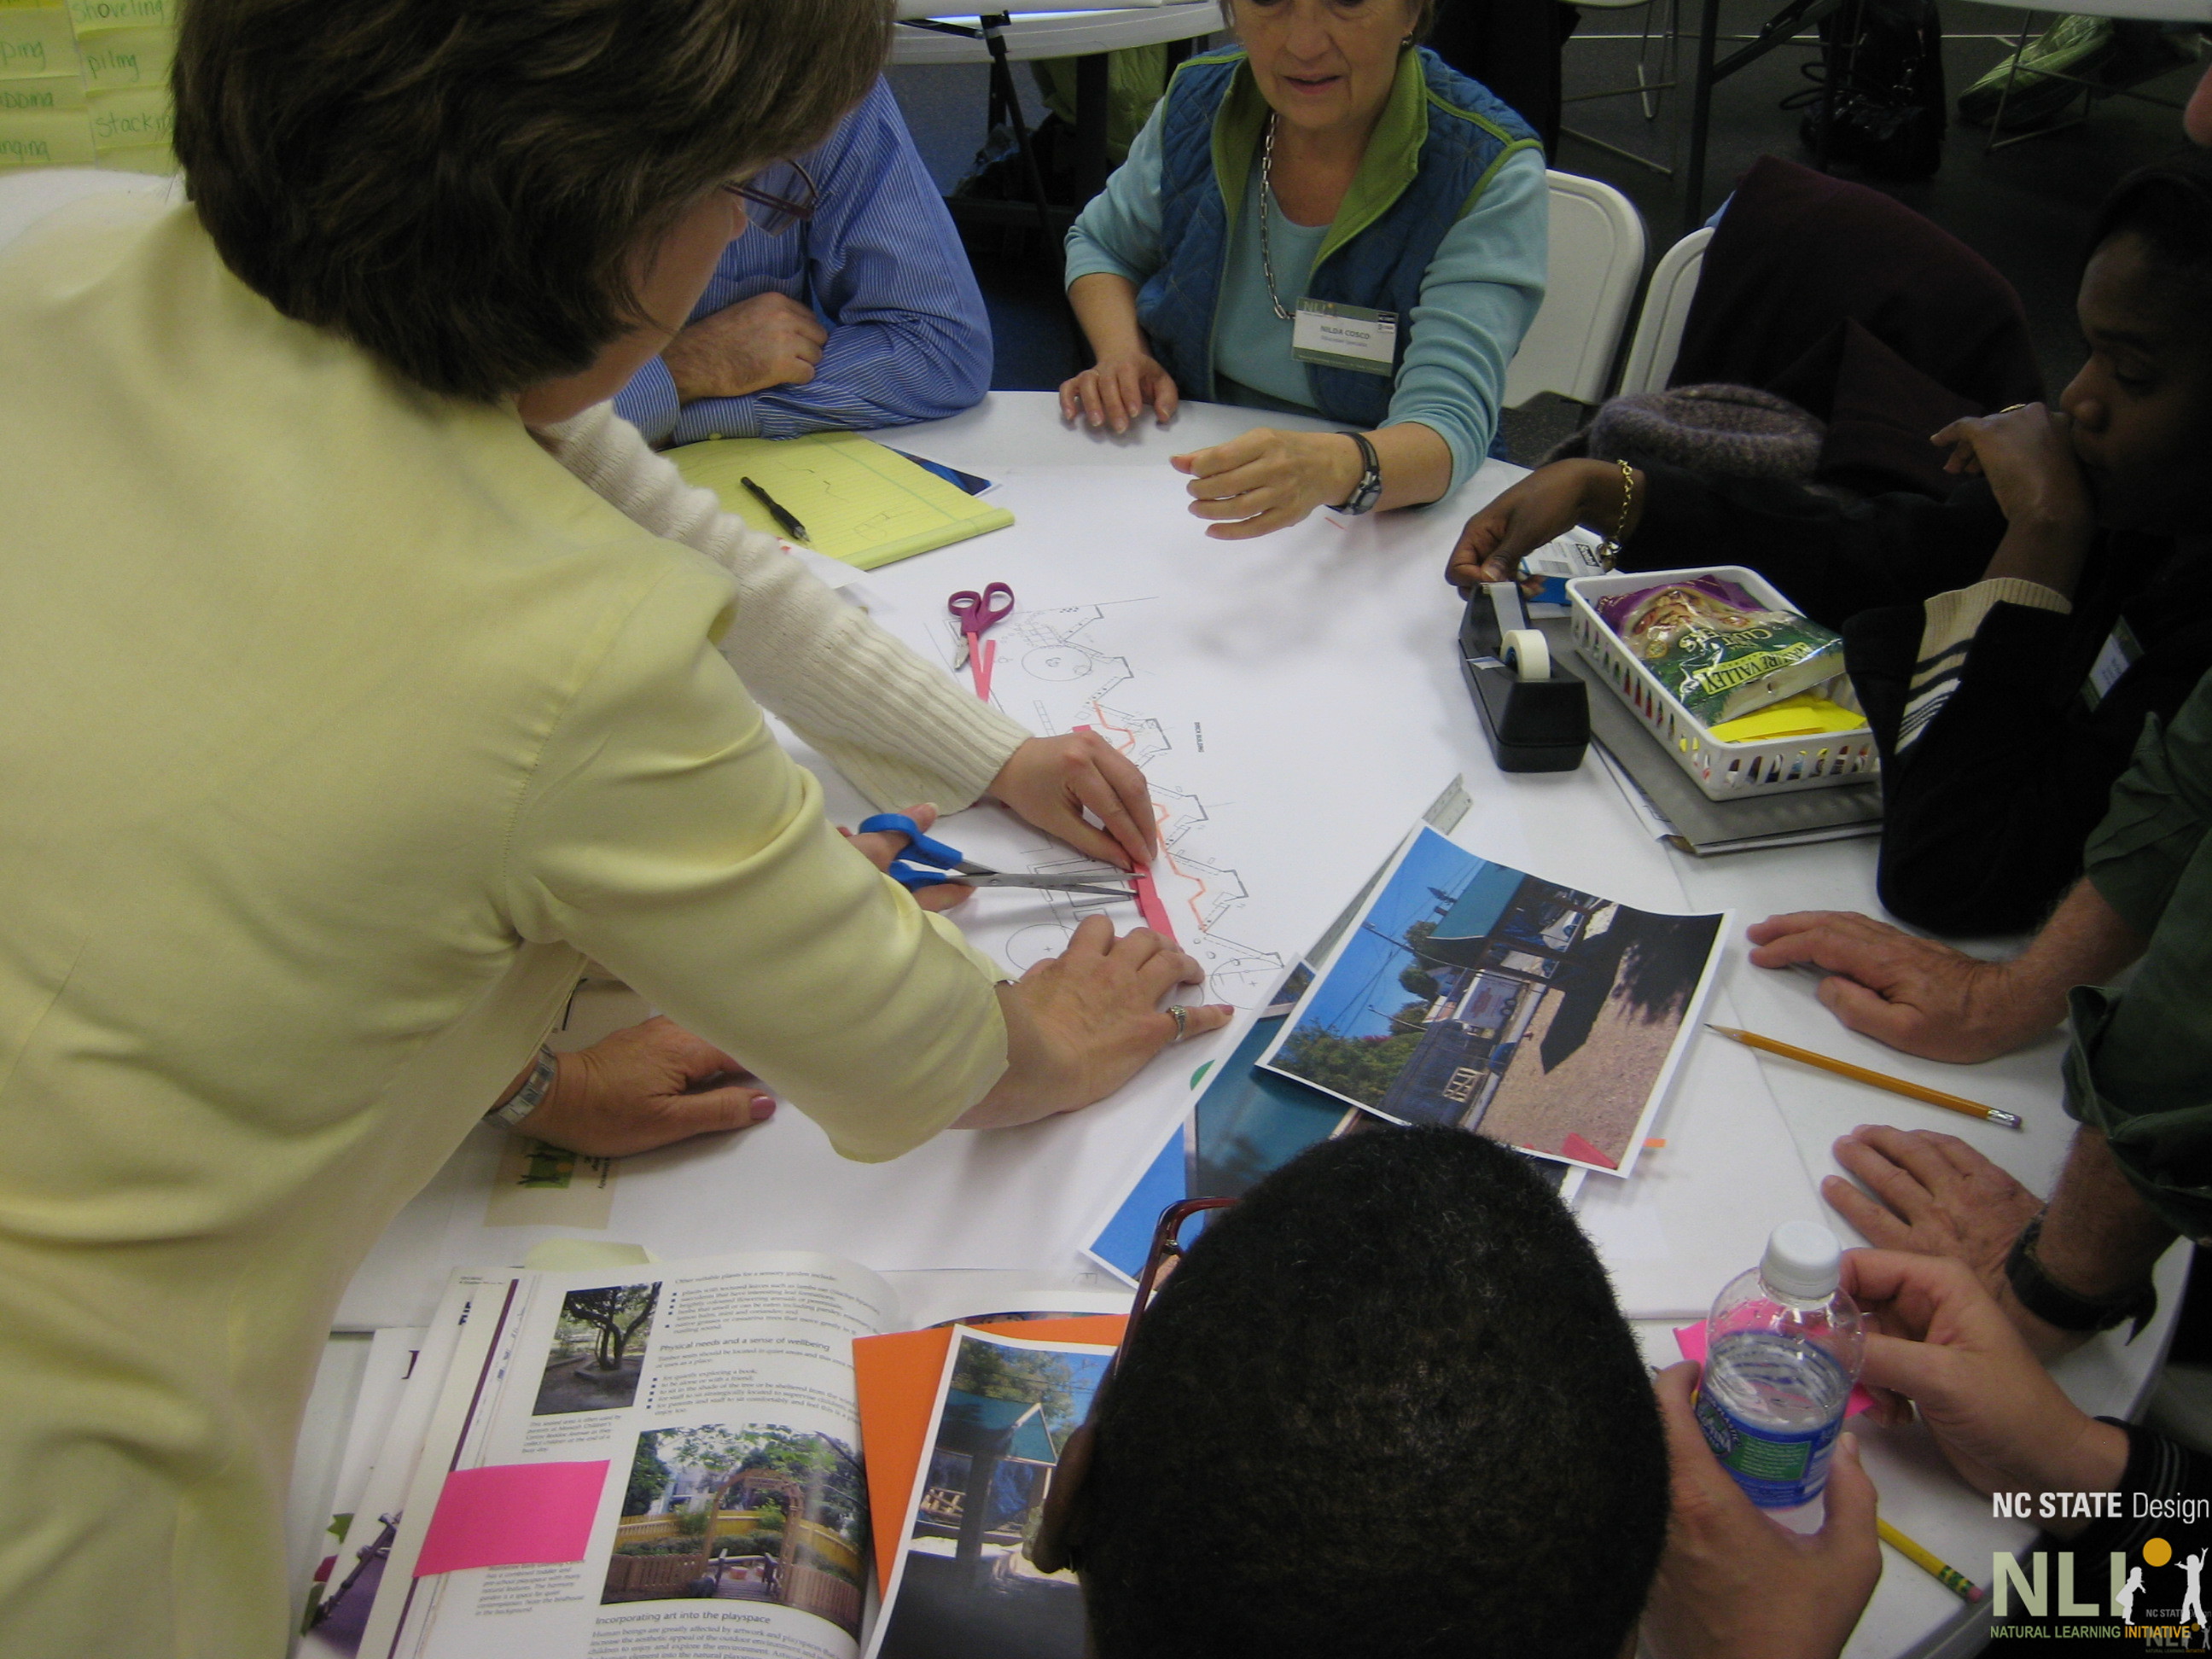
    team creating drawn plans

    Project Director

    • Nilda Cosco, Ph.D., is Director of Programs and Research Associate Professor in the College of Design, NC State University.

    DCD Members

    • Lorie Pugh, Assistant Section Chief, Raleigh, NC
    • Bridggette Campbell, Licensing Consultant, Knightdale, NC
    • Ramie Doll, Licensing Consultant, Rocky Mount, NC
    • Mara Brinton, Licensing Consultant, Charlotte, NC
    • Kara Jones, Licensing Consultant, Cullowhee, NC
    • Samantha McLeod, Licensing Consultant, Greensboro, NC
    • Melissa Loehr, Abuse/Neglect Consultant, Chapel Hill, NC
    • Debbie Parrish, Supervisor, High Point, NC
    • Tasha Owens-Green, Professional Dev/Training Coordinator, Raleigh, NC

    North Carolina Rated License Assessors Project

    • Lia Rucker, State Anchor, NCRLAP, Greensboro, NC
    • LaToya Hedgspeth, Level 1 Assessor, NCRLAP, Charlotte, NC

    Project Design and Strategies

    • Project Advisory Committee: A special Advisory Committee of DCD consultants and assessors has been created to guide the development of training materials and events, advise NLI on policies and regulations affecting the implementation of outdoor learning environments (OLEs) containing natural elements, and shape recommendations for improving policies related to naturalized OLEs. The Committee is staffed by NLI and meets quarterly.
    • DCD Staff Training: NLI developed and delivered for DCD staff a two-hour session including the benefits of outdoor play for young children, background research, and design considerations for naturalized OLEs.
    • Quarterly Webinars: NLI is preparing and delivering quarterly webinars to transmit the naturalized OLE knowledge base to consultants and assessors.
    • Information Sheets: NLI is creating a series of information sheets on key topics related to the design, development, implementation, and use of outdoor learning environments for young children.
    • Regional Site Visit Workshops: NLI is organizing and delivering regional workshops for consultants and assessors (one in each of three DCD regions), including visits to model naturalized OLEs in existing childcare centers. Site visits include discussions with NLI staff, local Smart Start partnerships, quality assessment staff, and center directors.
    • Outdoor Learning Environment Naturalization Training Module: NLI is producing a comprehensive training module for delivery by NLI and other trainers as part of the Basic Job Skills Training Plan or other ongoing DCD training programs. The module includes the resources provided through the training events and webinars, along with a resource listing of related publications and websites.
    • Symposium: NLI will deliver a one-day intensive symposium on best practices, research, design considerations and use of naturalized outdoor learning environments with expert speakers from the fields of early childhood education, child health, physical fitness, and landscape design.
    • Resource Directory: NLI is producing an annotated list of research findings and major publications and websites on outdoor learning environments, accessible via the NLI website.
  • Primary Pathway Layout

    The Green Desk

    Primary Pathway Layout

    What steps are involved in laying out a primary pathway?

    Laying out a pathway can seem complicated and overwhelming. Following the provided steps should simplify the process and produce a more successful result. This post addresses laying out primary pathways, which are the most challenging. The procedure can also be applied to smaller, secondary pathways, if necessary.

    For more information on pathways check out the rest of the Green Desk pathways posts.

    Tools required for layout

    • Scaled plan (can be printed at a local print shop)
    • Engineering scale (available at most office supply stores)
    • Pencil with eraser
    • (2) 100’ measuring tapes (available at local hardware stores)
    • (2) 25’ measuring tapes (available at local hardware stores)
    • 100′ garden hose or rope (minimum)
    • Survey flags (available at local hardware stores)
    • Spray marking chalk (available at local hardware stores)
    • String or mason’s twine (available at local hardware stores)
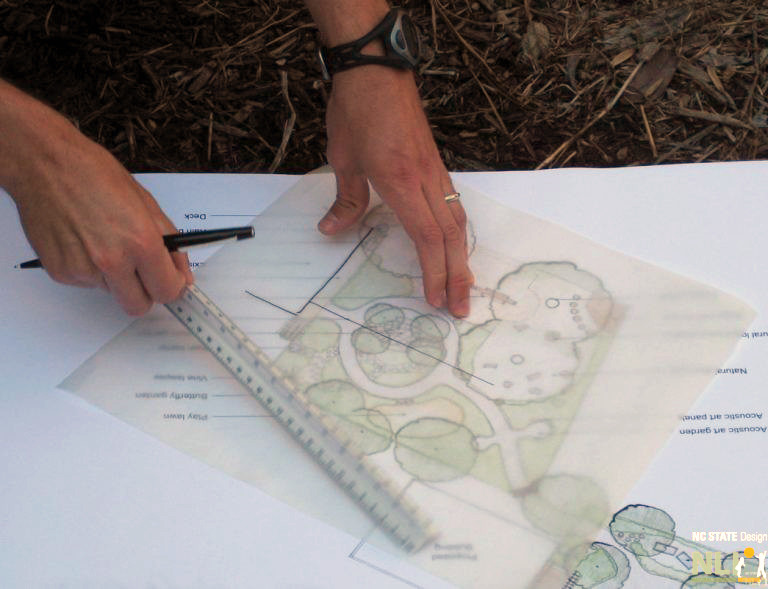
    architect drawing on a design plan

    Preparing for pathway layout

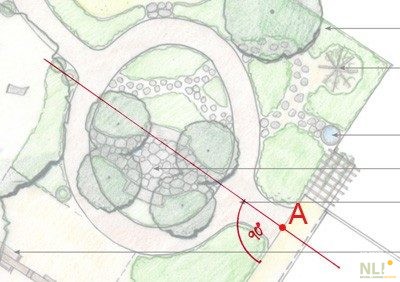
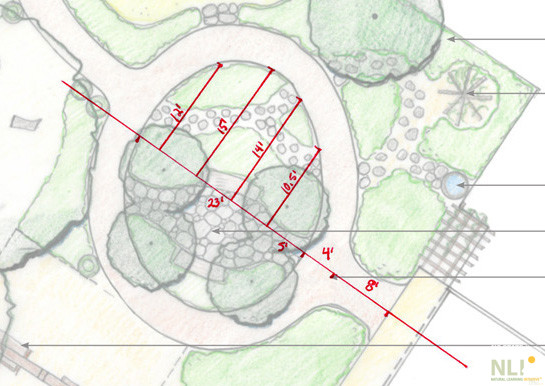
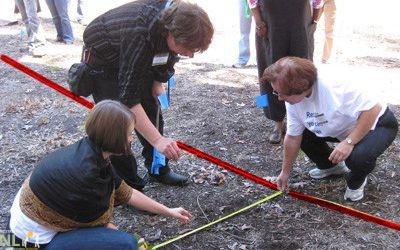
    • Using a pencil and the scale as a straight edge, mark the point of beginning (A) and baseline on the plan.  All other dimensions and measurements will be taken from the baseline (red line in Figure 1).  There are two common ways to setup a baseline.
      • Option 1 (preferred): Use the exterior wall of a building as the baseline or a line projected perpendicularly from an exterior wall of the building.
      • Option 2: Use a straight, immovable object, such as a fenceline, as the baseline or project a line perpendicularly from the straight, immovable object.  Use the right angle of any square object (a sheet of paper, cardboard box) to make sure the baseline is drawn perpendicular to the object being used.
    figure 1
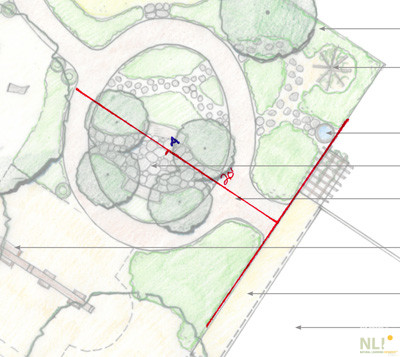
    • Using a pencil and the scale as a straight edge, mark the point of beginning (A) and baseline on the plan.
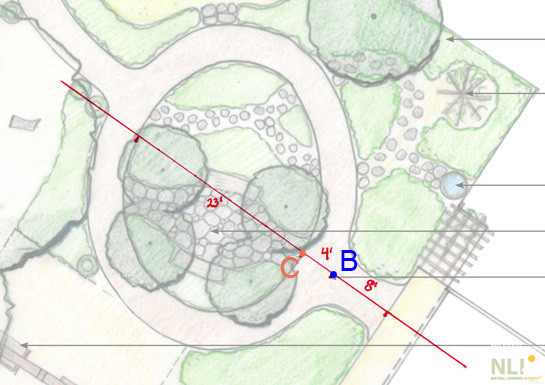
    figure 2
    • Determine key dimensions along the baseline. Examples of key dimensions would be the intersection of two paths (B) or intersection of the primary pathway with the baseline (C).
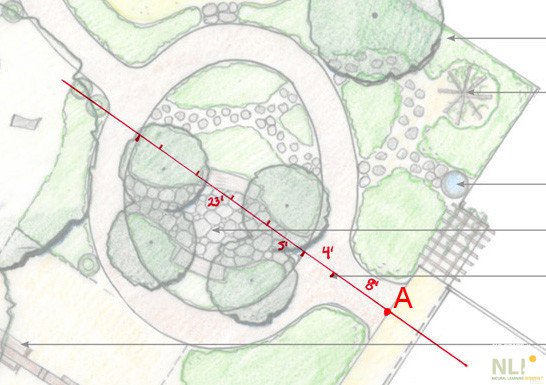
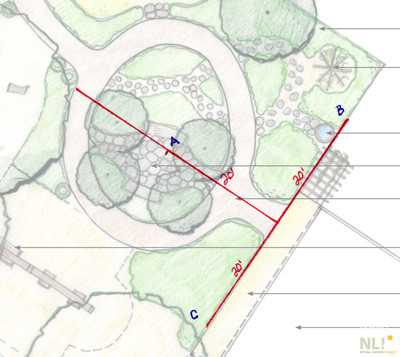
    figure 3
    • Mark 5’ increments along baseline. Starting at the point of beginning of the baseline (A), use the scale to measure and mark 5′ increments along the baseline.
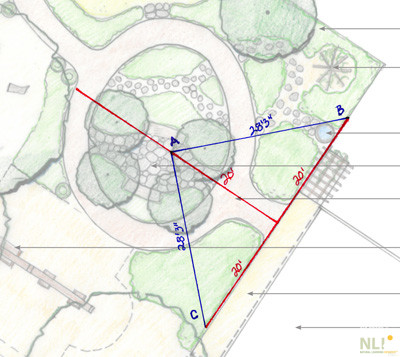
    figure 4
    • At each 5’ increment, measure the offsets from baseline to inside edge of pathway. Use the scale to measure and mark the offsets.

    Laying out the pathway

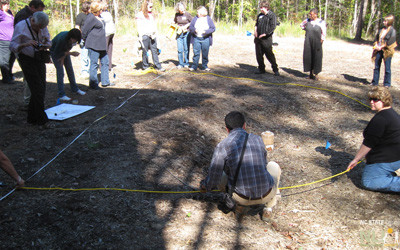
    • Repeat the steps above, but in real dimensions on the ground. This will transfer your measurements from paper to the site.
    • Layout the baseline. If the baseline begins at a building or fenceline and extends perpendicularly from that object, follow these steps:
      • Locate the point of beginning of the baseline.
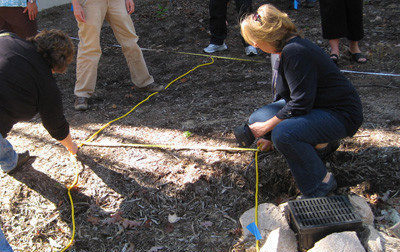
      • Start at the point of beginning and stretch the 100’ measuring tape or string into the outdoor learning environment. Be sure to keep it tight and straight.  Use the 100’ measuring tape to temporarily mark the baseline.
      • To guarantee that the measuring tape is perpendicular to the building, follow these basic steps.  Measure equal distances along the baseline and building.  The distance between these points should be the same length on both sides of the baseline. If measuring from a corner, verify that the baseline is perpendicular using one hypotenuse only.
    figure 5
    • Measure 20’ along the baseline. Mark point A with a survey flag.
    figure 6
    • Measure 20’ along the building in either direction of the baseline. Mark points B and C with survey flags.
    figure 7
    • The distance between points A and B (hypotenuse 1) and the distance between points A and C (hypotenuse 2) should be the same, 28’ 3”.
    • Adjust the angle of the baseline until these dimensions are the same.
    measuring the width of the pathway
    • Once final, mark baseline with marking chalk.
    • Mark key dimensions along the baseline with survey flags.
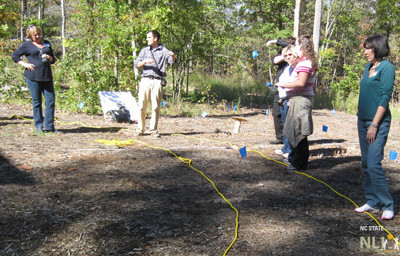
    • At each key dimension, measure from baseline to inside edge of pathway. Mark each point with a survey flag. Note that the baseline is highlighted in red.
    laying out the potential place of the pathway
    • Mark 5’ increments along baseline with survey flags.
    • At each 5’ increment, measure the offset from baseline to inside edge of pathway and use survey flags to mark the location.
    • Use a garden hose or rope to layout the interior edge of the pathway along the line of survey flags.
    • Make sure curves are smooth.
    measuring a primary pathway layout
    • Using a measuring tape, offset the inside edge of the pathway to desired width and mark the outer edge of pathway with survey flags.
    • Use a garden hose or rope to lay out the outer edge of the pathway. Again, make sure curves are smooth.
    laying our a primary pathway
    • Verify key measurements, i.e. between path and fence, and make necessary adjustments.
    • Mark the edges of the pathway with marking chalk.
  • Primary Pathways

    The Green Desk

    Primary Pathways

    What is a primary pathway?

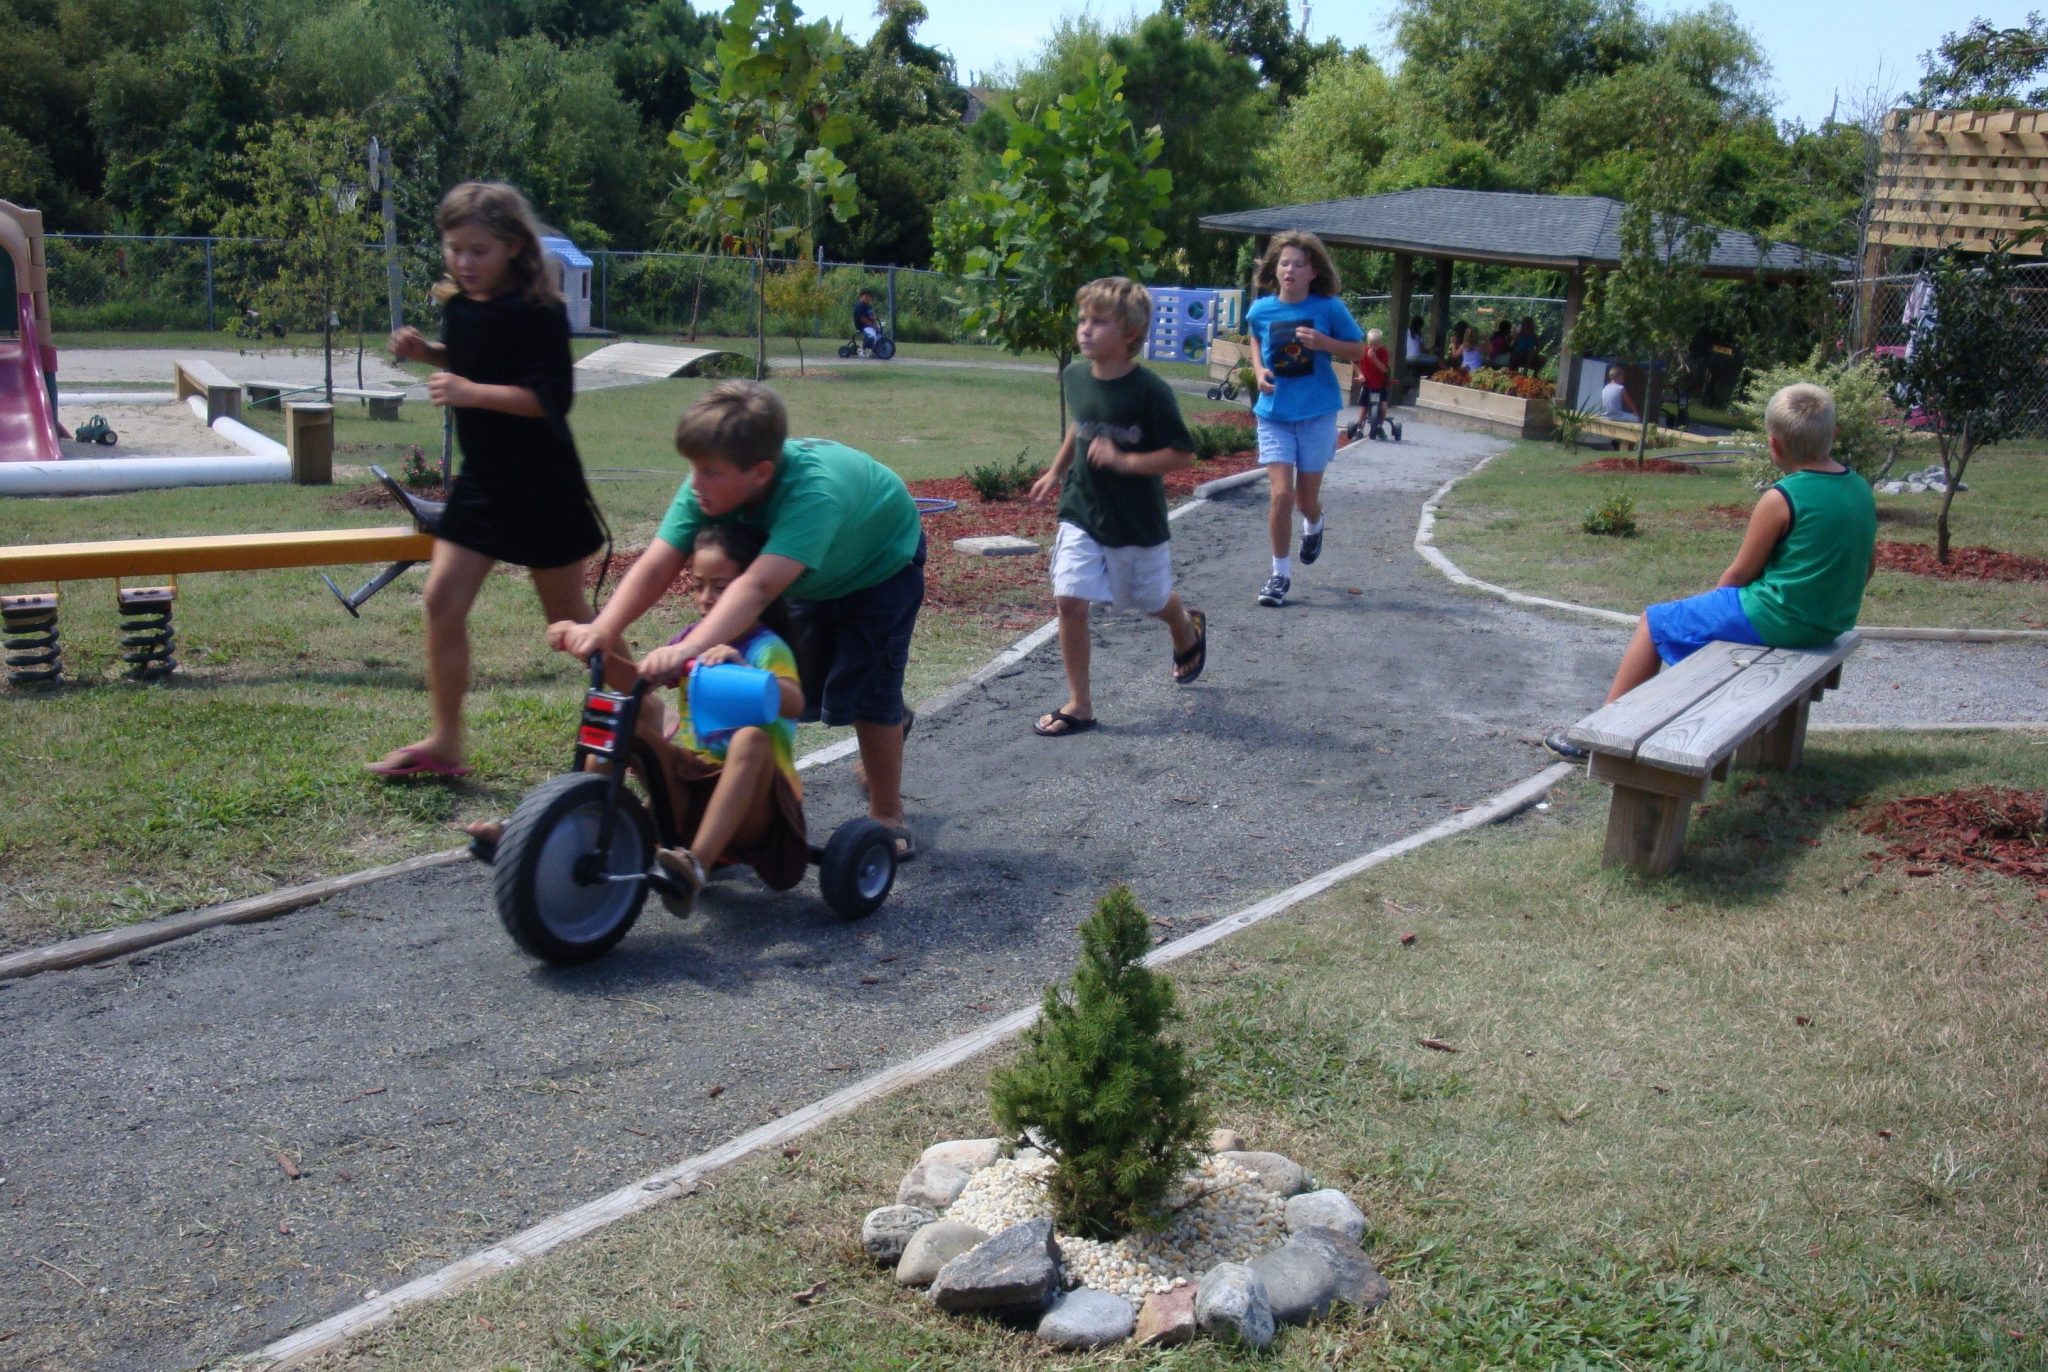
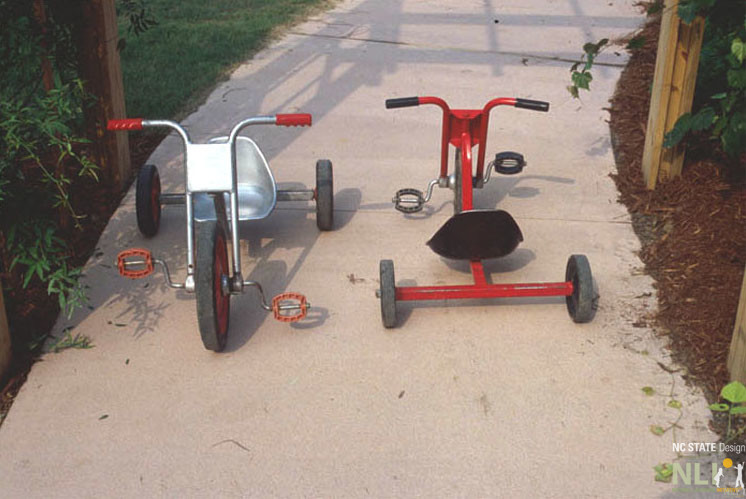
    Primary pathways are a functional necessity in childcare outdoor learning environments and promote physical activity by facilitating walking, running, chase games, and wheeled toy use (riding, pushing, pulling). They are designed to provide easy, attractive circulation throughout the outdoor learning environment and to connect classrooms to the primary settings of infant, toddler, and preschool areas. Primary pathways provide a spatial structure that simplifies OLE navigation for children. Primary pathways also serve as accessible routes and allow teachers to move quickly through the OLE when necessary.

    How wide should I make my primary pathway?

    Primary pathways should be wide enough to accommodate intense pedestrian and wheeled-toy traffic, helping children stay on the pathway and pass each other without conflict.

    In our experience, primary pathways within preschool outdoor learning environments should be a minimum of 5 feet, with a preferred width of 6 feet. Primary pathways within infant and toddler outdoor learning environments can be narrower (4 feet minimum) because the children are smaller and do not move through the environment as quickly.

    What materials should be used for primary pathways?

    Primary pathways can be constructed of concrete, fine crushed stone, or mulch. Each option has its benefits. Concrete pathways are the most stable, require the least amount of maintenance, and are the most expensive. The concrete can be stained or have color integrated to give it more natural color and help it blend into the surroundings. Finely crushed stone pathways are less stable and require some maintenance, but may be less expensive than concrete pathways, depending on your location. Mulch pathways break down over time and the mulch must be replenished. Mulch pathways require more maintenance than the other two options but are the least expensive initial investment.

    children playing on a primary pathway
    wheeled toys on a pathway

    Resources

    Pathways for Play: Best Practice Guidelines

    Primary Pathway Attributes

    1. Looped. No dead ends.
    2. Curvy. Avoid sharp corners, straightaways, and bottlenecks. The inside radius of the pathway should be no less than 10 ft. Gently curving forms integrated with adjacent plantings and other play settings provide an interesting experience and stimulate exploration.
    3. Connected to and centered on entrances and exits.
    4. Linked to primary play and learning settings and important landmarks.
    5. Wide enough to accommodate intense pedestrian and wheeled-toy traffic, helping children stay on the pathway and pass each other without conflict.
      • Preschool: 5 ft. minimum
      • Infant/Toddler: 4 ft. minimum
      • Located to allow sufficient room for settings and plantings, both inside and outside the pathway.
      • Offset from sand play, walls, ball courts, and fences.  Provide a 3 ft. minimum buffer, planted or otherwise, between very active settings (i.e. ball courts), and immovable objects (i.e. fences, trees and walls).
      • Provide buffers between hard surface pathways and sand play to avoid creating slippery surfaces.
      • Smooth and flat.  Longitudinal slopes should be gentle to accommodate the safe use of wheeled toys. In extremely flat areas provide positive drainage.
  • Summer Play: Beat the Heat

    The Green Desk

    Summer Play: Beat the Heat

    What are some tips for safe summer play?

    Drink Water

    • Take a water cooler out to the outdoor learning environment. Make cups and water cooler accessible for children to get water when they need it.
    • To avoid throwing away plastic cups every day, each child could have a reusable water bottle with their name on it.
    • Milk and sugared juices and drinks do not rehydrate or quench thirst as well as water.
    Offer less intense activities

    Do less. Stay cool!

    Adjust the OLE schedule

    Move outdoor playtime to the early morning when it is generally cooler outdoors. If necessary and possible, overlap outdoor play sessions so all classes can be outdoors during the cooler morning hours.

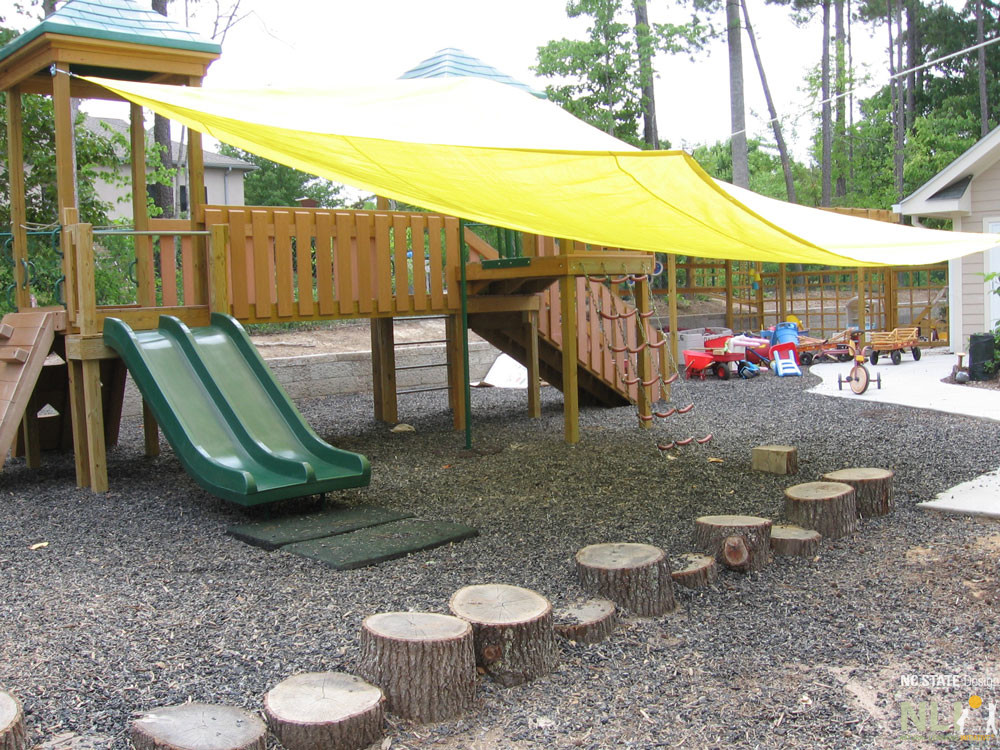
    Provide temporary shade
    • Shade sail, tarp or sheet on the fence or tent pole
    • Parachutes. Make temporary forts or drape them over the corner of the fence.
    • Cardboard box playhouses
    • Pop-up shade structures
    • Vine teepee with fabric and/or annual vine
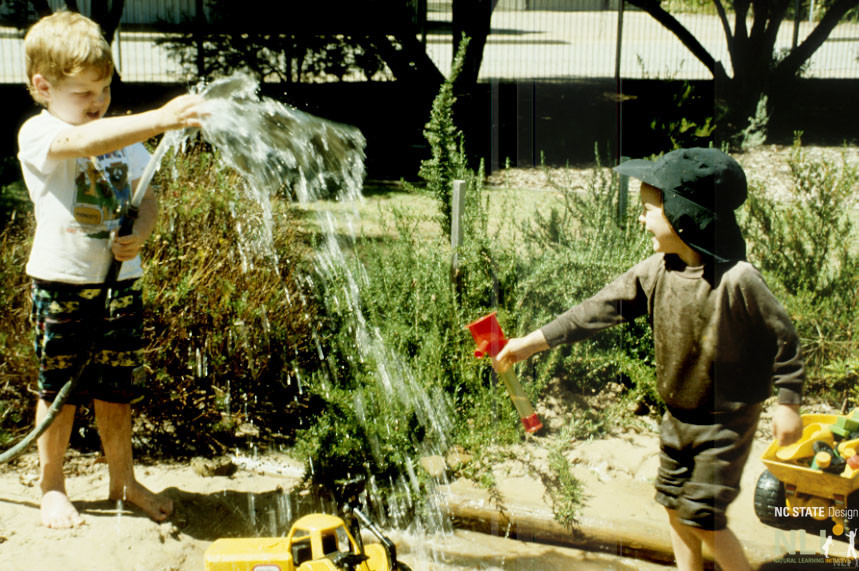
    Provide “whole body” water play opportunities each day

    A low cost provision can be a lawn sprinkler in the center of a grassy area or suspend a hose with a soft spray head or mister overhead. This will allow both the more active children to chase in and out of the water and the less active children to enjoy it. Many types of colorful, plastic “water guns” or squirt bottles are available and suitable for preschoolers. Children should come prepared with a change of clothes and towel for drying off. See this Green Desk Misting Station post for an affordable water play setting.

    Fans

    An anchored fan, secured and out of the children’s reach, can provide a cooling breeze (and also keep mosquitoes away).

    Cool snacks

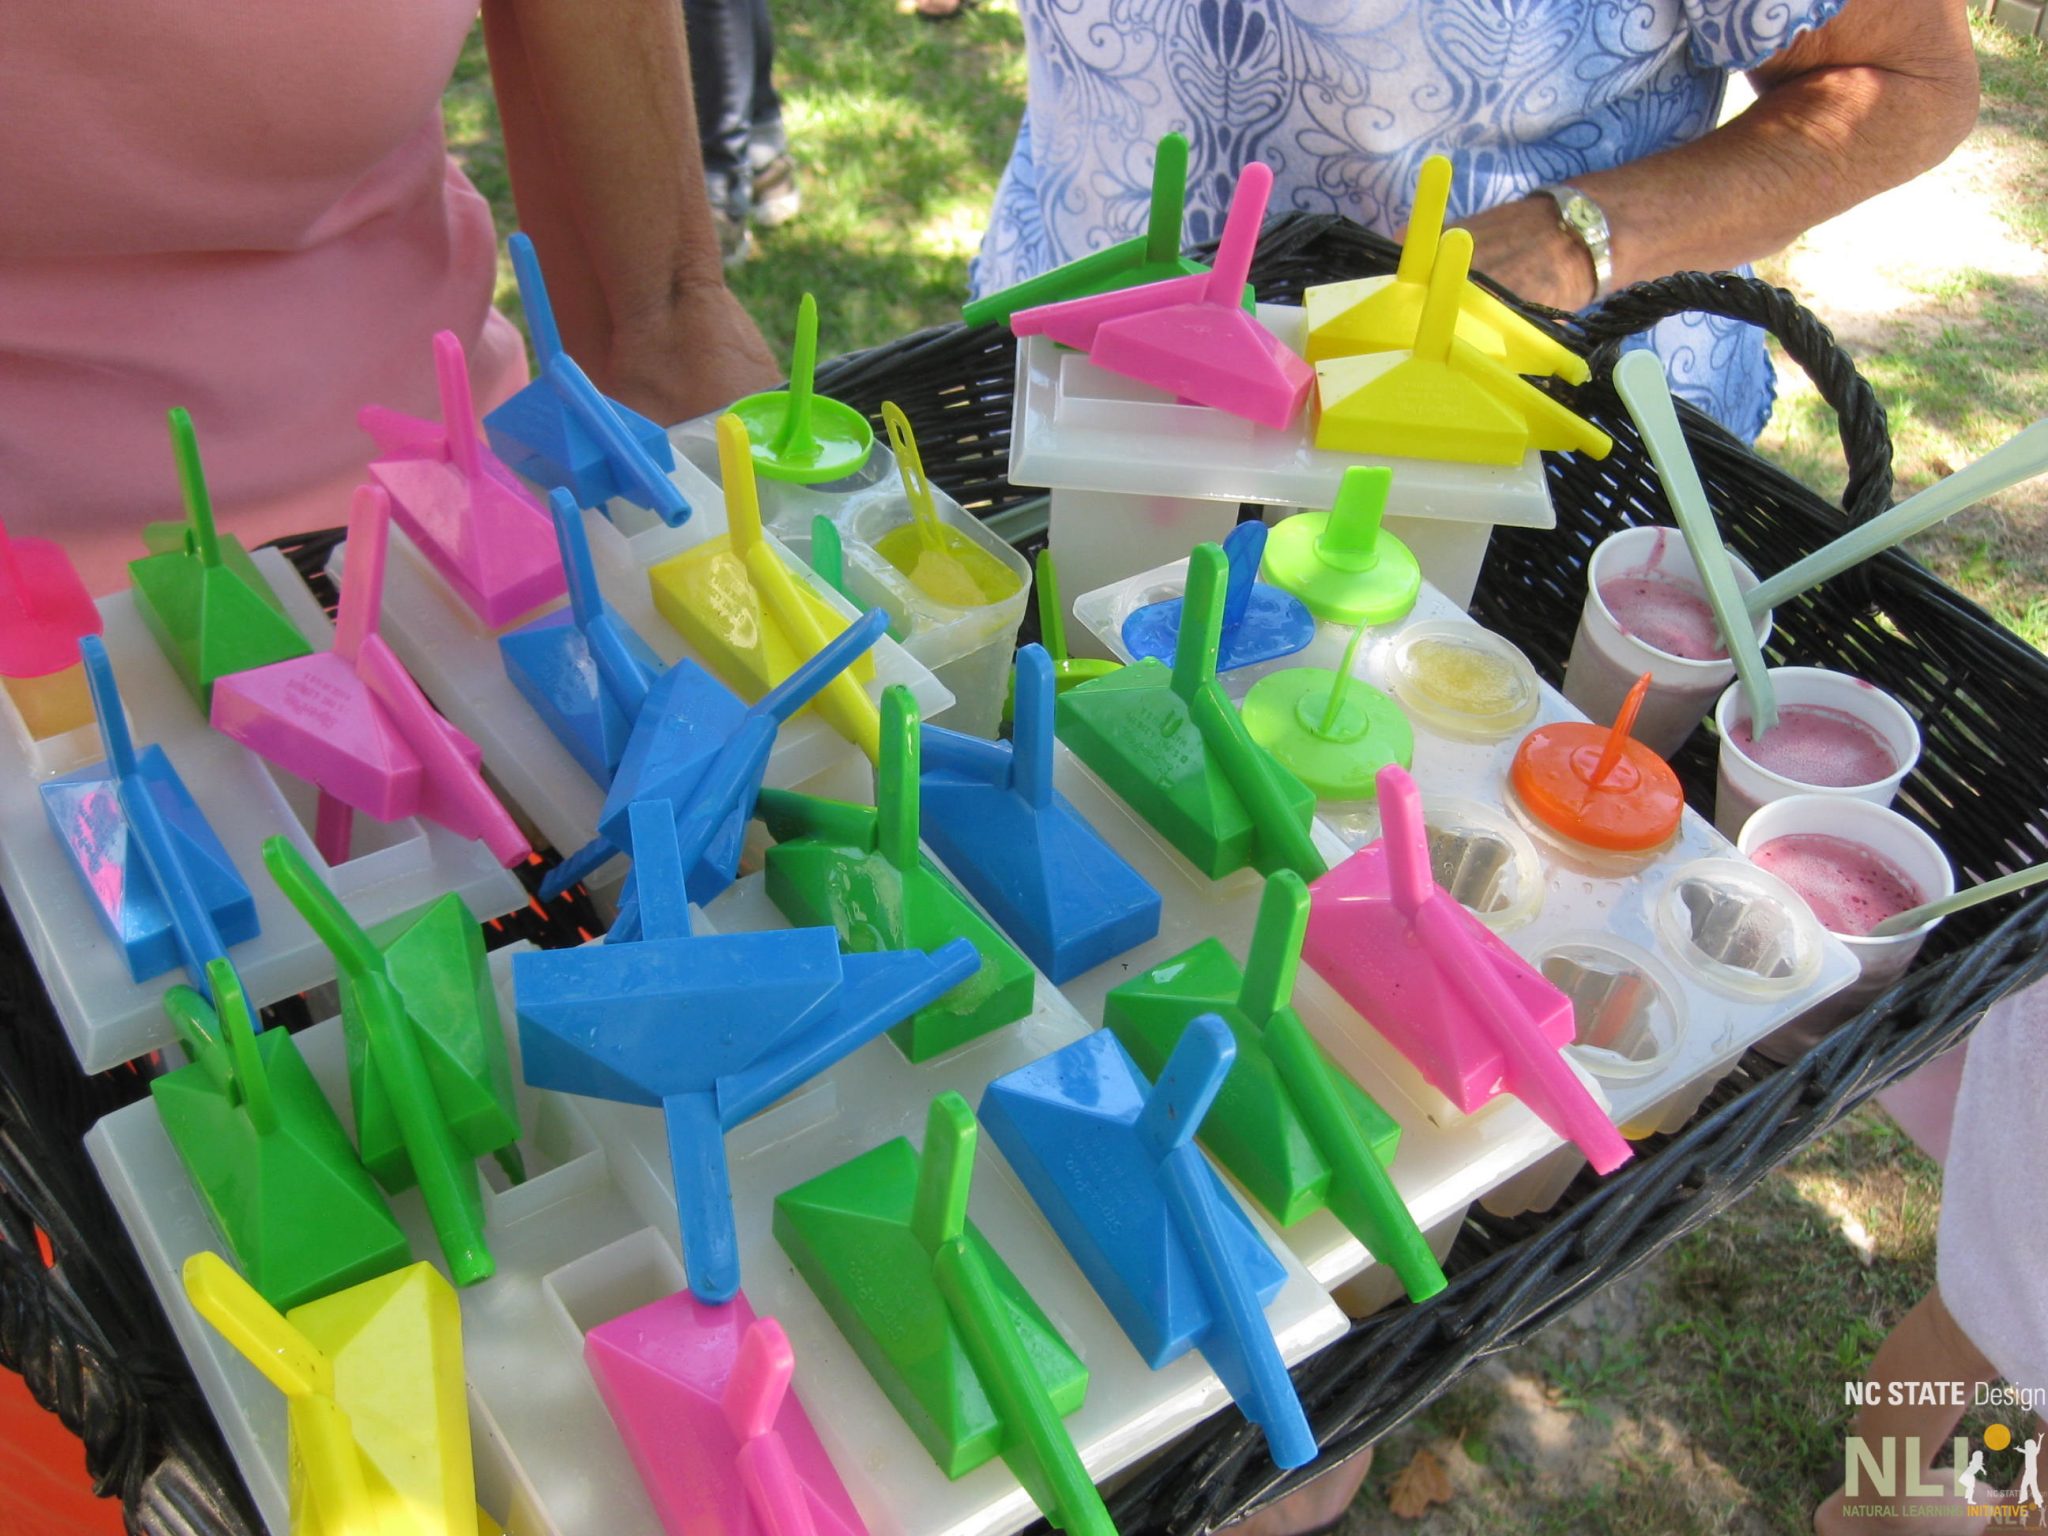
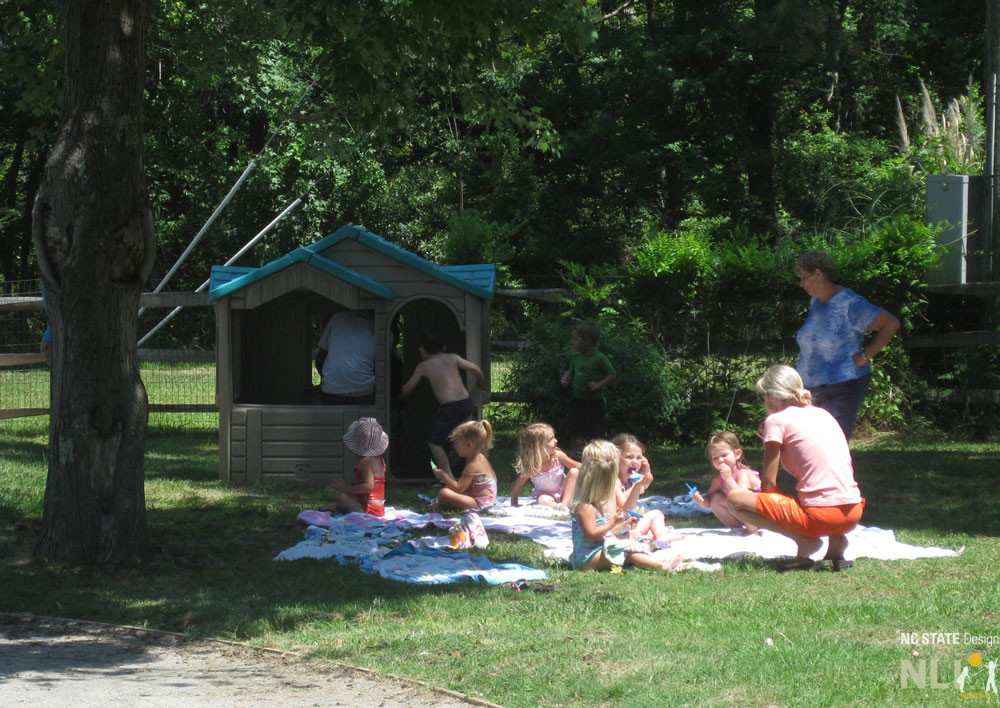
    Homemade popsicles or frozen fruit are great snacks that help to cool off children from the inside out. Fresh fruits, such as watermelon, berries and peaches, have high water content and are quite refreshing served chilled. Find a shady spot to eat the snack midway through the play session. This creates a break in the action and allows the teachers and staff to check in with the children to make sure they are each safely coping with the heat.
    children engaging in water play with a hose and toys
    shade sail put up over by play equipment
    homemade ice pop molds
    children resting on blankets and playing in a manufactured play house

    Download the PDF

  • Preventing stings

    The Green Desk

    Preventing stings

    How can I help prevent stings from bees and other insects?

    The best way to help prevent stings is to establish proper ways to interact with insects. Bees are most likely to sting when they are near their hive and feel threatened.  When bees are away from their hive gathering pollen and nectar they are very busy and not likely to sting unless they are bothered – inadvertently or deliberately.

    Ways to prevent stings:

    • Be cautious and respectful of bees and other stinging insects.
    • Remain calm and move slowly.
    • Use care when entering sheds and other places where stinging insects may nest.
    • Wear light-colored clothing and do not wear perfumes or scented soaps, deodorants, lotions, etc.
    bee on a plant