What are the steps for installing fine crushed stone or mulch pathways?
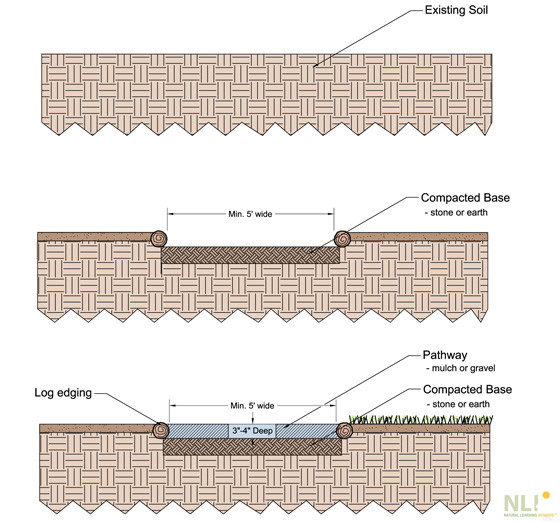
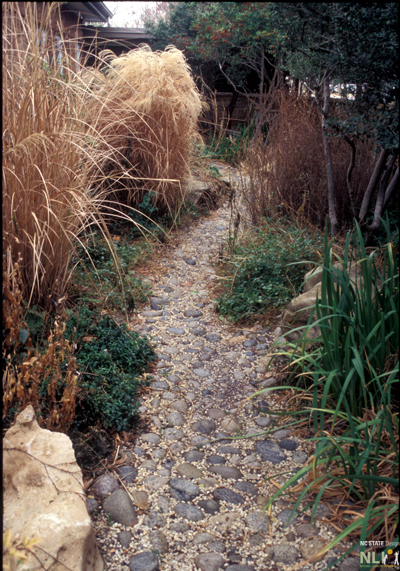
Pathway installation will depend on site variables. Pathways can either be installed on top of the existing ground surface (on-grade) or by removing soil and installing the pathway material in the resulting excavated area (excavation). In most situations, NLI recommends removing soil and installing in the pathway in the excavated area to maintain existing drainage patterns.
Excavate 3”-4” deep and five feet wide plus the width of the edging. If you are going to use a compacted gravel base, you will need to excavate an additional 3”-4”.
Add the 3”-4” gravel base, smooth with a garden rake and compact with a vibrating plate compactor.
Prepare and lay edging along excavated edge. To avoid creating a trip hazard, the edging should be no more than 2” above finished grade.
For fine crushed stone pathways:
Add 1.5”-2” of fine crushed stone. Lightly spray with a hose on the mist setting and compact with a vibrating plate compactor.
Add the remaining fine crushed stone. Lightly spray with a hose on the mist setting and compact with a vibrating plate compactor.
For mulch pathways
Add the 3”-4” of mulch and smooth with a garden rake.
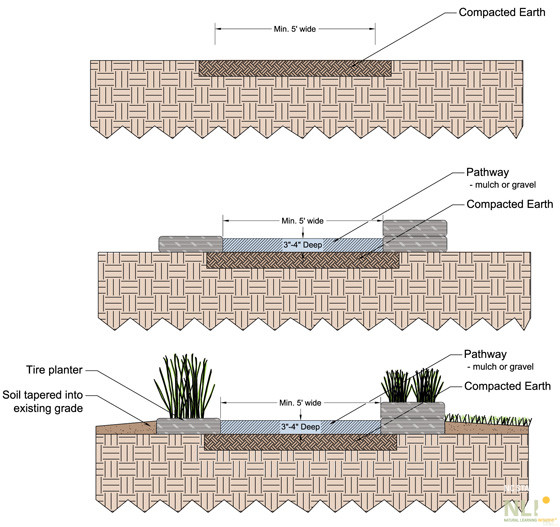
Option 2: On grade
Figure 2.
Compact the existing earth sub-base with a vibrating plate compactor approximately 1’ beyond the edges of the path.
Layout and secure the edging. Note: Edging should be at least as tall as the path will be deep, 3”-4”. To avoid creating a trip hazard, the edging should no more than 2” above finished grade.
For mulch pathways:
Add the 3”-4” of mulch and smooth with a garden rake.
Backfill with topsoil to top edge of edging and taper topsoil into existing landscape.
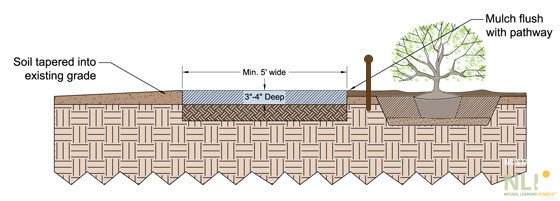
Figure 3.
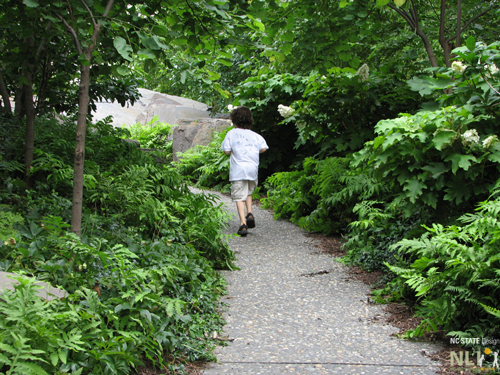
Pathway and mulched planting beds adjacent to pathway should be at the same finished elevation. Take this into consideration when planting. Plant protection railing added to define the pathway and protect adjacent plants.
I need some inspiration for creative autumn outdoor play. Any suggestions?
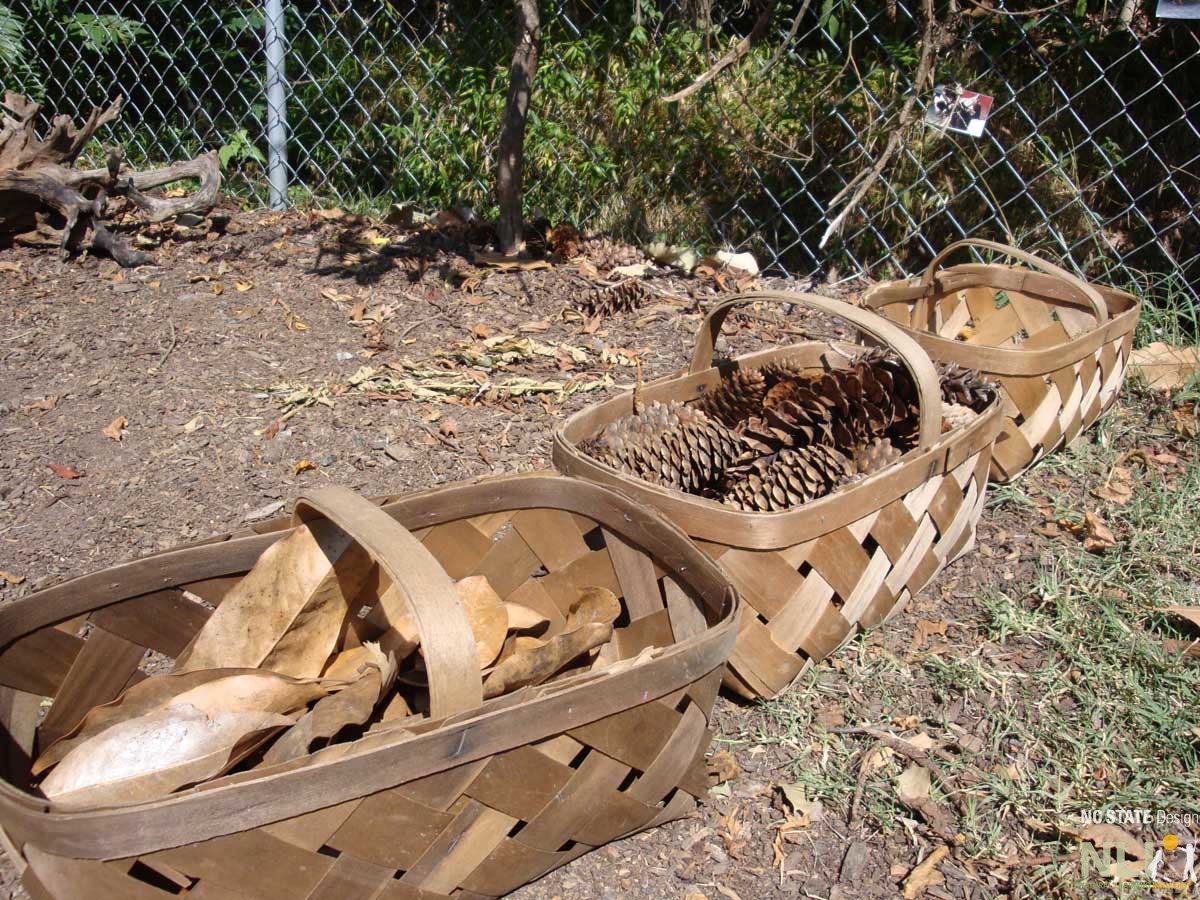
Autumn is a magical time of year. Leaves change to brilliant yellows, oranges and reds. An abundance of natural loose parts fall to the ground and are now within reach. If inspiration is needed for creative outdoor play ideas, try connecting the stories and themes of children’s books to autumn outdoor play.
To help narrow down the vast array of autumn themed children’s books, some our POD partners have recommended some of their favorite autumn books and outdoor activities.
Amy Barry, Program Manager, Smart Start of Buncombe County, likes The Dandelion Seed (by Joseph Anthony, Illustrated by Cris Arbo). She says, “A related activity is a seed search. Children put adult athletic socks (high ones) on over their shoes and pants and walk in an area where there are grasses/plants with seed heads. They examine what they collect on their socks, to determine which plant it came from and how it got there (wind borne or from brushing against their legs).” This book, particularly the illustrations, should inspire many other fall activities.
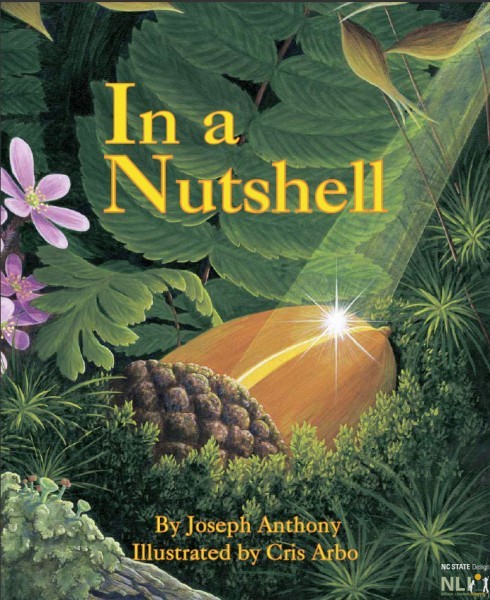
Anthony and Arbo also collaborated on In a Nutshell, which tells the life story of the oak, from acorn to mighty, mature oak. With the many acorns to be found right now (you will have to beat the squirrels to them), autumn is the perfect time for this book, as well.
Lee Bush Perry, Child Care Resources, Inc., Mecklenberg County, says, “I LOVE The Little Old Lady Who Was Not Afraid of Anything(by Linda Williams, Illustrated by Megan Lloyd) . It is definitely my favorite fall book. It is all about the different sounds that the lady hears and it ends up being a scarecrow. Children could gather materials that make the different sounds, gather materials to create a scarecrow, etc.”
In addition to the three books listed above, check out:
How can we create a butterfly garden at our childcare center?
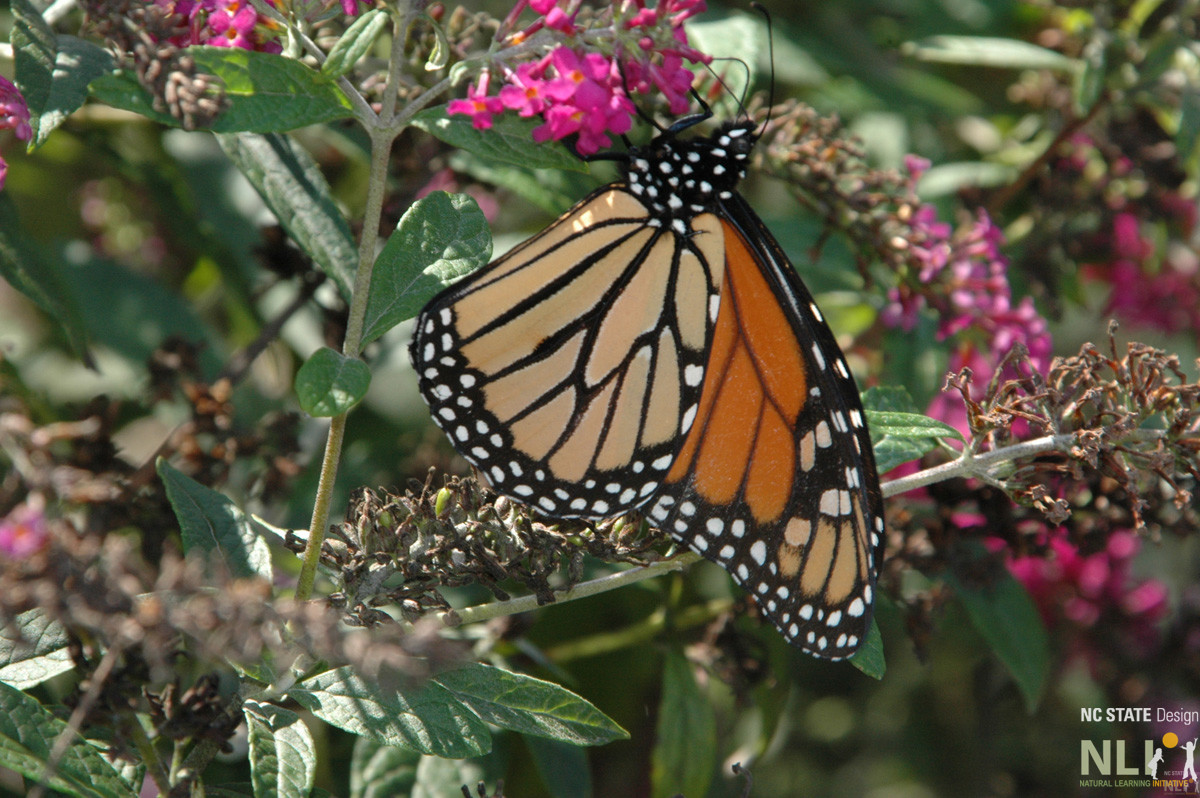
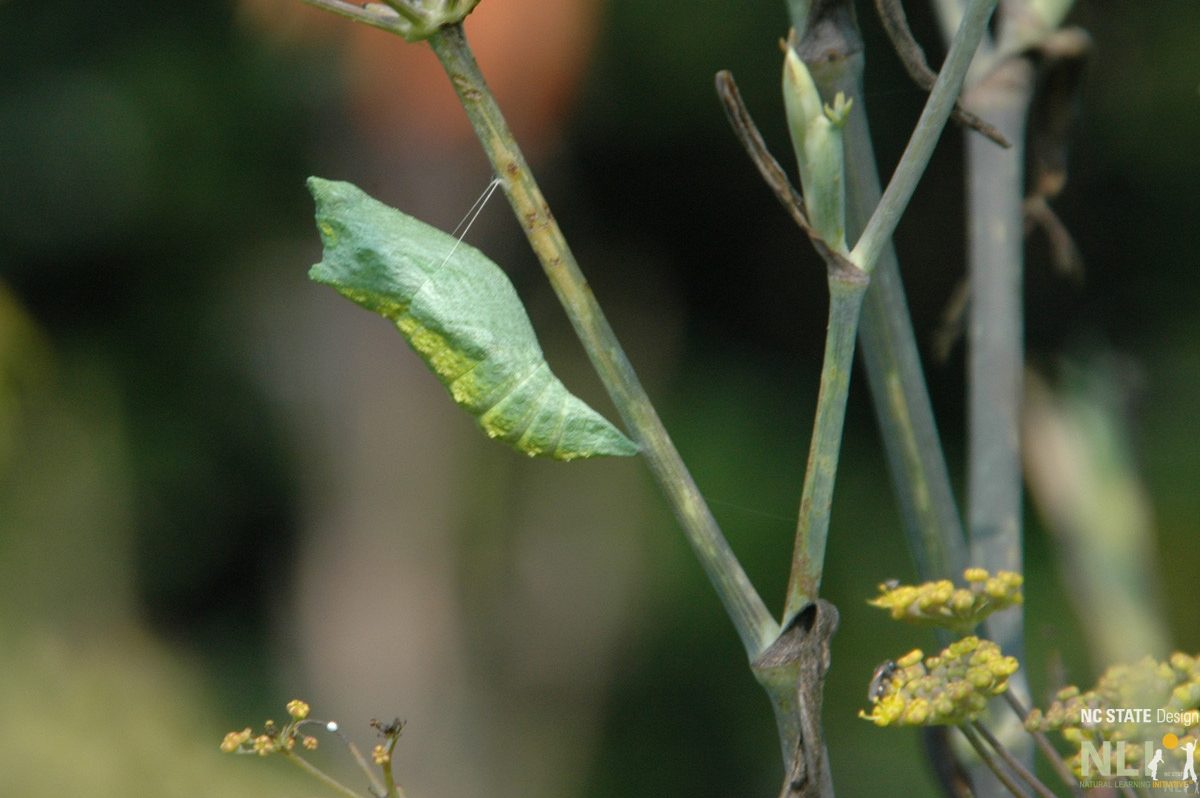
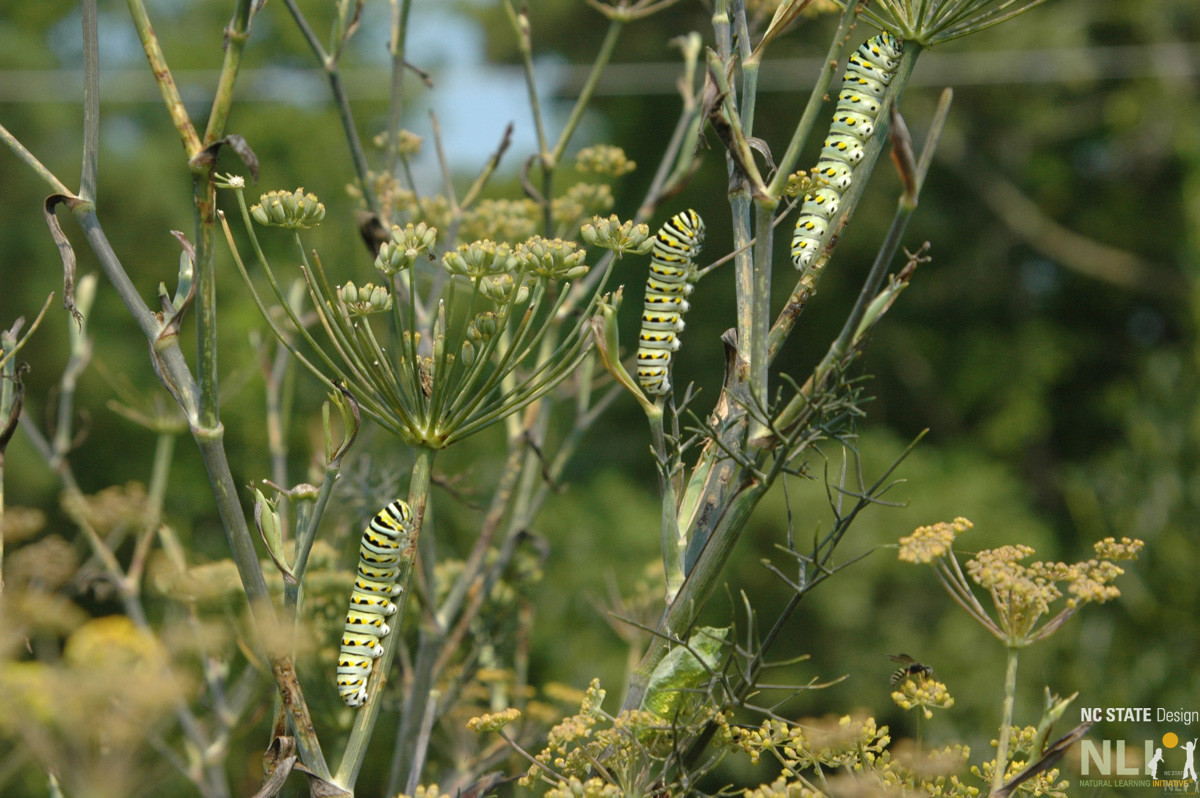
Butterflies are the elegant result of a fascinatinglife cycle beginning with eggs laid by an adult female butterfly on a host plant. These eggs hatch, develop into caterpillar larvae, form chrysalises, and emerge as adult butterflies – and the cycle starts over again.
Butterflies can inspire natural learning across the curriculum of science, math, art, dramatic play, and language arts. Childcare center butterfly gardens can be created to support the complete butterfly lifecycle. To thrive, butterflies require both nectar-producing and host plants. A successful butterfly garden should contain both.
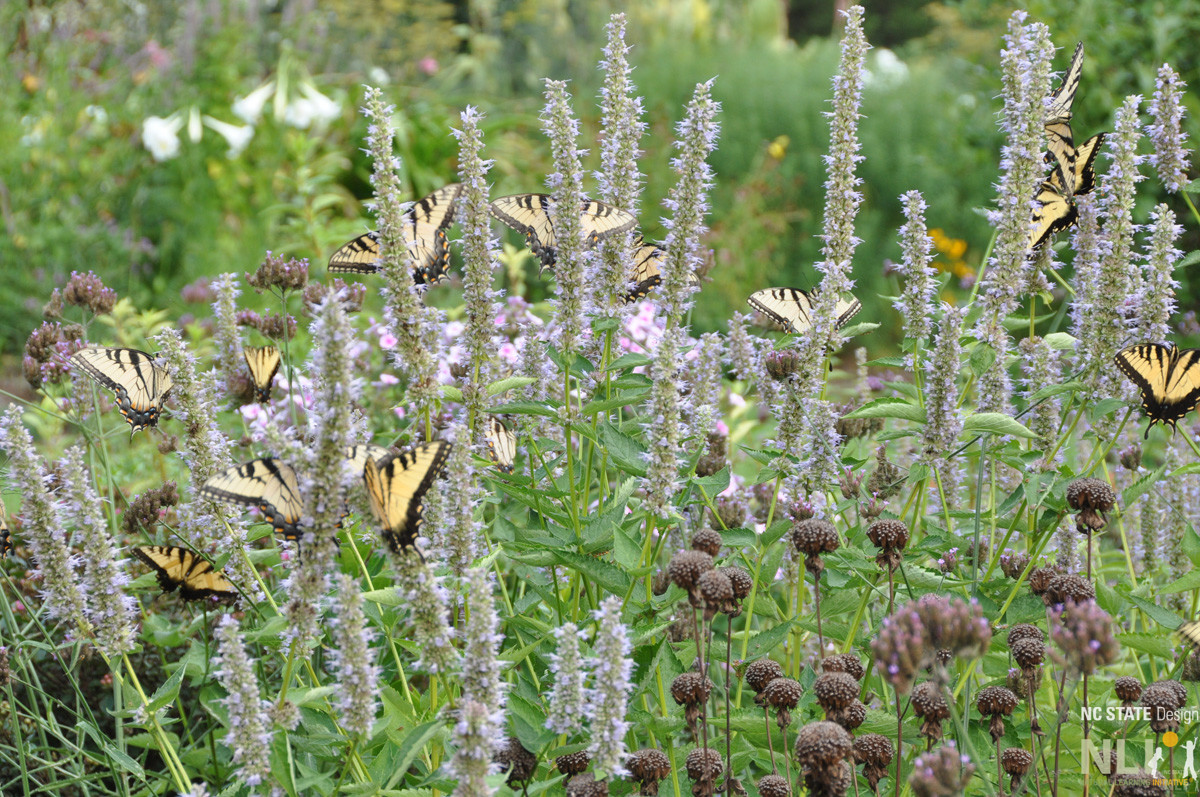
Nectar-producing plants provide a source of food for adult butterflies attracted by brightly colored, sweet-smelling, easily accessible flowers. Common nectar plants include flowering dogwood, Virginia sweetspire, abelia, thornless blackberry, highbush and lowbush blueberry, butterfly bush, black-eyed Susan, purple coneflower, lavender, agastache, salvia, cosmos, zinnia, Joe-Pye weed, and asters.
Host plants upon which butterfly larvae feed are certain types of native wildflowers, shrubs, and trees. Primary examples include many asters, yellow, sweet and river birch, highbush and lowbush blueberry, clover, dill, flowering dogwood, hackberry, fennel, parsley, passion flower, swamp sunflower, switchgrass, vetch, black willow, and many species of oak.
Other important issues to consider for successful butterfly gardening include:
Choose a sunny, sheltered butterfly garden location. Plants and butterflies need sun to thrive. If possible locate the butterfly garden on the south side of a building, wall, shrubs or trees to shelter it from wind that may blow tall plants over.
Never use pesticides to eliminate “harmful” insects as butterflies and their caterpillar larvae will also be killed.
Butterflies are attracted to masses of color and fragrance, so cluster plants of the same species instead of scattering single plants.
A variety of plants that bloom at different times will attract a diversity of butterfly species from early spring through late fall.
To attract some species of butterflies, you must plant their preferred nectar-producing and host plants. Review the resources below for specific guidance.
Resources
Children’s Literature
The Very Hungry Caterpillar by Eric Carle is a classic children’s tale about the lifecycle of a butterfly that also provides information about counting, fruits, healthy eating, and the outdoor world.
Butterfly Gardens
Top Ten Easy-to-Grow Perennials and Shrubs for Attracting Butterflies and Hummingbirds. Natural Learning Initiative Handout.
Attracting Butterflies. NC State University. Department of Horticultural Science. Contains lists of nectar-producing and host plants by plant type.
Butterflies in Your Backyard. NC Cooperative Extension Publication # AG-636-02.
The Butterfly Site.
The National Butterfly Association.
Native Plant Resources
Going Native: Urban Landscaping for Wildlife with Native Plant, NC State University. Search for native plants that will attract wildlife and sort by “wildlife value.”
Top Ten Easy-to-Grow Perennials and Shrubs for Attracting Butterflies and Hummingbirds:
To beat the summer temperatures and transform nearly any overhead structure into a misting station all you need is about $30, a water spigot, and a little time to hook up the system. Setting up the system is simple and should only take a few hours to purchase materials and install. If help identifying parts is needed, ask someone at the hardware store for help, most stores have employees ready to answer questions.
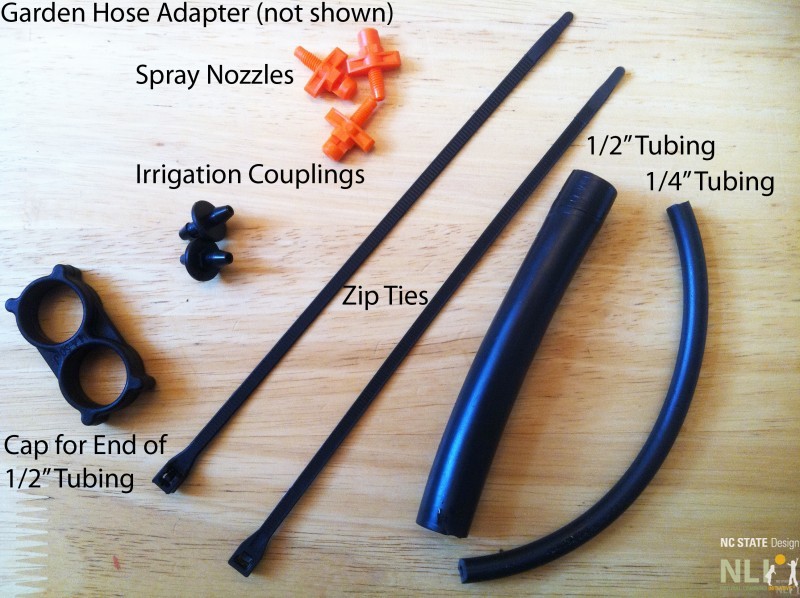
Supplies:
Outdoor water spigot and normal garden hose
50′ of 1/2″ irrigation tubing
The smallest available amount of 1/4″ irrigation tubing
Hose to irrigation tubing adapter
1/4″ irrigation couplings
At least four (4) 180 degree spray nozzles
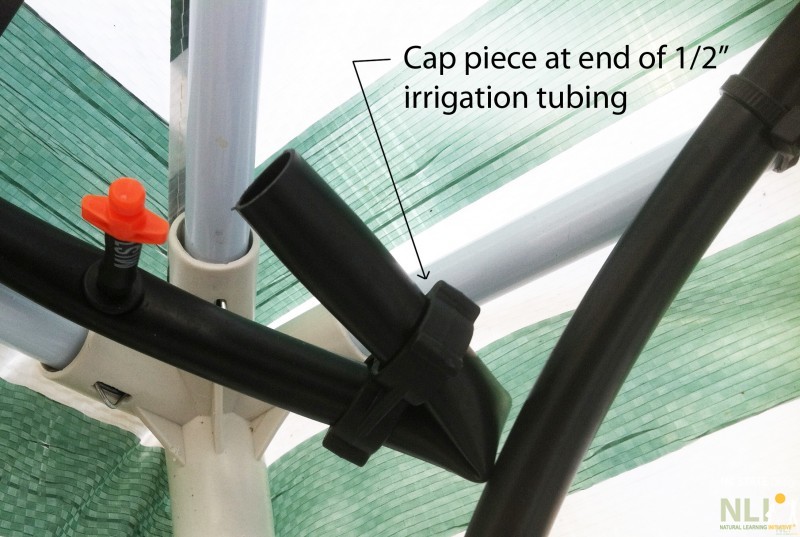
One “cap” piece for the end of the 1/2″ irrigation tubing.
One puncture tool for attaching the irrigation couplings
One pack of zip ties
Scissors for cutting the irrigation tubing
Steps for success
Shop for supplies (this step will probably take the longest)
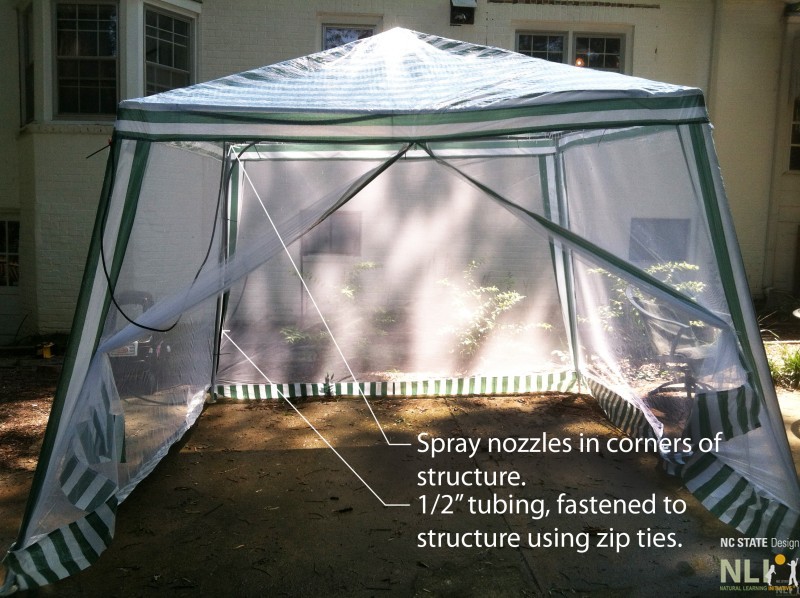
Choose an existing overhead structure. This could be an arbor, pergola, a tree, play structure, fence, or any convenient overhead element. Purchase of any prefabricated, low cost structure could work, too, as long zip ties can be attache (Figure 4).
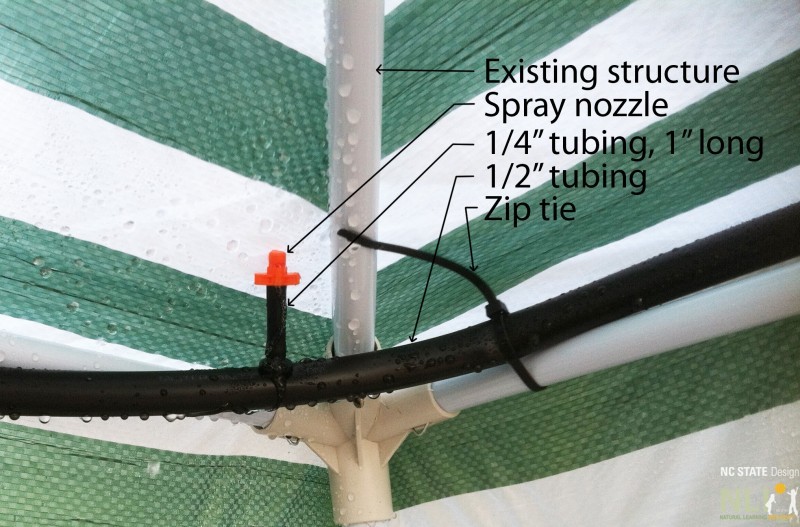
Attach the 1/2″ irrigation line to the structure using zip ties. Be sure to cap the end of the line (Figures 2&3).
Use the puncture tool to poke holes where you want the spray nozzles. Corners are best. Each nozzle will cover an area of around 6′, depending on the height and water pressure. Insert couplings into each hole.
Cut 1″ long pieces of 1/4″ irrigation tubing and insert spray nozzles into each piece of tubing (Figure 3).
Attach 1″ tubing with spray nozzles from step 5 onto each coupling that was installed in step 4 (Figure 3).
Attach hose to irrigation tubing adapter to the end of the 1/2″ tubing and connect to the spigot.
Turn the spigot on and jump in! Your misting station is complete.
Tips:
The area under the misting station will eventually become saturated with water. Pick a location that is either over a pathway or patio or well-established turf, in order to keep the mud down, or install a piece of soft outdoor carpet.
Spray nozzles can be attached anywhere on the line, so have fun and be creative!
Plants can be irrigated at the same time as kids get irrigated by choosing a structure that has nearby plantings.
Tools & Equipment for Outdoor Learning Environment Installation
What tools and equipment are commonly used to install outdoor learning environments (OLEs)?
Garden tools and equipment are designed for specific tasks. Needless to say, it is important to select the right tool for the task at hand. Using the inappropriate tool can make any task more difficult, and sometimes impossible, to complete.
When installing and managing an outdoor learning environment, consider the tasks to be completed and the number and skill level of volunteers required.
Review the following list of tools and equipment and determine how many of each are needed based on the tasks to be completed. Ask volunteers to bring tools they may have.
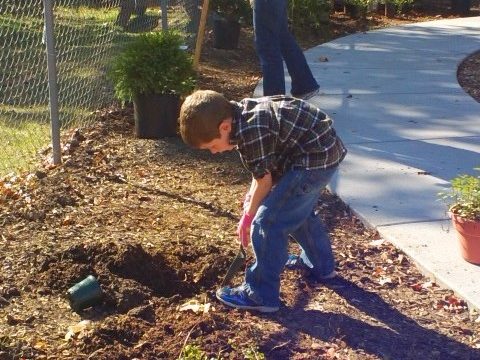
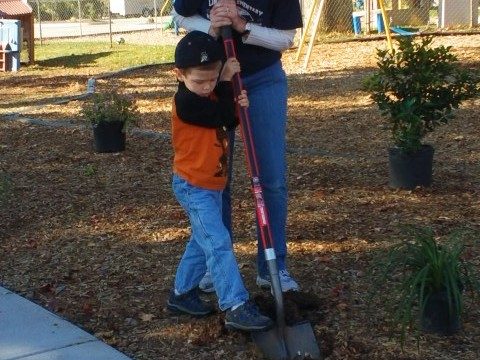
Jacob & Mom Planting @ Pick UpTimothy & Mom Planting
Hand Tools
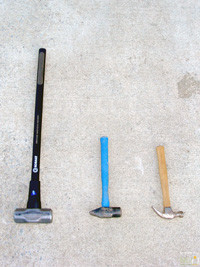
Hand tools are less expensive than power equipment, often serve multiple uses, and are easier to use in small spaces. In addition to those listed below, these may be useful for specific tasks, as well as in later maintenance and/or cleanup: Crow bar (or pry bar), Garden hoe, Trowel and Push broom.
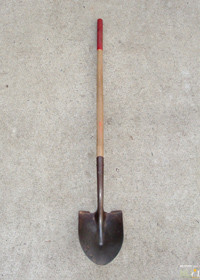
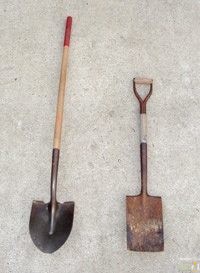
Round Point Shovel
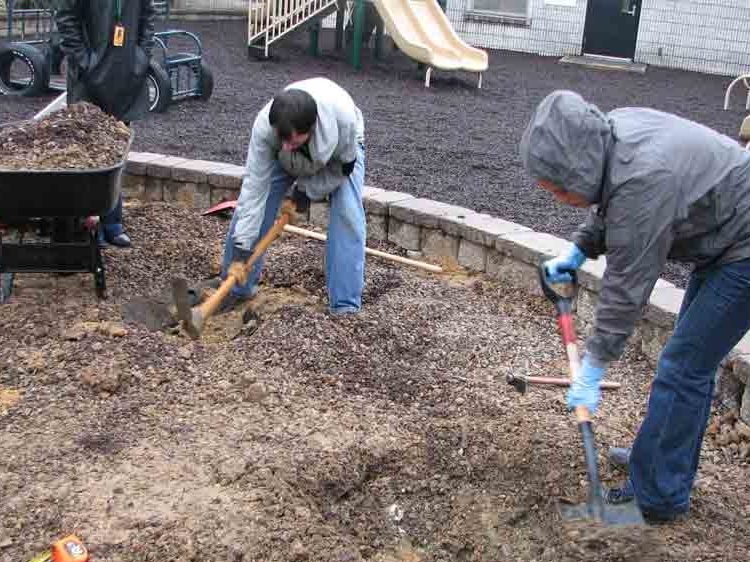
Round point shovels have sharp edges and triangular or rounded points. They are used to dig holes, remove plants and scoop loose materials, such as dirt, mulch, or sand.
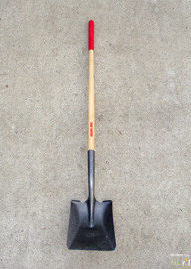
Square Shovel
Square blade shovels are used for scooping loose materials, such as dirt, mulch, or sand.
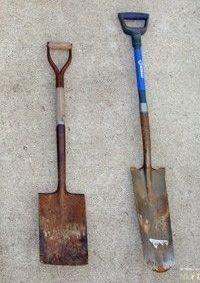
Garden Spades
Garden spades have flat, sharp blades that are generally narrower than shovels. Garden spades are great for digging holes, particularly in tough soil, and creating sharp, clean edges along planting beds.
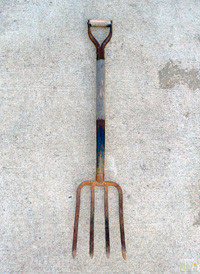
A pitchfork has a long handle and long, thin, widely spaced, pointed tines. Pitchforks are can be useful for loading mulch into wheelbarrows and pitching it into place.
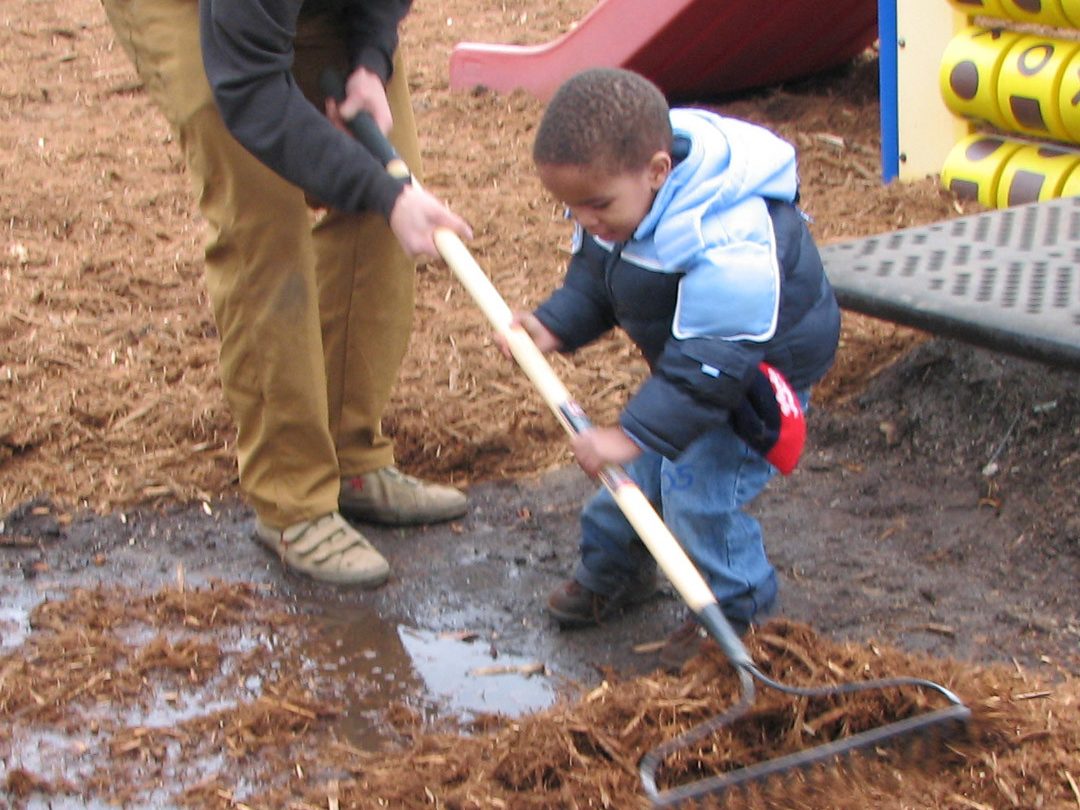
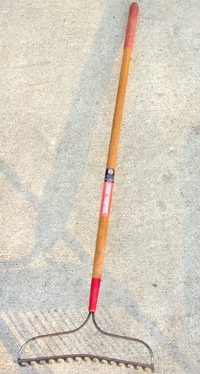
A bow rake has a long handle with stiff metal tines. Bow rakes can be used to evenly spread loose materials, such as soil, sand, and mulch.
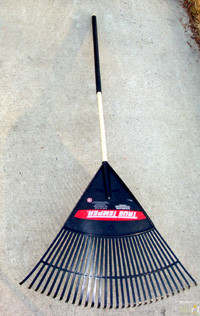
Leaf Rake
A leaf rake has a long handle with flexible metal or plastic tines. Leaf rakes can be used to gather or spread loose materials, such as leaves, soil, sand, and mulch.
Power equipment make particularly difficult or labor-intensive tasks easier, requires fuel, electricity, or batteries, and can be rented from tool rental centers. Power equipment should be used with caution and only by adults familiar with its function.
Rototillers are used to break up soil and uniformly mix in amendments. A rototiller has engine-driven tines that break up soil and propel the machine forward. The operator walks behind the rototiller controlling its speed and direction. Rototillers are particularly useful for preparing large planting beds or gardens.
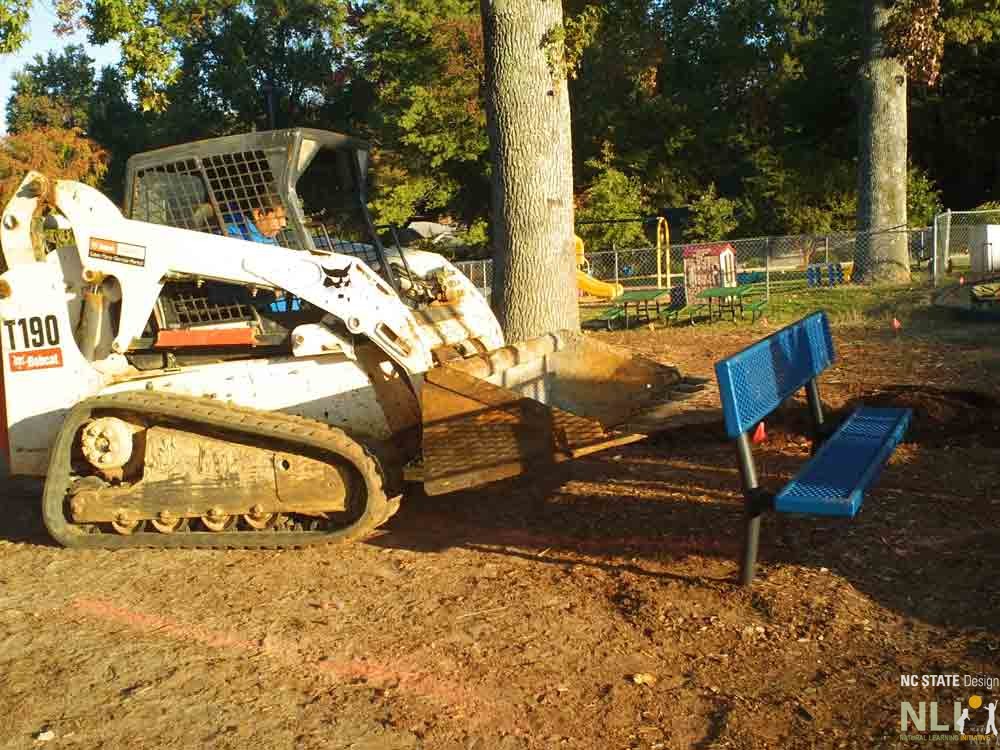
A skid-steer loader (generically called a Bobcat) is an engine powered machine with lift arms and various attachment tools. Skid-steer loaders have many onsite uses including hauling large objects, such as trees and boulders, and loose materials, such as mulch and gravel, and excavating pathway beds.
Other Useful Items
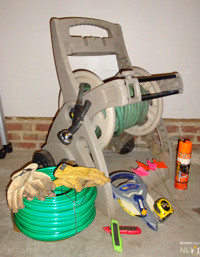
Work gloves that are quality and well-fitting should be owned by everyone working in the outdoor learning environment. Work gloves are sized and can be tried on in the store prior to purchasing. Leather gloves tend to be more durable and offer better protection.
Measuring tapes come in various lengths and styles. Both 25’ and 100’ measuring tapes are useful when laying out the outdoor learning environment.
Wheelbarrows and garden carts are used to haul heavy and/or loose materials. They make hauling heavy loads easier and are quite versatile.
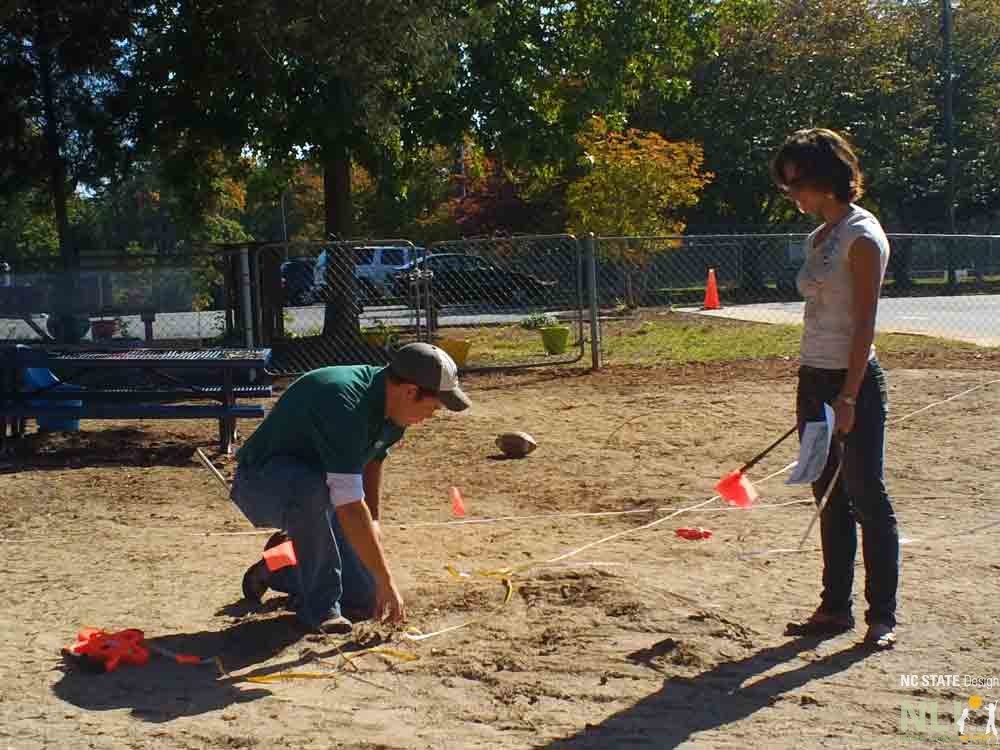
Survey flags are used to temporarily mark plant, setting, or pathway locations during layout and installation.
Spray marking chalk is used to temporarily mark plants, settings, or pathway locations during layout and installation. Rain or heavy use can remove spray marking chalk, so installation should occur soon after it is used for marking.
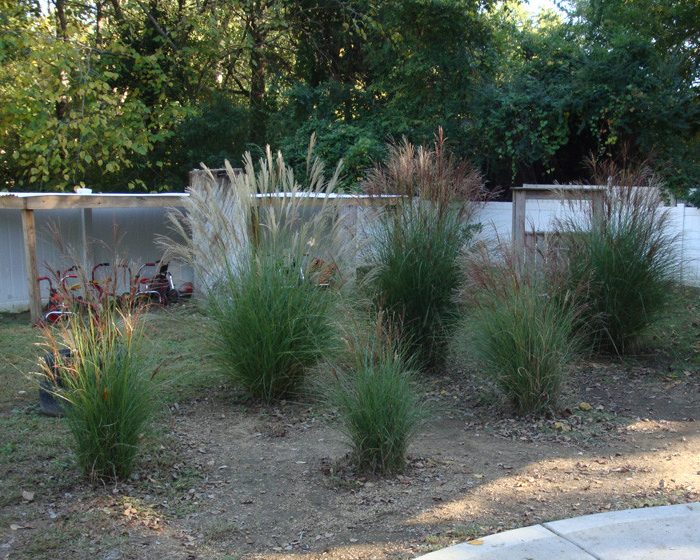
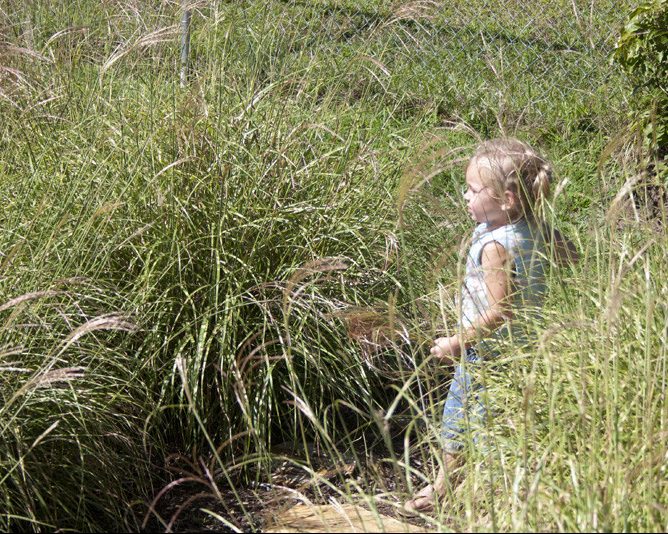
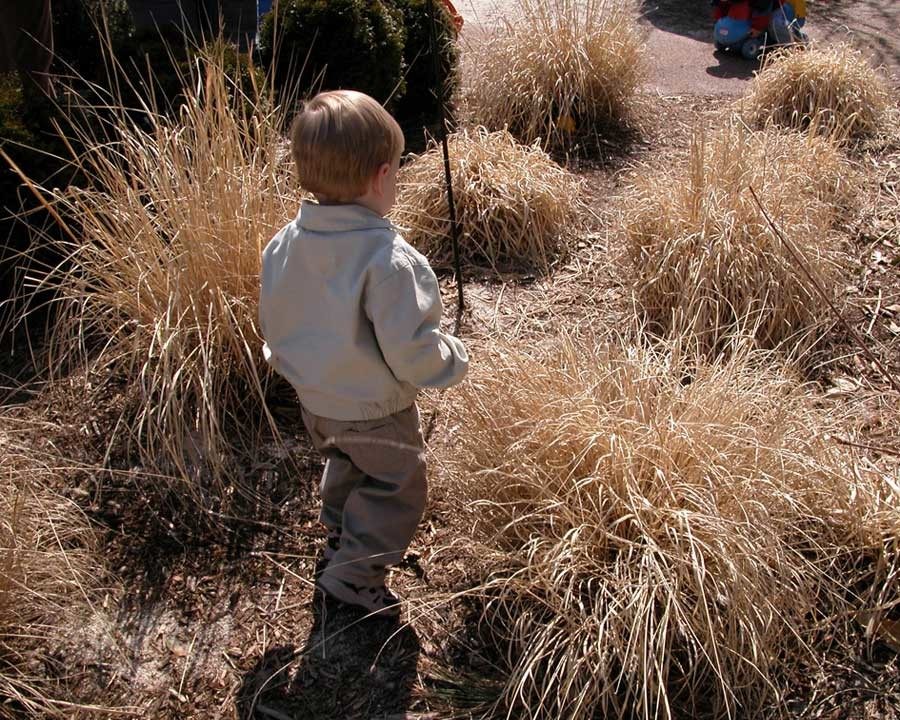
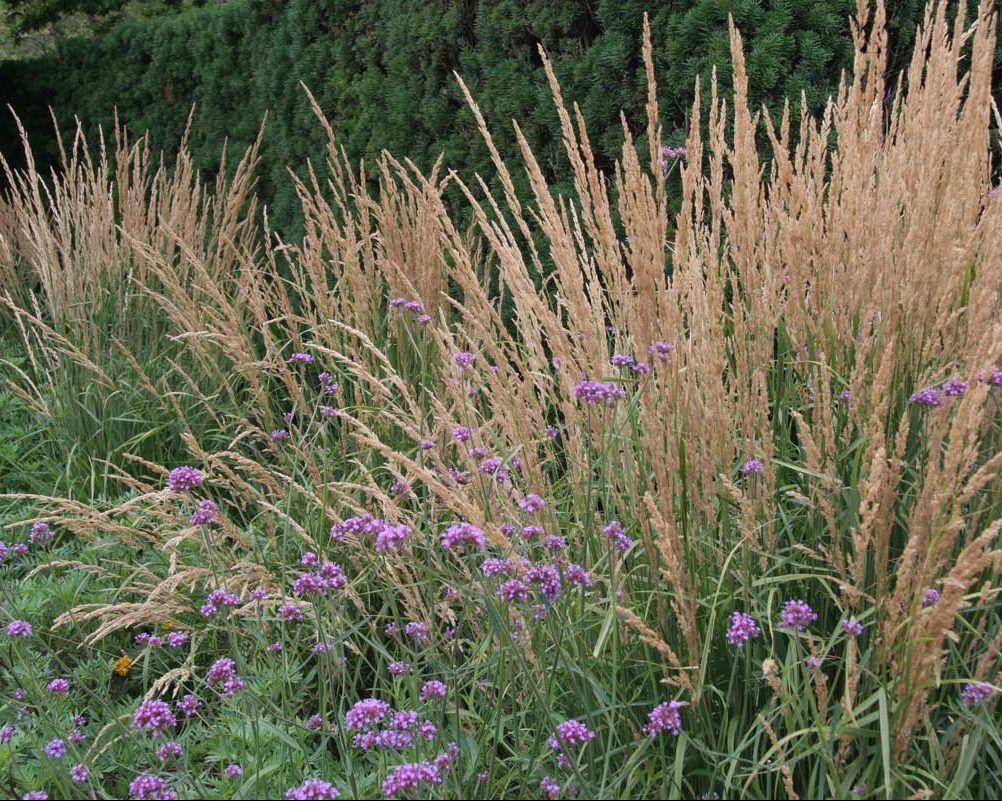
Grass mazes are composed of informal arrangements of ornamental “clumping” grasses (i.e., that do do spread through rhizomes). Grass mazes support chase games like tag and hide-and-seek, and provide space for intimate conversations, rest, and reflection. Moving in the wind, soft grasses provide year round sensory stimulation.
Overall size
Grass mazes offer versatile layout options because of their flexible form. A minimum recommended overall size is 100 square feet (10’ x 10’ approx.). Of course they can be larger.
Spacing
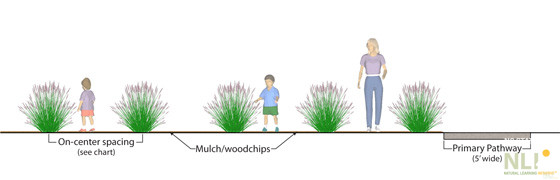
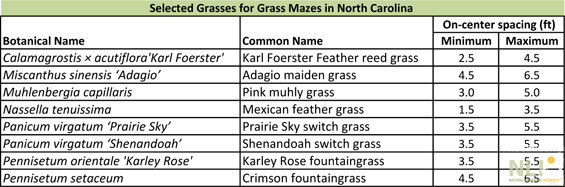
Spacing between plants should be based on mature size, so children can easily move between them. Distance between mature grass heads can vary (6” to 30”) based on the desired character of the maze. A maze with closely spaced grasses feels and is used very differently than a maze with plants that are further apart. The on-center spacing of grasses (distance from the center of one plant to the center of the next) is based on the mature width of the selected species of grass and the desired width of movement aisles between. The table of selected cultivars below indicates minimum and maximum on-center plant spacing. Minimum spacing will provide narrow aisles and close contact with plants; maximum spacing (as illustrated in Figures 1 and 2), will result in wider aisles supporting more active chase games.
Height
Mature height of grasses should not exceed four feet, so they do not block adult views of children. The mature height of many ornamental grasses includes the height of seed heads, which does not obscure views.
Annual growth cycle and management
Ornamental grasses offer a fascinating annual growth cycle and can provide year-round sensory interest if properly managed. As the weather begins to warm in the spring, new, green leaves emerge and by the end of summer will have reached their mature height. In Fall, seed heads emerge in dramatic fashion. In winter, dormant foliage continues to support play, provides endless natural loose parts, and protects the plant from hard freezes. After the last frost and just before the new leaves emerge, the brown dormant leaves can be cut back to 3”-6” above the ground with pruning shears. Simply tie together the top growth with twine before cutting to keep the leaves bundled together and to simplify clean-up. Cut leaves can be used as loose play material.
Groundcover
Natural, plant-based mulch, such as shredded hardwood mulch or woodchips, are best practice groundcovers. Grass mazes can be installed in existing turf grass with the understanding that children will create wear patterns and the worn lawn will eventually have to be covered with mulch.
Plant selection
Grass mazes can be planted with a single cultivar of ornamental grass or a combination of cultivars of various heights, colors, and textures. To achieve an upright, dense form, many ornamental grasses require full sun. Some ornamental grasses are sensitive to soil moisture and prefer well-drained soils. Improve damp soils with amendments or regrade to improve drainage. Consider site conditions and consult local experts. Grass cultivars suitable for North Carolina are listed below. They are hardy, soft to the touch, drought tolerant, and withstand compaction around their roots.
Developed by the Natural Learning Initiative and the National Wildlife Federation, this guide shows easy, affordable ways you can turn your backyard or other types of domestic outdoor spaces into vibrant Nature Play Spaces™ for children so they can reap the physical and mental benefits of playing outside. Creating natural play opportunities can be part of the solution to increasing the amount of time kids spend in the great outdoors for the health of their minds, bodies, and spirits.
My Place by The Bay: Prepared Environments for Early Science Learning
The Bay Area Discovery Museum (BADM) is an indoor/outdoor children’s museum at the foot of the Golden Gate Bridge, serving over 300,000 visitors per year on a 7.5-acre site. It is the only children’s museum in the U.S. to be located in a national park. The museum emphasizes creativity through play and encourages children ages 6 months to 8 years to develop as curious, creative, adventurous lifelong learners and explorers. The Museum’s programs feature hands-on art, science, and environmental exhibitions, performances, special events, cultural festivals, and ongoing educational curricula to engage, delight, and educate children through exploration of the diverse environments and communities they live in.
In 2003, NLI was appointed to conduct the BADM research project My Place by The Bay: Prepared Environments for Early Science Learning. The goal was to investigate the relationships between the design of outdoor early childhood museum settings and the science learning behaviors of children three to five years old. This research project was supported by the National Science Foundation and the team consisted of Robin C. Moore (PI), Nilda Cosco, Ph.D., Orçun Kepez, PhD., and Evrim Demir, Ph.D.
How can designed and prepared outdoor environments stimulate and support science learning behaviors of children?
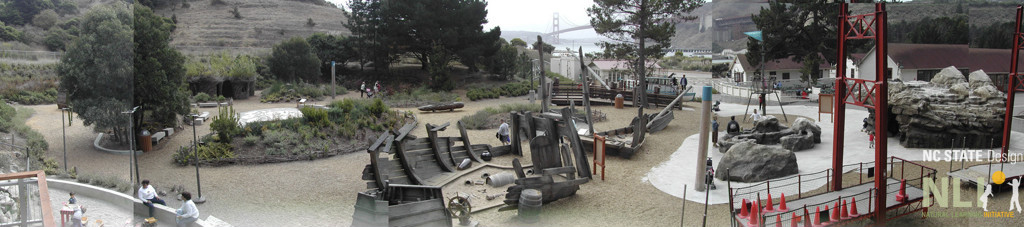
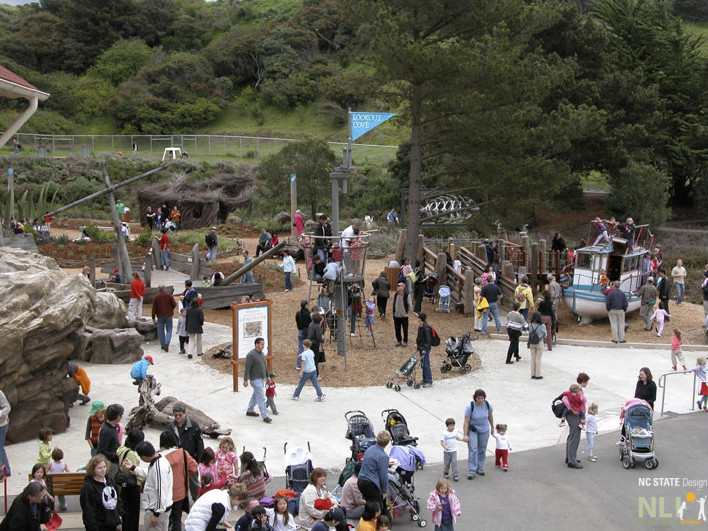
The field research was conducted at the Outdoor Tot Spot and Lookout Cove, outdoor exhibit areas, which opened in the Spring of 2003 and Summer of 2004 respectively. Outdoor Tot Spot was designed for children ages four and younger. Lookout Cove was designed for children ages three to eight with an emphasis on children ages five to eight.
A qualitative/quantitative, environment-behavior approach was used to investigate how the Outdoor Tot Spot and Lookout Cove design features and related behaviors (independent variables) stimulated science learning behaviors (dependent variables) of young children and their caregivers. An online members survey was administered to gather caregiver use patterns, perceptions, and descriptions of Outdoor Tot Spot and Lookout Cove, linking their design attributes to science learning.
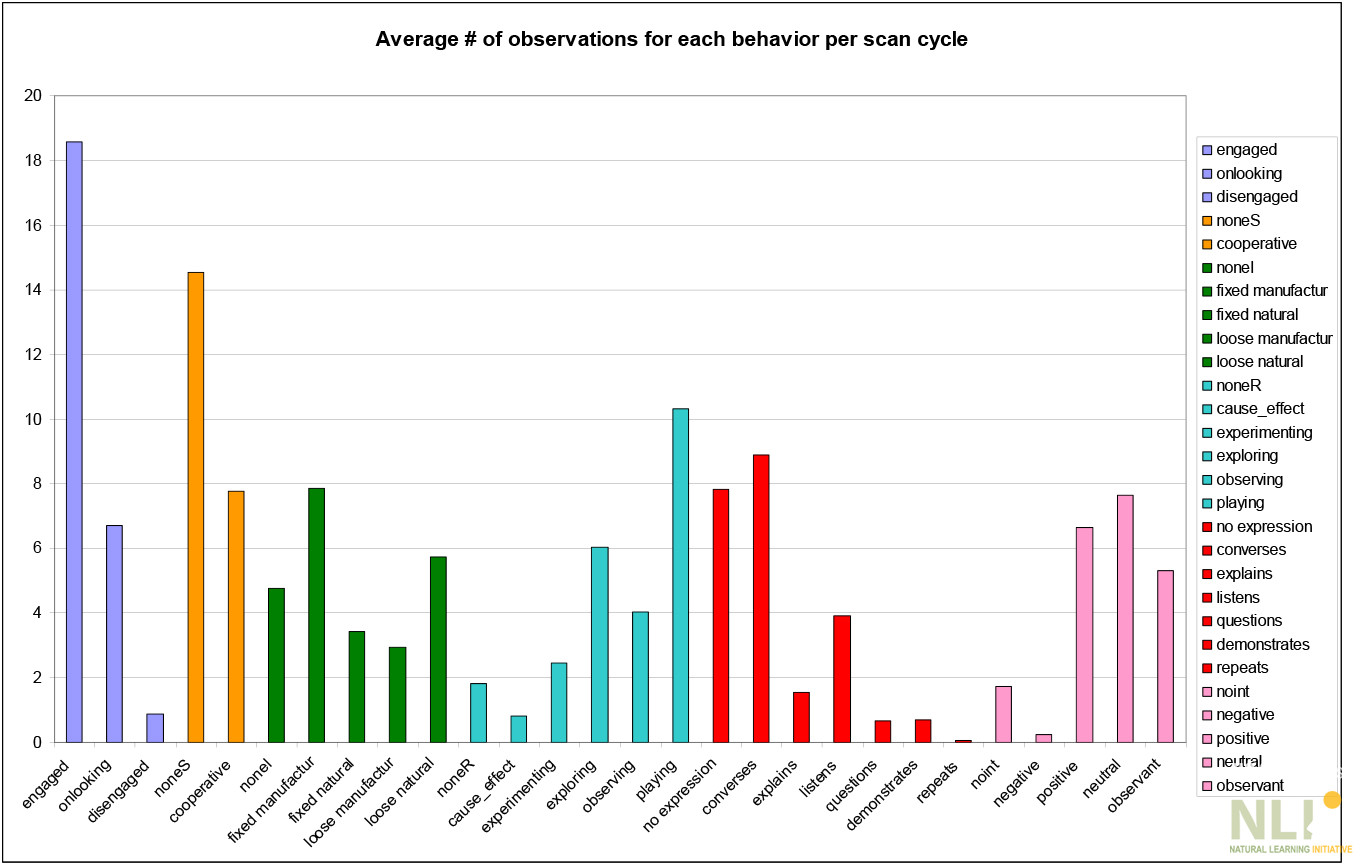
Two linked behavior-mapping studies were used to define behavior-setting boundaries, which were then applied to a second study looking at science learning behaviors (playing, observing, exploring, experimenting, and cause-and-effect) and related environmental and social contextual variables. Descriptive statistics and the results of a correlational analysis were used to help understand which settings supported science learning behaviors and their associations with setting attributes.
Study Conclusions
Results demonstrate that outdoor environments of children’s museums can be designed to afford science learning behaviors for young children. The success of the two BADM areas (Tot Lot and Lookout Cove) suggests that it is possible to design age-appropriate, museum-related outdoor areas to serve as family destinations that child and adult visitors perceive as providing fun, enjoyable, educational experiences that motivate repeat visits. The main conclusions that follow may be useful in guiding future design and development of outdoor environments to support early science learning. However, site dynamic variables such as compactness of settings, circulation form, and site layout, which were not part of this study, may also influence the results.
Space utilization
In both BADM areas, a limited proportion of the total number of settings was heavily used and strongly supported science learning behaviors. Analysis of the setting variables associated with science learning behavior helps explain (as follows below) why some types of settings were more successful than others.
Water exhibits
Age-appropriate water settings strongly support early science learning, the range of which will be associated with the presence of loose parts and the amount of manipulation afforded by the setting. The BADM water settings conclusively demonstrated this. The outcome impact of water features might be increased by mimicking natural characteristics such as flow and pressure providing children with additional opportunities for experimentation.
Loose parts and manipulability
In settings other than water, the inclusion of loose parts and possibilities for environmental manipulation (in settings such as the Gravel Pit and Bridge) will increase the chance that science learning will be supported. The use of loose natural materials (gravel, sand, etc.) often encourages longer periods of engagement and play, which may have a strong science-learning behavior component.
Live nature exhibits and settings
Because of the likely, positive effect of loose parts and manipulable exhibits on science learning, it is possible that natural settings other than water may also support science learning behavior – emphasizing the long tradition of formal science education. Natural features, especially trees, shrubs, vines, ground covers, and perennial flowering plants, can be designed into “nature pockets” to provide hands-on contact and an overall natural ambiance throughout the exhibit area. The current cultural issue of children’s lack of contact with nature in their daily lives lends further justification.
Fixed elements of settings or exhibits
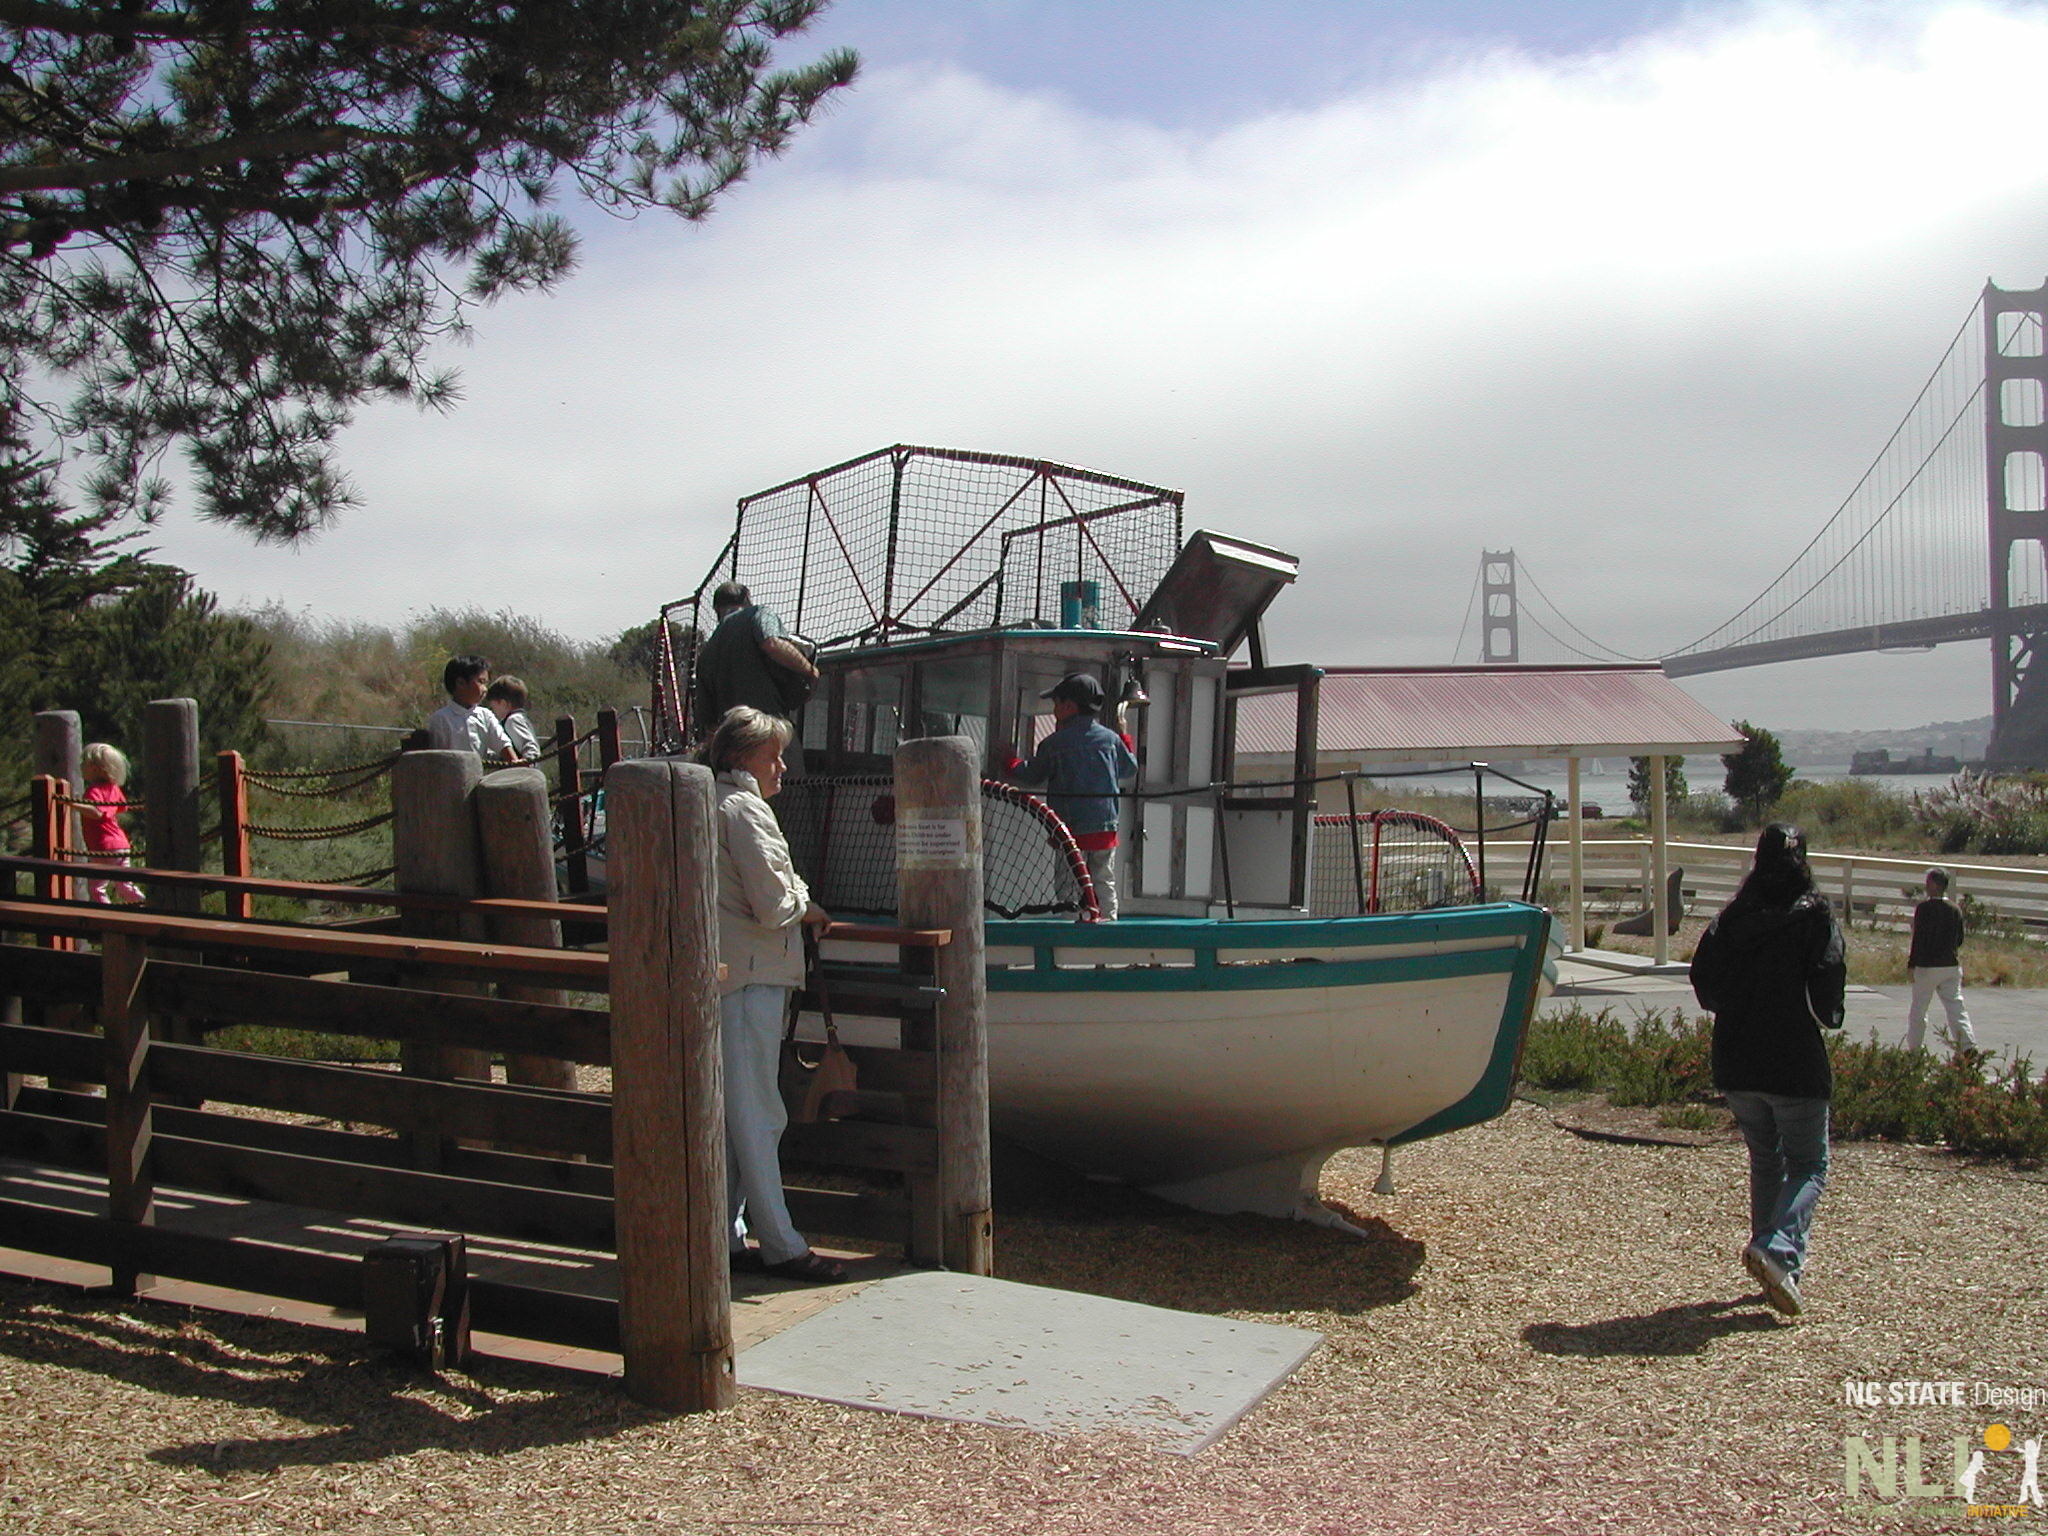
These may be natural (as described above) and manufactured (e.g. boat, bridge) and provide the stable, permanent physical frame of action in combination with loose, manipulable parts. Fixed manufactured elements may be used to define setting boundaries or to provide landmarks. A BADM example was the manipulable, fixed fish sculptural exhibit installed on the ramp entry to the Fishing Boat. Although it attracted only modest use, it provided a valuable fixed yet manipulable play and learning feature of the Fishing Boat setting.
Fixed/loose combinations
Successful BADM fixed/loose combinations include the Gravel Pit (fixed, manufactured container of poured concrete, with natural, loose gravel, and manufactured, loose toy trucks) and the Tide Pools (fixed, natural rock pools – actually fake but looking natural – with natural manipulable water, and loose manufactured – lifelike – fish). In both of these examples, the level of environmental interaction and engagement appeared to support higher levels of science learning behavior. Pockets of nature as described above may provide further enrichment and possibilities for interaction because of the offering of natural materials (leaves, flower parts, seeds, twigs, etc.). A successful BADM example of a manufactured fixed/loose combination was playing with toy trucks on the Bridge access ramp, which afforded cause-and-effect science learning behavior.
Diversity of small-scale natural loose parts
The provision of natural settings can offer a wide range of loose parts that increase possibilities for supporting individualized experiences of a wide range of children by age, personality, and cultural background.
Dramatic play settings
Carefully specified and designed dramatic play exhibits and settings incorporating features that naturally afford science learning behavior through play can provide effective outcomes. The most successful BADM setting in this regard was the Fishing Boat. This was not only one of the most popular settings but afforded high levels of science learning behavior. It is possible to speculate that the display of real-life objects is very appealing to children. They may also act as backdrops to spontaneous dramatic play that, in turn, becomes a means for exploration and experimentation. Programming such a setting could extend educational outcomes even further by introducing specific scenarios (navigating a storm for example). The addition of manufactured loose materials (toys, dresses, etc.) to initiate dramatic play and interaction with other children may increase the potential of affording science learning behavior.
Programmable settings
The science learning impact of settings and exhibits may be extended through educational programming by museum staff. BADM areas provided outdoor play and learning environments that functioned primarily as stand-alone facilities but were also programmed to offer additional enjoyable, educational benefits, for example, treasure hunts, which encouraged children to use the landscape of the whole Lookout Cove area. As in this example, programmed activity can be used to attract the engagement of older siblings.
Risk and safety considerations
Museum environments must be designed to protect the health and safety of visitors but at the same time offer challenging risk-taking by young visitors. Although these topics were not systematically investigated in the research reported here, the BADM outdoor areas were observed to offer risk-taking challenges by allowing movements up and down, under and over features as much as around features.
The Montessori concept of the “Prepared Environment”, that the schoolhouse should be designed to facilitate independent learning and exploration, fits well with The Natural Learning Initiative’s (NLI) focus on designing the outdoor environment so that children will have the opportunity to discover nature and the joy of playing outside. This connection is evident in the designs NLI developed for Montessori Schools at several sites in North Carolina and in Ithaca, NY.
The mission: Create a public park in lower Manhattan that transcends its small, overshadowed site and mid-block location through bold topography, complex irregular spaces, and robust plantings, from ground covers to trees. A biodivers playground for all, including wildlife – especially birds.
Design goals: Respond to the harsh local microclimate (wind off the Hudson River) and lack of sunlight (overshadowing by tall buildings). Sustainability as an organizing principle, including fully organic soils and maintenance regimes, recycled materials and gray water from adjacent apartment buildings, and captured rainwater for irrigation. Offer urban children adventure and a green sanctuary engaging mind and body. Create a complex, three-dimensional landscape using topography, water features, natural stone, and lush plantings to achieve intricately choreographed views and dramatic changes in scale.
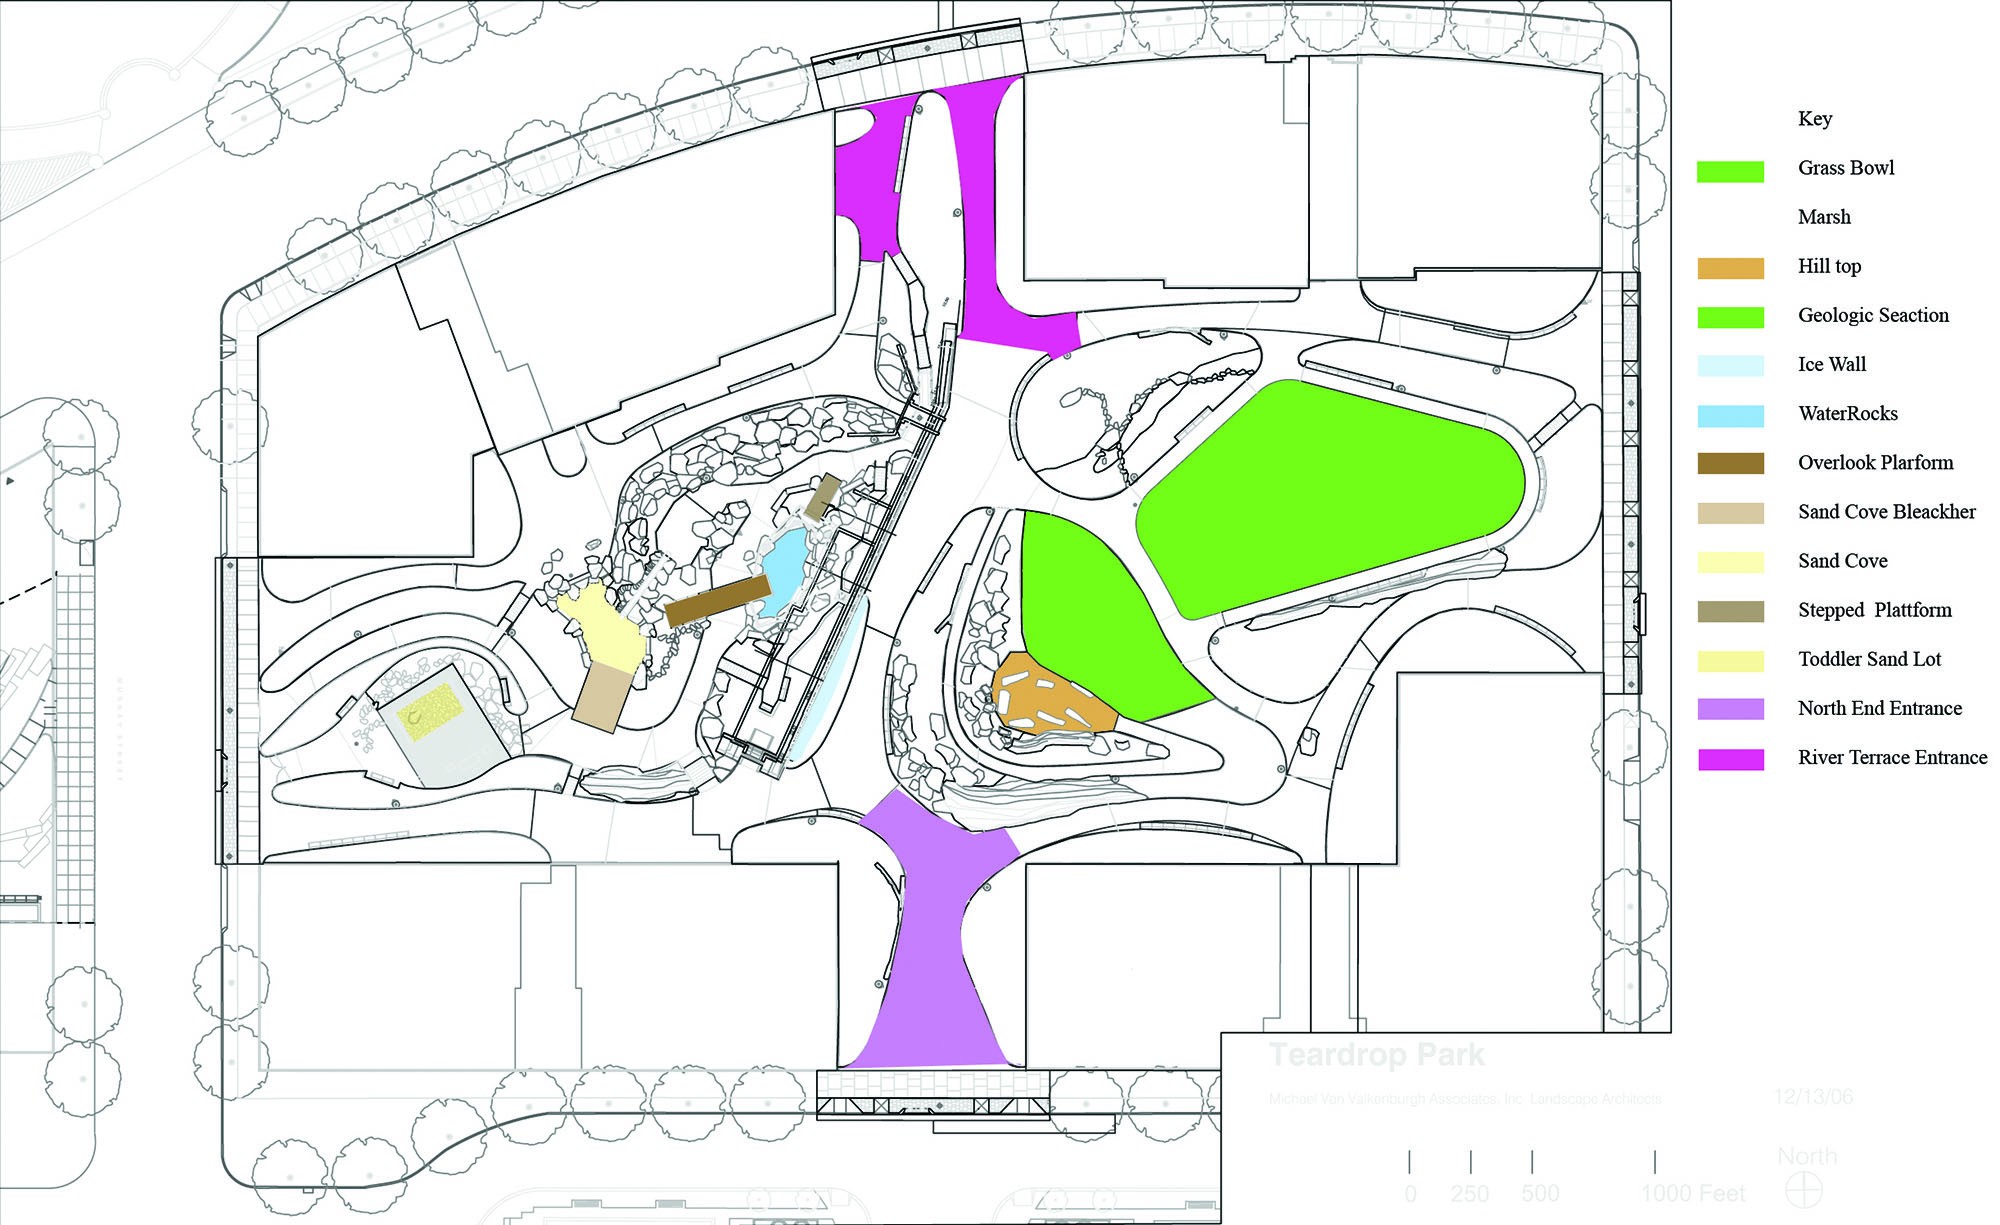
Planning and design process: A series of work sessions conducted by BPCA with the design team and representatives of the many city interests. MVVA presented a range of conceptual approaches from classic axial to avant garde, which evolved into a complex, intricate design of 15 distinct settings, including art works, linked by a hierarchy of sinuous pathways.
Primary settings: Shadbush Hill, Tunnel, Water Play, Slide Hill, Sand Lot, Sand Cove, Amphitheater, Overlook, Marsh (children’s natural hideaway), Lawn Bowl, Geologic Section, Beech Grove, Reading Circle (favorite adolescent hangout), Ice Wall, Witchhazel Dell, and multiple broad to narrow pathways.